Drupal Calendar Creation Unleashed: Useful Modules And A Step-by-Step Walkthrough
Authored by: Nadiia Nykolaichuk.
One of the earliest known calendars was created by ancient Egyptians, who used hieroglyphics and carvings to represent the months, days, and important events. Today, visually appealing and user-friendly calendars are easily created on websites, all thanks to powerful CMSs like Drupal. We’ll share some modules in Drupal that are available for calendar creation and management, and carefully walk you through the key steps of building a calendar.
Drupal modules for calendars
A calendar is essentially a collection of dates arranged in a month or week layout, with specific events displayed for specific dates. When it comes to creating collections of items, nothing equals Drupal Views. That’s why many modules for calendars in Drupal are based on Views and provide special, calendar-style formatters. Once a view for the calendar is set up, it’s easy afterwards for editorial teams to add or edit events to it on a regular basis like any other content.
Each module also adds more specific features for better calendar handling. The modules are built on different tools, often JavaScript libraries, which makes calendars more interactive. Some popular calendar modules based on Views are as follows:
In addition, the Calendar Systems module adds support for alternative calendar systems to Drupal. Also, if you need to create functionality for making reservations, there is a nice Bookable Calendar module. The full list of calendar-related modules that are compatible with Drupal 10 can be found here.
Let’s take a closer look at the steps needed to create a calendar using two great modules that are supported in Drupal 10 and have had fresh stable releases during the last year — Fullcalendar View and Calendar View.
The Fullcalendar View module in Drupal
Fullcalendar View is a popular and feature-rich module that enables you to create a calendar with Drupal Views with the help of the FullCalendar JavaScript library it uses under the hood. A calendar is automatically created from a view thanks to a special formatter, and the event dates on the calendar are pulled from date fields in content.
Some of the module’s great features include:
- Calendar display by day, week, or month.
- Calendar events can be created by double clicking, edited inline, resized (for all day events), and drag-and-dropped around.
- Events can have different colors based on taxonomy or content type.
- Recurring events are supported.
- Multilingual functionality is supported.
A basic guide to creating a calendar with the Fullcalendar View module
1. A note on the installation
Install the module per normal. Based on the information from the module’s page, Fullcalendar View depends on several JavaScript libraries, but installing them locally is optional — if you don’t, they will be loaded for you from a CDN.
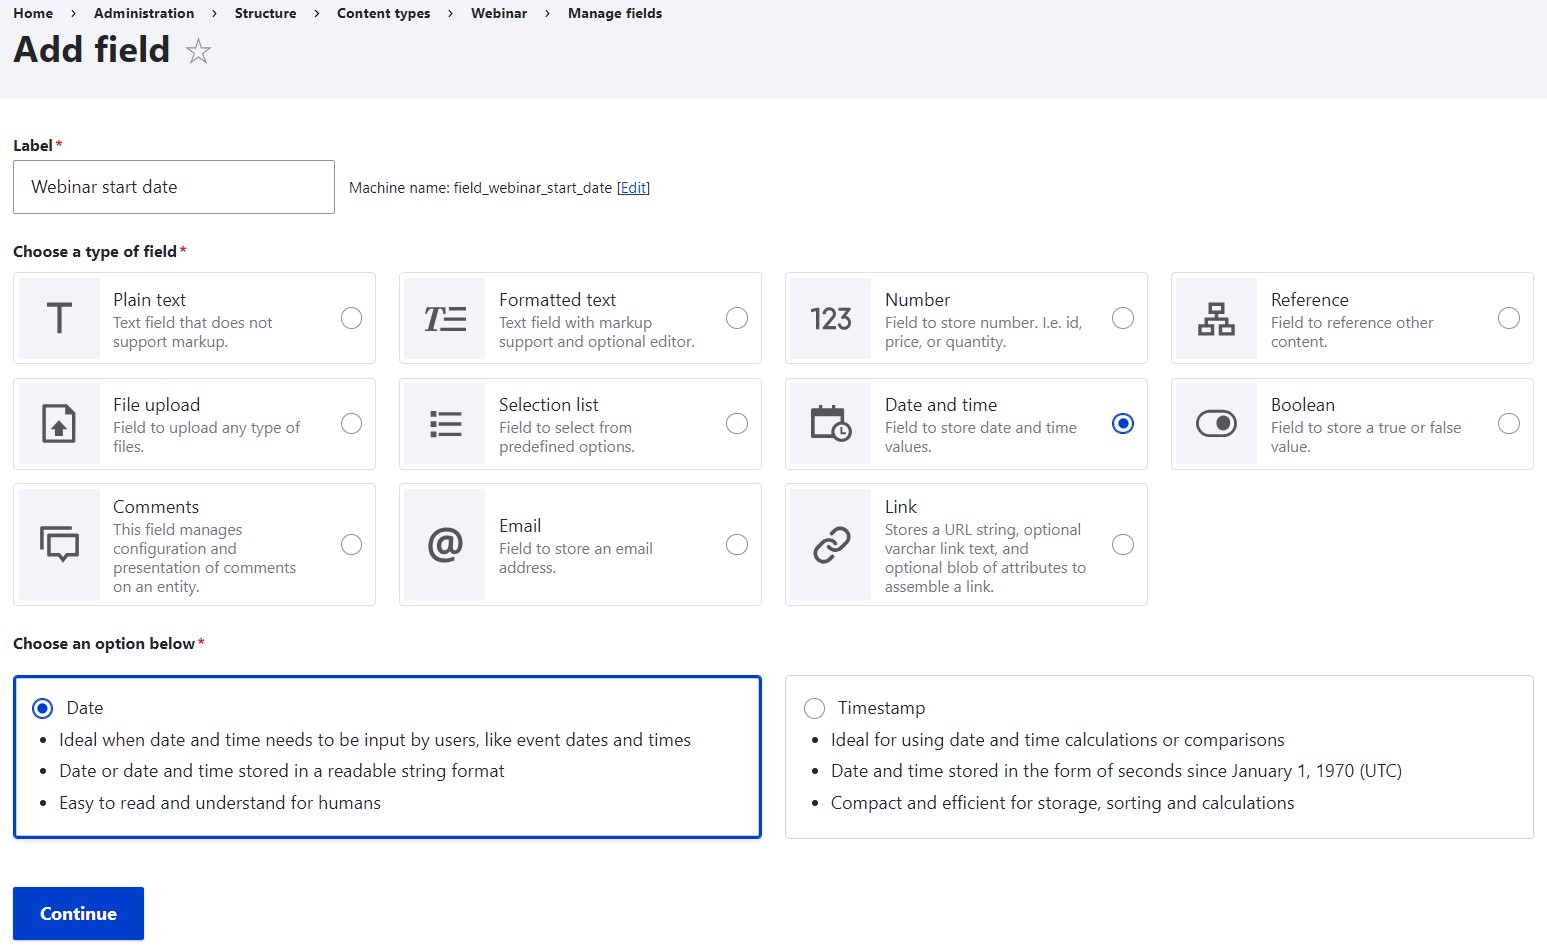
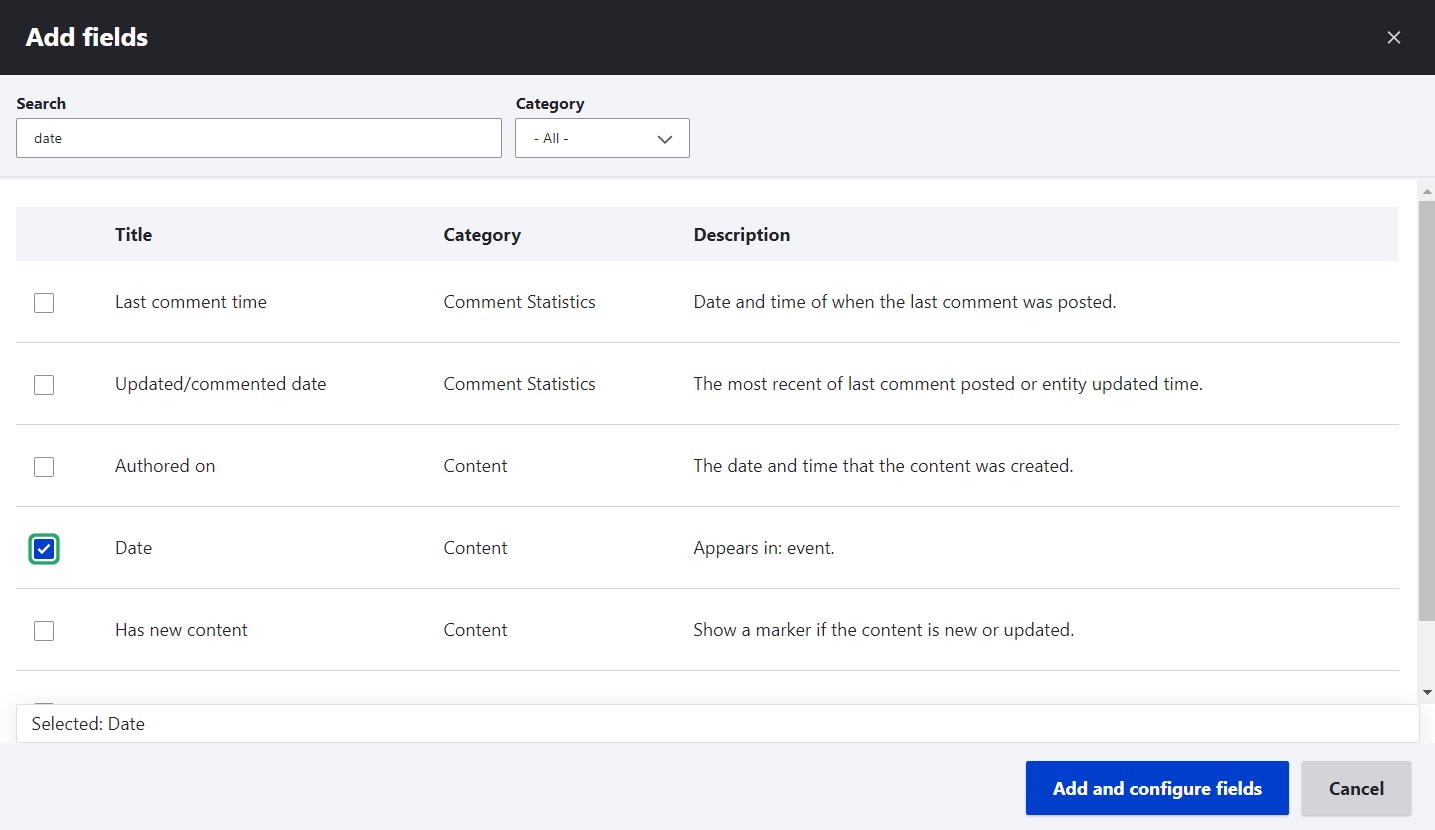
2. Creating date fields
Now it’s time to add a date field to a content type that represents your calendar events (for example, “Event”). You can do it by going to Structure > Content types > Event > Manage fields. The module supports various field types such as Date, Timestamp, or Date Range.
To keep it simple, we’ll use the standard Date field. However, we’ll create two fields of this type:
- a field for the start of an event
- a field for the end of an event
That’s because the module supports the start and the end dates in Views as separate fields, creating a nice colored display of how long an event spans.
In this screenshot, we’re showing how the field creation process looks in the revamped Field UI that is one of the new features in Drupal 10.2, which you also might want to check out.
3. Creating event categories (optional)
It’s not a must, but you might want to add another tweak to this setup. As mentioned earlier, the module can show different types of calendar events in different colors, which can be based on one of these two options:
- content types (different content types can be created to represent different types of events, for example, “Webinar” and “Workshop”)
- taxonomy (a taxonomy vocabulary with categories — terms — for different types of events can be attached to the general “Event” content type, enabling editors to select a specific event type for each event from a dropdown or select list)
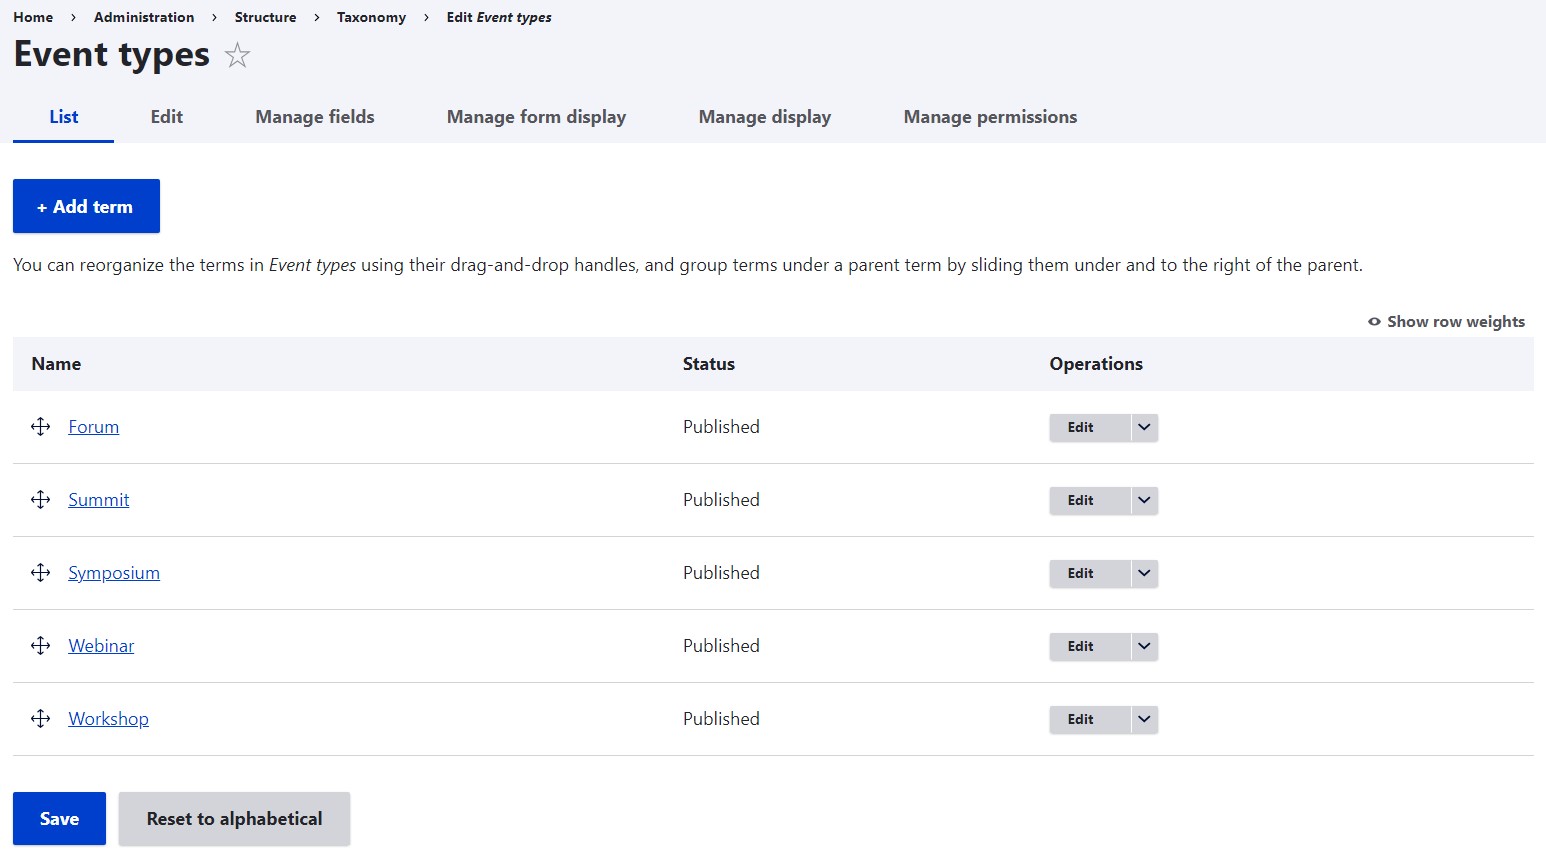
In this example, we’ll opt for a taxonomy vocabulary, which can be done in Structure > Taxonomy > Add vocabulary. Let’s name it “Event types.” Event categories (Webinar, Forum, Summit, etc.) can be added as taxonomy terms.
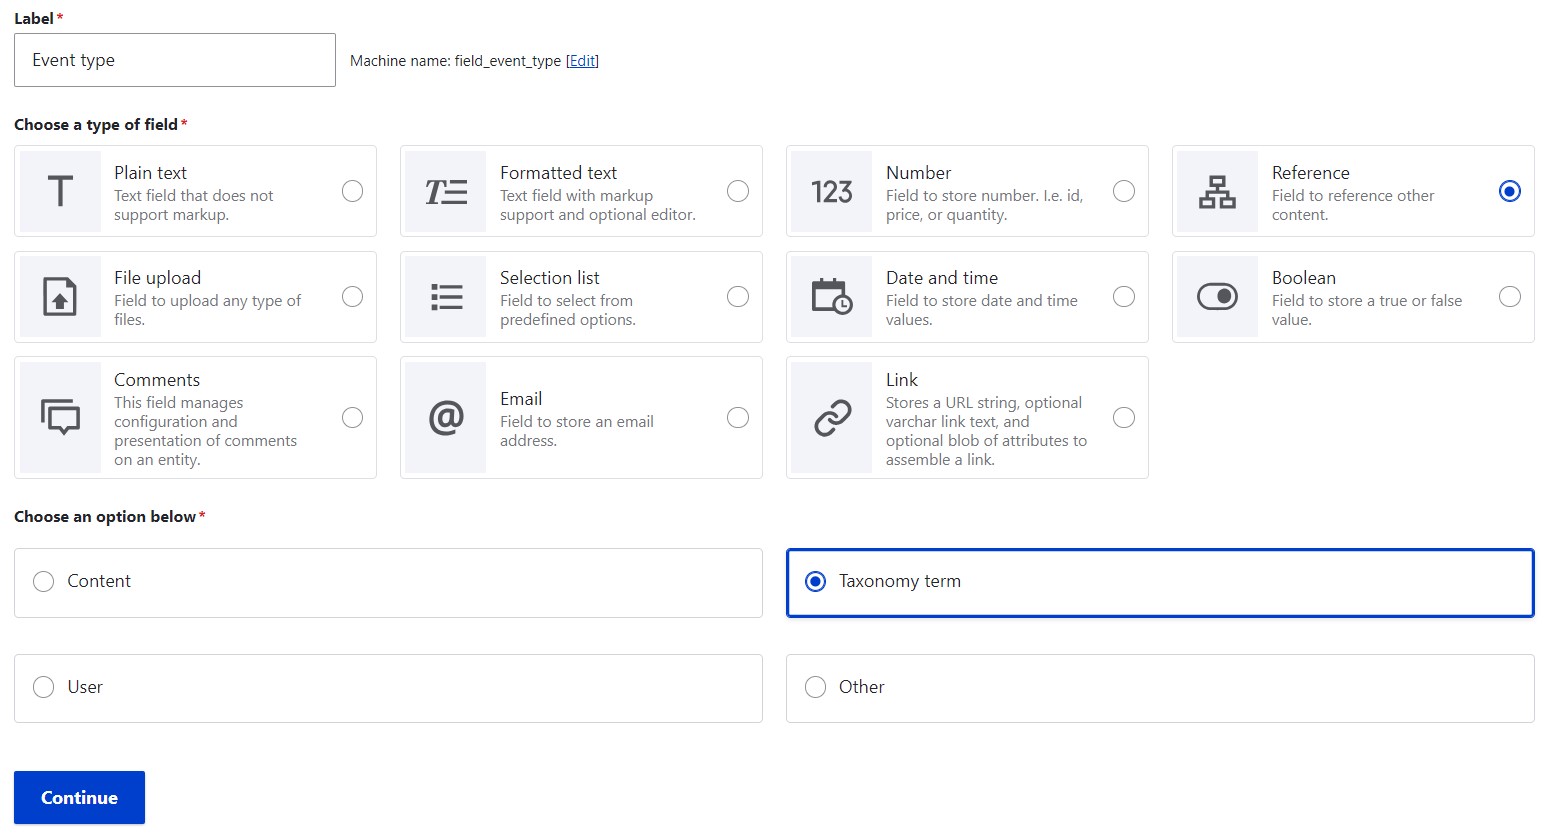
Next, a taxonomy field will need to be added to the Event content type similarly to how we’ve added a date field. The main difference is that the initial field type to choose will be “Entity reference” (or just “Reference” in the new Field UI). Next, select “Taxonomy term” and finally, in the next step of the field configuration, select the specific “Event type” vocabulary.
4. Creating events with a date
Create content of “Event” type and specify the start and end date for each event. Content titles will appear as event titles in your future calendar. Also, specify the event type by selecting the category from the newly-created “Event types” taxonomy vocabulary.
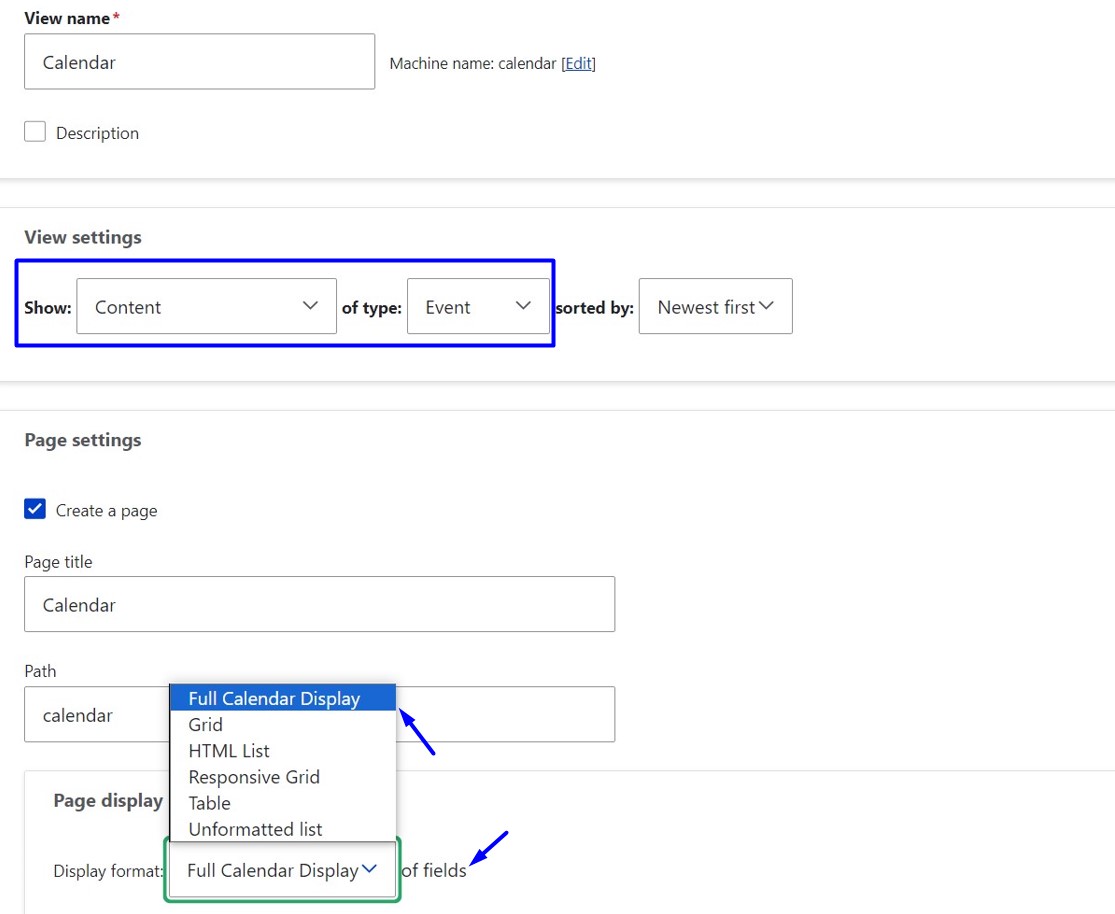
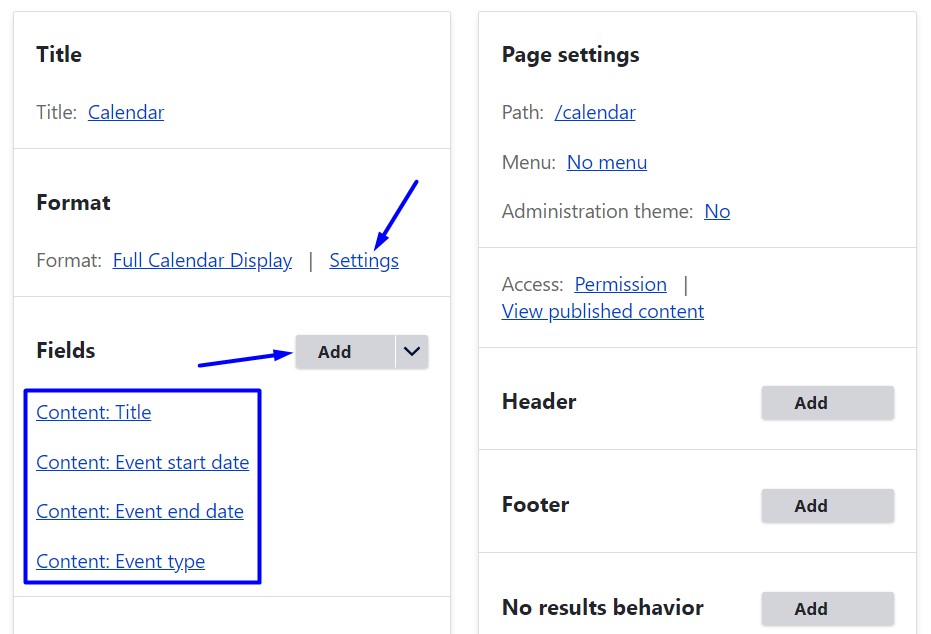
5. Creating a view for the calendar
To create a new view, go to Structure > Views > Add view. Under “View settings,” select to display content of the Event type. After clicking “Create a page,” under “Page display settings,” select the display format as the “Full Calendar Display” of “fields.” That’s a special format provided by the module.
Once the view is created, we’ll be most interested in the “Fields” section for adding fields and the “Format” section for configuring the display.
As far as fields, you’ll need the following:
- title (which is created by default)
- event start date
- optionally, event end date
- optionally, event type (the taxonomy vocabulary we’ve created earlier)
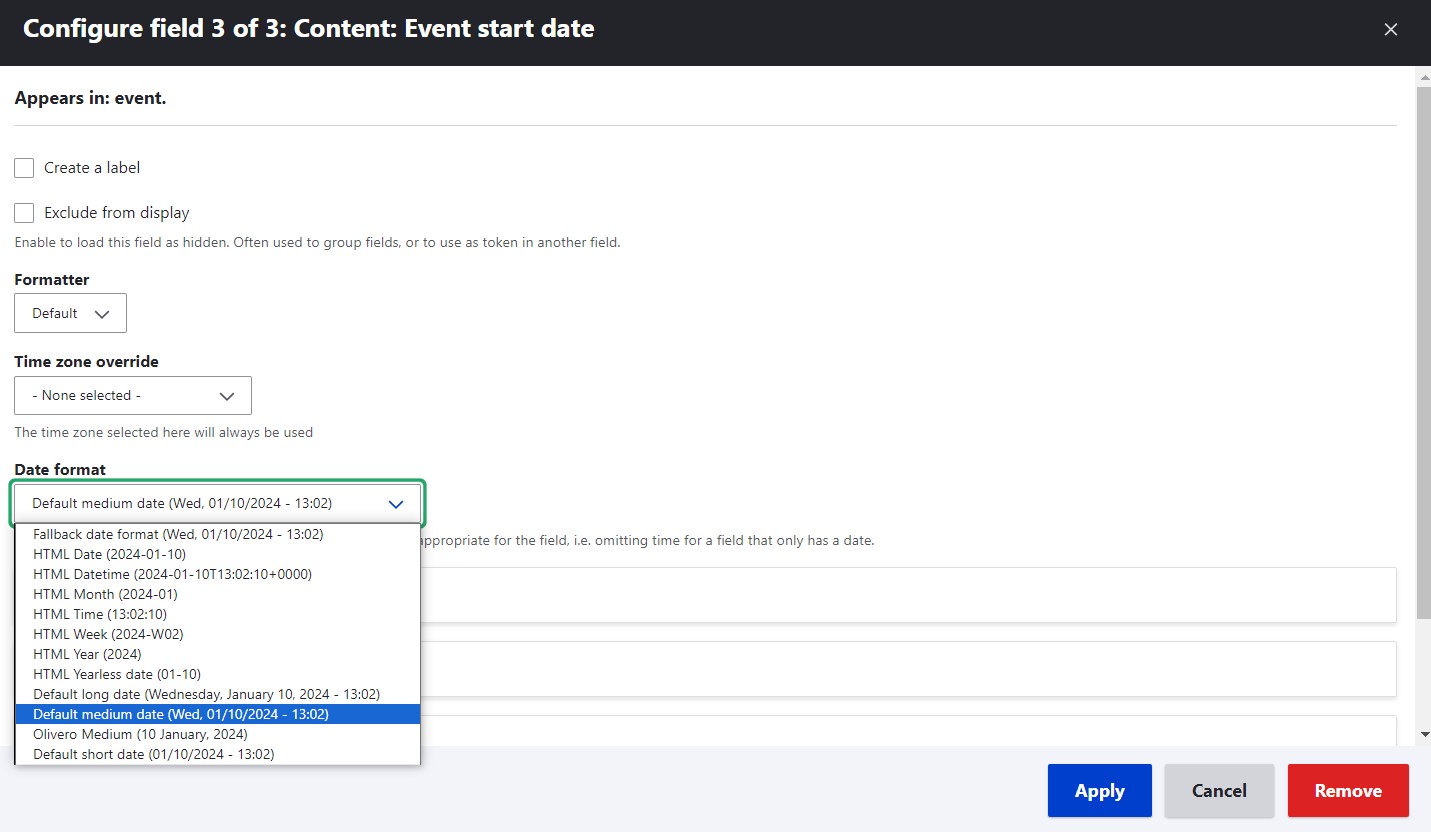
As the next step of configuring the date fields, you’ll be able to select the specific date format.
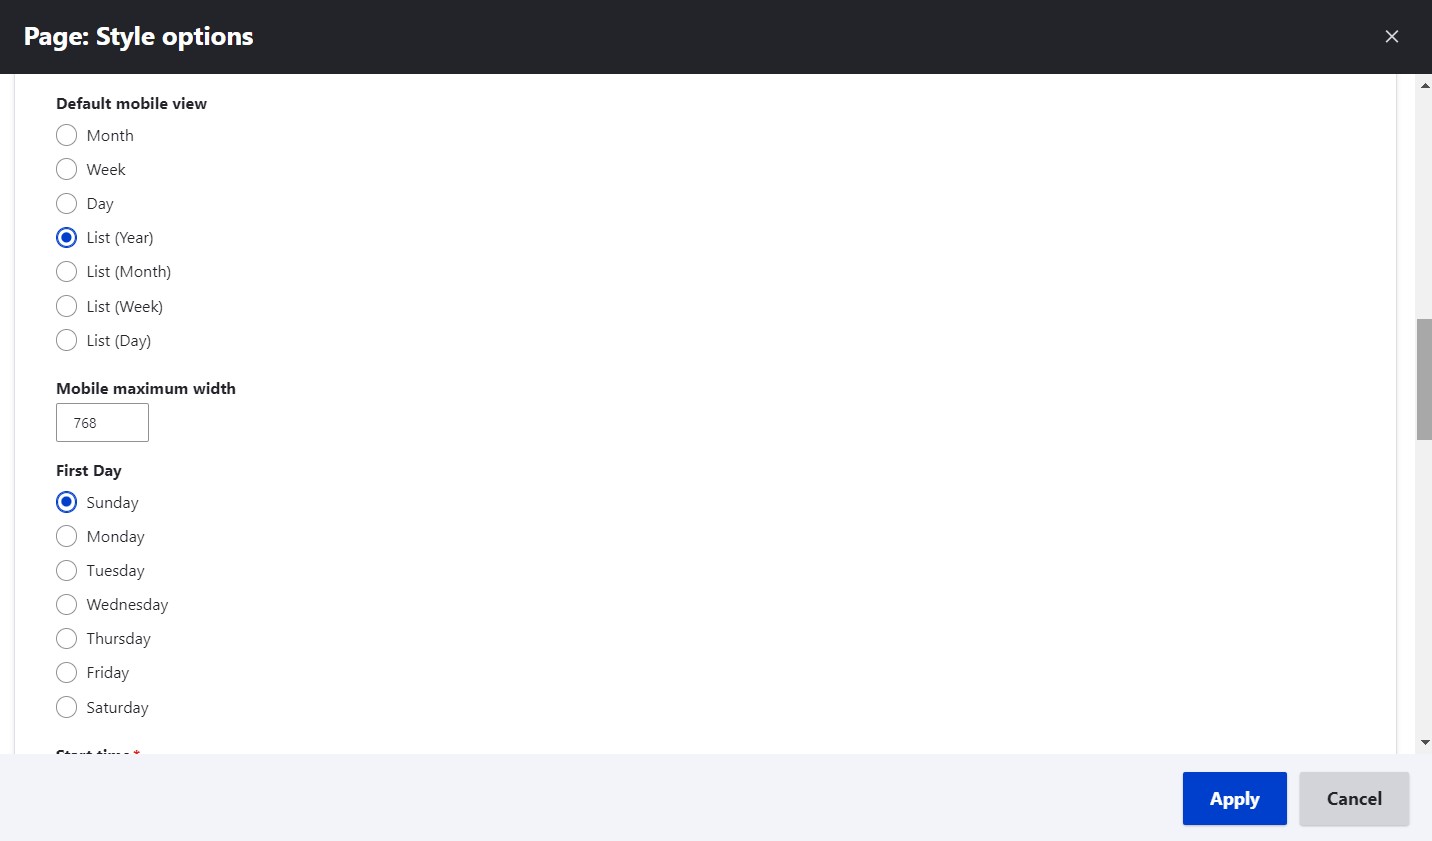
Once done with the fields, go to the “Format” section of the view and click “Settings” next to the “Full Calendar Display” format. It opens an impressive list of settings:
- default date
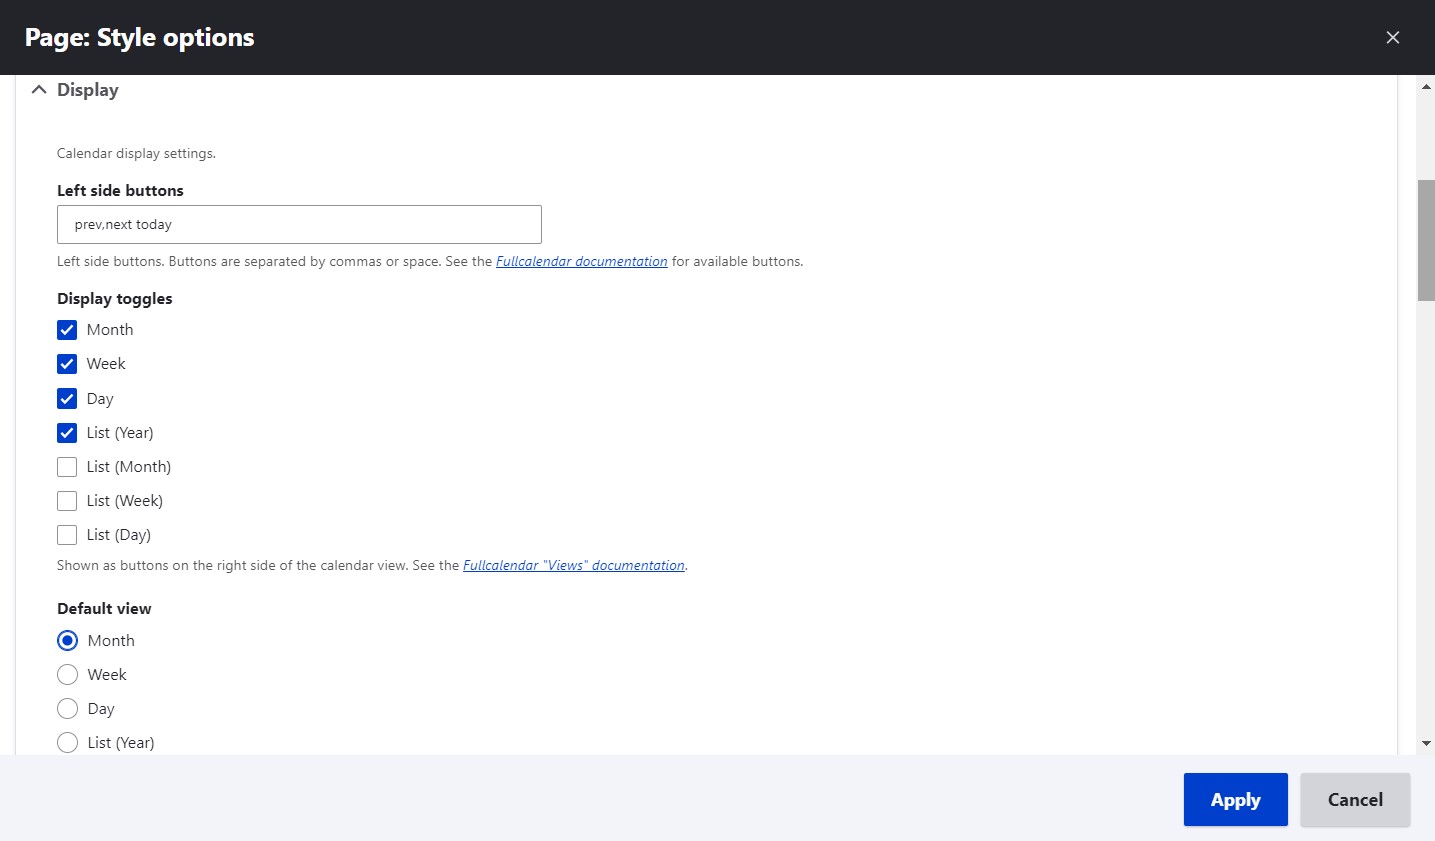
- the fields to be used for the start date, end date, and title (these are some of the most important settings in this view)
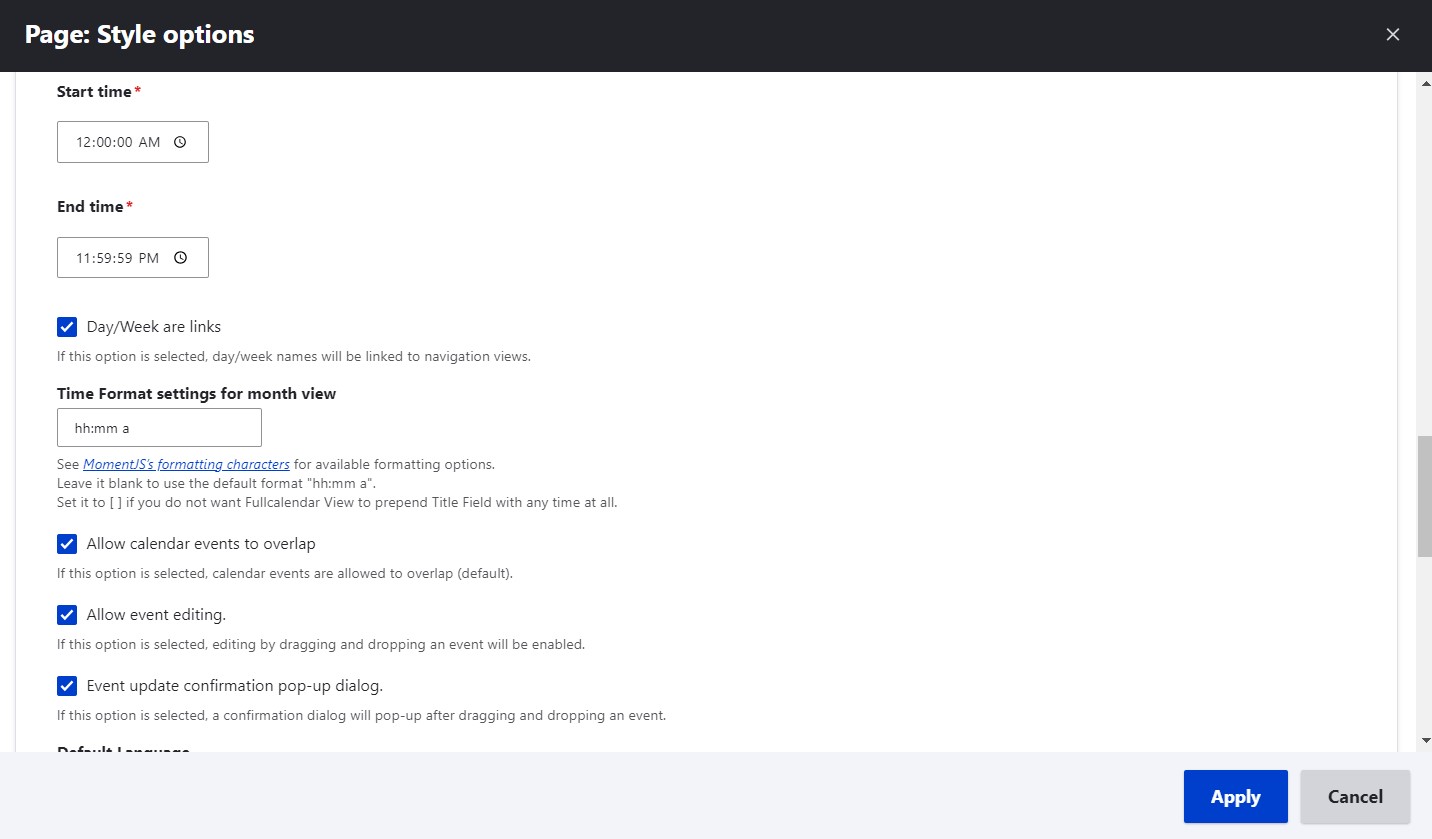
- lots of display options such as default view (month, week, list, etc.), default mobile view, start and end time (required), and much more
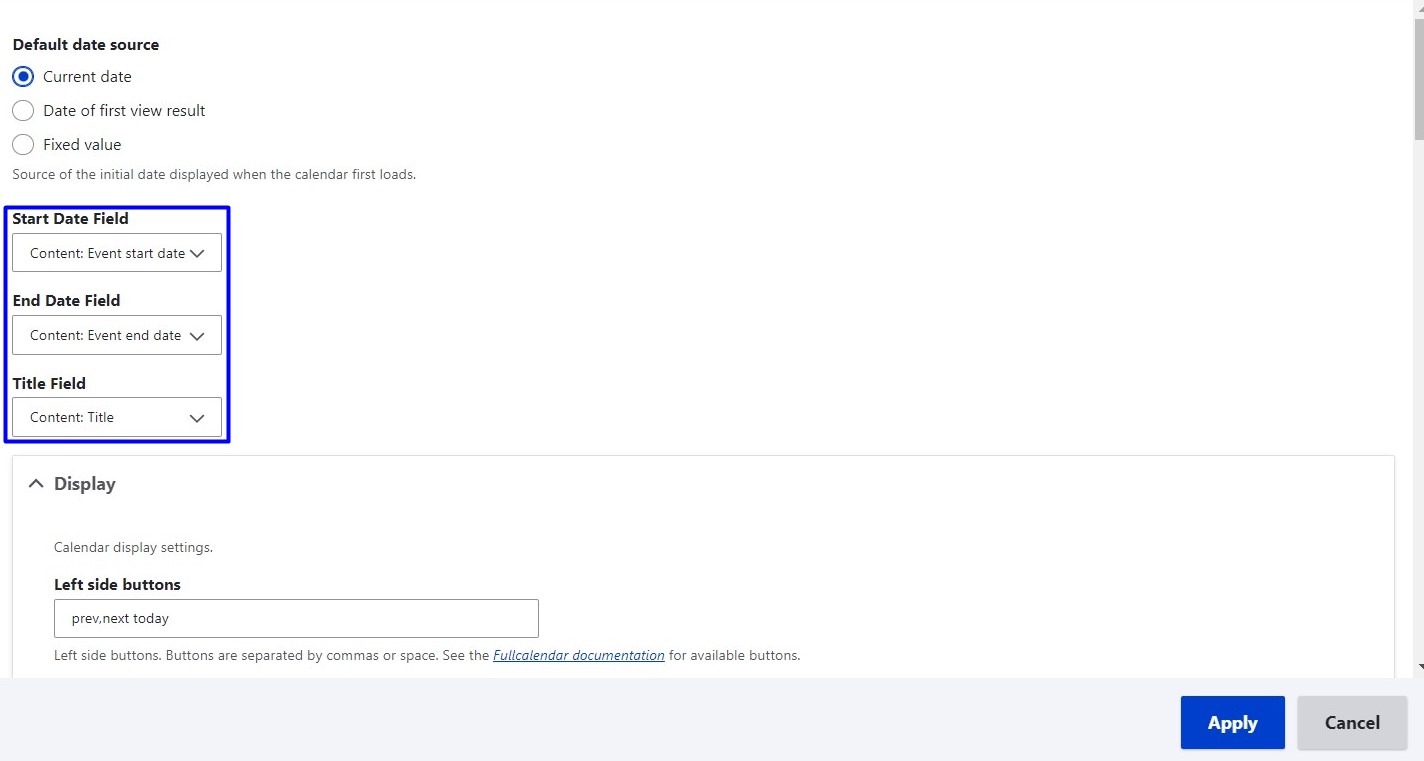
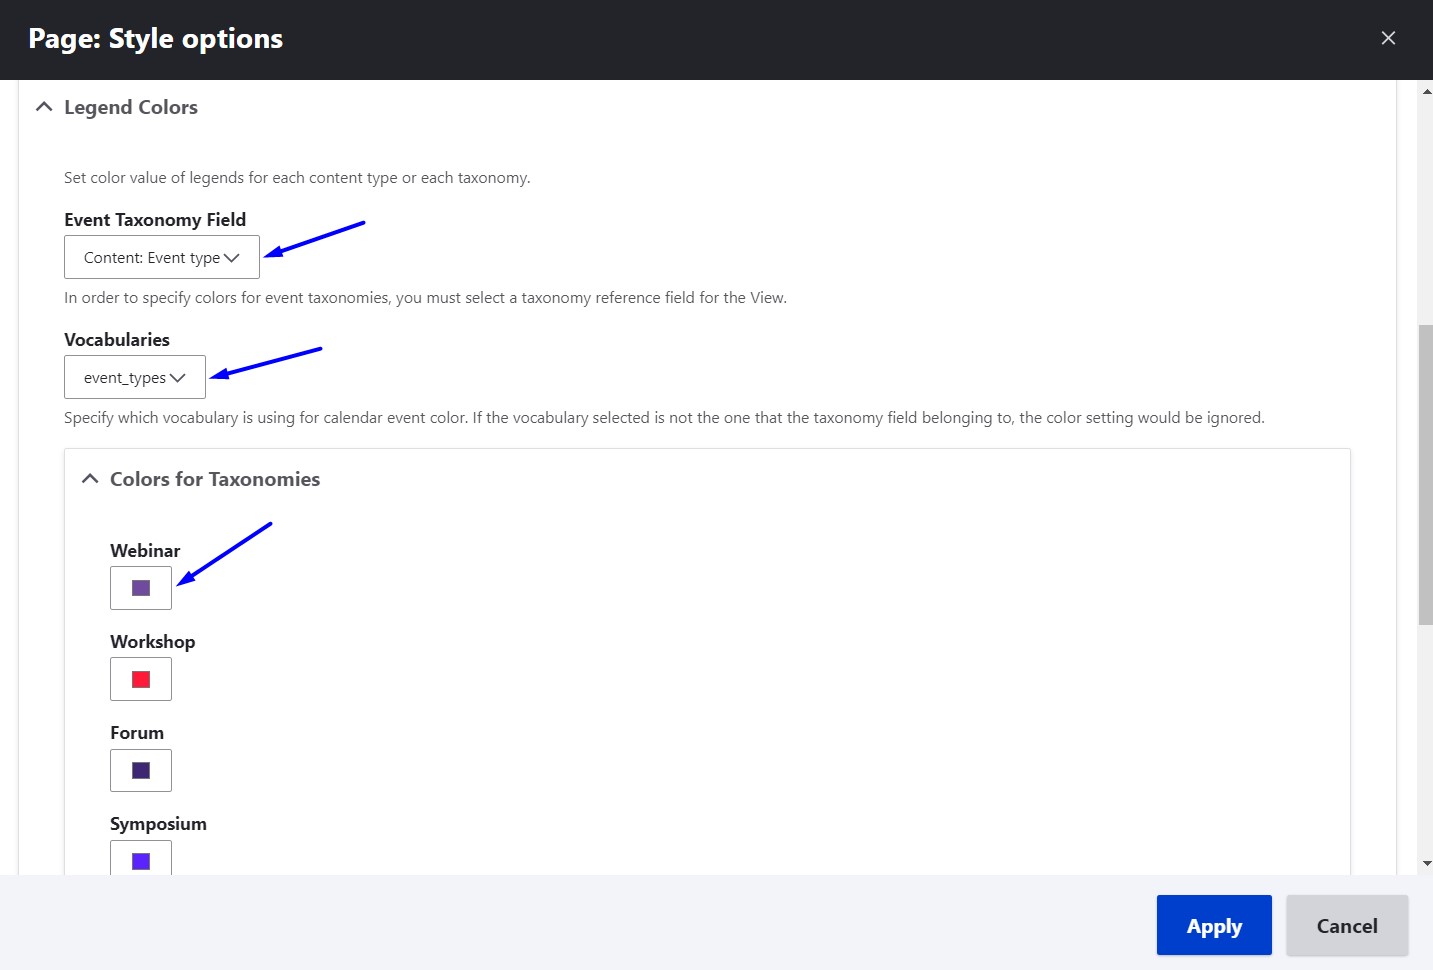
An interesting section at the bottom of these settings block is “Legend colors.” Here, you can specify the taxonomy field and vocabulary and then set different colors by RGB values for different event categories.
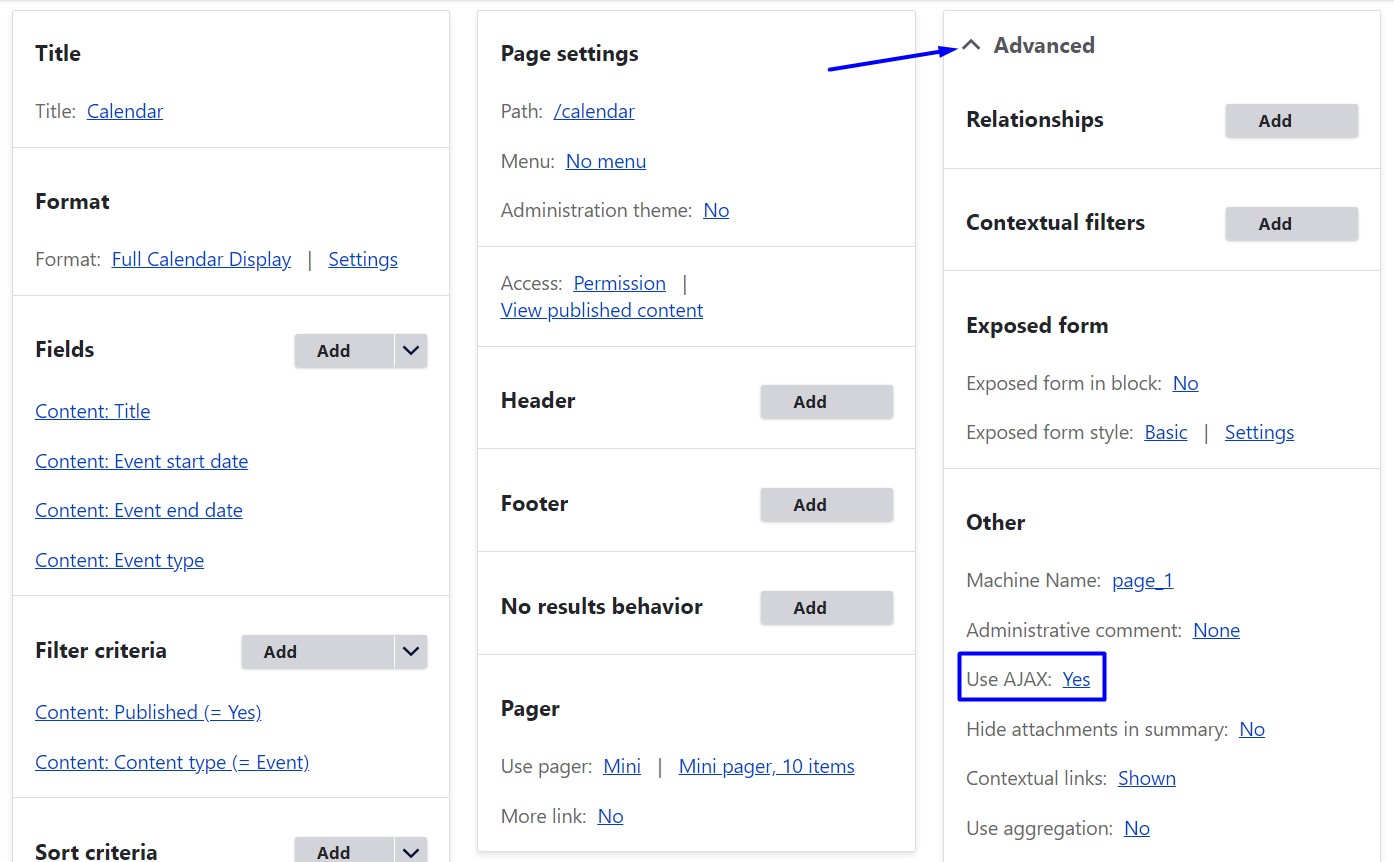
In the “Advanced” section of the view, change “Use AJAX” from “No” to “Yes” to enable AJAX navigation.
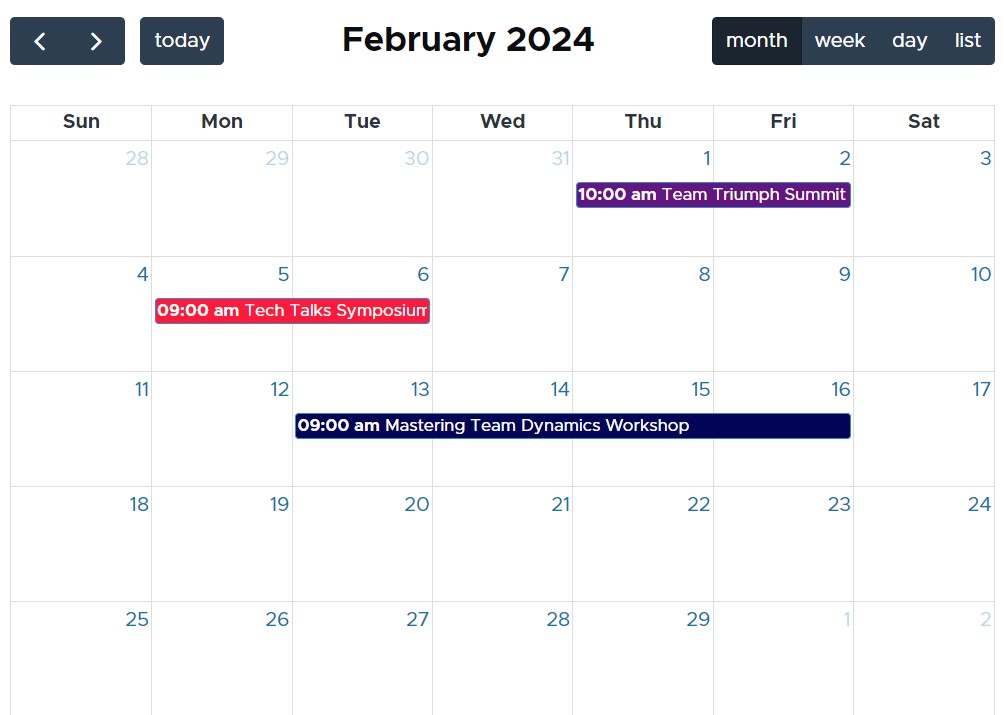
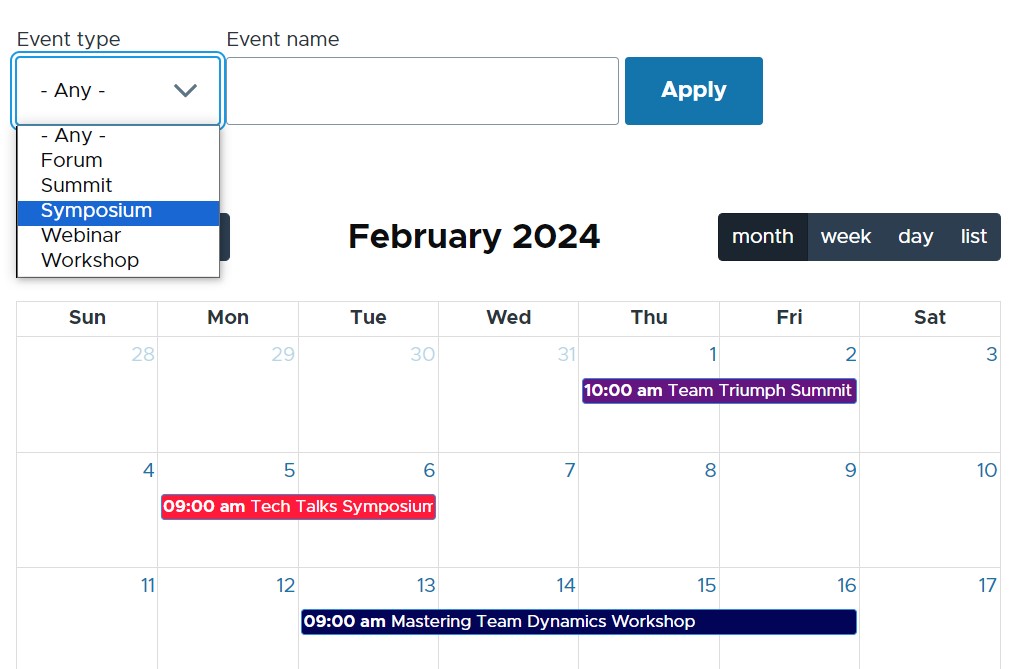
As a result of this setup, there is a calendar view that shows events marked with different colors based on category. By clicking on each event, you can open it for editing. It’s possible to drag-and-drop events around the calendar to change their date. By double-clicking on an empty date, you can create a new event. It’s possible to navigate the calendar using the “Previous/Next” labels and choosing between the month, week, day, or list layouts.
The Calendar View module in Drupal
Next up is the Calendar View module, which is a lightweight tool for displaying the results of Drupal Views as a calendar. During the last year, the module has received multiple updates, including the new major version 2.x, and generated some buzz in Drupal circles.
Just like the previous module, this one uses dates from date fields in content to show in an automatically created calendar. It offers monthly or weekly calendar displays with tooltips and AJAX navigation.
Calendar View is compatible with the Smart Date module and supports the recurrent events functionality of the latter. The Calendar View Multiday submodule is great for events that span on multiple days. The module can also work together with the Bookable Calendar module for reservations.
A basic guide to creating a calendar with the Calendar View module
1. Creating a date field
With the module installed per normal, you can start by adding a date field to an “Event” content type similarly to how it was shown for the previous module. All types of date fields are supported, including ones with the date range. We will add only one standard date field to the content type to keep things simple.
2. Creating events with a date
Create content nodes of “Event” type and specify a date in each of them. Content titles serve as event titles in the calendar. You might also choose to use body text as descriptions for your events.
3. Creating a view for the calendar
Similarly to configuring the previous module, you can create a new view in Structure > Views > Add view, and select to display content of the Event type. This module provides two main formats to select from the start — after clicking “Create a page,” you can select “Calendar by month” or “Calendar by week” of “fields.”

Once the view is created, you can add the date field under “Fields.” As the next step of configuring the date field, you’ll be able select the specific date format.
You can also add a body field to the view in a similar way if you want event descriptions to be displayed in the calendar.
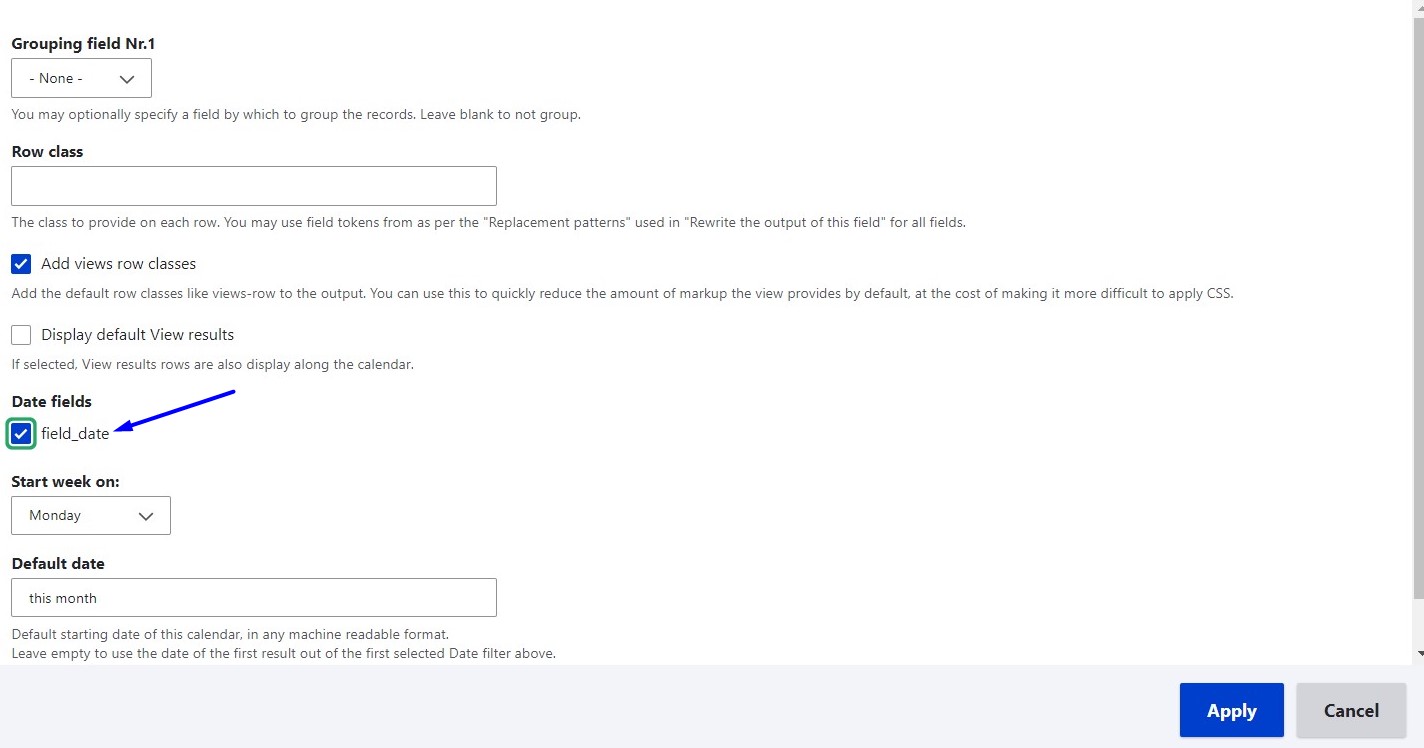
The next setting is very important for this calendar view. Go to “Format” and click “Settings” next to your “Month” or “Week” format and, under “Date fields,” select the date field to be used as the source. Configure the other options as desired (such as starting a week on Monday, showing the default date as the current month, etc.).
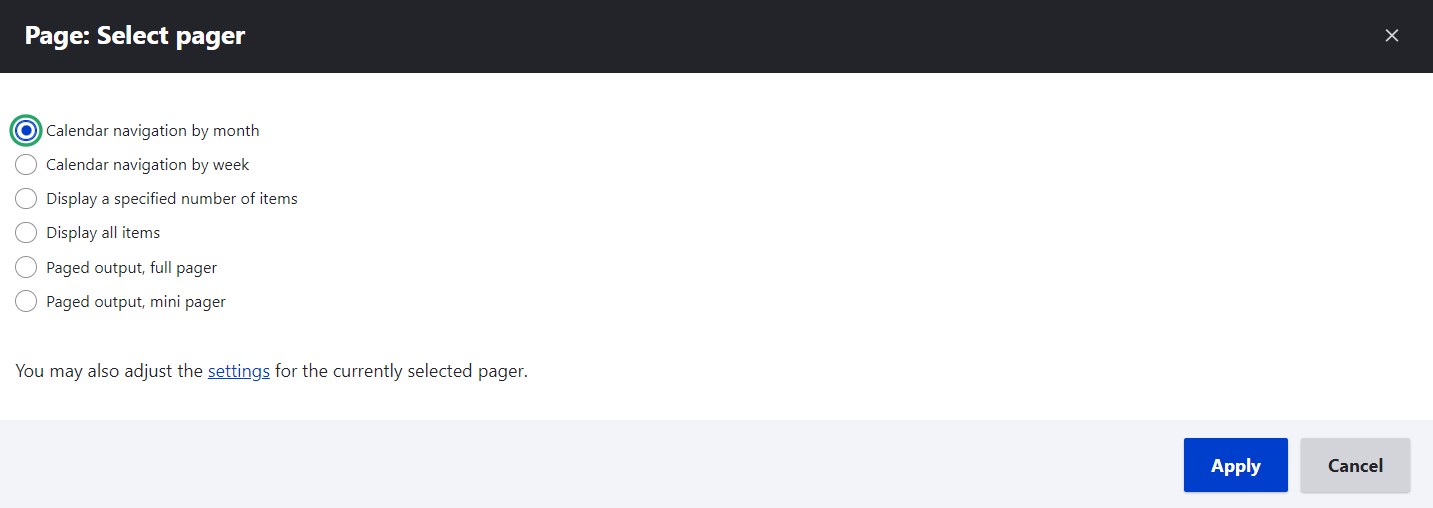
In the “Pager” section of the view, select navigation by month/week or other options. In the settings for the Pager, you can also configure whether navigation should be managed by “Previous/Next” labels. By default, it is.
Just like for the previous module, go to the “Advanced” section of the view and enable AJAX navigation.
With this setup completed, there is a calendar showing all the events for a month. It shows tooltips on mouse hover.

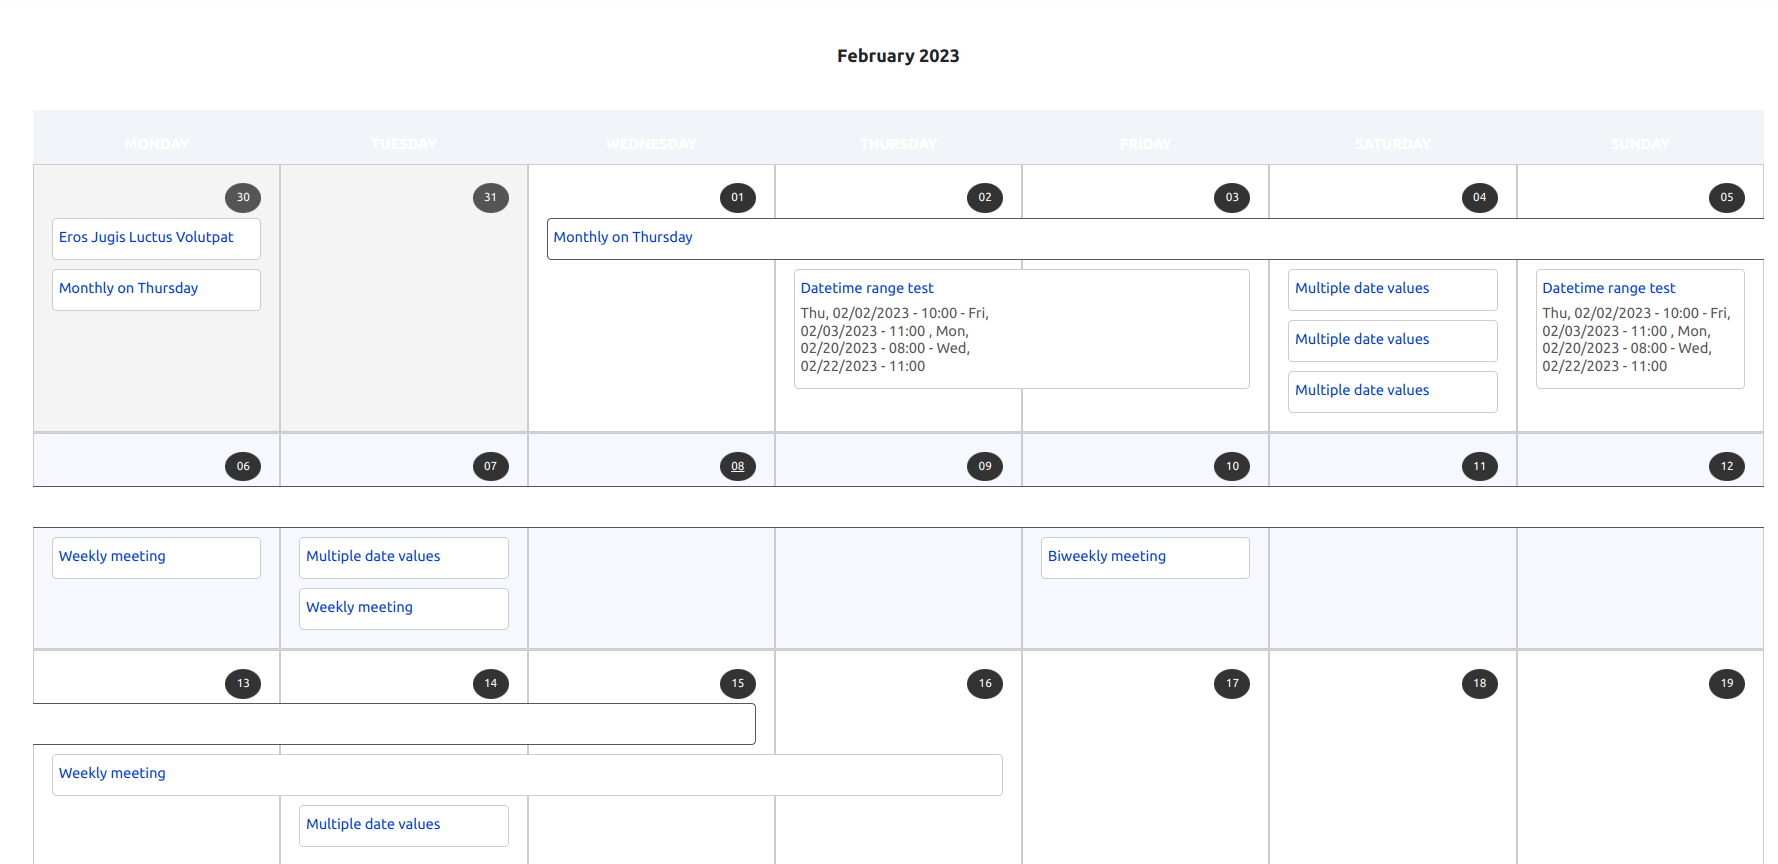
That was a simple setup, but when it comes to recurrent, multiple-day, and events with a date range, this looks like on the following screenshot from the module’s official page.
Enabling visitors to find events (possible with all modules)
When creating calendars with Fullcalendar View, Calendar View, or other modules based on Views, you can also enable visitors to easily find specific events thanks to filters (for example, by category, by city, by in-person/online event type, and more).
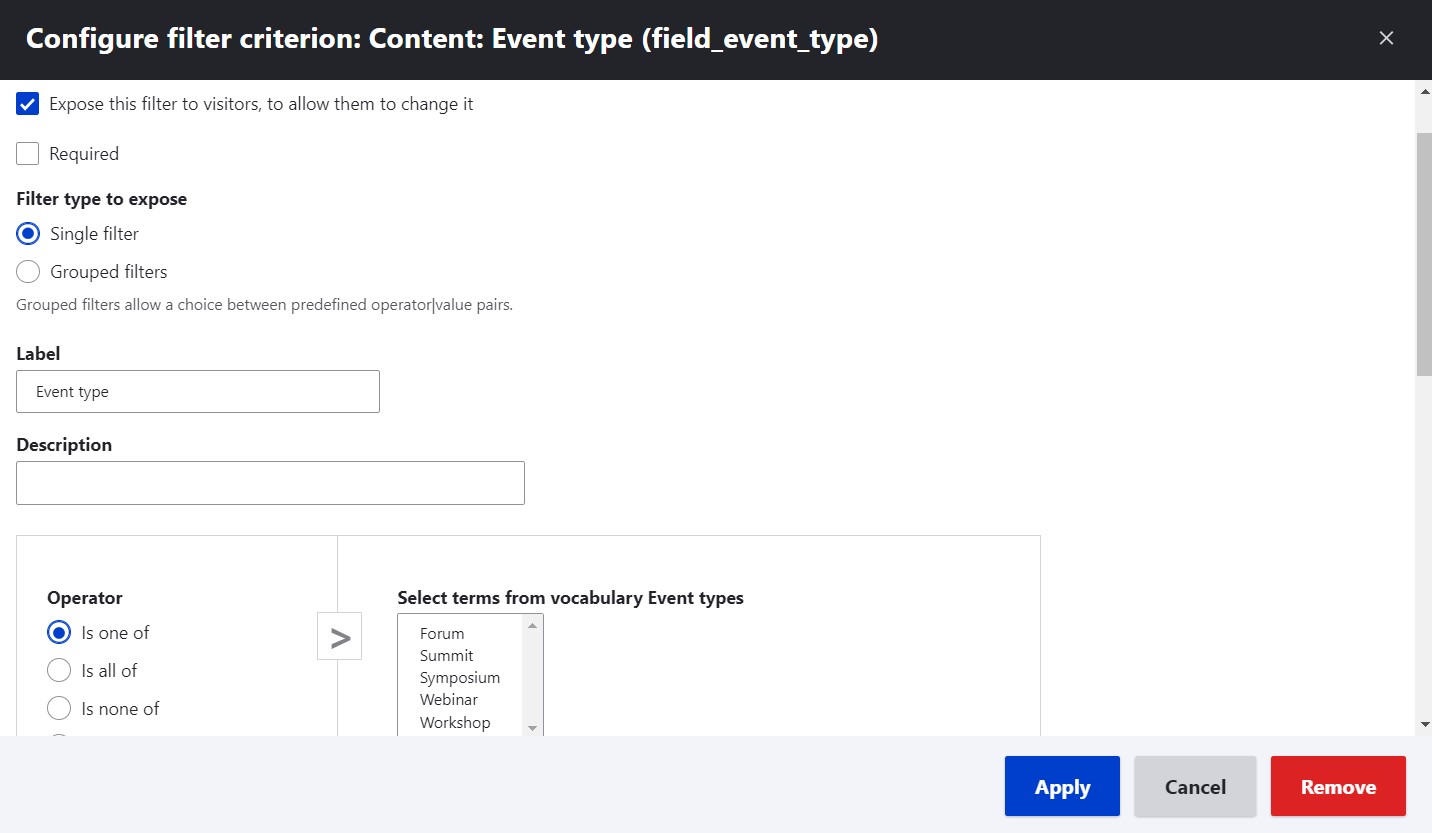
In a nutshell, this is achieved by adding filters to the view and making them exposed. Countries, cities, event types, and similar options can be created by adding a Drupal taxonomy field — first to a content type, then to the view (just as described in the “Creating event categories” part for the “Fullcalendar view” module). Next, the “Expose this filter to visitors” checkbox must be checked to make the filters visible to users and manageable by them.
That is not something specific to any calendar modules but the essential functionality of Drupal Views you might want to learn more about.
Final thoughts
We’ve walked you through the steps for creating a calendar with two great modules, showing just the basics of what can be built. An array of endless possibilities goes far beyond the above examples. We haven’t covered recurrent events or personal calendar creation with the help of contextual filters in Drupal Views among many others.
In addition, it’s possible to do all imaginable customizations and, of course, style the calendar to match your design guidelines. Ensure your calendars align with your needs and are consistently filled with successful events!