
How to Increase Efficiency with Content Moderation Workflows in Drupal
If your website has tons of content, the process of adding and editing the content does not have to be a heavy burden on your team’s shoulders. There are smart content management tools that can help make your workflows streamlined, simplified, and efficient. This is especially true for Drupal websites that can rely on Drupal core modules to improve editorial experiences, as well as a huge choice of contributed Drupal modules for editors.
In this post, we would like to focus on a specific feature that content-heavy websites often need — we are very familiar with the challenges this feature addresses because we have many customers with content-heavy websites, including several higher-ed institutions and non-profit organizations. The feature in question is content moderation, and it involves different participants who fill roles such as authoring, reviewing, and publishing of content. Making changes to a piece and informing each other about its status via endless emails, documents, signal fires, or Slack messages is not very efficient or convenient.
Drupal 9 has something much better for editorial teams! Intuitive moderation workflows are controlled directly in the Drupal admin dashboard with just a few clicks from the participants. Another good piece of news is that this functionality is included in Drupal core. Let’s explore Drupal’s moderation workflows, their key features, elements, and settings, as well as their main differences from the traditional Drupal content states.
Drupal’s content moderation: part of core but not enabled by default
Moderation workflows in Drupal 8 and 9 are provided by the work of these two core modules — Content Moderation and Workflows. They are included in Drupal core and share its best practices. However, they are not enabled from the start.
This is because content workflows, just like Drupal's multilingual features, are not needed on all websites. Avoiding unnecessary functionality helps a website stay lighter. But if a site does need these modules, they can be enabled in a couple of seconds, with nothing extra to download.
To be able to use Content Moderation and Workflows on a production website, you need Drupal 8.5 or later (this is the version where both modules reached stability). They work as a duo but the Workflows module has wider use that is not limited to content. It provides an interface for creating all kinds of workflows with states provided by other modules. The job of Content Moderation is to provide content states, as well as transitions between these states - for editorial workflows in particular.
The essence of content moderation in Drupal 8 and 9
With Content Moderation and Workflows enabled, you can use moderation workflows that will define your content’s journey from the moment of its creation, through approval, and to publication, as well as possible archiving, and so on.
You can configure how the content changes from one state to another (e.g. from Draft to Published) and which users are allowed to make these changes. It’s possible to either use the 3 default states that are Draft, Published, and Archived, or create custom workflows with any other states based on your team’s needs. Every content type can have its own workflow in Drupal.
An interesting feature is that the system allows you to have a published content piece that is live on the web, as well as a working copy that can be edited as much as needed. More details are waiting for you in the next section.
The new moderation system is much more advanced compared to Drupal’s standard functionality that only allows content to have two states — Published and Unpublished. However, the traditional functionality is perfectly sufficient for many websites if all that their teams need is to switch the content “on and off” using the Published/Unpublished option.
Moderation workflows key elements and settings
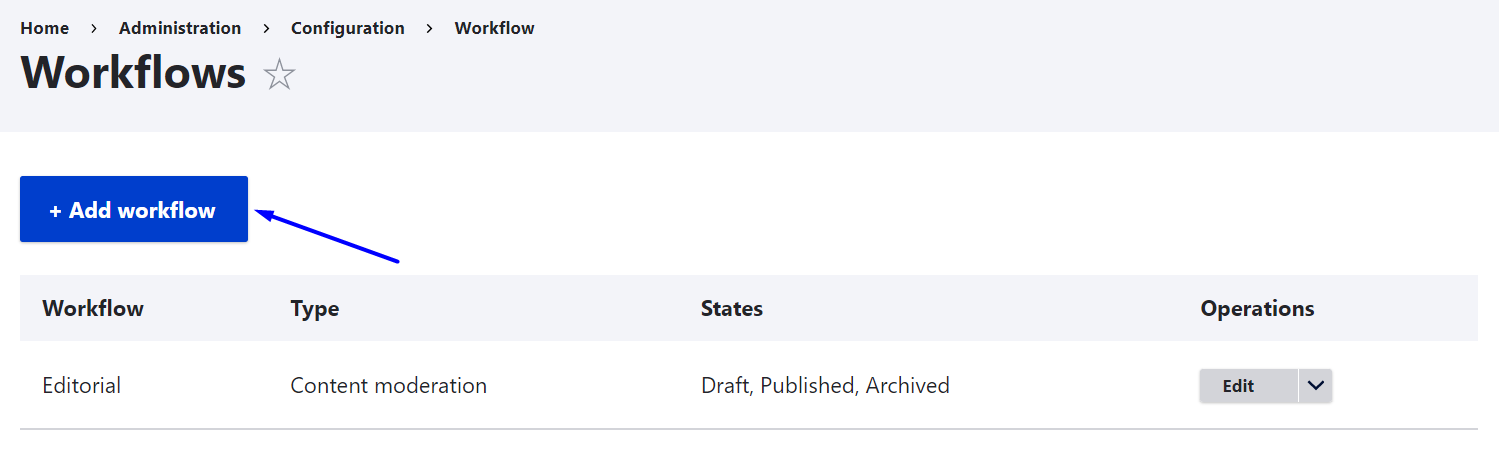
As soon as the Content Moderation and Workflows modules are enabled on the Extend tab or via Composer, the default “Editorial” workflow becomes available. You can find it on the Configuration > Workflow page of the Drupal admin dashboard. If you create multiple workflows for different content types on your website, all of them are available for editing on this page as well. There is the “Add workflow” button for creating custom workflows to meet the specific needs of your team.
- Label
A label is a name for your workflow (e.g. “Editorial”). If you have multiple workflows on your websites, descriptive labels are very helpful for differentiating between them. As for workflows that differ based on the content type, it’s convenient to give them the respective labels (e.g. Blog, Photo, Article).
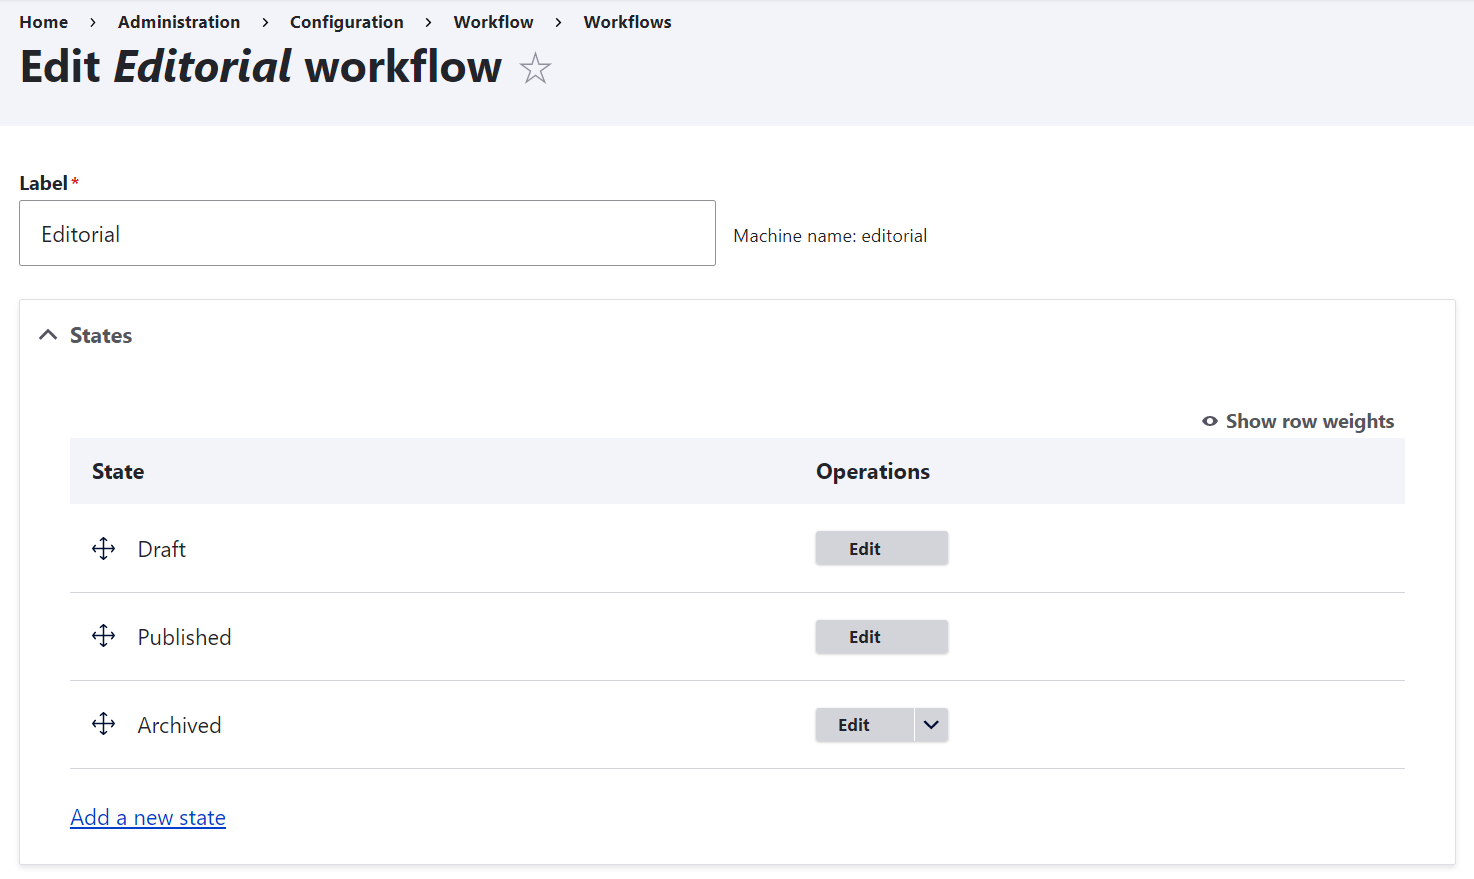
- States
A state is a current condition, or status, that a content node is in. For example, the default states in the “Editorial” workflow include “Draft,” “Published,” and “Archived.” The “Add a new state” link enables you to create custom states. For example, “Needs review,” “Needs work,” “Ready for publication,” or anything else based on your team’s preferences.
NB. The new states may look a bit confusing for anyone who is used to working with Drupal’s classic “Published” and “Unpublished” states. In the default settings of the new moderation system, a piece moves from state to state as follows.
A piece is first created as a Draft, then it can move to the Published state by a person who reviews it. If you need to hide a published piece, you can move it to Archived (in the traditional system, you would use the “Unpublish” button). If needed, an archived piece can be restored to Draft and then moved to Published.
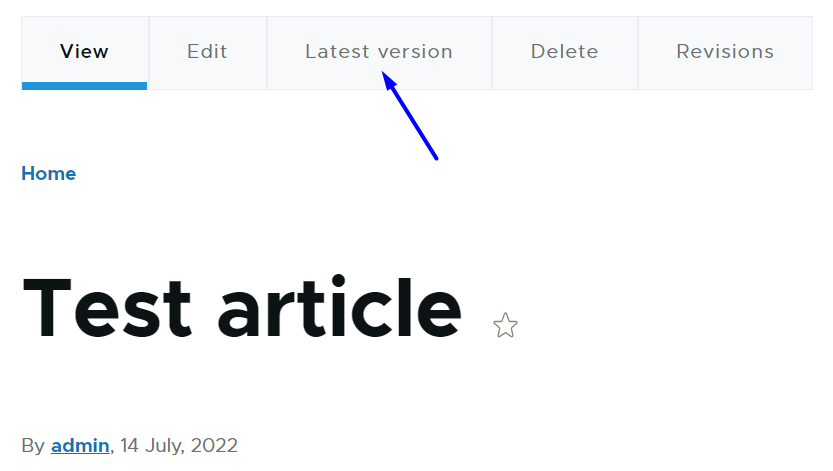
If you need to just edit a node instead of hiding it, you can use the following unique feature of the new system. It allows you to create new working drafts while the published piece stays intact and available to the audience. All you need to do is to edit a published node and save it as a Draft. It immediately becomes available in a new “Latest version” tab on the node, and the Revision tab displays all the node’s changes. The draft is visible to the reviewing users who can see the changes and publish it again, but is not visible to website visitors who continue seeing the initially published version until the new version is ready and replaces the old version.
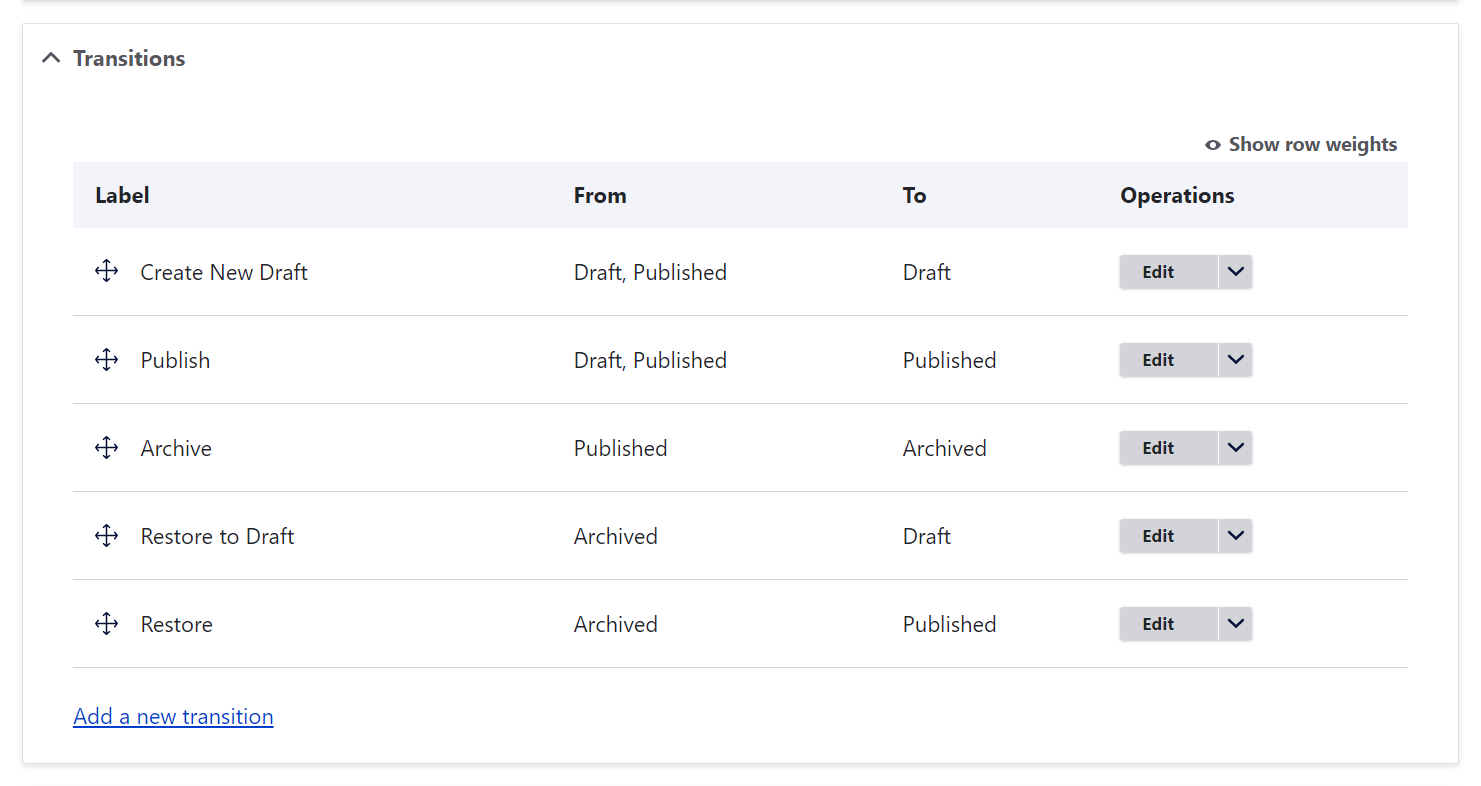
- Transitions
A transition is the changing of a piece from one state to another. Ideally, it is named with a verb and describes an action that needs to be applied to the content.
For example, the “Archive” transition moves a piece from the “Published” state to the “Archived” state. Another example is the “Restore” transition that could take your piece from “Archived” to “Published.” As the person who approves content (editor or moderator, based on the roles in your workflow) clicks the “Restore” option for the node, it becomes published again.
Using the “Add a new transition” link, you can create your own transitions. For example, the “Send for approval” transition could send nodes from “Draft” to “Needs review” where the moderator will see them.
The “Approve” transition could transfer a piece from “Needs review” to “Ready for publication.” Your editor will click “Approve” and the content will go to the person who is responsible for publishing.
You could also have the “Reject” transition that sends the piece to the “Needs work” state so that the person who creates content can see it and make edits to the piece.
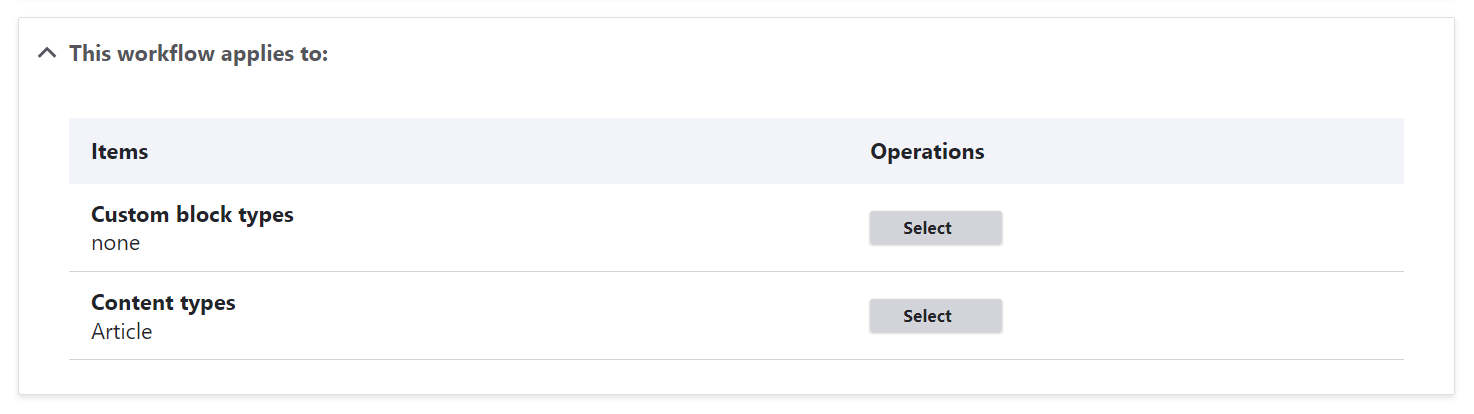
- “This workflow applies to”
In this setting, you can choose the content type to which this workflow applies (blog, news, etc.). This is actually not limited to content — it can also apply to Media types, custom block types, and other Drupal entities.
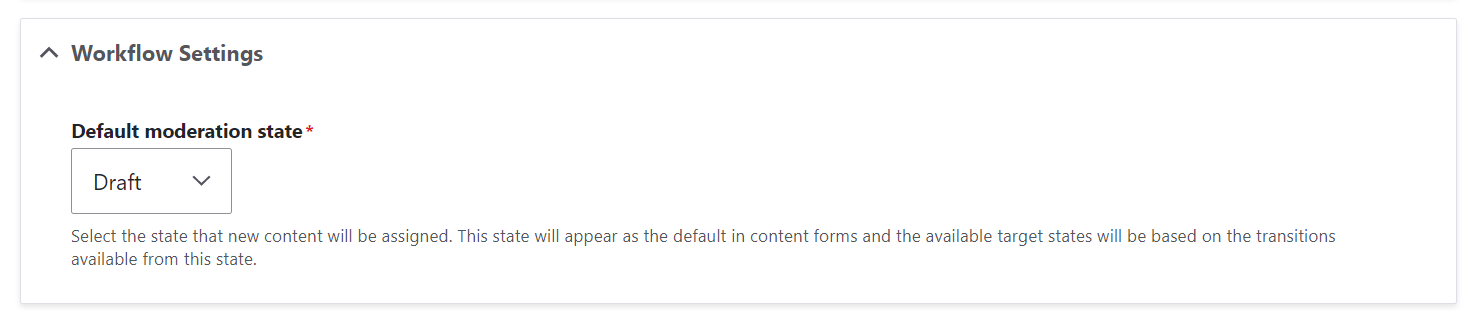
- Default moderation state
This is the default state for newly created pieces. This state will appear on node creation forms. If you do not change anything in this setting, the default state is Draft, which looks very reasonable.
- Roles and permissions
Of course, moderation workflows rely on their respective roles. As usual in Drupal, you can create these roles and give them granular permissions on the People > Permissions page.
Users who do not have permission to do a certain action to content will simply not see the respective option in the editing interface.
The Permissions have the Content moderation section with all workflows that are available on your website. Under each workflow, you will see a set of permissions for different actions with content based on roles.
In a simple workflow, the role for the person who creates content needs these permissions:
- “Use Create New Draft transition”
- “Use Restore to draft transition”
- “View the latest version”
The role for the person who reviews and publishes content needs the “Use Publish transition” and “View any unpublished content” permission, as well as all others in this particular workflow.
In addition to the Content moderation section, there is also the traditional Node section in the Permissions that needs your attention. Be sure the person who creates content is allowed to “View own unpublished content” while the person who approves content is allowed to “Access the content overview page.”
Alternatively, you could have a custom workflow where one role approves pieces and moves them to the “Ready for Publication” or “Reviewed” state while another role is only responsible for publishing. In this case, the permissions need to be rebuilt accordingly.
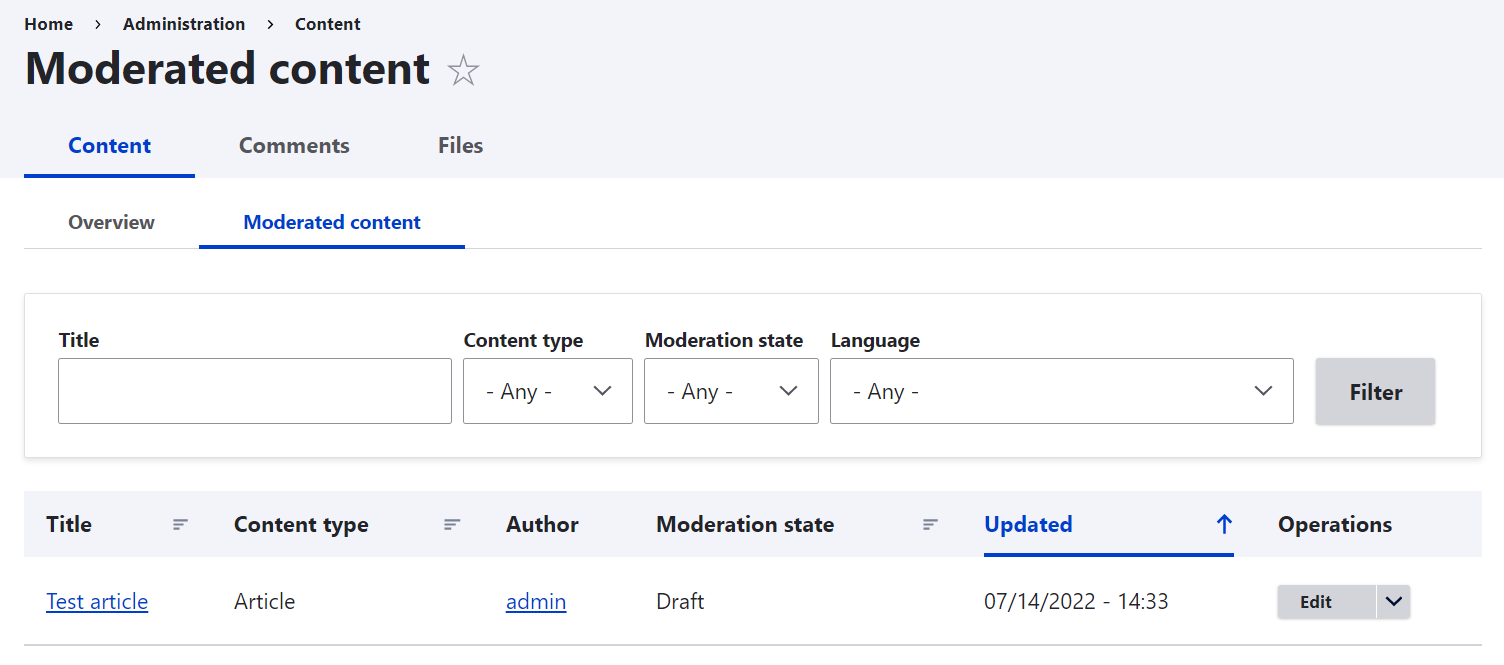
- All moderated content on the same tab
Conveniently, you get a special “Moderated content” tab where you can manage all the nodes that need moderation. As soon as they get published, they are gone from this tab.
Helpfully the workflow views are available directly on a user’s dashboard.
Set up your ideal content workflows in Drupal
Interested in creating a custom workflow on your content-heavy website? Let us call it content-rich instead — this emphasizes that plenty of content is an advantage, not a burden. It boosts your SEO, raises your audience’s engagement, and helps you bring your message across in the finest detail. Enjoy all these benefits and leave moderation workflows to the useful tools available in Drupal 8, Drupal 9, and beyond!
Unsure on where to start? Just reach out and our team will be more than happy to help you set them up.