
A Guide to Extending Drupal Views with the Modules Contributed by Our Developers
Authored by: Nadiia Nykolaichuk & Bryan Sharpe
When you think of the most powerful tools in Drupal, it should come as no surprise that Views are always at the top of the list. Built into the Drupal core since 8.0.0, Views, together with their companion module Views UI, enable website administrators, site builders, and developers to display content listings on their websites in any format they need.
The main capabilities of Drupal Views are described in detail in one of our previous articles. In addition to that, we’d like to share a step-by-step guide to some of our favourite contributed modules that extend Drupal Views — the Lazy Views module and the Views Combine module, built by our team’s developers Bryan Sharpe and Robert Phillips. Let’s begin our tour!
A quick glance at Drupal Views
Drupal Views are known as a powerful SQL query builder equipped with a convenient graphical interface. The query-building work is done behind the scenes, while you use the GUI for “telling” Views what you’d like to display and how. The interface is easy-to-use compared to having to create actual database queries. Still, working with Drupal Views requires a certain level of understanding of Drupal’s key concepts.
Out of the box, Views are able to display content as a grid, table, HTML list, or unformatted list. Extra modules bring more formats such as charts, slideshows, carousels, maps, and more. You can filter and sort your data based on various criteria and expose those options to website visitors so they can customize the listings they see. In more advanced settings, you can add a relationship to Views to show related content or create a contextual filter to display content dynamically based on the current context.
When we speak about displaying content in Views, the word “content” is used as a general term. The official Drupal terminology distinguishes between the actual content, taxonomy terms, comments, users, and other entity types— all of which can be successfully displayed in Drupal Views.
A massive ecosystem of contributed modules that has grown around Drupal Views adds a plethora of interesting features to the built-in options. So let’s now move on directly to the contributed modules created by our team.
How to extend Drupal Views with two great contributed modules
The Lazy Views module
The first module we will focus on is the Lazy Views module contributed by b_sharpe of ImageX. It uses a similar idea as the lazy-loading technique which is meant to improve your website’s performance by only loading the content when it’s needed.
So the module enables you to configure loading your view:
- either by a trigger (when a user explicitly clicks on a button or link)
- or upon page load
The Lazy Views module uses AJAX to load your views. It respects the Views permissions, as well as supports the filtering and sorting settings.
Here are the key steps for configuring the Lazy Views module:
- Enabling AJAX in a view
- Customizing the HTML code snippet
- Placing the view on your website
- Checking the result
1. Enabling AJAX in your view
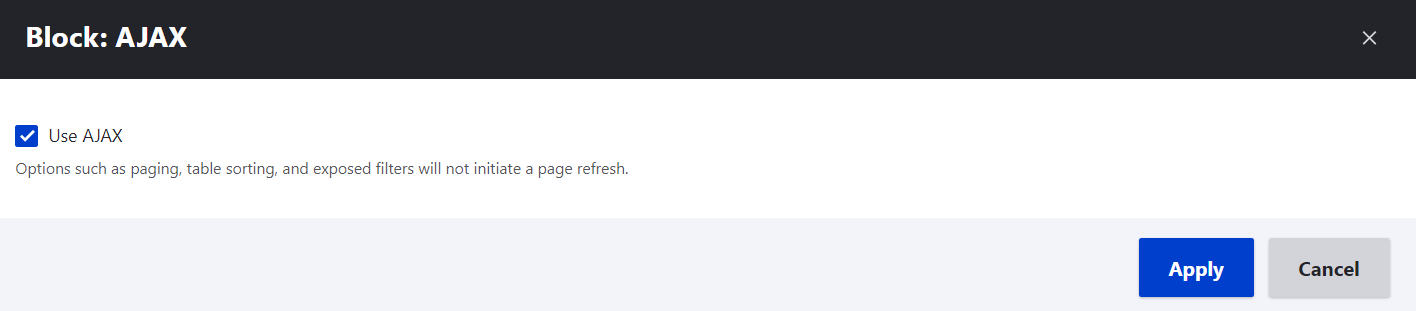
With the Lazy Views module installed and enabled on your website, you can go to Structure > Views and edit or create a view that you would want to be loaded. In its Advanced Settings, you will see a “Use AJAX” box, which needs to be enabled, otherwise, the functionality will not work. Next, click the “Apply” button. Finally, save your view.
2. Customizing the HTML code snippet
The module’s description page provides three examples of HTML code that you can add to your website’s pages where you’d like your view to be loaded. The examples show different ways of loading a view:
- This loads the “Recent Content” view block upon the click of the anchor:
<a data-lv-id="content_recent" data-lv-display="block_1" href="#">Click Me</a></p>
<div class="lazy-view"> </div>
- This loads the “Recent Content” view into itself upon a page load:
<div id="lazy-view" data-lv-id="content_recent" data-lv-display="block_1" data-lv-execute="true" data-lv-target="lazy-view"></div>
- This demonstrates all data attributes available. There is an important note for developers that the target attribute can accept either a class or an ID:
<button data-lv-id="content_recent" data-lv-display="block_1" data-lv-args='1,5' data-lv-target='my-custom-area' data-lv-execute='true'>Click Me</button>

<div id="my-custom-area">Loading Content...</div>
Those examples are using the parameters of the built-in Drupal view “Recent content.” The minimum requirements to use are as follows.
- the view ID (“content_recent” in the example)
- the display name (“block_1” in the example)
For customizing the code snippet, you would need to replace the parameters of the example view with the same parameters of your own view (the one you want to display).
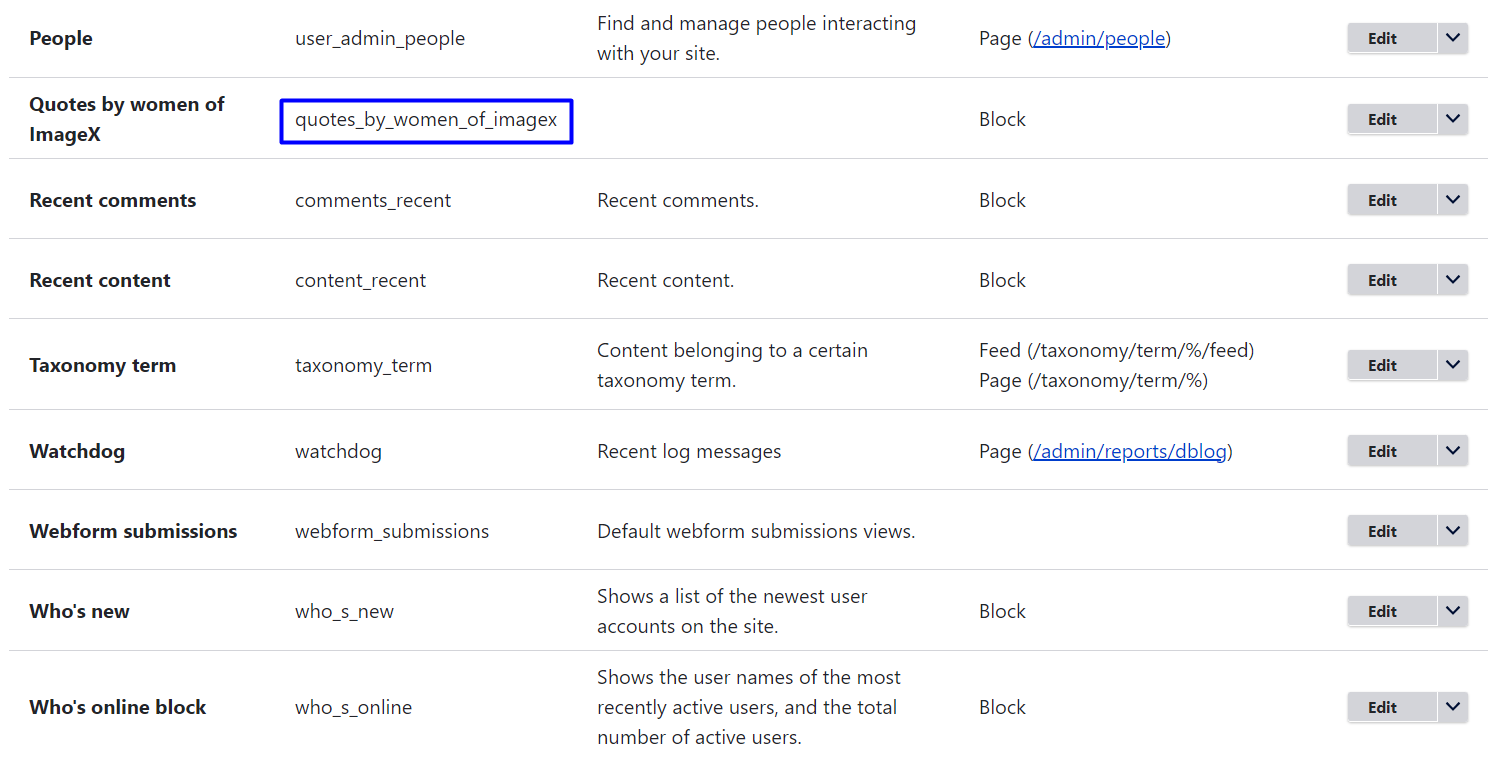
The view ID can be found on the list of Views in Structure > Views. For instance, let’s use our view named “Quotes by the women of ImageX” and check its ID on the list. It will be “quotes_by_women_of_imagex.”
The other parameter we need — the display name — depends on which display you’d like to choose (default, block 1, block 2, etc.) Click on the specific display inside the view settings and see its name on the Advanced tab. In this case, it’s “block_1.”

It’s possible to customize lots of things in the code, including the text labels. Let’s replace the “Click me” link text with “View the quotes.” So our customized code snippet to load the view via a trigger will look like this:
<a data-lv-id="quotes_by_women_of_imagex" data-lv-display="block_1" href="#">View the quotes</a></p>
<div class="lazy-view"> </div>
3. Placing the view on your website
When the HTML code snippet is ready, it’s time to put it somewhere on your website where you’d prefer your view to be loaded. One of the quick and easy ways to do this is to put the code into a custom block. This can be done in two ways:
- via the traditional Block Layout system in Drupal
- via the Layout Builder
Here is a quick guide to using the 1st option. Go to Structure > Block Layout > Custom block library and click “Add custom block.” Click the source button on the text editor toolbar and insert the HTML code. Save the block.

Now go to the “Block Layout” tab, select the region where you’d like to place the block and click “Place block.” Find the newly created custom block on the list and click “Place block” next to it.

In the block settings, configure details like on which pages it should appear, users of which roles should be able to see it, etc. Then click “Save block,” and, finally, “Save blocks” at the bottom of the page for the entire block layout.
4. Checking the result
When the block is added to the layout, it’s time to visit our frontend page to see how it looks.
It’s a block with an anchor link that a user needs to click for the view to load.
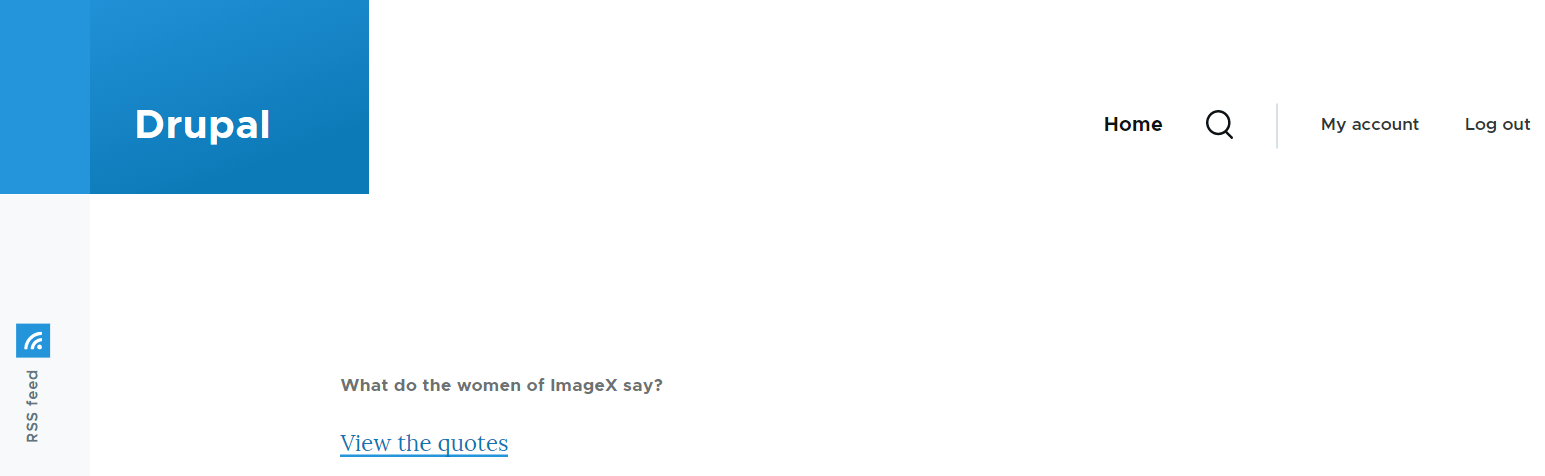
As we click the “View the quotes” link, we can see the entire view successfully loaded. Of course, it will also need to be styled for a better visual presentation, but it’s enough to show the module’s work.

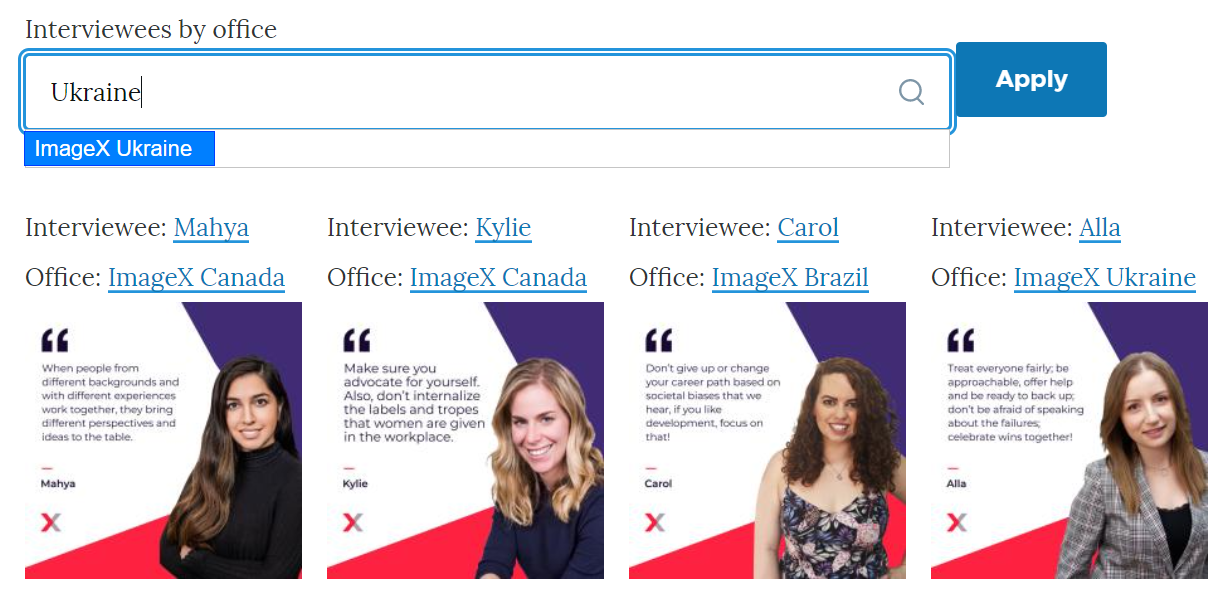
As mentioned above, the Lazy Views module supports sorting and filtering. So let’s see how it works with an exposed filter added to the view. Once we have added the filter, let’s click the link in our loaded block again — and the filter is successfully displayed above the view.
The Views Combine module
The next tool we'll be covering is the Views Combine module contributed by b_sharpe and robphillips. This module can combine views based on different entity types (content, media, taxonomy, etc.) into a single output by implementing the UNION operator for the query.
The module provides a “Views Combine” field which helps you quickly add other views to the one you choose as the parent view in the entire collection. It also offers a “Views Combine” filter which can be exposed to users so they will be able to switch between different views within the same output.
Let’s take a look at the steps to set up a combined view with the module:
- Aligning the fields, filters, and sorts
- Adding the “Views Combine” field and fusing the views
- Adding the “Views Combine” filter
- Checking the result
1. Aligning the fields, filters, and sorts
With the Views Combine module installed and enabled, the journey starts in Structure > Views where you can edit or create a field-based view. It should be noted that if you'd like to use exposed filters or sorts, each view must share the common fields for the unions to apply globally. In most cases, you'd want to align the filters and sorts as well.
For example, if the parent view is based on content, it has a “Content: Published (= Yes)” filter. However, if we want to add a taxonomy view or a media view into the output, they won’t have the “Published (= Yes)” filter. So let’s remove this filter from our content view.
Similarly, we will remove the “Content: Title” field. Instead, the module requires using the "Content: Rendered entity" field for the views. Let’s also add the “Random” global sorting that we will be able to share across all other views in the collection.
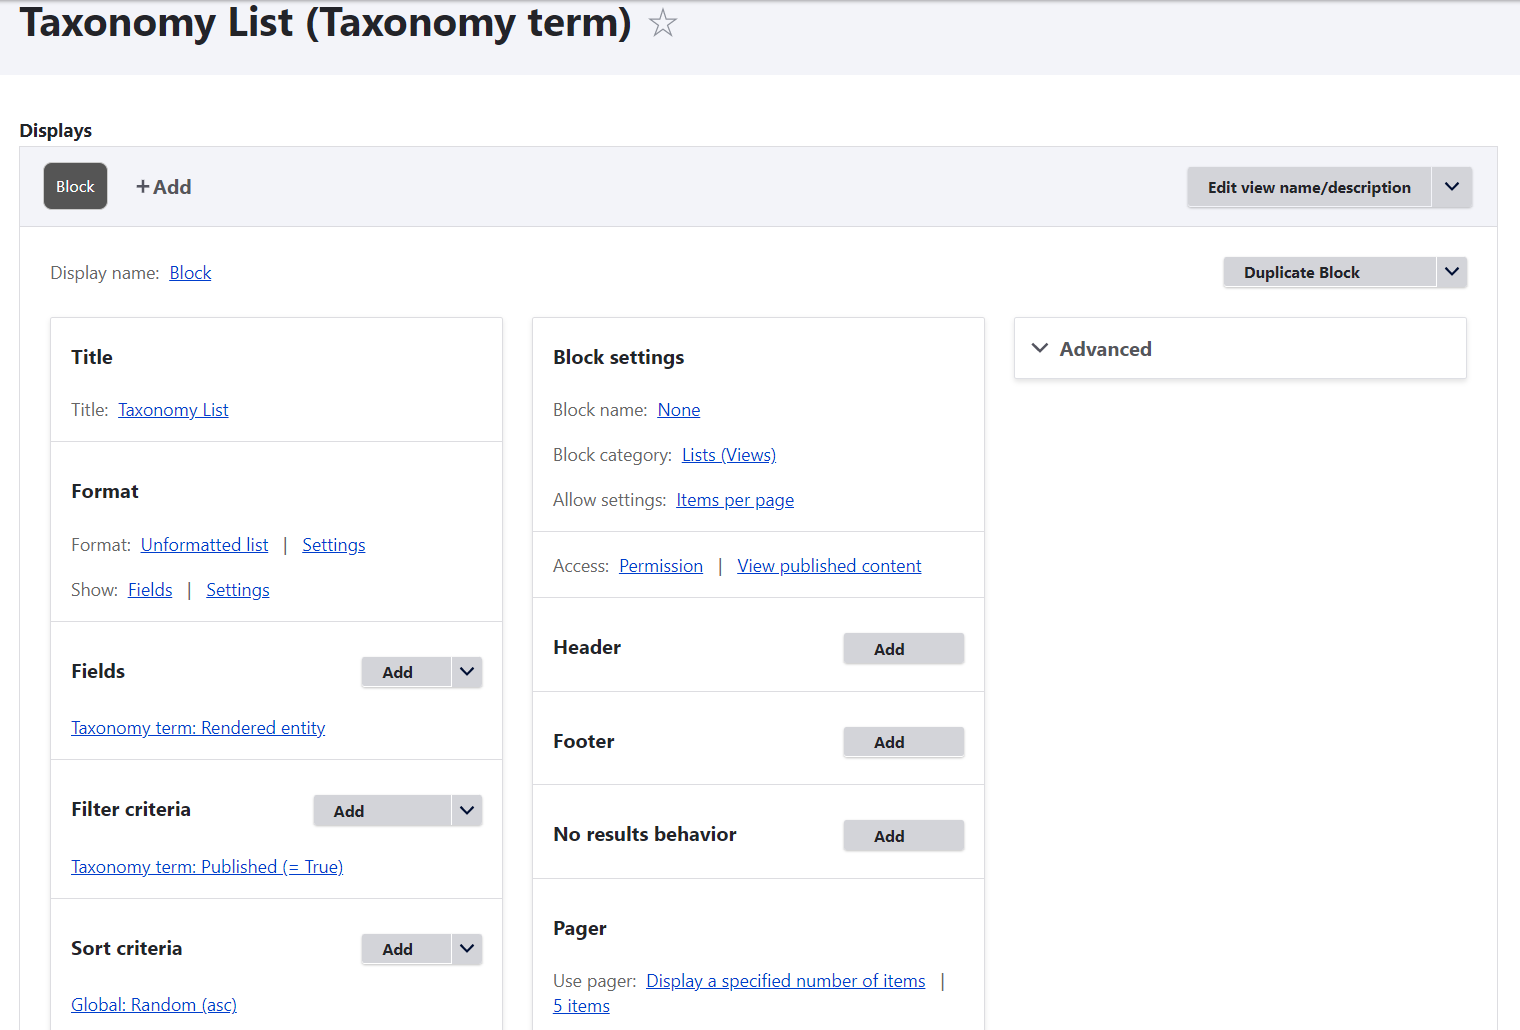
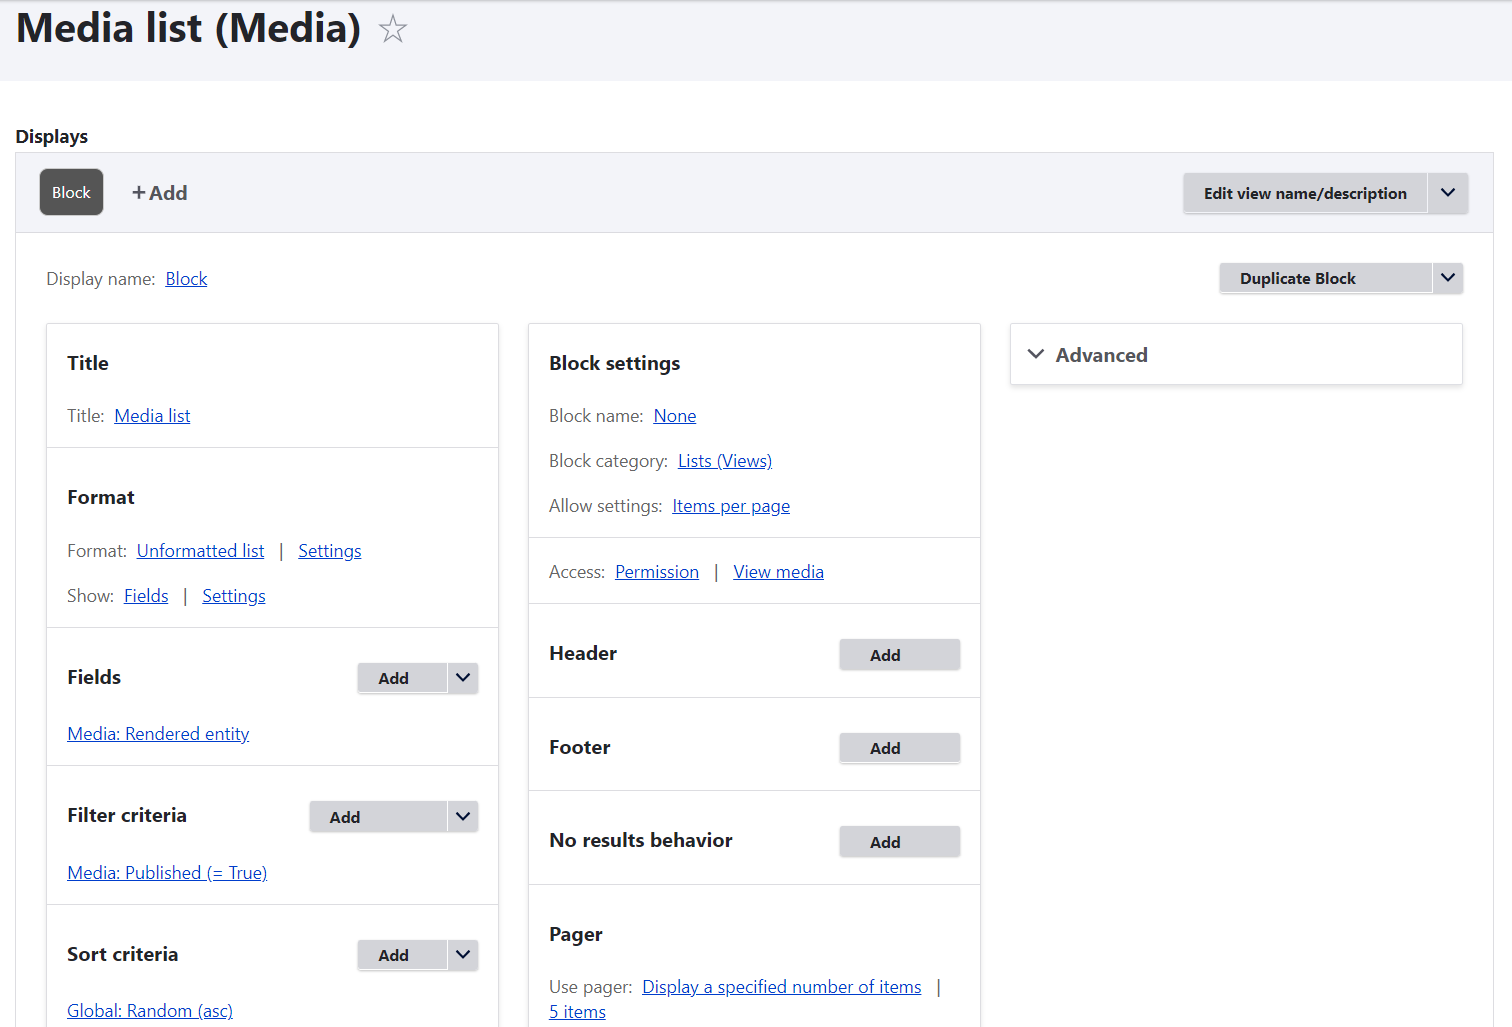
Similarly to the content view, our “Taxonomy list” view and “Media list” views will need to use the “Taxonomy term: Rendered entity” and “Media: Rendered entity,” respectively. We’ll remove their standard “Taxonomy term: Name” and “Media: Name” fields. Finally, we’ll add the “Random” global sorting to both views.
2. Adding the “Views Combine” field and fusing the views
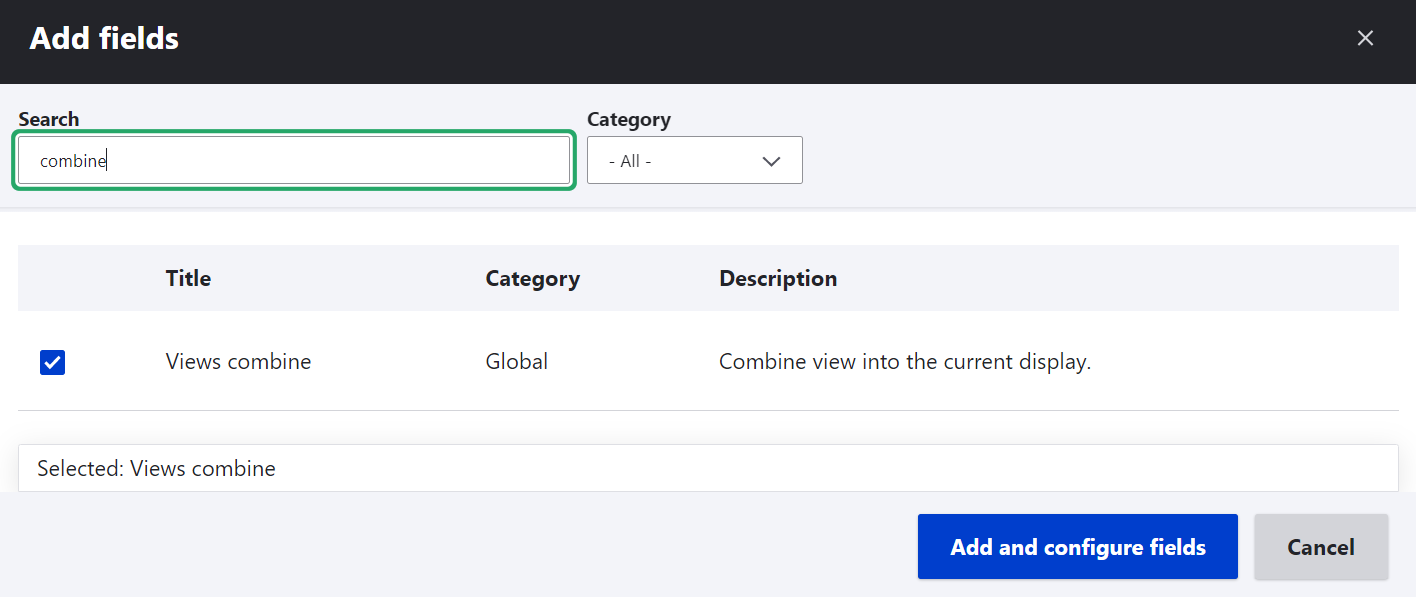
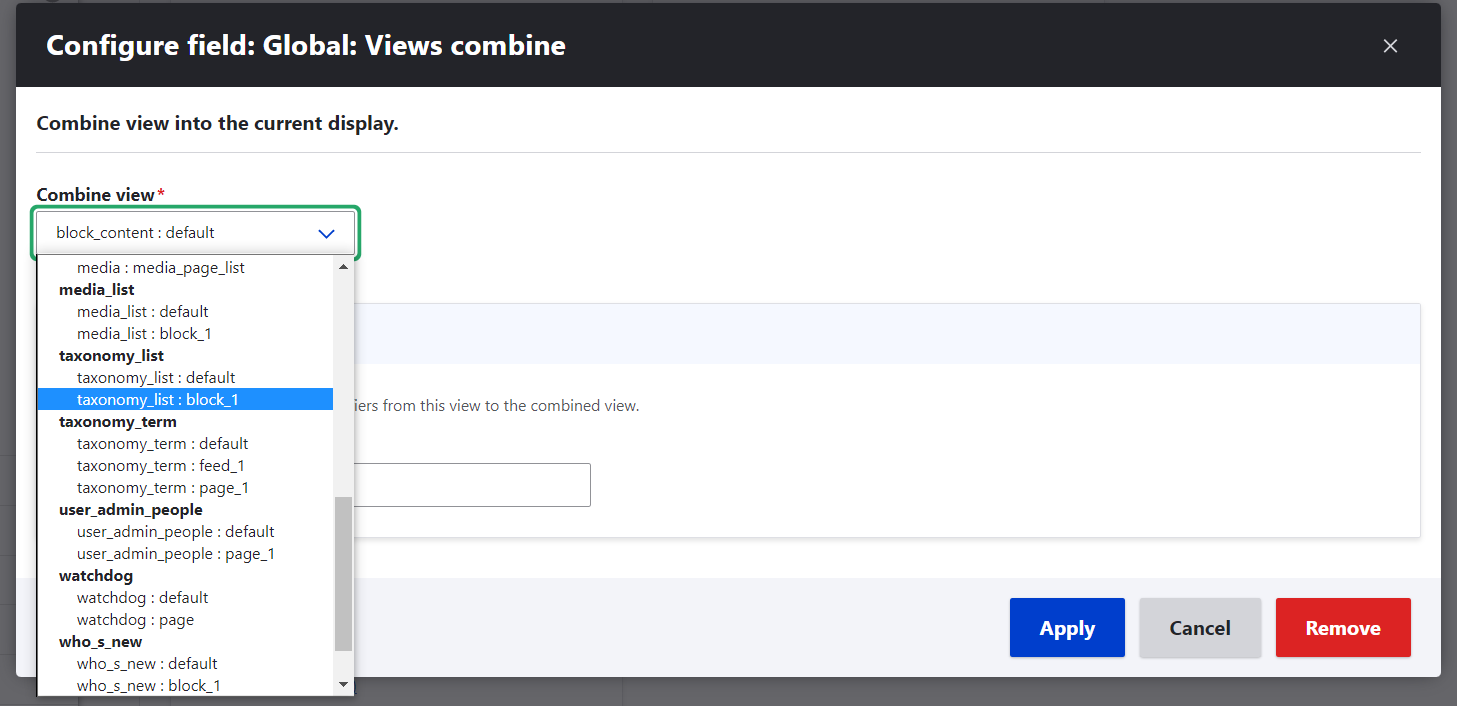
Now that the views are prepared for fusing, let’s return to the parent view, add the Views Combine field, and click “Add and configure fields.”
Then let’s add our taxonomy and media views by selecting them from the dropdown and clicking “Apply.”
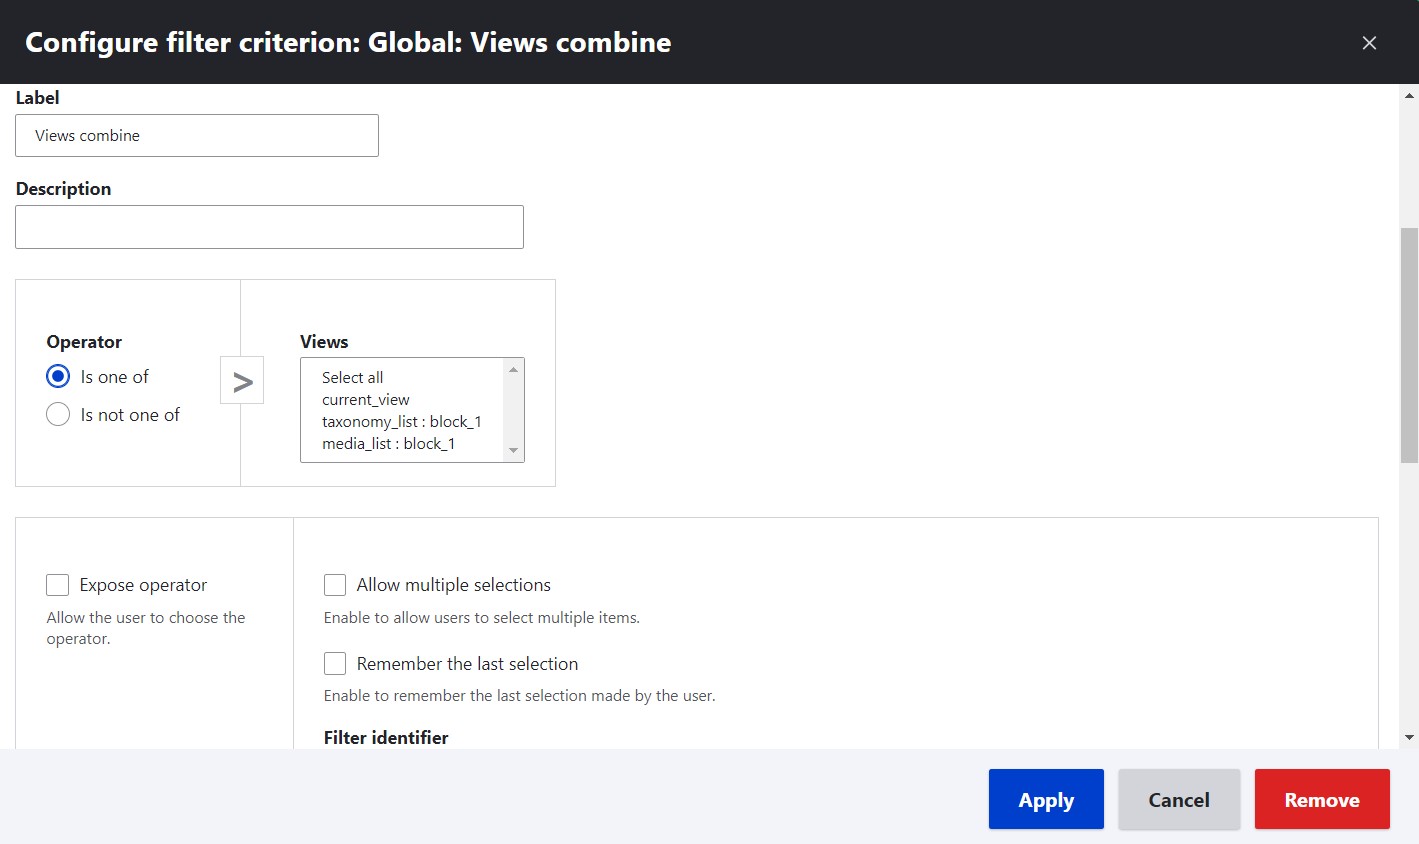
3. Adding the “Views Combine” filter
Once we’ve added all the views with the help of the field, let’s add the “Views Combine” filter to the main view. With no need to configure anything, the filter will include all the views from our collection in the “Is one of” operator.
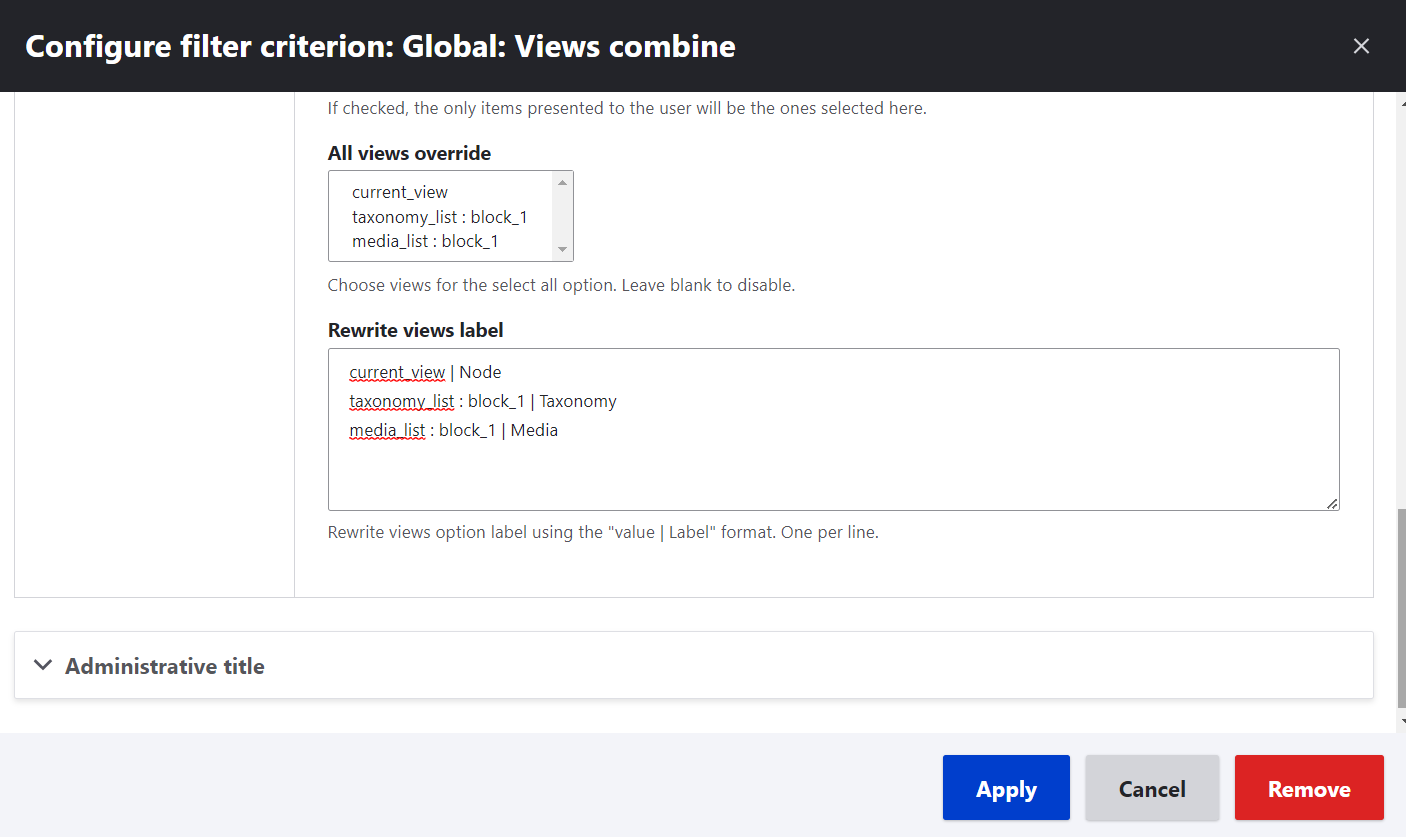
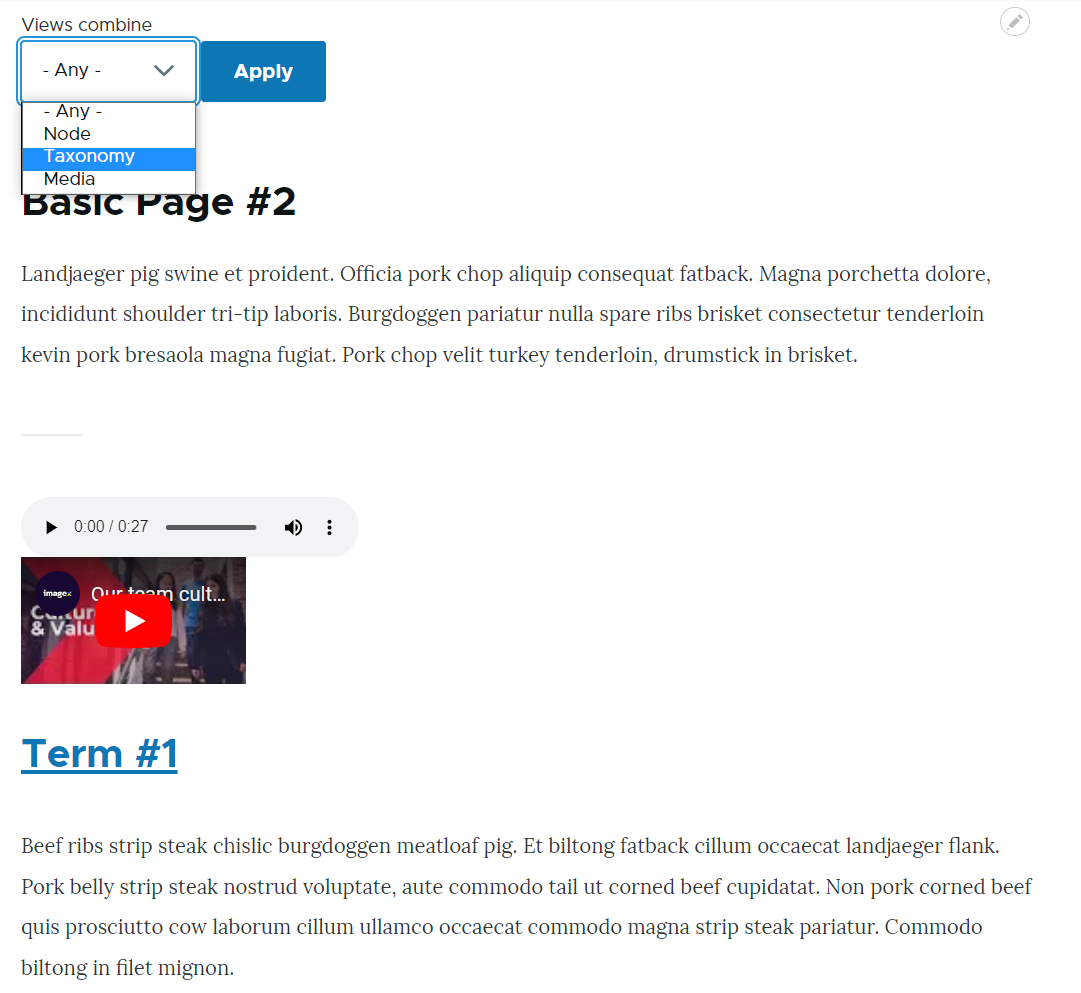
Let’s check the “Expose this filter to visitors, to allow them to change it” box, scroll down to the “Rewrite views label” section, and write human-readable labels for all views in our collection in a "value | Label" format, one per line.
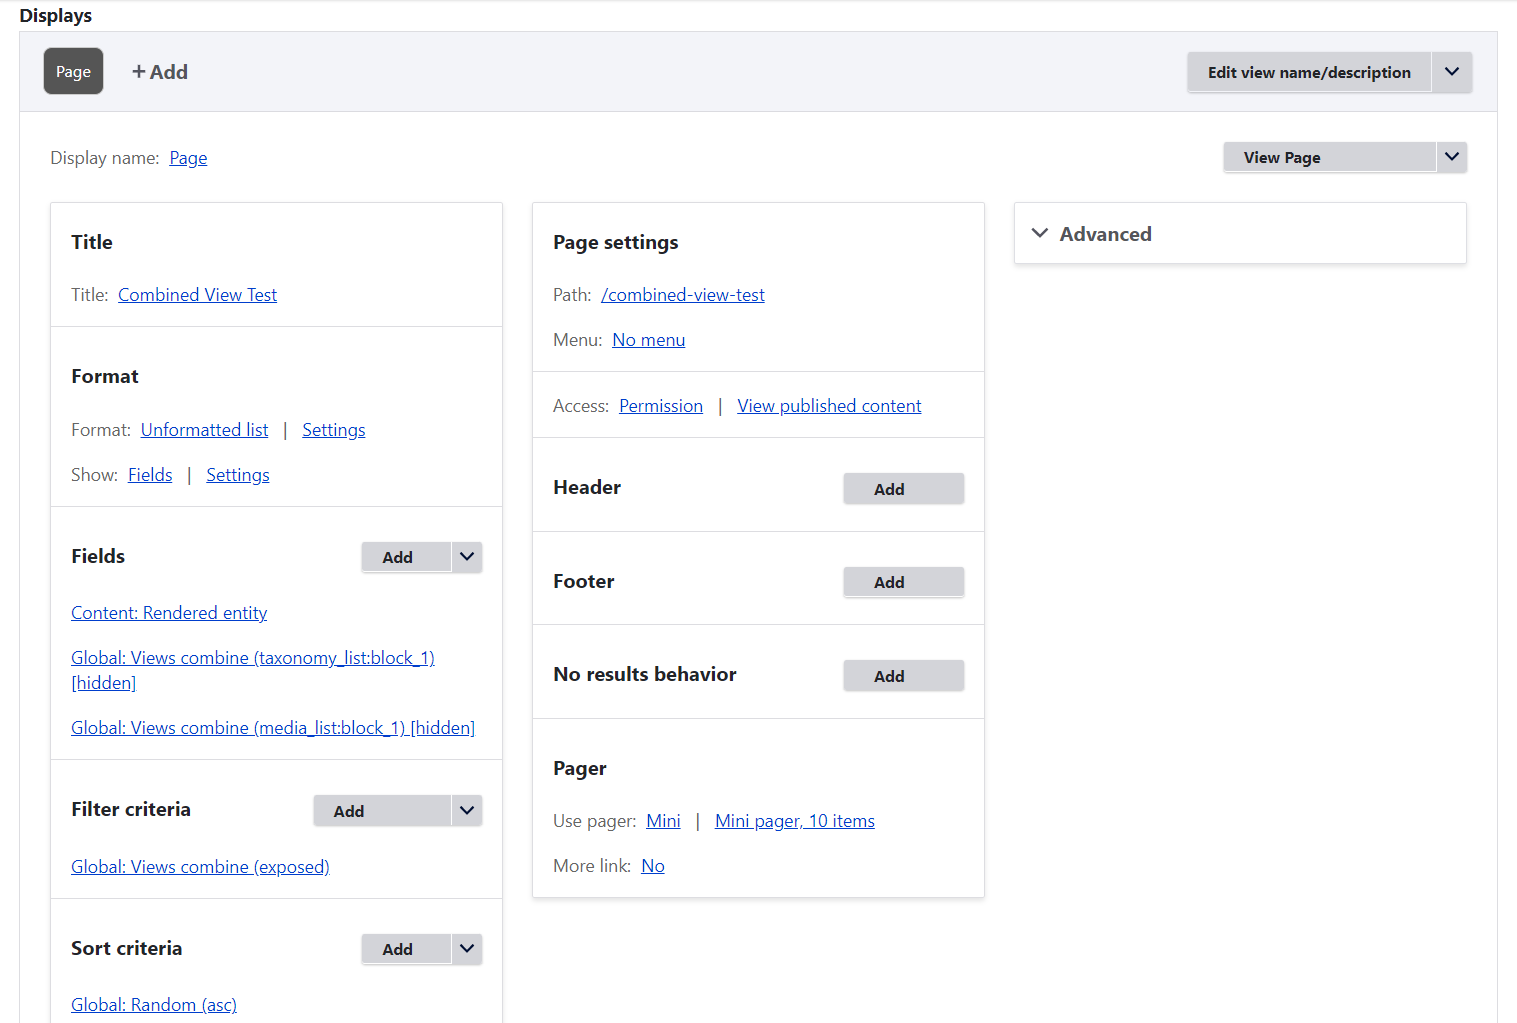
4. Checking the result
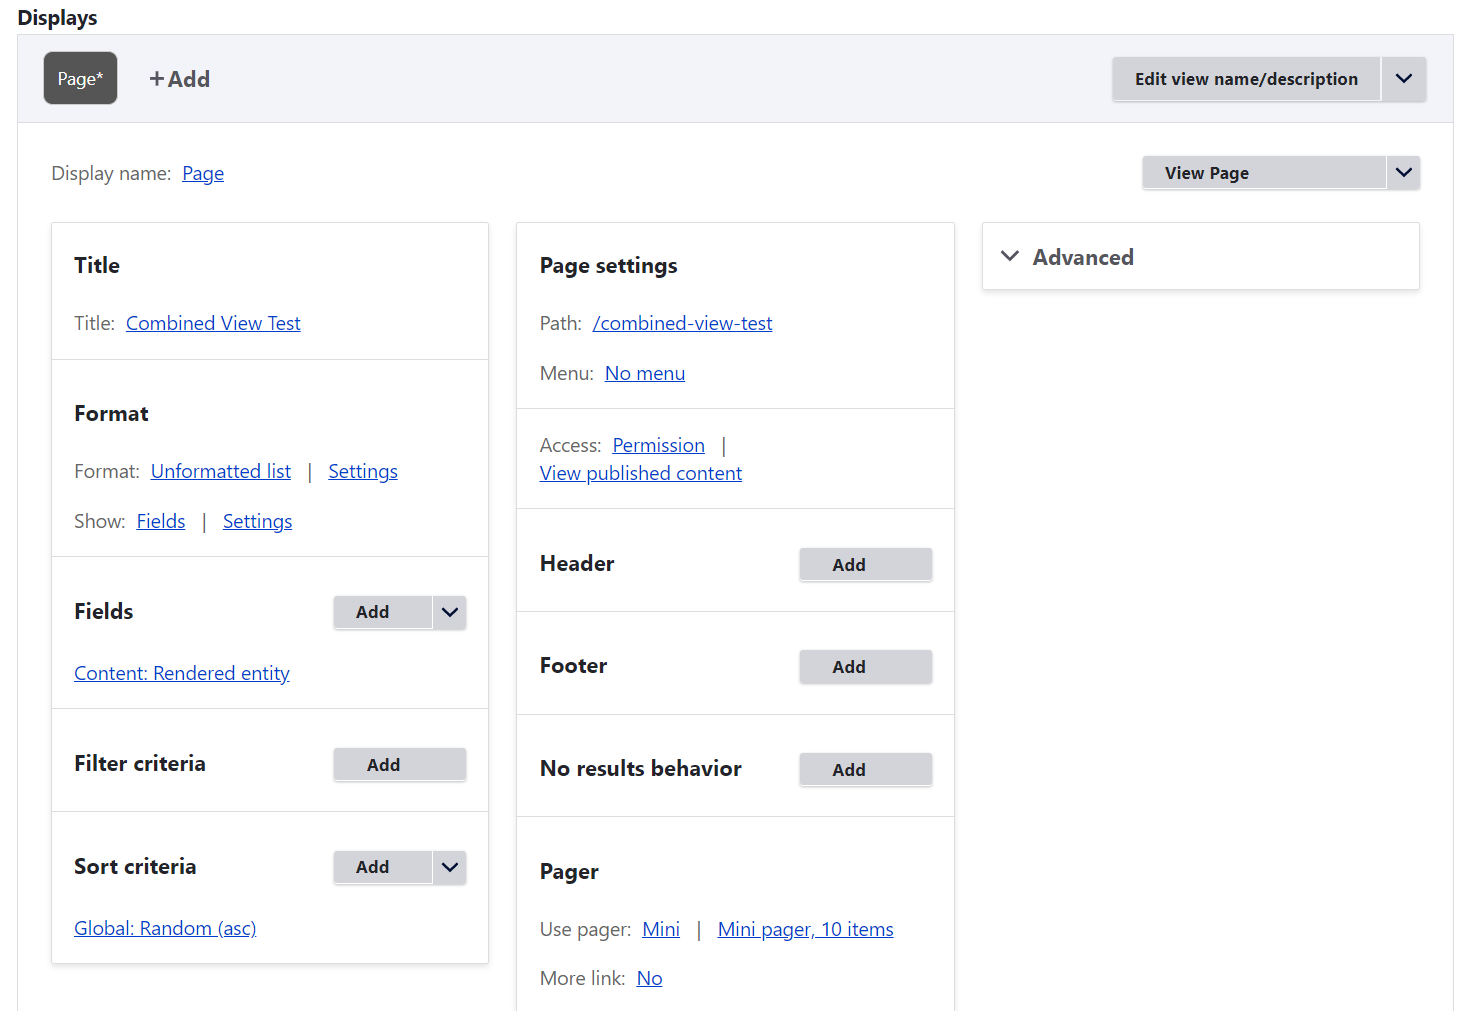
With the “Views Combine” field added, other views selected, and the “Views Combine” filter in place, our updated view settings look like this:
Now it’s time to see what our combined view displays on the front end. We can see that it shows the entities from all three views that we’ve combined — content, taxonomy, and media. There is an exposed filter that provides a dropdown for a user to select one of the three entity types if they want to.
Final thoughts
Our team is passionate about getting involved with expanding the capabilities of Drupal Views. We will keep up the contribution efforts that help the community make great Drupal tools even greater. We’d also like to let you know that whenever you need help setting up existing Drupal modules or creating custom functionality for your website, you are always welcome to reach out to our Drupal development professionals.