
How To Schedule Content For Future Publishing In Drupal
There are many cases when your content needs to go live or be removed at specific dates and times. This might be important for special campaigns, holiday greetings, limited-time offers, press embargoes, release notes, etc. Unfortunately, this often requires an editor to stay up at night or work on a weekend or while on vacation. But even if publishing happens during regular working hours, it would be much more convenient to just schedule content to be published automatically.
Thankfully, we are living in the age of automation, so publishing ahead of time can be easily entrusted to tireless and reliable machines. As a result, more time can be freed up for creative work and brilliant ideas.
When it comes to Drupal websites, the mission of publishing and unpublishing your content at exact dates and times belongs to the Scheduler module. It is absolutely free just like all other contributed Drupal modules for editorial experiences. Keep reading to discover more about the Scheduler module’s features and see a simple guide on scheduling content for future publishing in Drupal.
The Scheduler module and its main features
The Scheduler module offers an interface for editors to define when content items need to be published and/or unpublished. The module works not only with content but also with taxonomy. The publishing/unpublishing dates and times are set in plain text or via a calendar popup.
The module enables you to configure scheduling separately for each content type (article, news, blog, etc) and fine-tune the scheduling experiences. As usual with Drupal, permissions for working with Scheduler can be assigned to specific user roles.
How do scheduled pages get published and unpublished automatically? Drupal has an automated task manager — Cron. At predefined intervals, this tool automatically performs all tasks on its “to-do list.” Scheduler provides Lightweight Cron, which can take the load off the system by running scheduled publishing operations separately from all the Cron functions on the Drupal website.
In addition to the publishing and unpublishing of content based on scheduled dates, Scheduler can provide additional capabilities thanks to its integration with other Drupal modules. For example:
- With the Scheduler Rules Integration submodule enabled, Scheduler can cooperate with the Rules module to do publishing/unpublishing based on occurring events on a Drupal website.
- When used with the Scheduler Content Moderation Integration module, it can add the scheduled publishing feature for editorial workflows provided by the Drupal core Content Moderation module.
- Together with the Devel module, Scheduler can add publishing/unpublishing dates automatically in the process of new test content being generated by Devel.
How to schedule content for publishing in Drupal with Scheduler
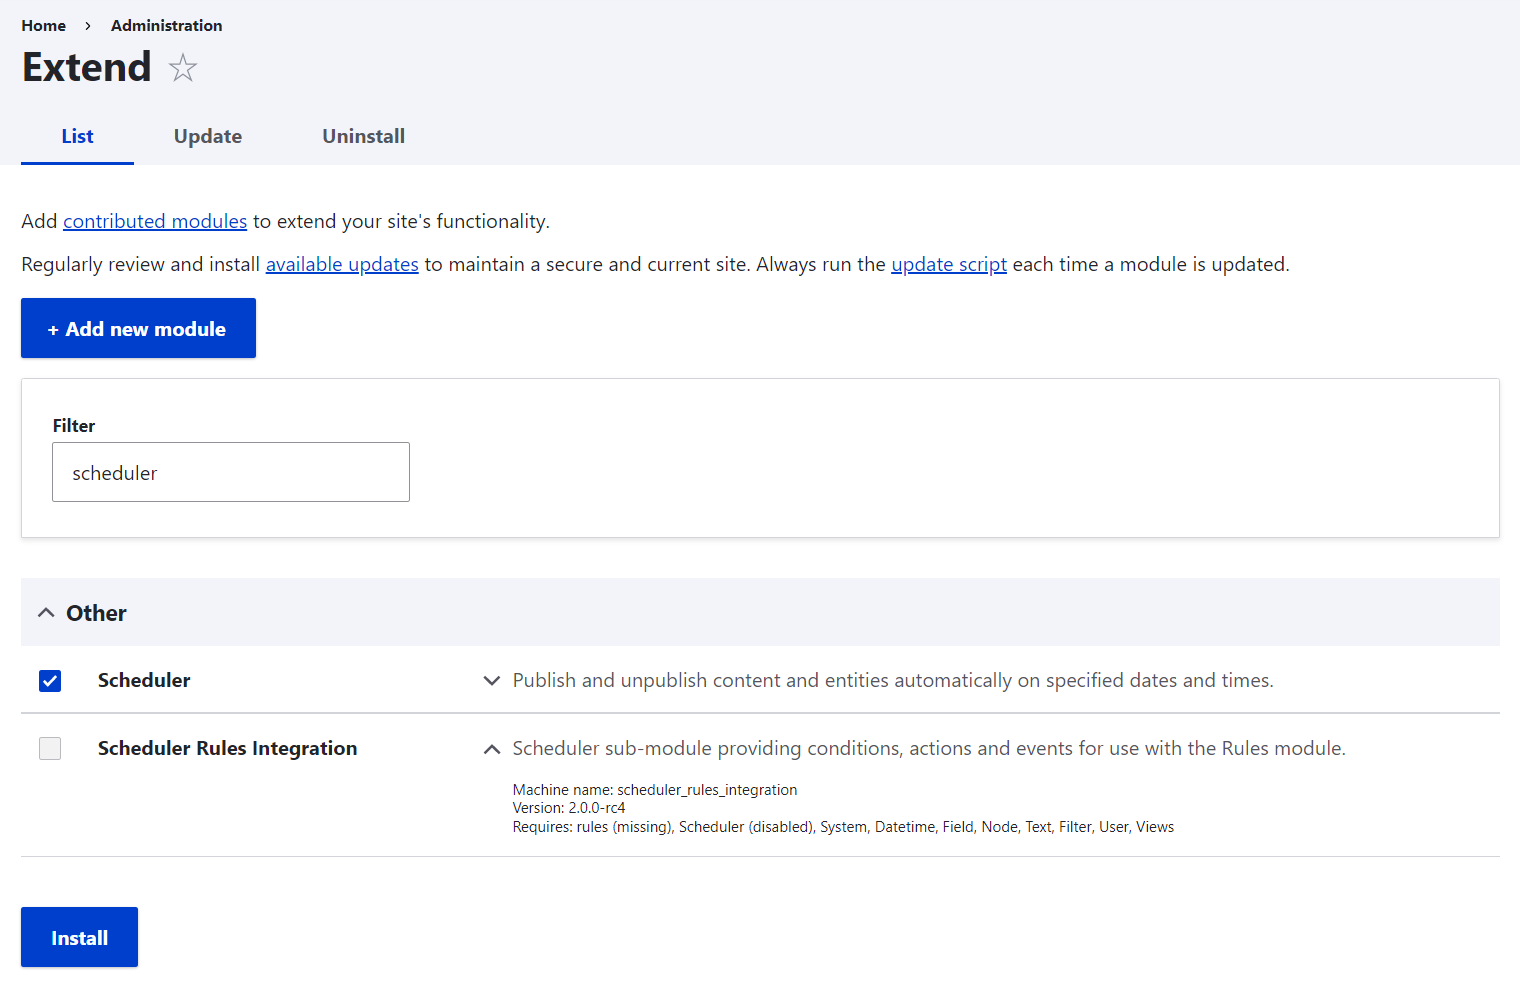
Installation
You can download the Scheduler module from drupal.org and then install it on the Extend tab of the Drupal admin dashboard (although the best practice is to install modules with Composer in Drupal 9). The module comes packed with the Scheduler Rules Integration submodule, but we will not need to install this for our example. We will only install the main module in this instance.
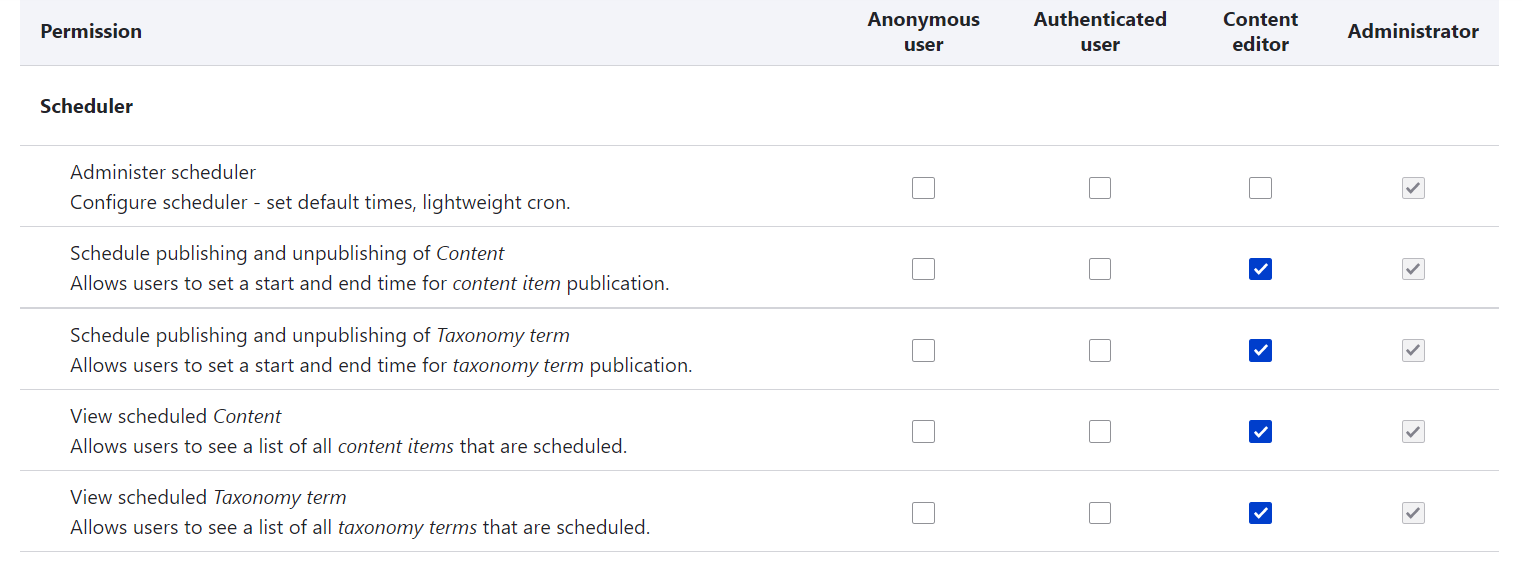
User permissions
There is now a Scheduler section on the People > Permissions page. If you are using an older Drupal version, you might see three permissions there. But now that we are using Scheduler 2.0 on a Drupal 9 website, the section has five permissions including those for taxonomy.
The administrator role — or another trusted role that you might have on your website — will need permission to administer Scheduler (permission #1).
The other permissions enable users to schedule the publishing and unpublishing of content, and to view scheduled content, as well as the same for taxonomy. They should be given roles that work with content directly. Drupal 9’s default Content editor role is a great fit for this. You can assign these permissions to the respective role by checking them in the box and clicking “Save permissions” at the bottom of the page.
General configuration
On the Configuration > Content authoring > Scheduler page, you will find the settings for the module. They apply to all entity types, but a menu widget enables you to navigate to a specific type for individual settings. Let’s review the general settings first.
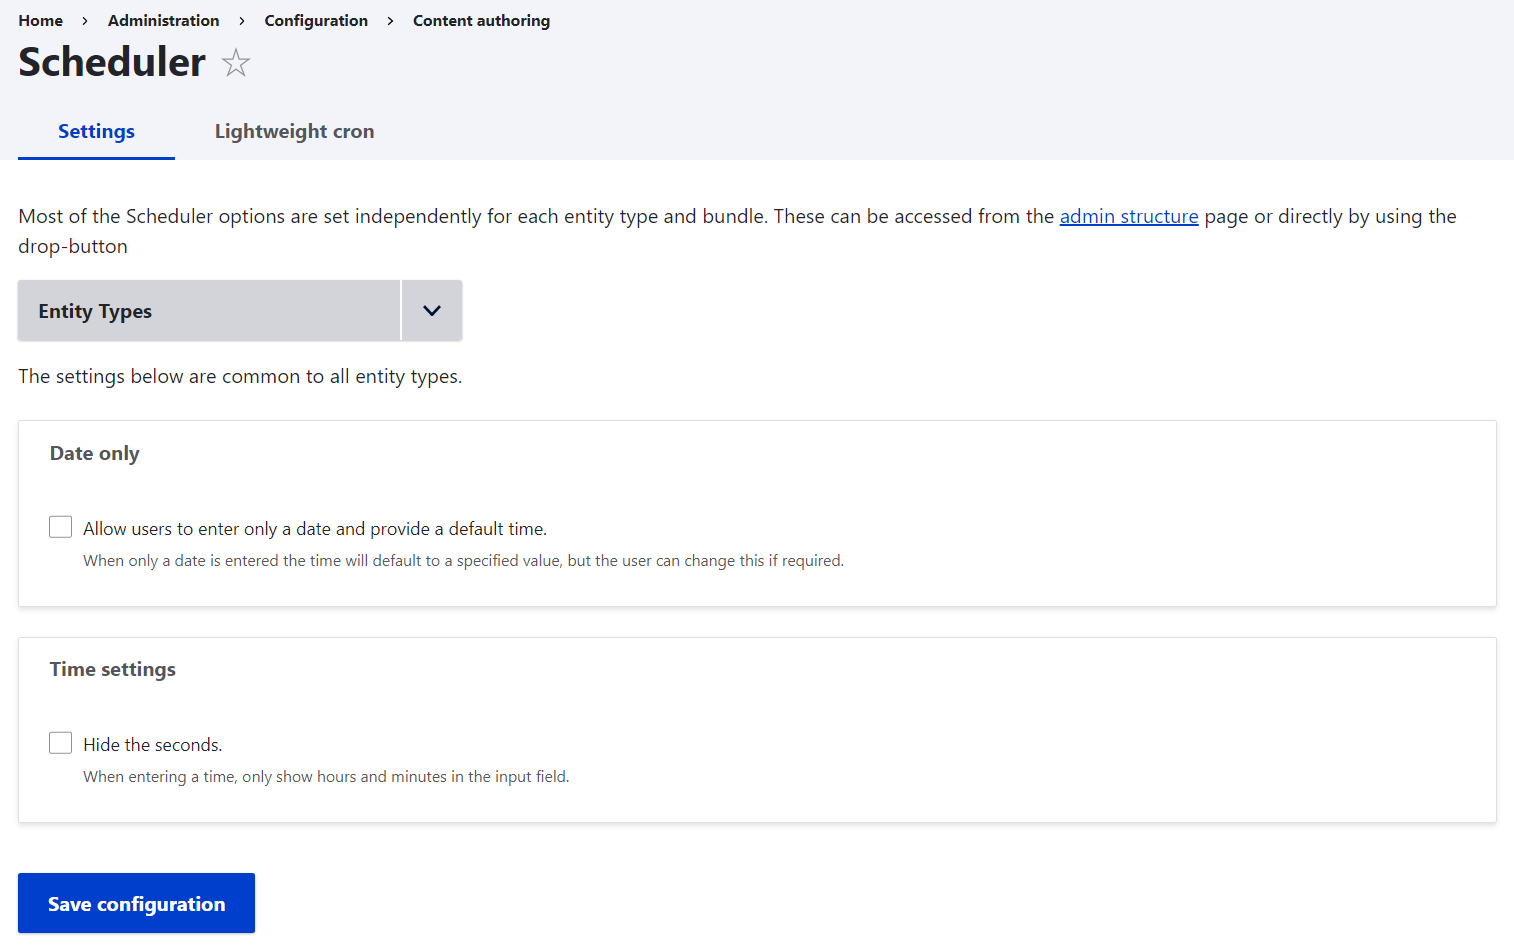
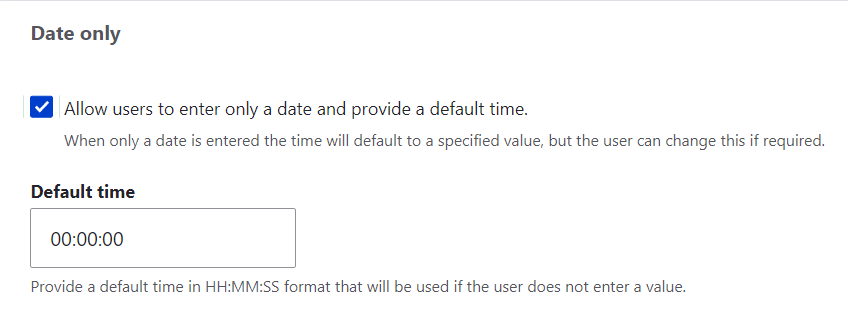
- Date only
If it’s the date that matters most to you, and there’s no need to use different times, you could check the “Date only” option. This will save your team time because they will not have to enter the hours or minutes. Nodes will be published and unpublished on different dates but at the same default time — the time that you choose here in the settings form.
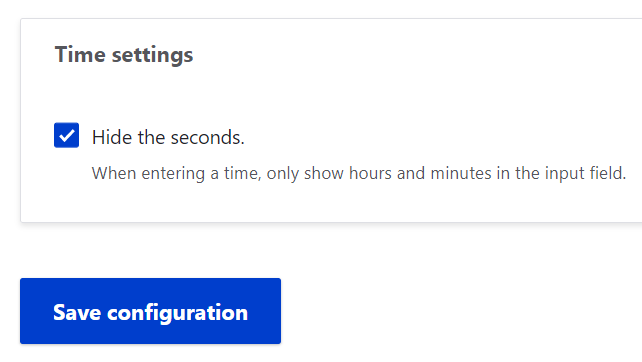
- Time settings
If you choose to hide the seconds, editors will only have the hours and minutes in the time input field. This is quite enough for most use cases.
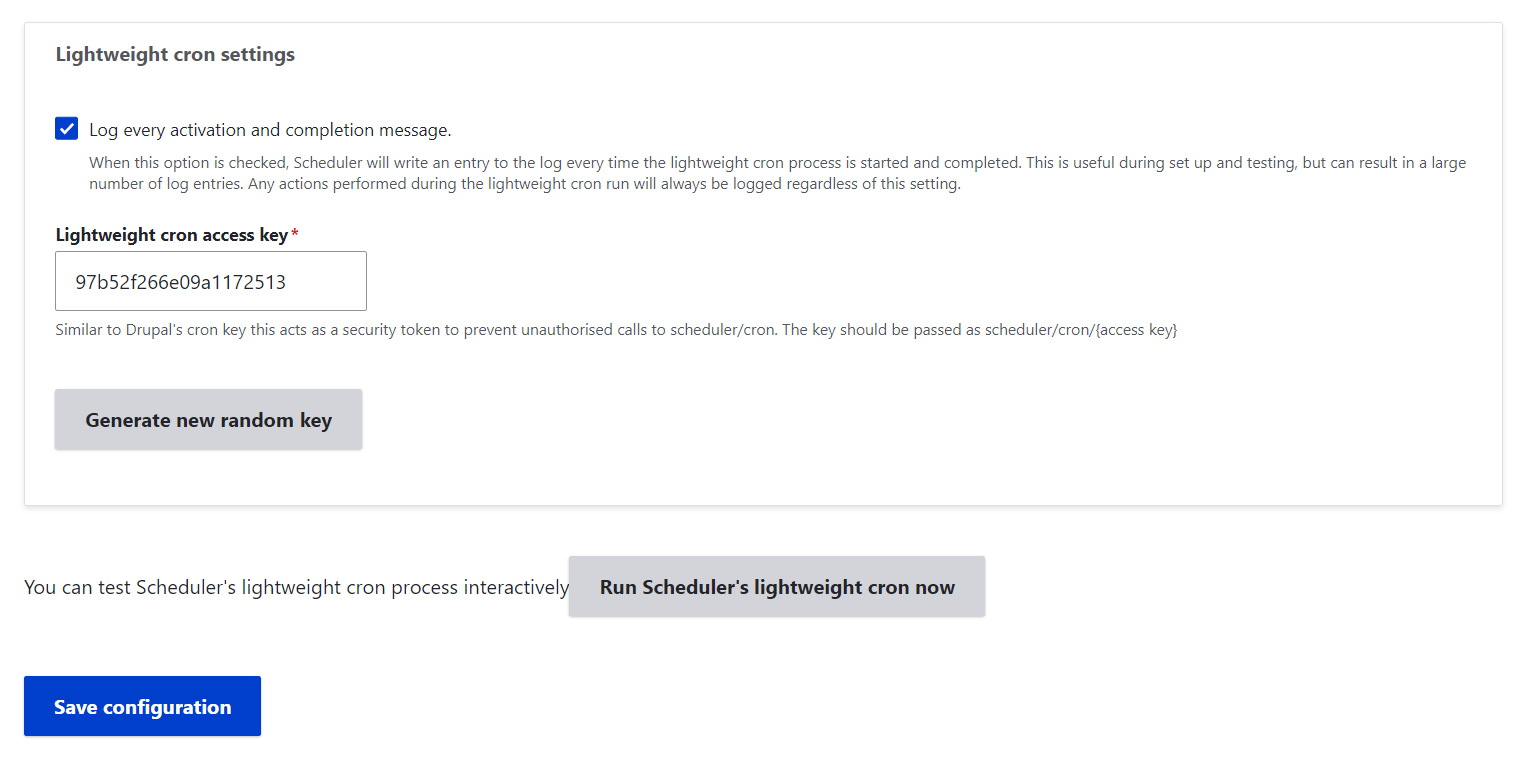
- Lightweight Cron
The second tab in the settings is dedicated to Lightweight Cron. As mentioned above, Lightweight Cron used by Scheduler allows you to run the scheduled publishing tasks without running Drupal Cron in a standard way (i.e. with all the tasks needed by the Drupal core or other contributed Drupal modules).
Why is this so important? Running the traditional Cron at too short intervals can affect a website’s performance. At the same time, these intervals have to be short for automatic publications to appear at the correct times. For example, if an article is scheduled for 9:30 and Cron is set to run every hour, it will not pick the article up to publish it until the next Cron runs at 10:00.
Lightweight Cron resolves this problem by running Scheduler’s tasks only, and the intervals for doing this can be configured in the Crontab tool on your website’s server. The Lightweight Cron access key that will be needed for creating the respective Crontab entry is found on the Scheduler > Lightweight Cron settings page.
This page also has a button that enables you to run Lightweight Cron immediately. This is very helpful for cases when some nodes need to go live quickly but the time has not yet come for Cron to run.
Configuring Scheduler for a content type
To configure the module for a specific content type, you can use the menu widget in Scheduler’s settings or go to Structure > Content types > [Your content type] > Edit.
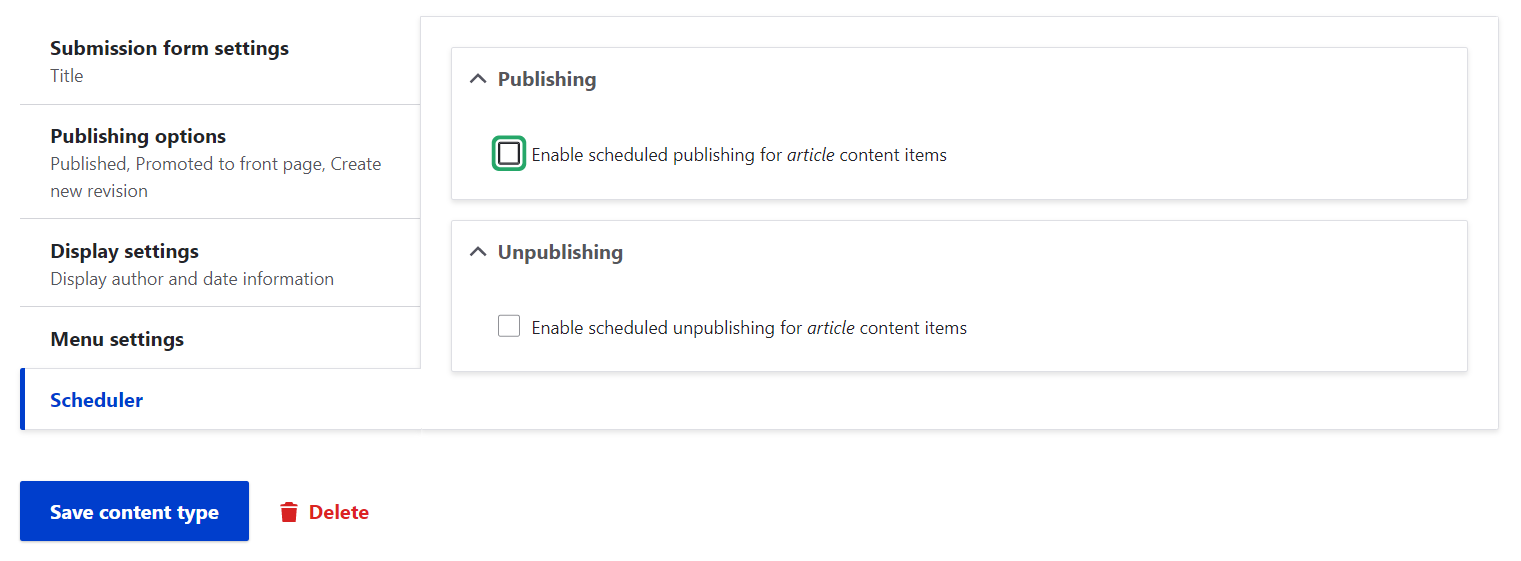
The Scheduler section is at the bottom of the content type’s settings. It has three subsections with specific settings for:
- Publishing
- Unpublishing
- Content edit page
First of all, you need to enable scheduled publishing and unpublishing for this content type by checking the respective boxes. You can enable both or only one of these two features depending on your website’s needs.
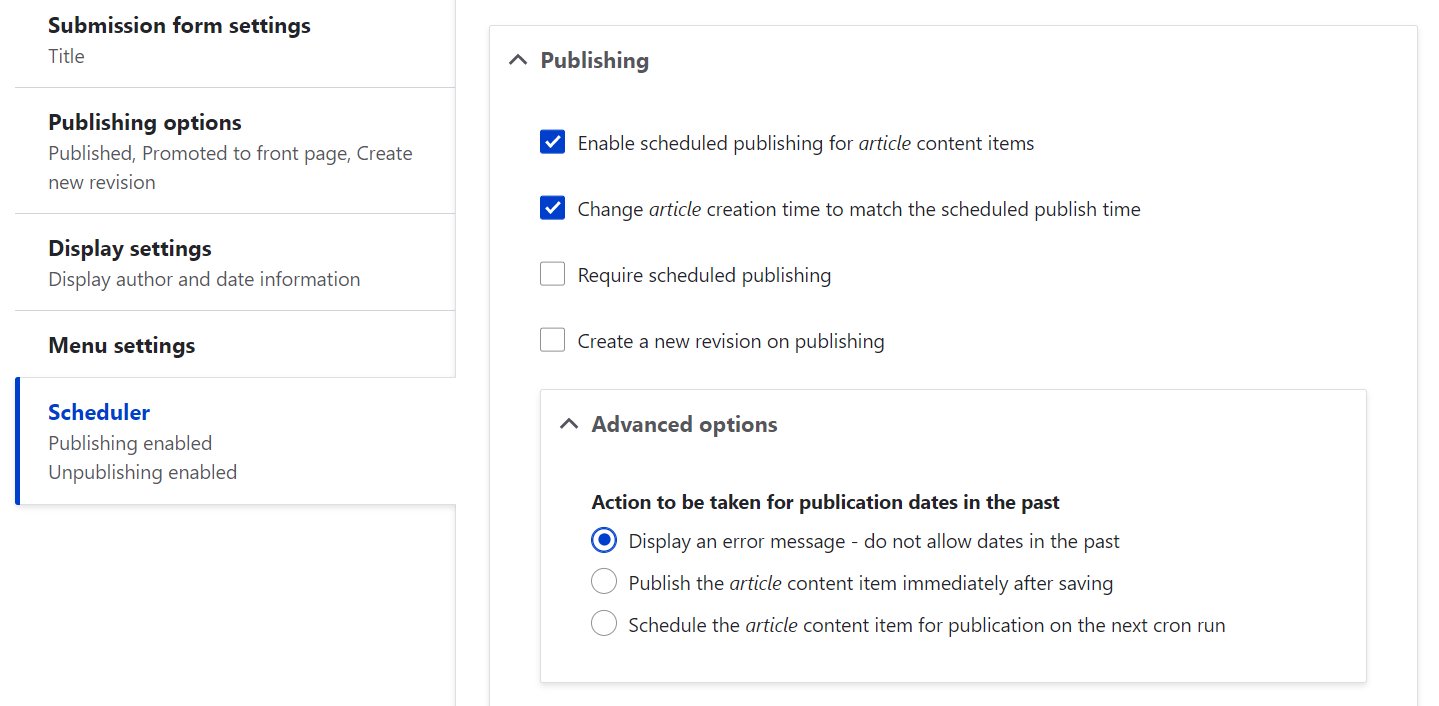
1) Publishing
Once you have enabled the Publishing feature, other options expand to you. By checking them, you can:
- change content creation time to match the scheduled publishing time (this will make your content look fresher)
- make scheduled publishing required (this is useful when you schedule all content and want to make sure editors do not forget to do it)
- create a new revision on publishing
Advanced options enable you to:
- display an error message when someone is trying to set a date in the past
- publish the nodes immediately after saving
- schedule the nodes to be published on the next Cron run
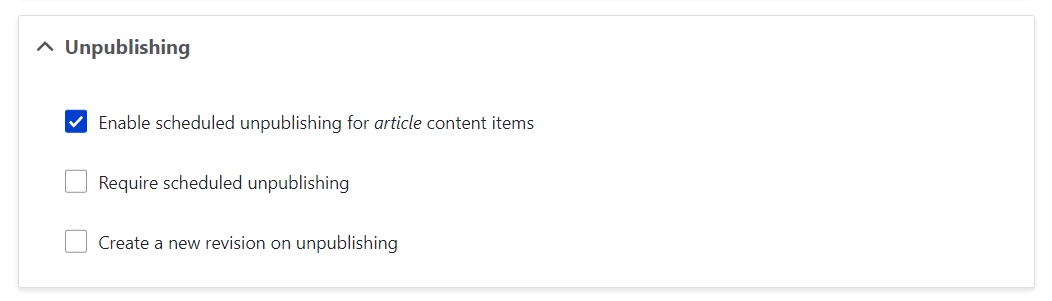
2) Unpublishing
Once you have enabled the Unpublishing feature, more options are there for you to choose from:
- make scheduled unpublishing required
- create a new revision on unpublishing
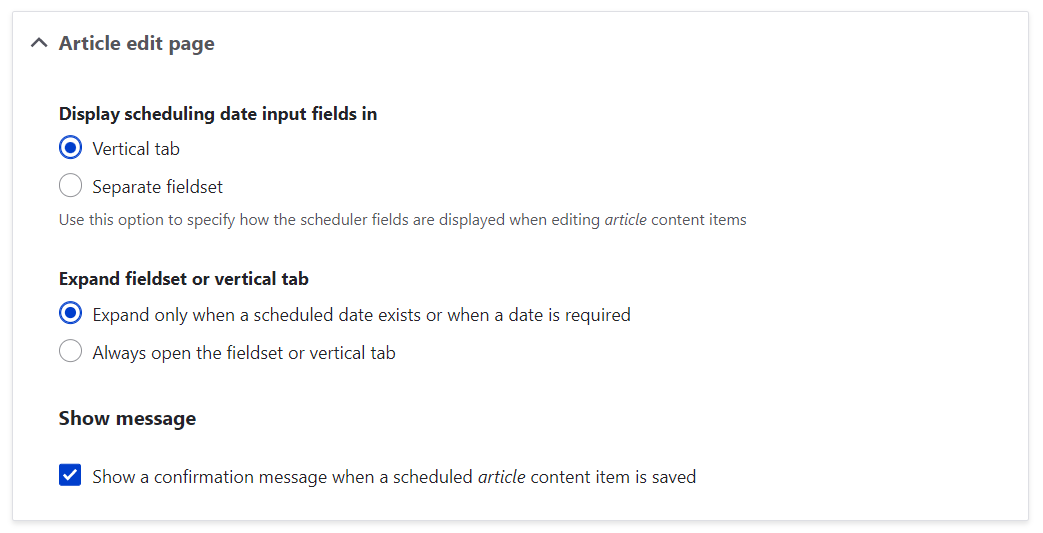
3) Content edit page
This final subsection will expand when you have Publishing or Unpublishing enabled. You can configure the following:
- whether the date input fields should be a separate fieldset or a vertical tab (by default, it’s a field)
- whether the fieldset or the tab should always open or expand only when a scheduled date exists or when a date is required (by default, it expands in these cases)
- whether a confirmation message should be displayed after the node has been scheduled (by default, it is)
When you have finished the settings, do not forget to click the “Save content type” button at the bottom of the page.
Using Scheduler in nodes
It’s time to see how this all works from an editor’s perspective. As you go ahead and create a node for a content type that Scheduler is enabled for, you will see the Scheduling options tab. Based on the settings you have made, it will feature the fields for entering the publishing and/or unpublishing date and/or time.

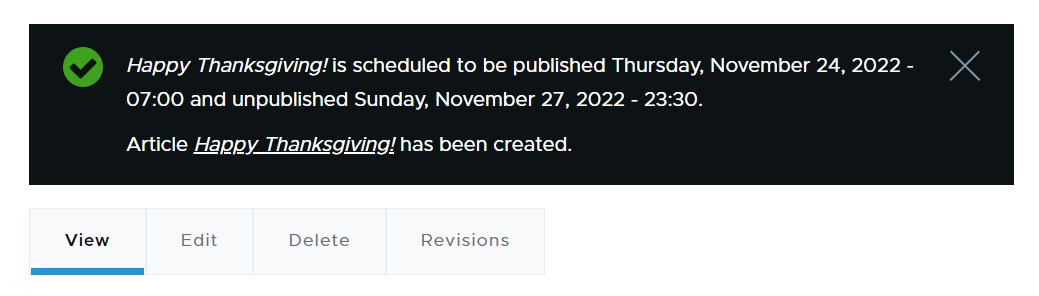
Once you have saved your node, you can see a message on the website that confirms scheduling and says for which date and time the node has been scheduled. So, on November 24, at 7 AM, all your readers will see the Thanksgiving Day greetings, and no one from your team will have to be online for making this publication go live! The node will be automatically removed on November 27 when it is no longer relevant.
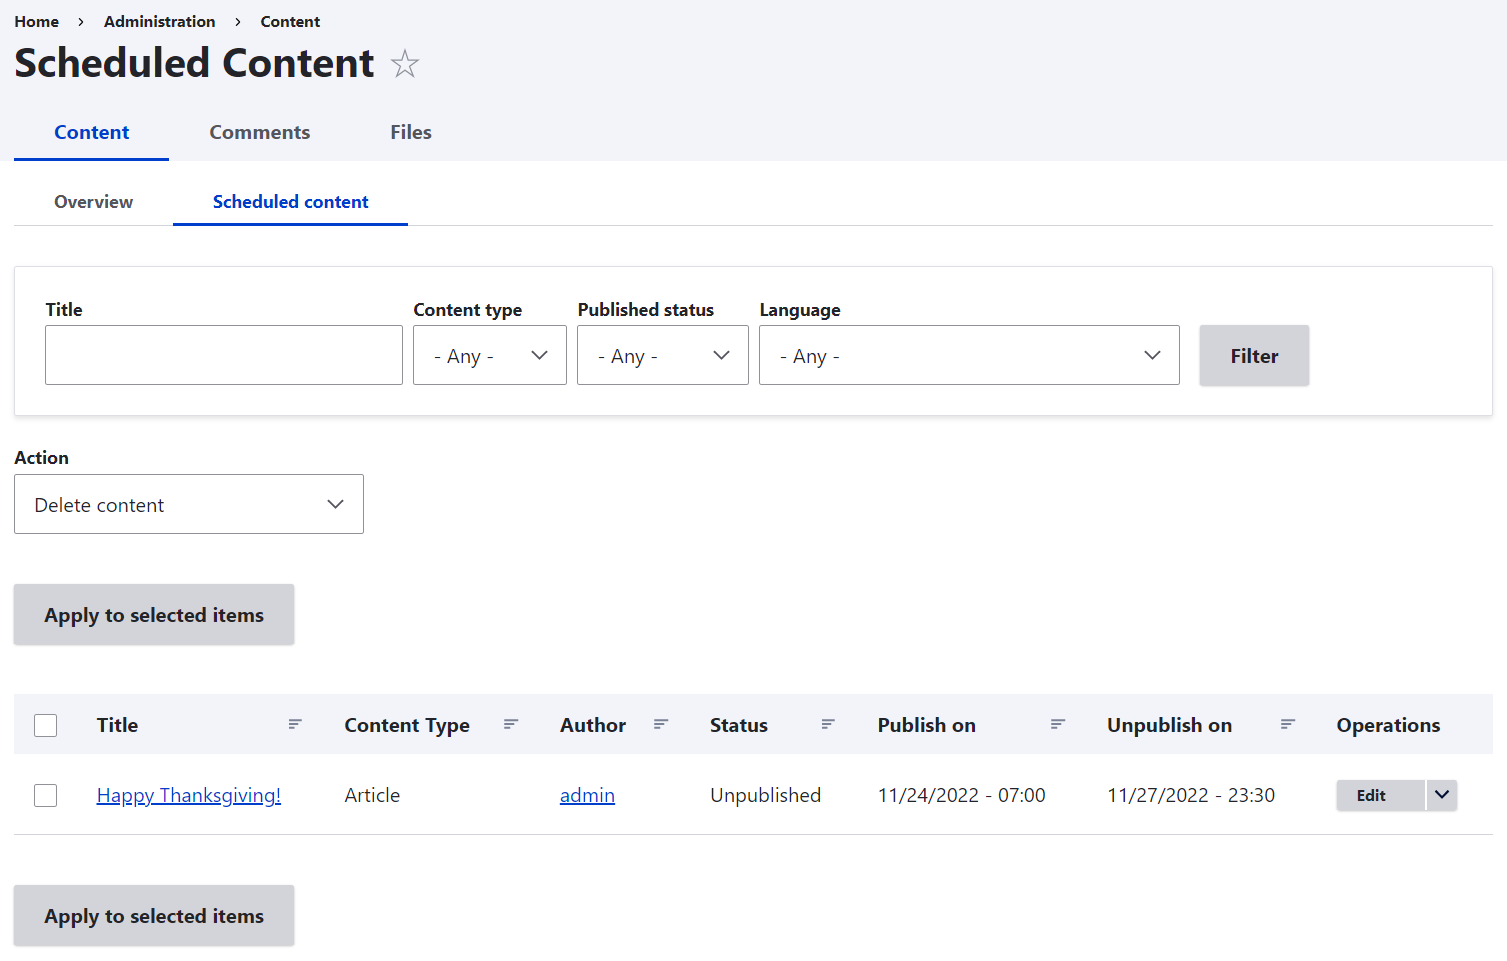
All scheduled nodes are available on the Content > Scheduled Content tab.
Final words
Would you like to fully use the capabilities of Scheduler? Consider scheduling a chat with our team.
Here at ImageX, we look to help make experiences with Drupal websites as efficient as possible. Let’s discuss how we can help you set up Scheduler or optimize your website with other useful tools that Drupal has in its arsenal.