
Control How Your Drupal Content Looks on Facebook and Twitter Shares
Social shares can significantly increase your brand exposure, expand your reach, boost your website traffic, and benefit your SEO. Of course, all this works much better if your shared content looks attractive, relevant, and well-formatted on social media.
Content preview snippets are built automatically when someone shares a link on Facebook, Twitter, LinkedIn, and so on. They include a title, a description, an image, or other details. Can you control how they look and make them so irresistibly clickable? Yes, sure, you can do this by setting up social media meta tags on your website.
In today’s post, we will give you a step-by-step guide to configuring how your website’s content appears on Facebook and Twitter shares. We will be generating the Facebook Open Graph (OG) and the Twitter Card meta tags on a Drupal site. In this process, we will rely on the Metatag module.
A glimpse at Facebook Open Graph and Twitter Cards
Facebook Open Graph and Twitter Cards are protocols that define the use of structured metadata (aka meta tags) for displaying shared content on Facebook and Twitter, respectively. Each of the social networks crawls the link that a user is sharing and searches for the appropriate metadata in order to build up a rich snippet. If none are found, each sharing script will choose elements from the page, such as the title, to create the snippet. These may not convey the message you would prefer to show when a given page is shared. Or worse, the elements chosen seemingly arbitrarily are not at all representative of the page.

Facebook introduced its Open Graph protocol in 2010 to improve the display of content from third-party websites in its news feed. Open Graph includes a set of HTML meta tags. By adding Open Graph tags to your website’s code, you can control which elements of your content are displayed in the Facebook feed (or Messenger) and how.
Facebook Open Graph tags have more recently been adopted by other social networks, for example, LinkedIn or Pinterest. Twitter created its own version of structured data meta tags and named it Twitter Cards. They work in a similar way to Open Graph tags. Moreover, in the absence of its special tags, Twitter uses the Facebook OG tags.
You could add Open Graph and Twitter Card meta tags into the HTML code of your web pages. But things are much more editor-friendly if your website is built on a CMS. In particular, Drupal has modules that provide user interfaces for setting up Facebook Open Graph and Twitter Cards in a few easy steps. Let’s now move on to the practical part and see how this works in Drupal.
Generating Open Graph and Twitter Card meta tags in Drupal
Module installation
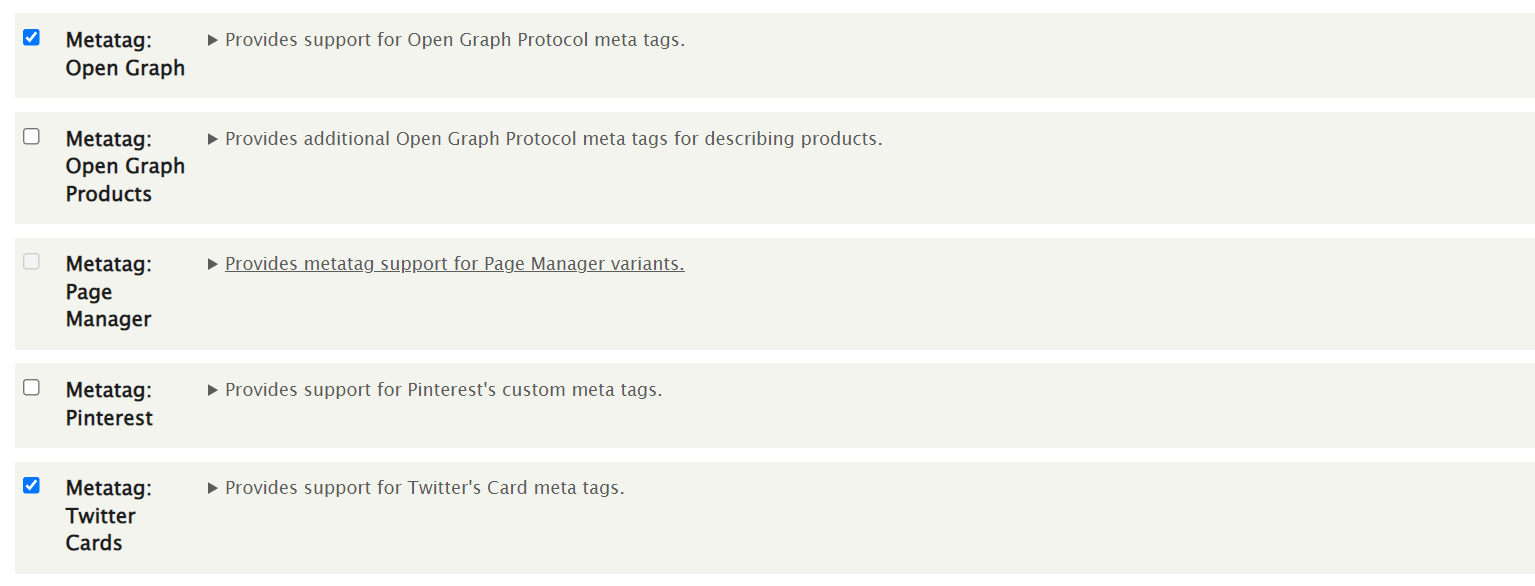
The Metatag is a complex Drupal module that takes care of all kinds of meta tags on Drupal websites. As we download it, we can see it comes packed with a bunch of submodules for search engines, various social networks, etc. For generating Facebook Open Graph and Twitter Card tags, we do not need all the submodules enabled.
What we will need is the main Metatag module, the Metatag Open Graph submodule, and the Metatag Twitter Cards submodule. These are the modules we need to check on the Extend tab of the Drupal admin dashboard and click “Save” at the bottom of the page.
The Metatag module will not be enabled without another Drupal module it depends on — Token. So we need to have Token installed first. It is used on many Drupal websites, so chances are you already have it. If you are using Composer for installing Drupal modules, it will take care of adding dependencies. So there is no need to worry about Token in this case.
Basic configuration
Once the modules are installed, we can go to Configuration > Search and metadata > Metatag on our Drupal admin dashboard. This page shows a set of configurable meta tag patterns. They are passed from one level to the next but can be overridden at every more specific level.
For example, if we are interested in the meta tags for the blogs, these will be inherited from the existing “Content” and “Global” sections by default. But we can create a specific section that will be used for the blog only and populate it with blog-specific tags. That’s what we are going to do right now. Let’s click “Add Default Meta Tags.”
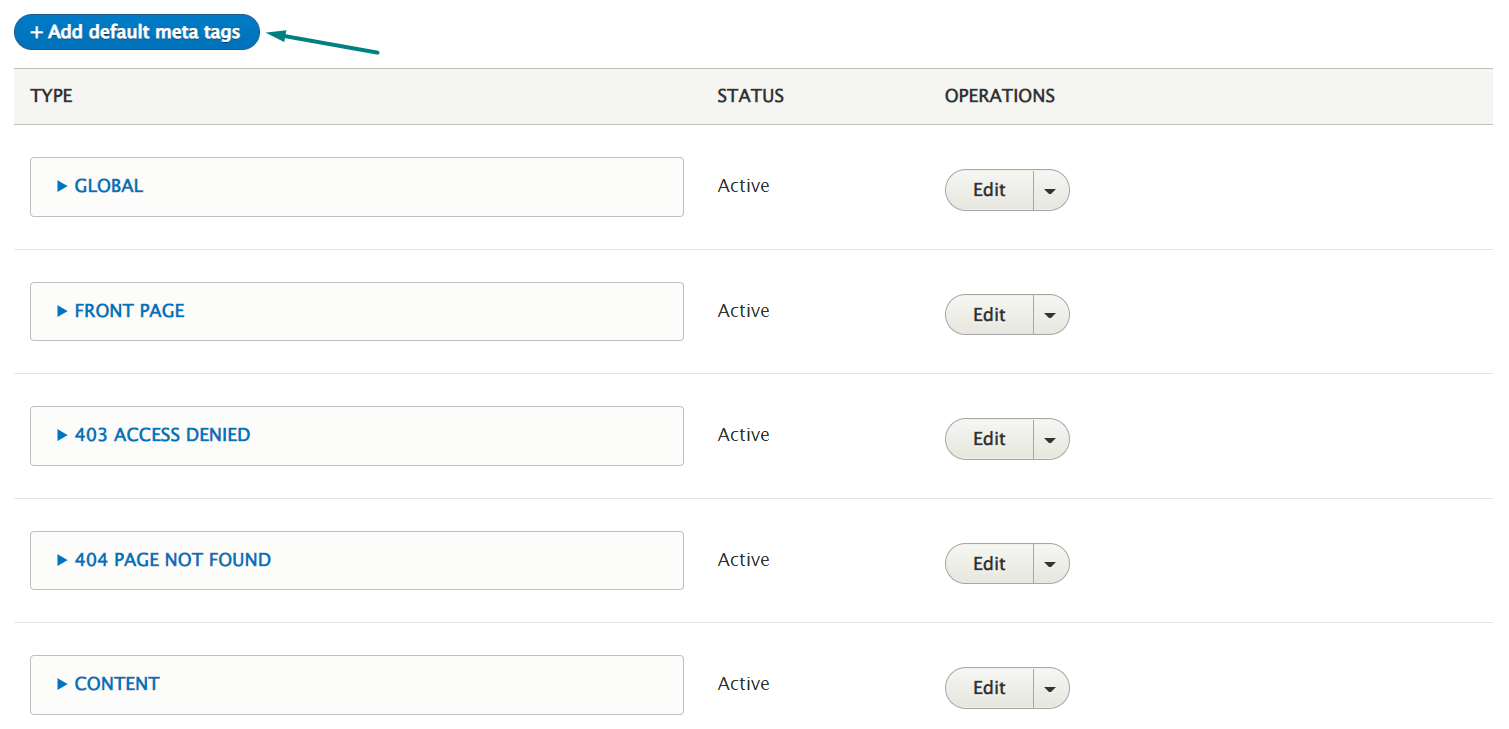
We can also see the meta tag sections that include Open Graph and the Twitter Cards. The best decision is to leave them as-is for now and click “Save” at the bottom of the page. Why don’t we just start creating them right away? By saving the content type first, we make sure the “Browse available tokens” option displays more specific tokens, which will greatly simplify the next steps.
A note on using Drupal tokens
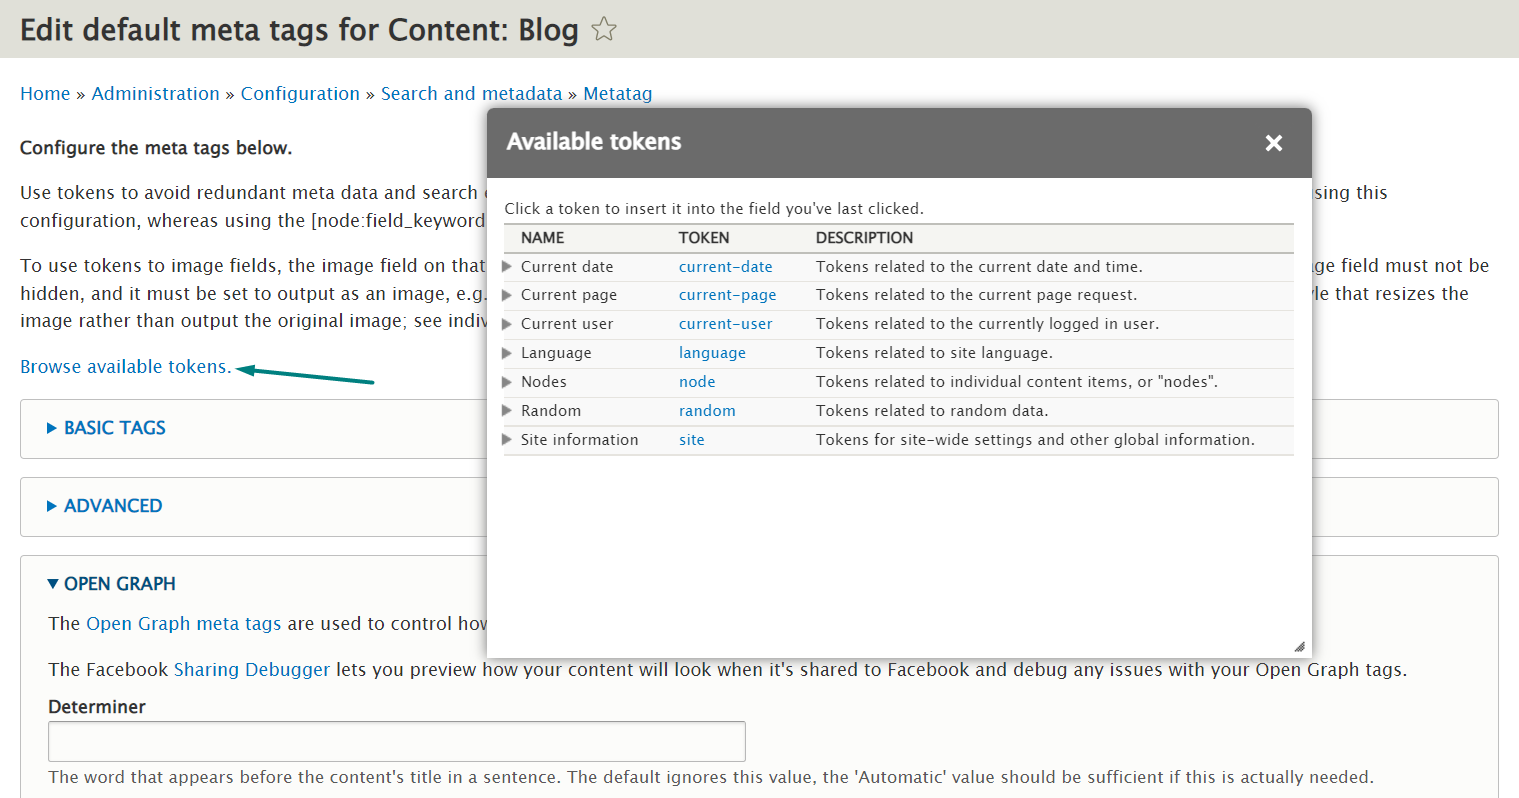
For most of the meta tag fields, we will use tokens. This means the meta tag values will automatically change for every blog item. For example, instead of putting a specific node URL into the field, we will use the [node:url] token. Thus Drupal will automatically add the URL to every current node.
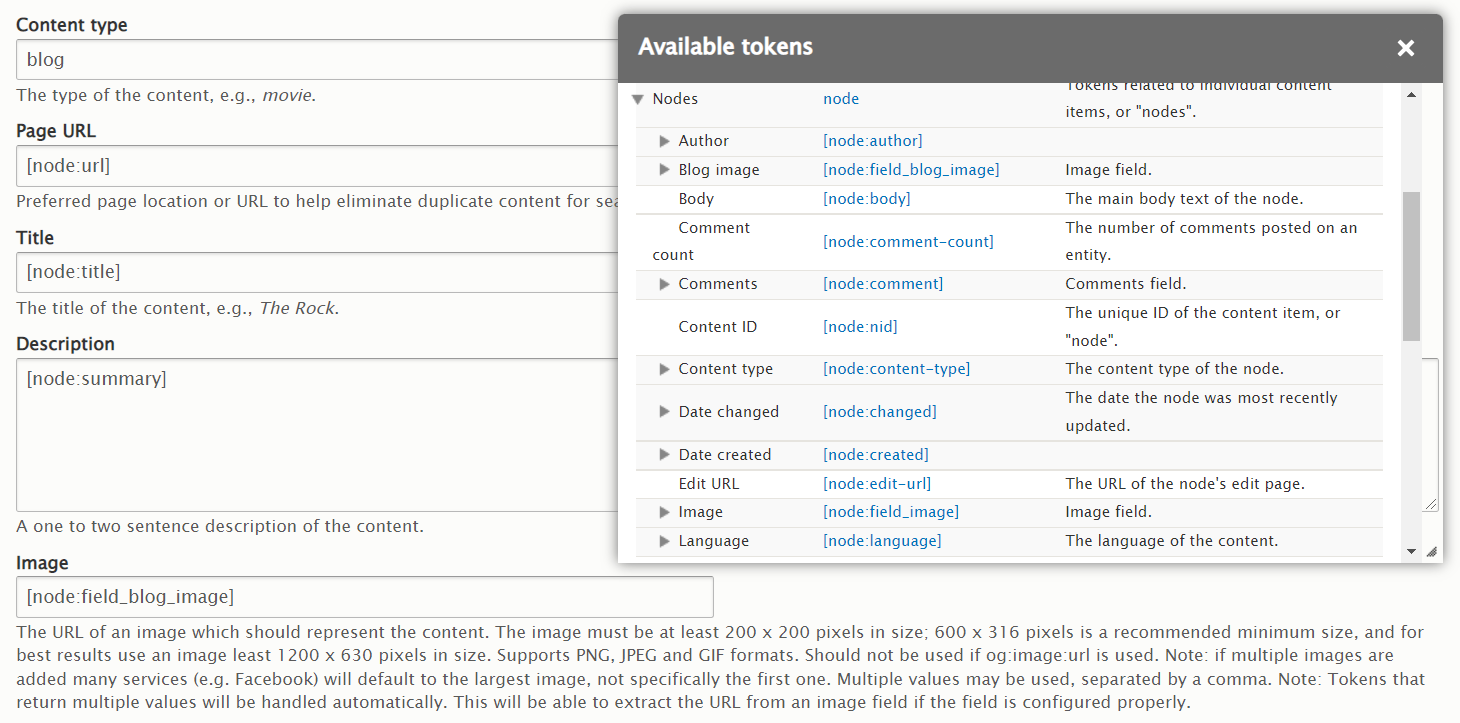
By clicking “Browse available tokens” at the top of the meta tag configuration page and expanding the “Nodes” section there, we can find the necessary tokens. A click on the selected token will put it directly into the meta tag field we have our cursor on. Alternatively, we can copy and paste the tokens into the fields.
Setting up Facebook Open Graph tags
In Configuration > Search and metadata > Metatag, we click “Edit” under “Operations” for “Content: Blog”. Then we find and expand the Open Graph section.

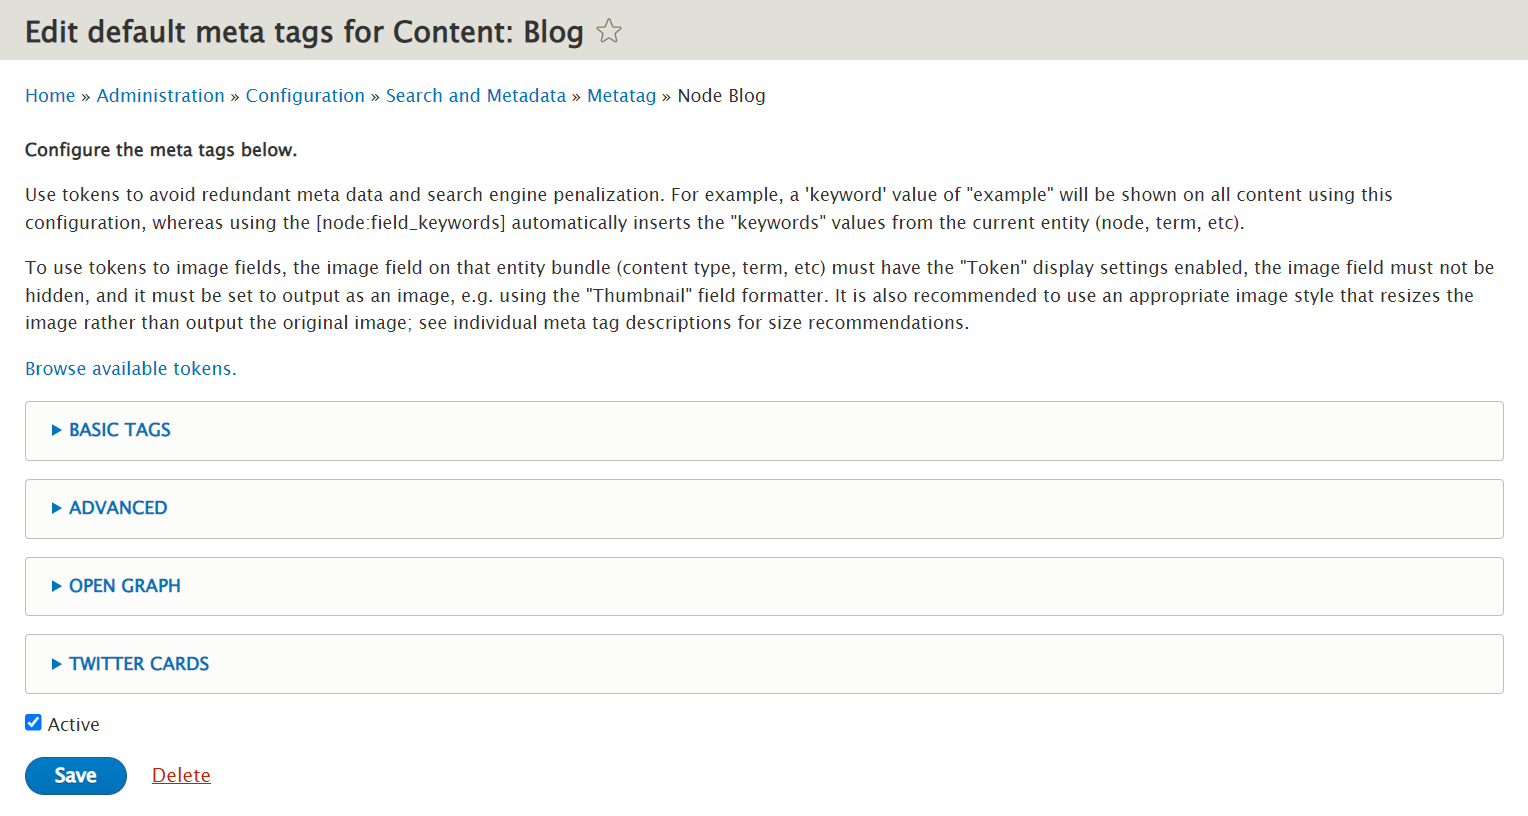
We immediately see a long list of fields for the Open Graph meta tags. There is no need to fill out every single field. Here are some of the most important ones:
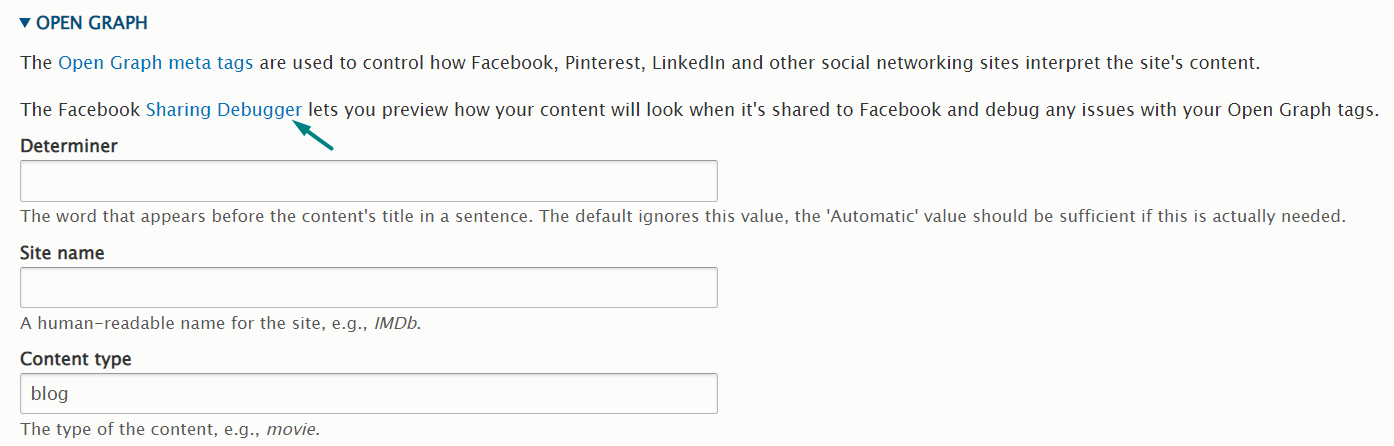
- Content type. This is not the content type as we know it in Drupal but the content type used by Facebook. Let’s put “blog” in his field.
- URL. After checking “Browse available tokens,” let’s put in the [node:url] token.
- Title. Let’s put in the [node:title] token.
- Description. Let’s put in the [node:summary], which provides a truncated version of the node’s body, if the body field is present.
- Image. Let’s put in the [node:field_blog_image] token. It is named after the Blog image field that we have defined for the Blog content type, and can be different in your case. Anyway, we need to make sure we are using a token for the field that represents the blog cover image. If necessary, we can always check what this field is named in Structure > Content types > *Blog*> Manage fields.
After we click “Save,” it’s best practice to clear our Drupal website’s caches, otherwise, the changes might not apply. Caches can be cleared in Configuration > Performance > Clear all caches.
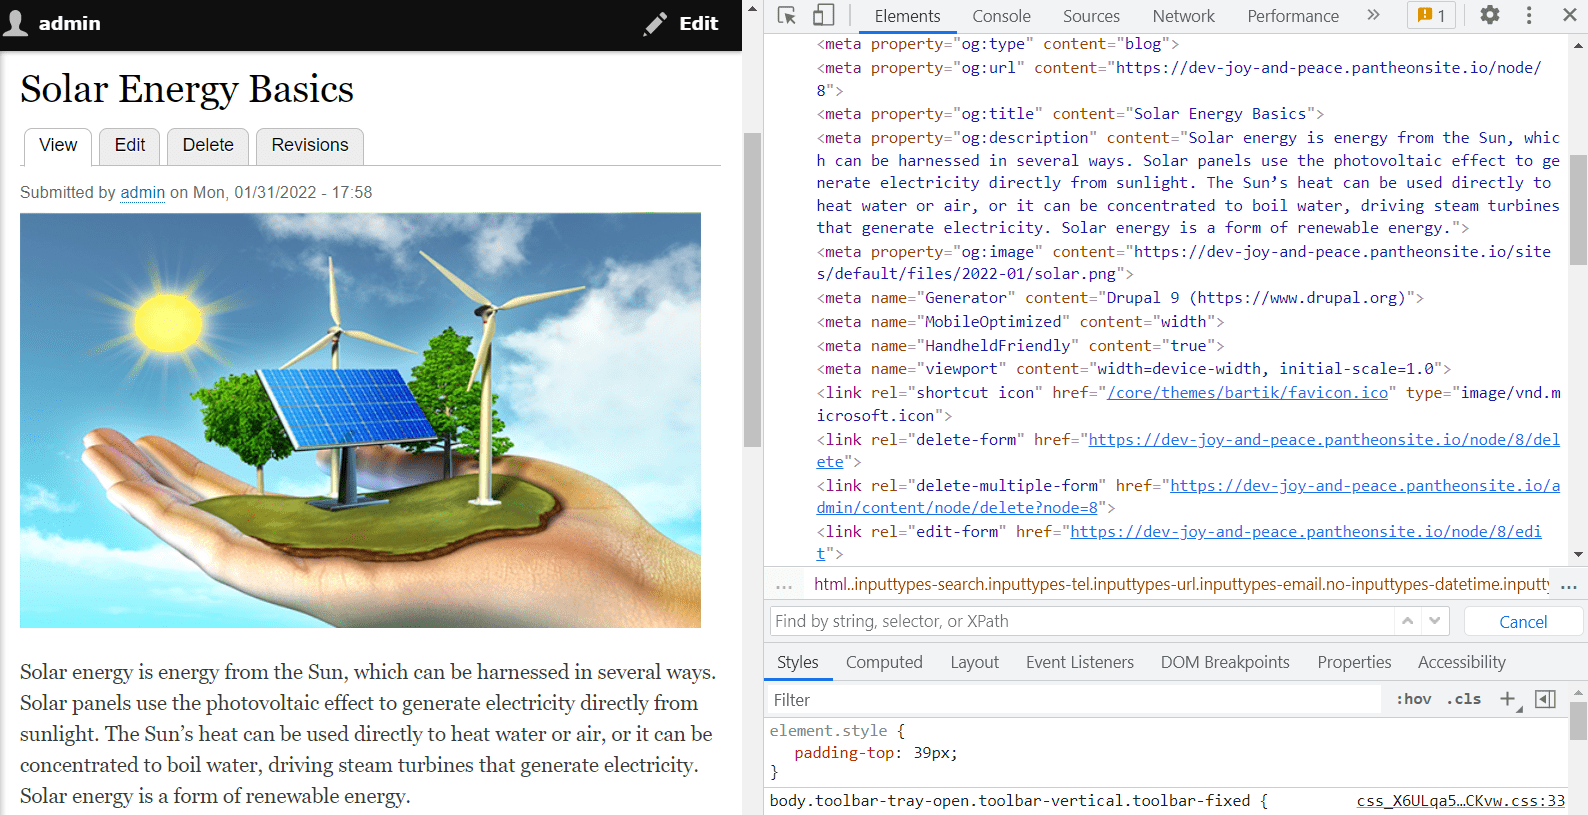
Next, we should be able to see our Open Graph meta tags in the source code of every blog node. Let’s open a node, right-click it and select “View page source,” or just click F12. Yes, the OG tags are there:
- “og:type”
- “og:url”
- “og:title”
- “og:description”
- “og:image”
We can check the link in “og:image” to make sure it really leads to our image. Yes, perfect!
We can also put the node’s URL into the Facebook Sharing Debugger. You will find the link to this tool directly in the Open Graph section.
It allows us to preview how our shared content will look on Facebook and to debug any issues in case they are found. We just put the node’s URL into the debugger and click “Debug.” The page needs to be publicly available for Facebook to be able to “scrape” it. If we make any changes to the meta tags, we can click “Scrape again” in the Debugger, and the updated version will be there.

Setting up Twitter Card tags
The setup of the Twitter Card meta tags is pretty similar to that of Facebook Open Graph meta tags. In Configuration > Search and metadata > Metatag, we click “Edit” under “Operations” for “Content: Blog,” then find and expand the Twitter Card section.
- Twitter card type. Let’s select “Summary card with large image.”
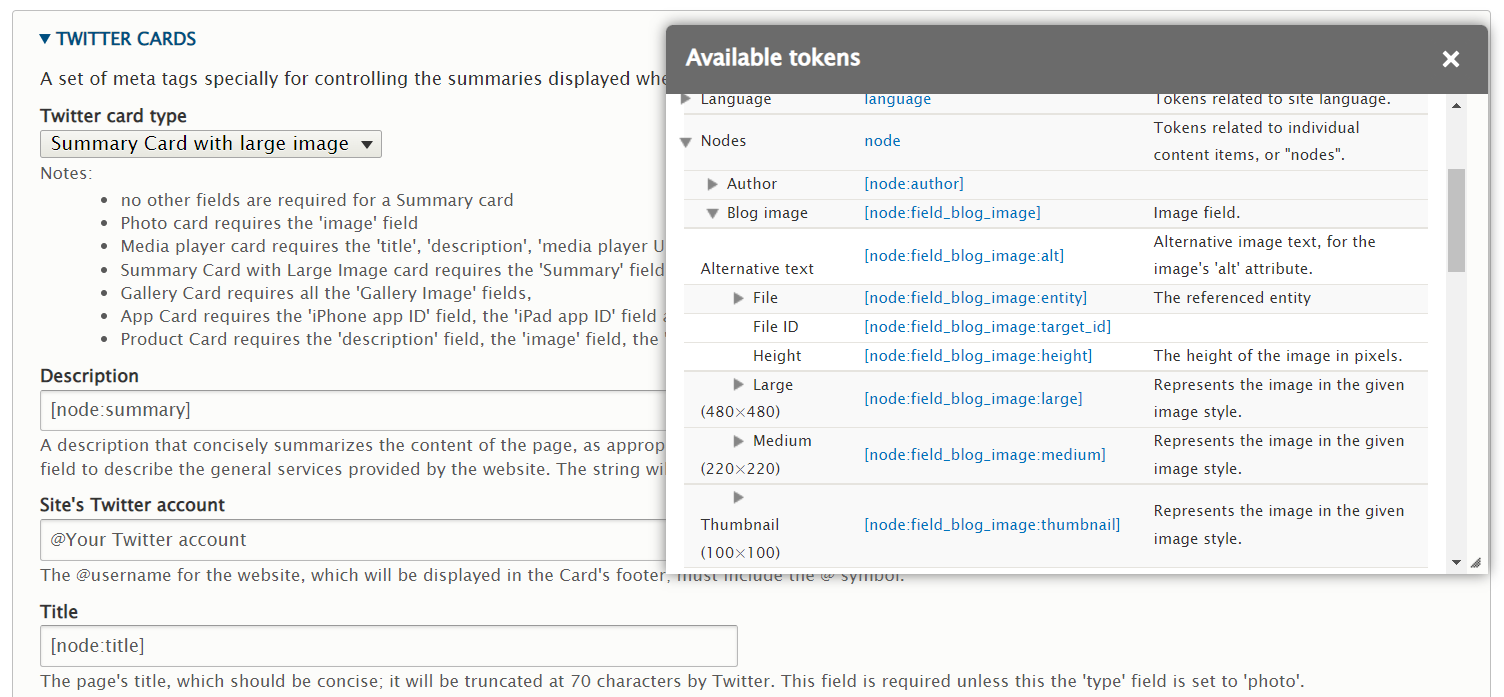
- Description. Similar to how we did with Open Graph, we can use the “Browse available tokens” option and select the [node:summary] token.
- Title. Let’s put in the [node:title] token.
- URL. Let’s put in the [node:url] token.
- Image URL. Let’s put in the [node:field_blog_image] token.
- Image alternative text. Let’s expand our Blog Image section and grab the [node:field_blog_image:alt] token.
Similar to the workflow with Facebook Open Graph, we can open a node and view its source code to check if the Twitter Card meta tags are there. If something is not updated, the cache clearing will come for help. After that, we can validate the Twitter Card meta tags using the Twitter Card Validator by simply entering the page URL.
Open Graph and Twitter Cards for individual nodes
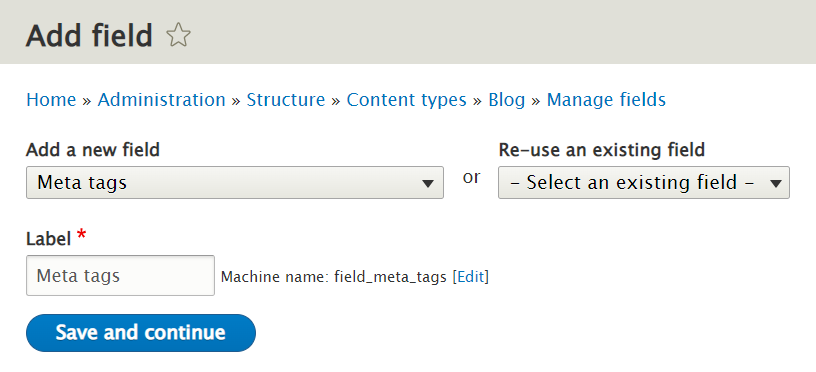
To give content editors control of the preview of specific Drupal nodes, it also makes sense to add the ability to edit meta tags directly into the content editing interface. We can do it by going to Structure > Content types > *Blog* > Manage fields > Add field, and adding the Meta tag field to the blog content type.
With this done, the collapsible Meta tag section group will become available on the right-hand side of each node’s edit page. The sections are Basic tags, Advanced, Open Graph, and Twitter Cards. There can be more — depending on the Meta tag submodules you have installed.
However, the meta tags on the node’s edit page are only used for individual Drupal nodes. So if we want a comprehensive default setup for the Blog or another Drupal content type, we need to go to the Configuration page for the Metatag module and use the same workflow.
Facebook Open Graph and Twitter Card meta tags are just examples of what you can do using the Metatag module in Drupal. In addition, Drupal has thousands of other useful tools that will help you easily reach various goals on your website. Have questions, comments, or ideas? Talk to our Drupal team!