
Drupal Views
When you come across an organized content listing on any Drupal website, you can bet it’s built with Views. The overwhelming majority of Drupal websites are using Views for content collections. This powerful tool brings out the best in the philosophy of a content management system. It's the ability to organize content in flexible ways via the user interface with no need to write complex SQL queries.
Today, Drupal Views will be the main hero of our blog post. We will overview their key capabilities, add some helpful step-by-step guides on how to use Views in Drupal. Also we'll suggest some interesting extra modules that expand their powers even further.
First off, what are Views in Drupal?
Views are a solution for creating content listings, or rather, data listings because their use is not limited to content. Users, comments, taxonomies, and other Drupal entities can also be incorporated into an organized collection.
Views are built via a handy interface by choosing which data you want to display on your website, and how. The tool makes a query to your website’s database to fetch the necessary data and displays it according to the criteria you specify. In this way, you can display a page with your latest articles, create an image slideshow, build an interactive map, show a block with related content, and so much more.
Views, together with its assistant Views UI (the Views builder user interface), are Drupal modules that were previously contributed modules. But they became part of the Drupal core with the release of Drupal 8 in 2015. The Views module is the “engine” of data handling. The Views UI module provides you with the interface for creating and editing your content listings.
Having Views as part of the Drupal core is incredibly convenient because everything is available out of the box, there is nothing to install. Moreover no individual updates are required for the modules. Additionally, standard administration tools are built with Views, allowing for site builders to modify their functionality without touching any code. In Drupal 7 where Views are not included in the core, this module remains the 2nd most popular contributed module among 40,000+ others.
Despite its content listing mission, the tool is not exactly meant for every content editor to play with. It’s preferable that it is handled by a tech-savvy person with a good understanding of Drupal structure and concepts. Ideally, it should be a site builder or a developer. The content listing capabilities of Views are really unlimited, with even the most complex scenarios possible. Let’s move on to reviewing at least the most standard ones.
How to work with Drupal Views: key concepts and settings
We will now show you the most important Views concepts in the order they are often applied. We will share helpful directions so this section can also be used as a step-by-step guide to using Drupal Views.
What data to display: content, users, comments, and more
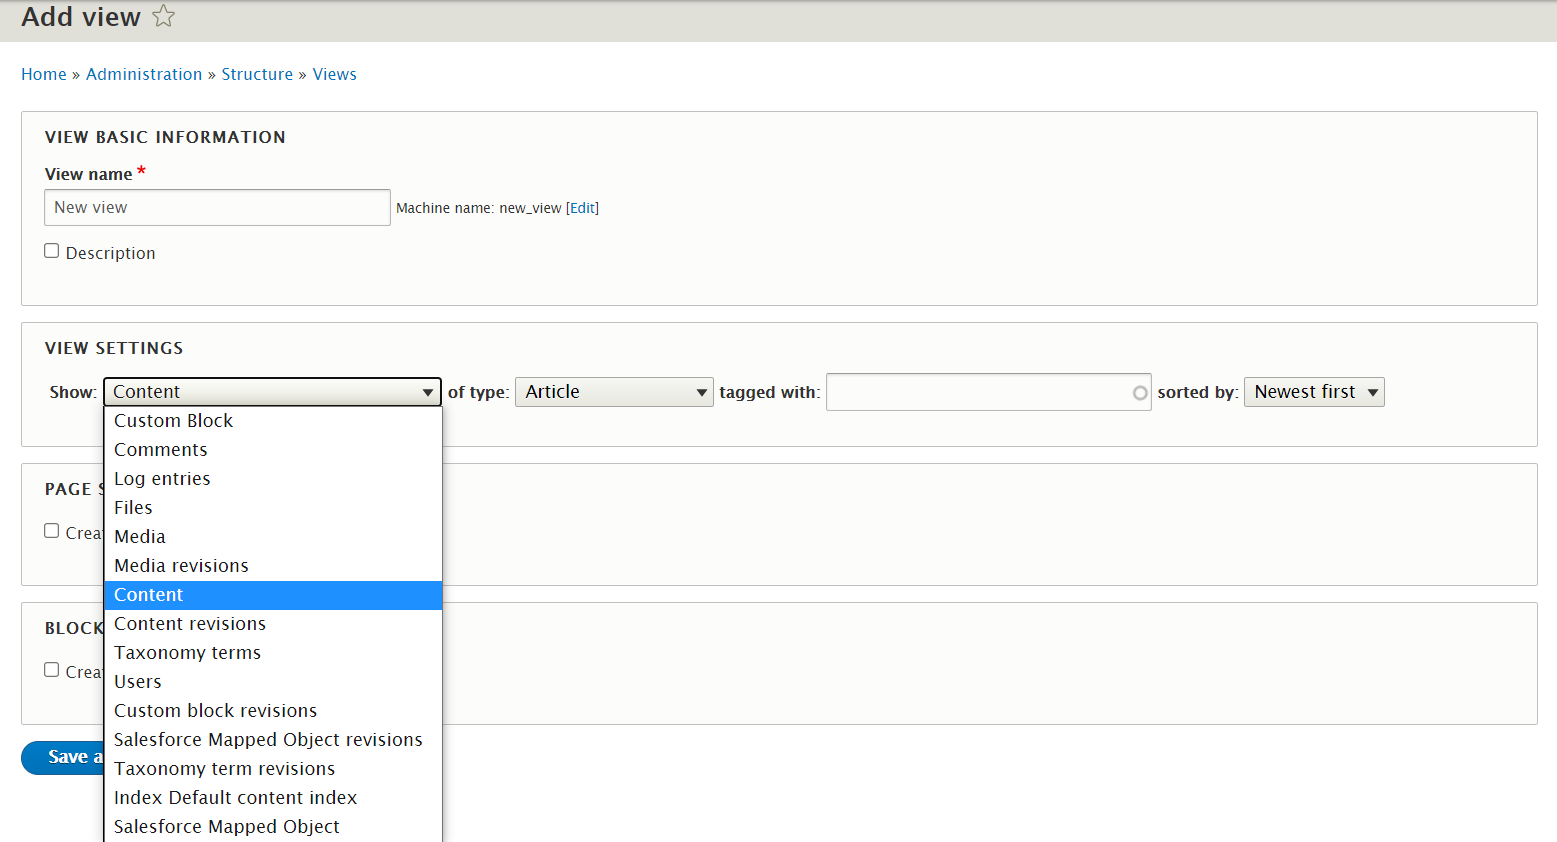
As you go to Structure > Views > Add view on your Drupal administration dashboard, you need to give your view a name and optionally write a description that only you and other admins will see. One of the first settings to make is to select what kind of Drupal data you want to display (content, media, users, taxonomy terms, etc.).
The list of data types may differ as extra modules installed on your website are able to add their own options. The default choice is content, and it is very popular in many scenarios. There also are additional options:
- You can restrict the content by content type, for example, to only show articles.
- It is possible to further narrow the results down by only showing those with specific tags.
- Finally, you can set the order of the results (the default is “Newest first’).
These can be changed later on in the process. The data type, however, is an important choice that cannot be changed later. Every Drupal view has a specific base table to fetch data from. All the additional settings except for the data type can be easily changed in the future.
Views displays: pages and blocks
The next important concept is the type of display. You will see at least two basic display types (and possibly others based on the modules you have installed):
- page (will be available at its own URL)
- block (will not be available by default but you can place it anywhere on your site using Structure > Block Layout or Layout Builder)
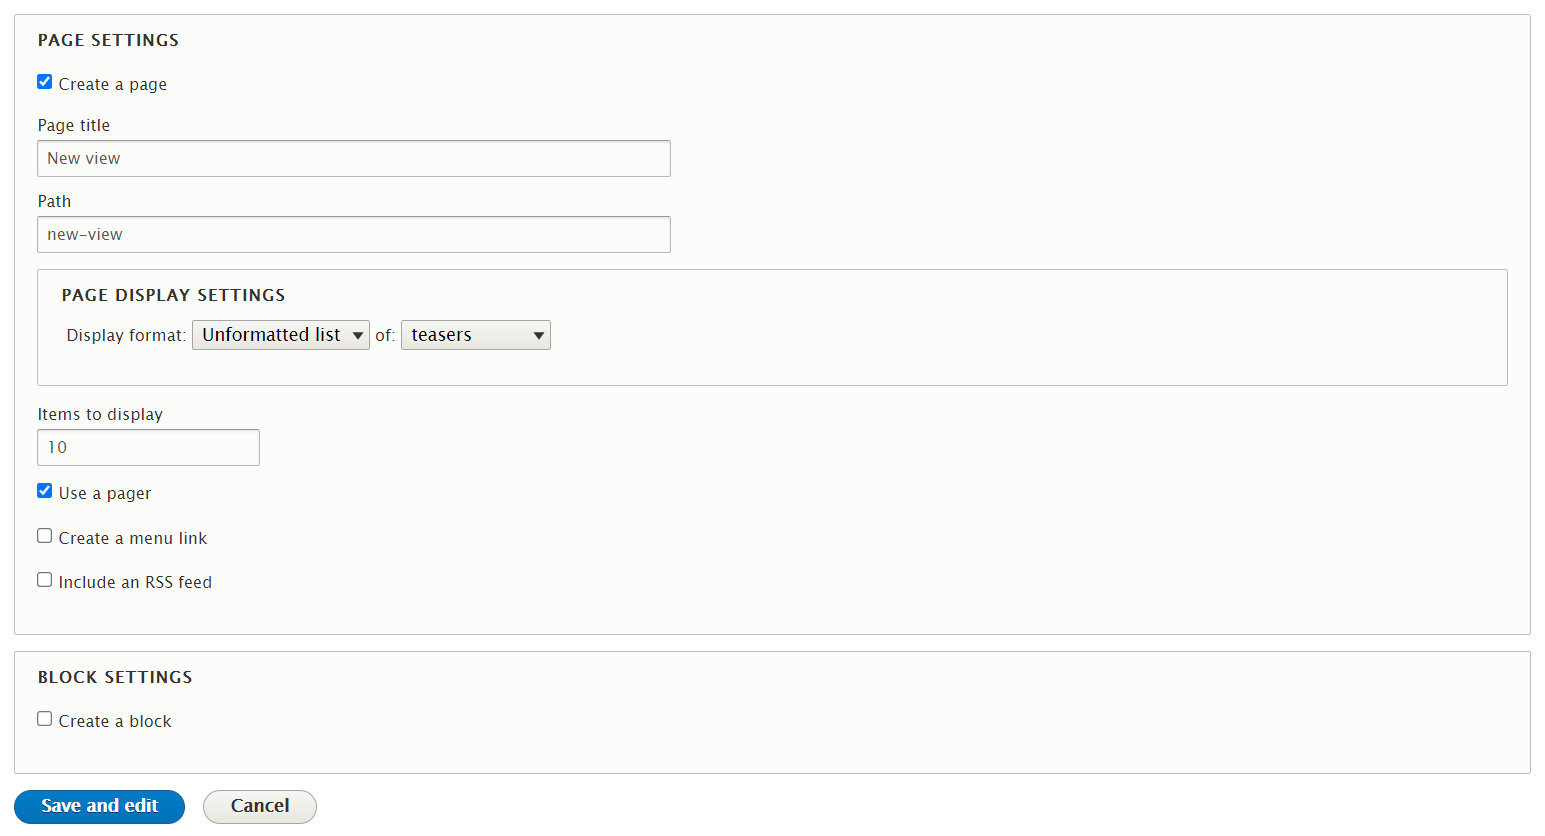
To begin the process, pick one of these display options. More displays can be added later, so don’t worry if you are unsure. Once you do, Drupal will ask you for additional settings such as the number of items per page, using a pager, and more. The page URL path is created automatically but you can edit it if needed.
View formats: grids, lists, tables, and more
One of the most important additional settings in the Views display (page or block) is its format. They differ per display type. For example, here are the standard display formats for a page:
- unformatted list
- grid
- HTML list
- table
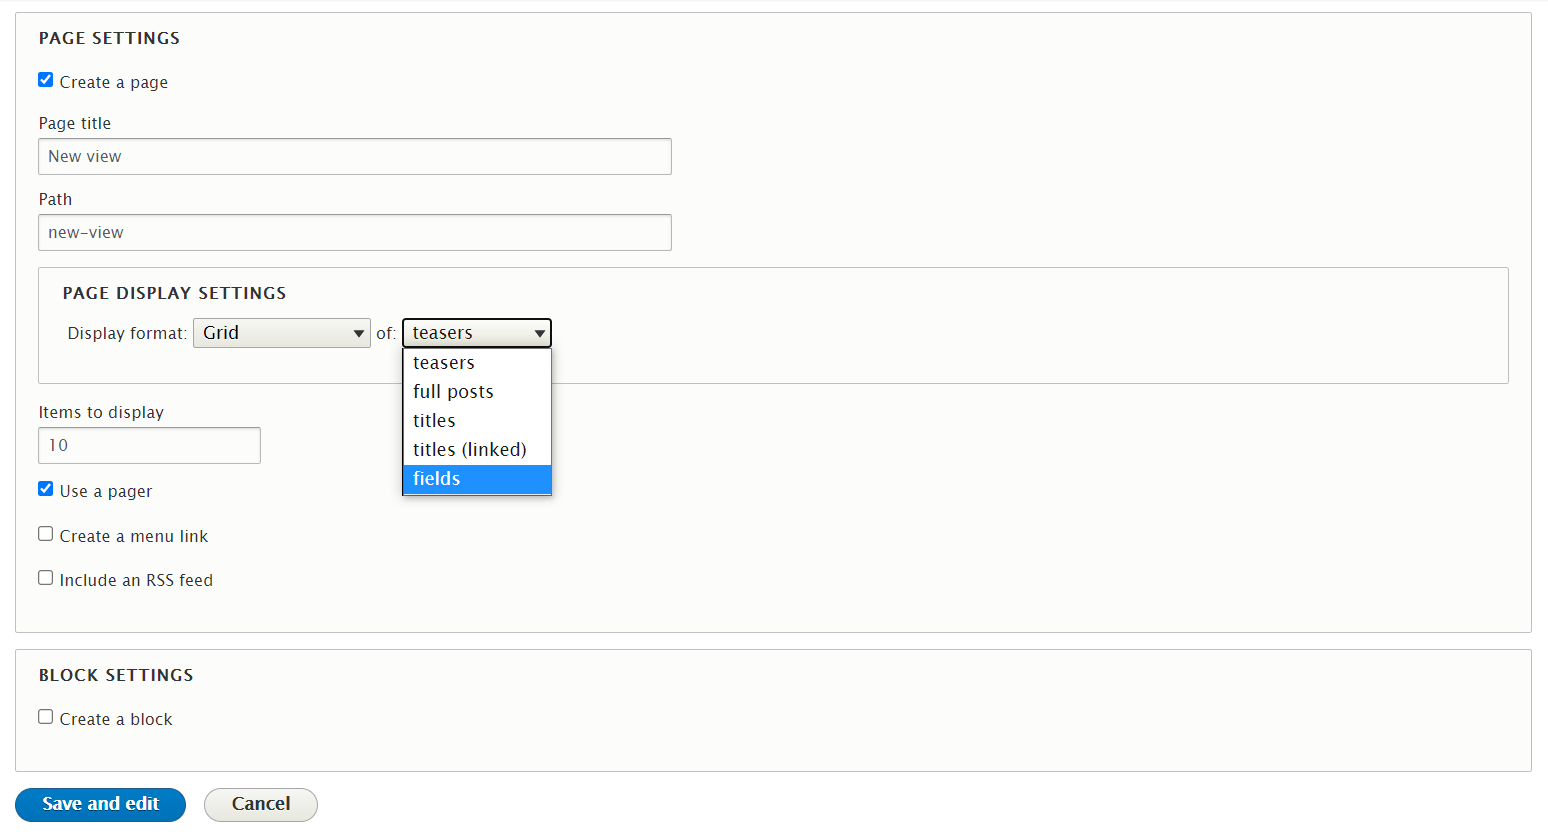
As usual, the more modules installed, the more options. A popular choice, especially with image-related listings, is a grid. The reason for that is that it can be two-dimensional and allows you to align elements based on as many sequenced columns as you like.
Next, you need to choose in what mode to display the entities in your grid, table, etc. The standard options are:
- teasers
- full posts
- titles
- titles (linked)
- fields
This is pretty self-explanatory — you can choose anything from displaying preformatted teasers to assembling your view field by field like Lego bricks during the next step.
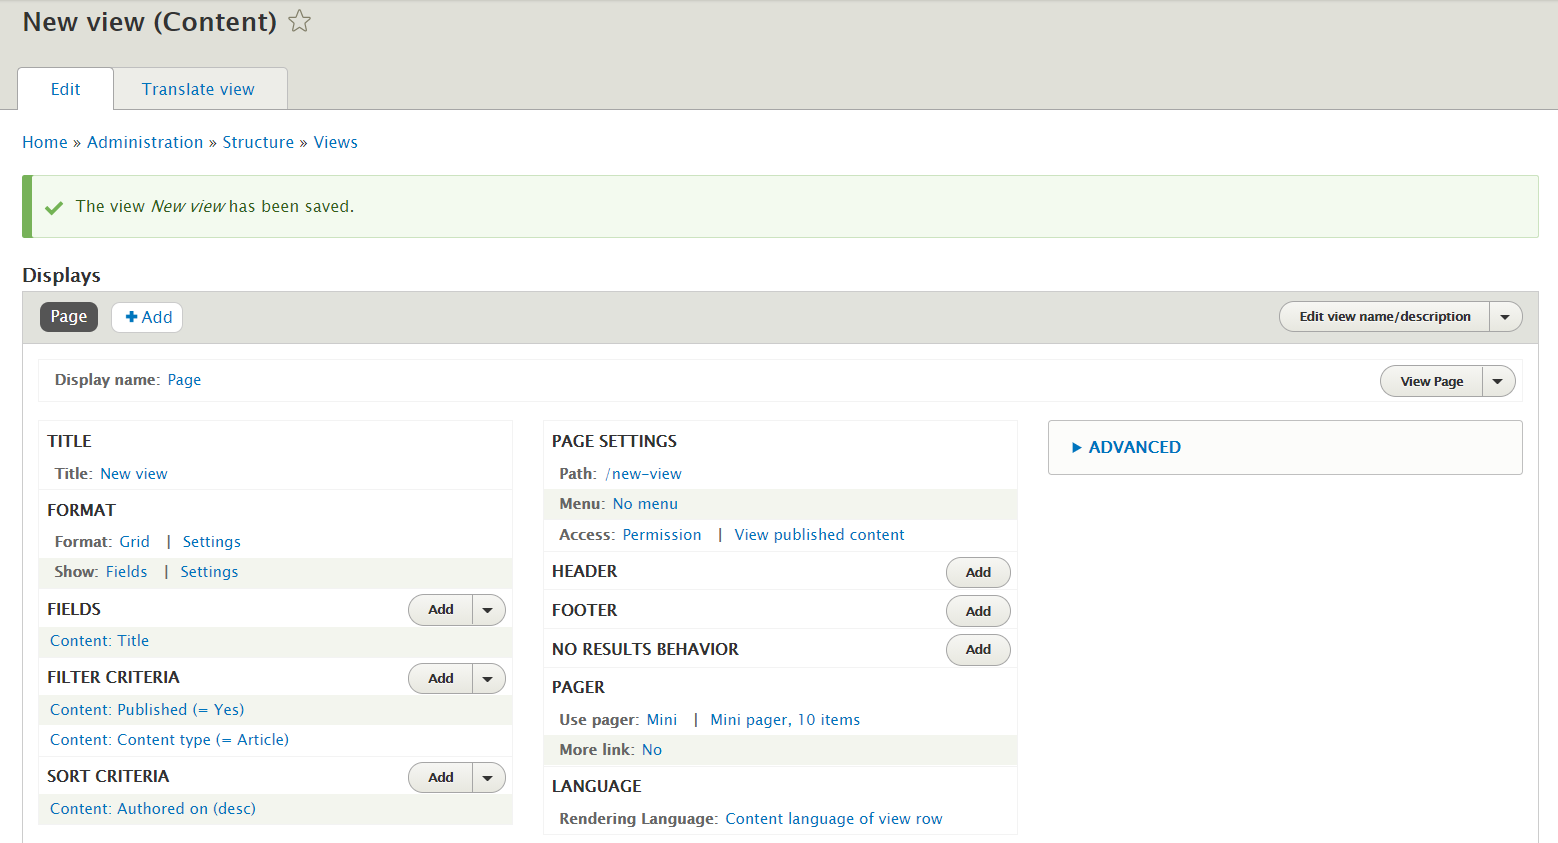
To continue configuring your View, hit the “Save and edit” button. This takes you to the main Views configuration interface. You will see that the title, the format, and other details are already there based on the choices you have made. You can edit them as well as try many others, such as adding fields, which we will cover next.
Assembling Views with fields (as an option)
If you chose “fields” in the display options, you will need to add them one by one in the main configuration interface. For example, if you want your article display to include the title and an image.
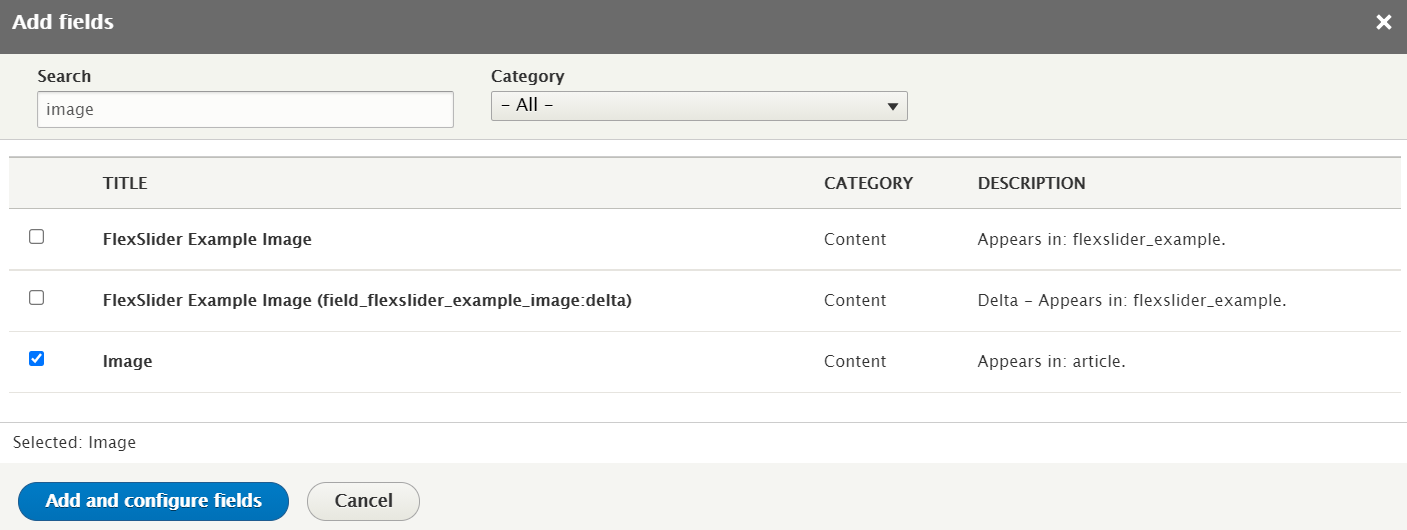
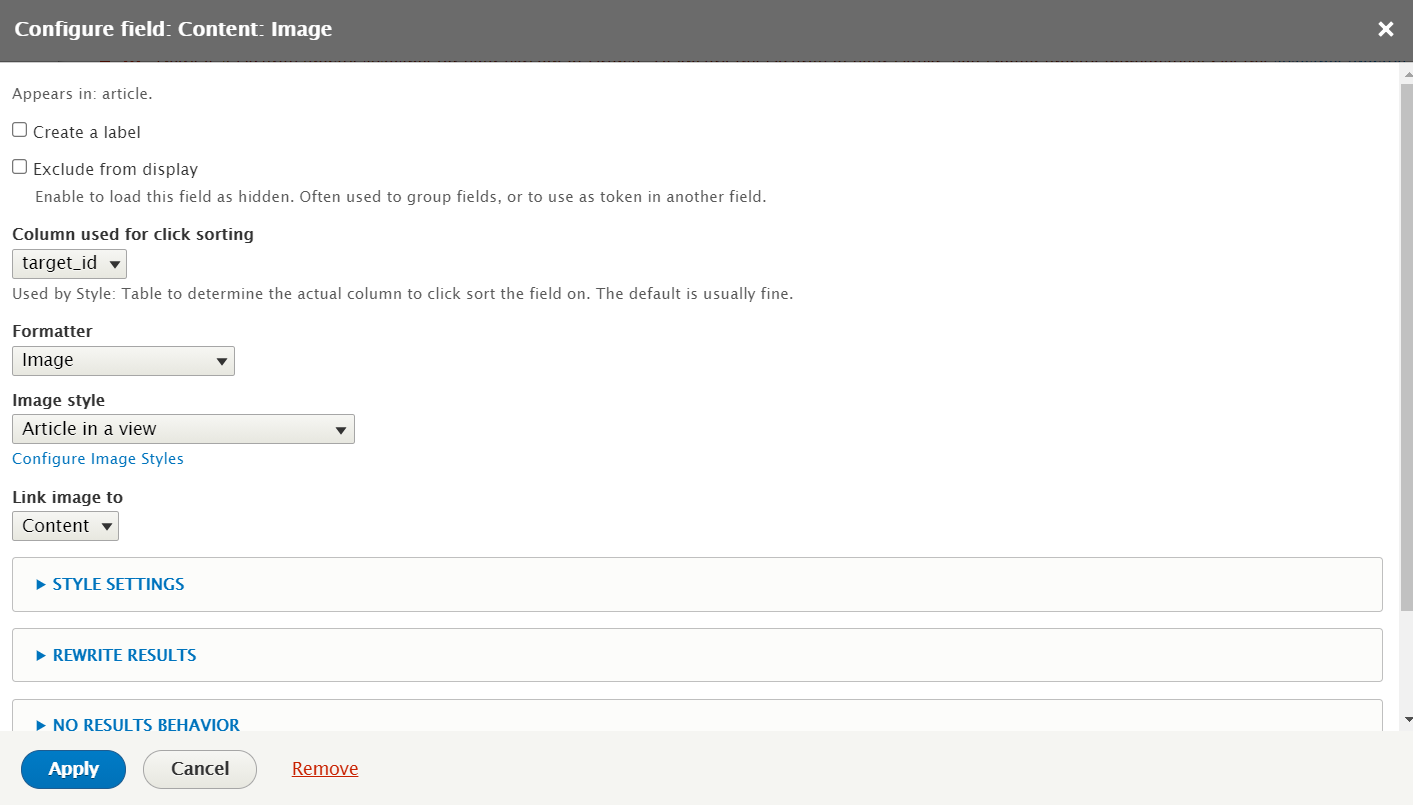
Under Fields, click “Add field” and find the necessary fields one by one using the search box. As you click “Add and configure,” you will also be able to make some settings to every field. For example, choose an image style for the image so they all look uniform. Once you have added the fields, you can click “Rearrange” and adjust their order to your liking.
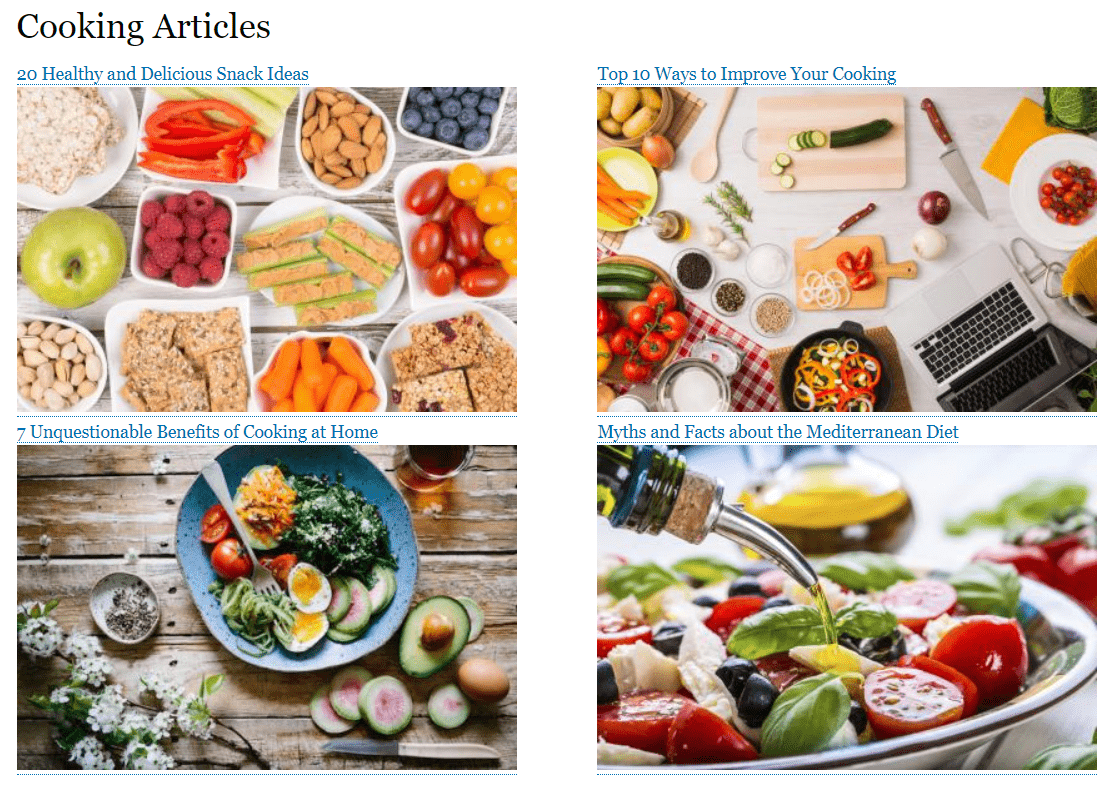
Here is how a ready Drupal view of articles based on the title and the image field may look. It uses a 2-column grid format that you can adjust under Format > Settings.
Filtering and sorting in Drupal Views
- By using filter criteria, you can choose to only show content that meets these criteria. For example, you can choose to only show items of a specific content type (we have already set this filter at the very beginning of the view creation). You can also show results with specific words in a title, those published on a specific date, those that have comments, and so on.
- By using sort criteria, you can show the view results in a specific order. The standard filter is the date of publication (“Authored on”) in a descending or ascending order. You can also prioritize items with the most comments, show products from least to most expensive, from the most to the least popular, and so on.
Exposing filters to visitors
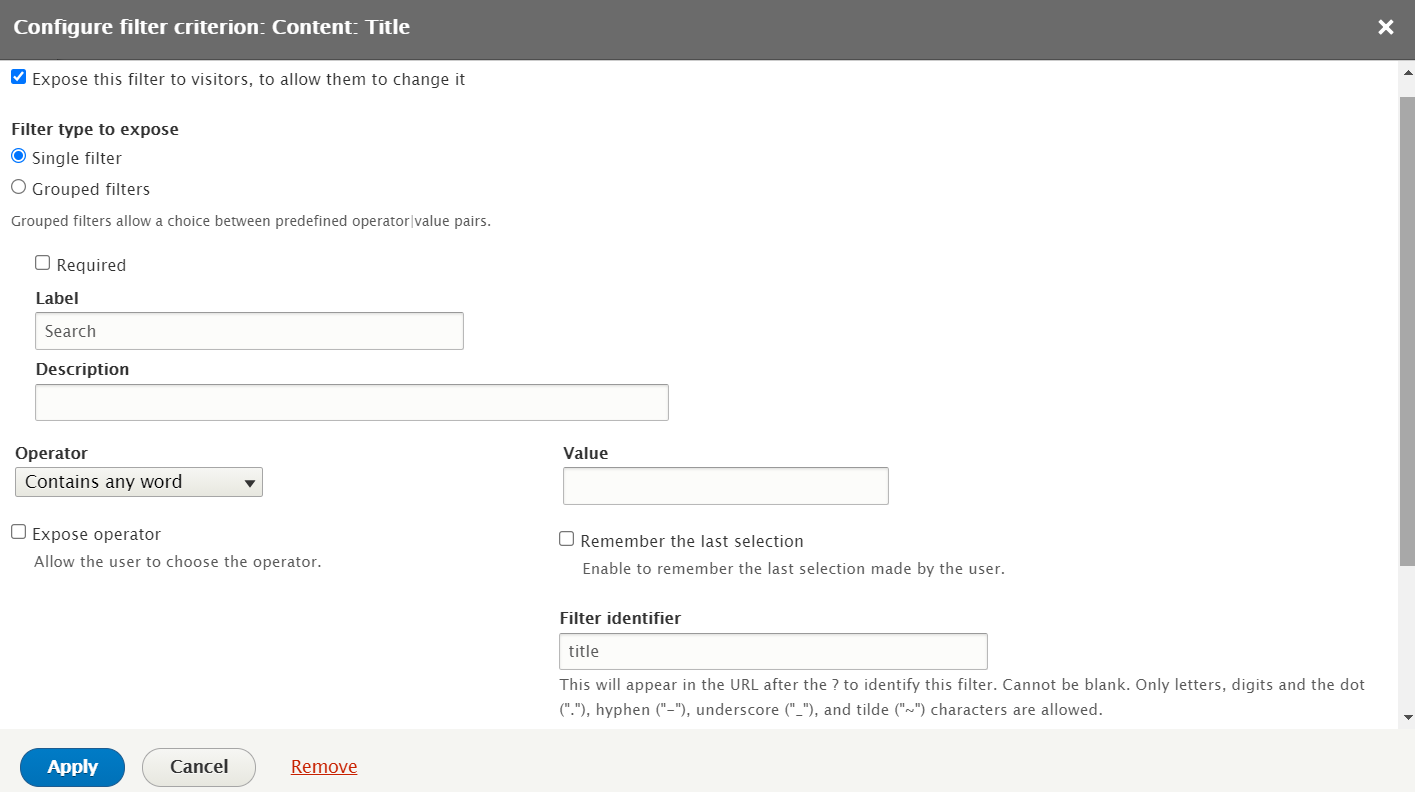
A very interesting option is exposing filters to users so they can manage them and quickly find what they are looking for. This makes exposed filters an incredibly important usability feature, especially for e-commerce websites. To create this functionality, check “Expose this filter to visitors, to allow them to change it” in the filter.
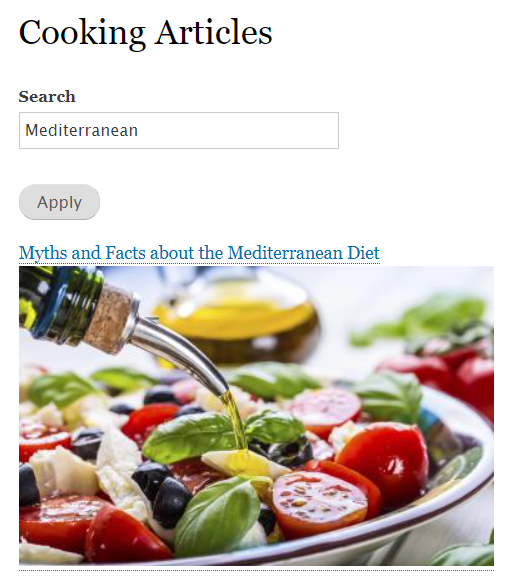
In this example, the “Title” filter is added, configured to “Contain any word,” has its label renamed as “Search,” and then exposed to visitors.
Related content in Drupal Views
We have mentioned at the beginning that every view fetches data from a specific base table that you choose and cannot change. It can be content, users, media, and so on, but one of these as the base table in a given view. But what if you want to display, for example, the authors with their photos next to the articles? Articles are content and authors are users, so these are different tables.
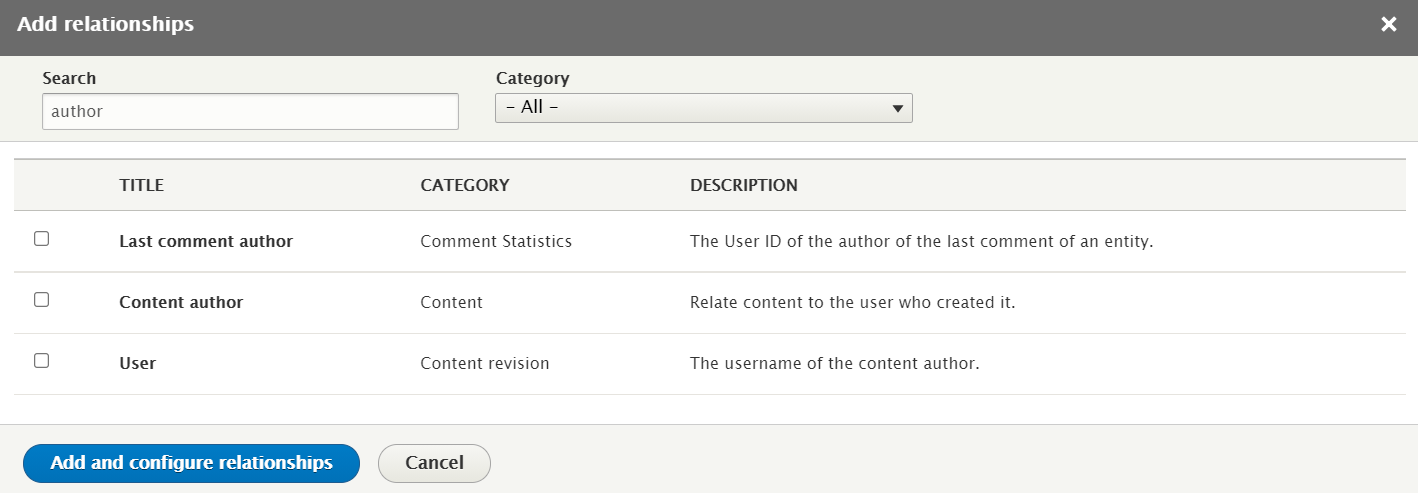
Luckily, there is a way to connect entities from other tables. For this purpose, there are relationships in Views. They can be added in Advanced settings, under Relationships.
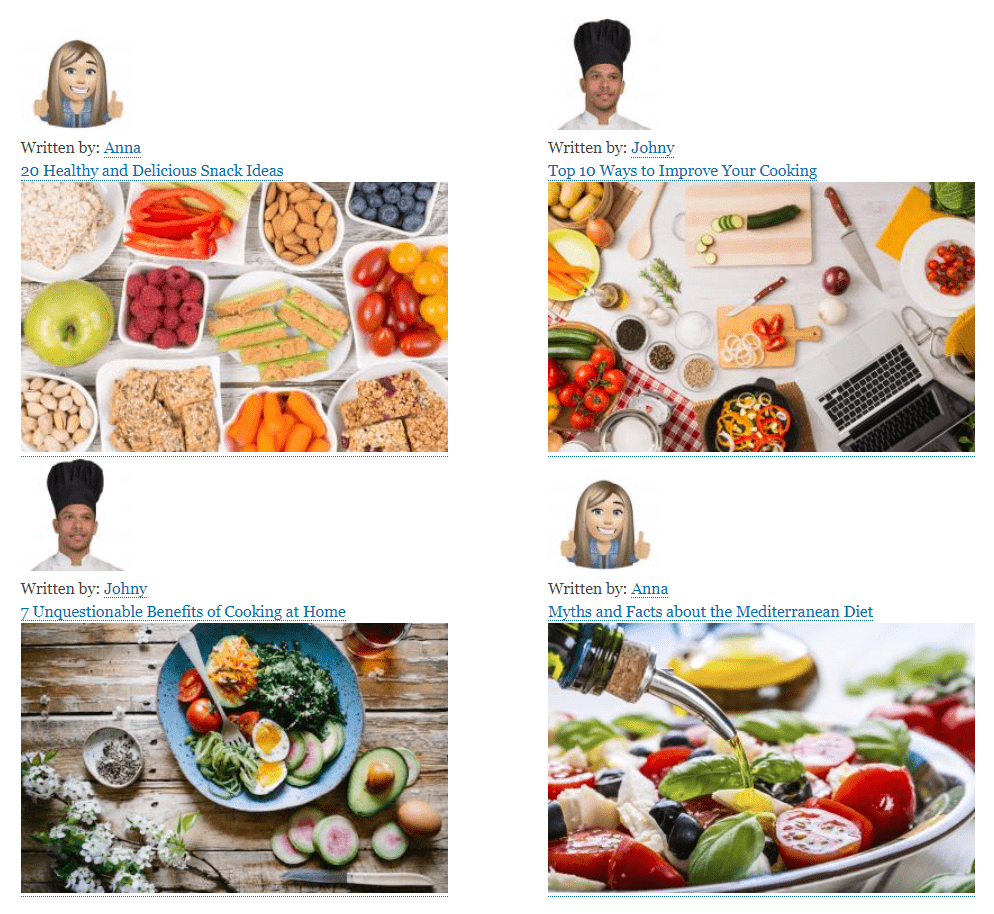
For example, to add the content author’s picture, we add the “Content author” relationship. Then we go back to the fields, and add the Picture field and the Authored by fields (we can change its label to “Written by”, for example).
Contextual filtering in Views
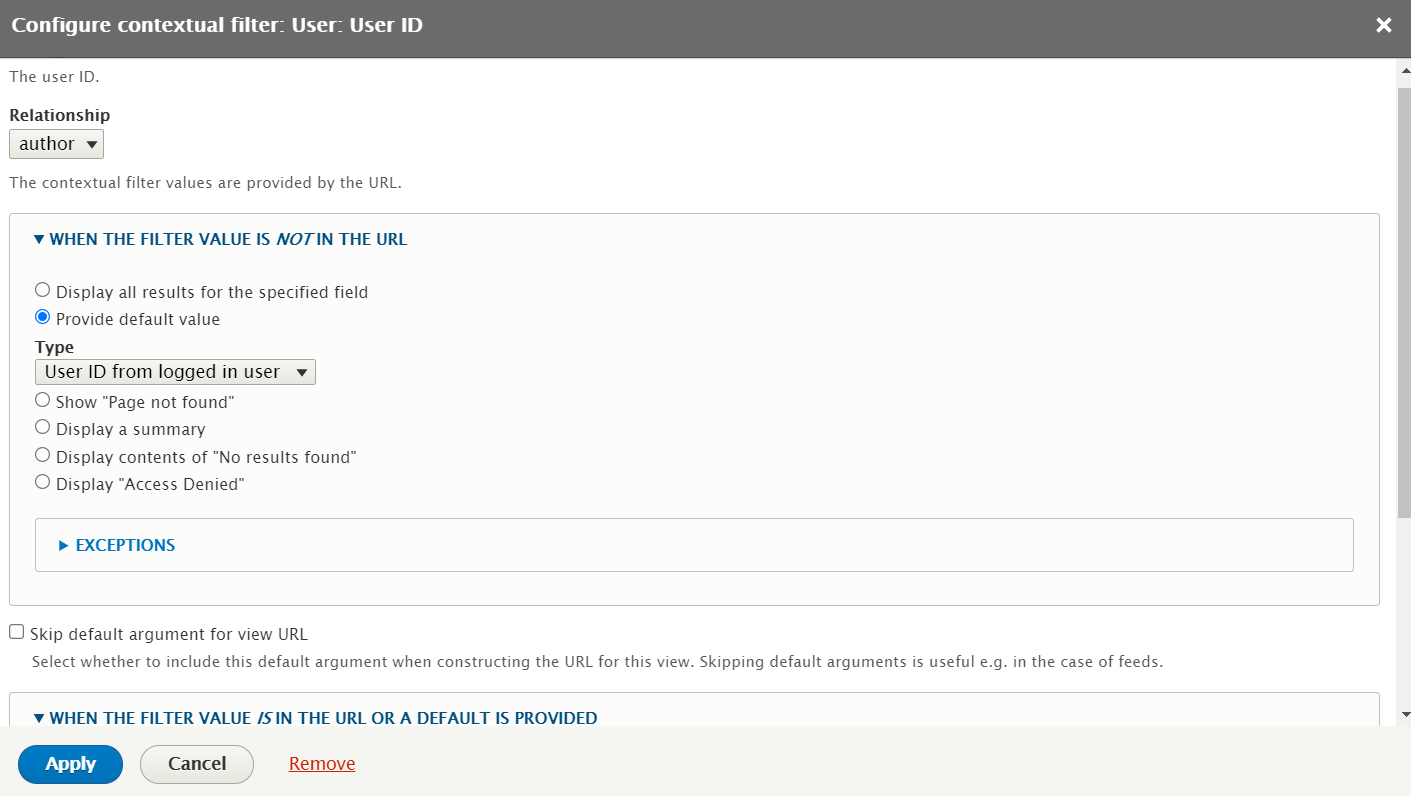
Classic filters that you apply in a view always remain the same irrespective of circumstances. However, you can also use contextual filters to alter the results dynamically based on changing factors. For this, the Advanced tab has Contextual filters. For example, we can show the content based on the user ID of the currently logged-in user. The contextual filtering in Drupal Views deserves a special article that we may create in the future.
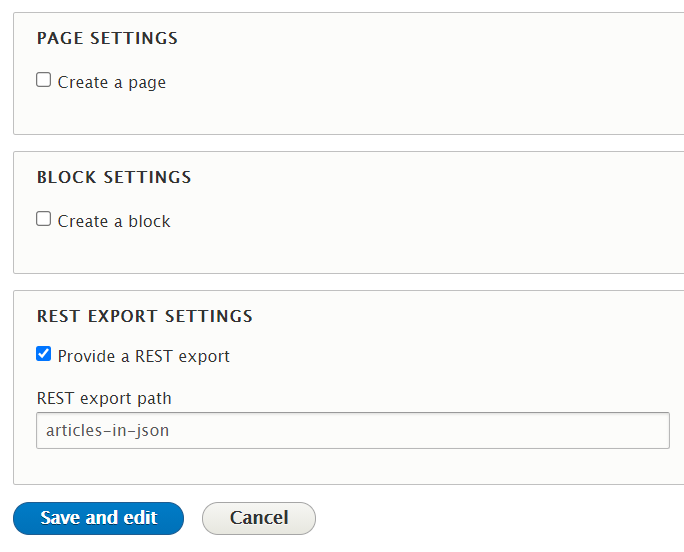
REST export with Drupal Views
Today, the idea to output Drupal content in the JSON format to other applications is very relevant. It is possible to output the content of Views in this way. The RESTful Web Services and Serialization core modules need to be enabled. Once they are, during the view creation you have a “Provide a REST export” option. By default, it will set your view format to “Serializer” and the data format to JSON (but you can also choose XML).
Extra modules for Drupal Views
- The Better Exposed Filters module adds radio buttons and checkboxes as options for your users to manage exposed filters.
- The Views Conditional allows you to change the output of the results based on various conditions.
- With the Views Bootstrap module, you will be able to utilize the Bootstrap framework’s components and styles from the Views UI.
- The Webform Views Integration enables Views to work seamlessly together with the Webform module for building online forms.
- Thanks to the Views Infinite Scroll, the results will automatically expand as users scroll down the page, optionally with a “Load more” button displayed.
- The Views Accordion can display your view contents as an expandable and collapsible JQuery accordion.
- With the Charts module, you will be able to display the results as charts.
- The Views Slideshow module allows you to create slideshows of all items.
- With the help of the Draggable Views, you can drag-and-drop the field rows to rearrange them.
- The FullCalendar module provides a display, a style, and a plugin to help you display the results as a calendar.
- Using the Views Bulk Operations (VBO) makes it possible to perform bulk operations with selected view entities. This feature is extremely useful for administrative Views.
- The Taxonomy Views Integrator allows you to replace specific taxonomy terms or vocabularies with a view.
Final thoughts
The capabilities of Drupal Views together with extra modules are enough for all imaginable content listings on your website. The look and feel of the displays can be customized by front-end specialists to meet your brand needs.
Reach out to our Drupal team for advice on how to build visually appealing and user-friendly content listings based on your most complex requirements.