
Give It a Five: Why and How to Add Rating Widgets to Your Drupal Content

Want to know what your visitors think about your content, products, services, or events? Interactive rating systems let them have their say — an essential part of any digital marketing strategy. In this post, we’ll explore the benefits of rating widgets and move beyond theory to explain the ways to create them in Drupal.
Whether you need star ratings, thumbs-up voting, or custom scoring, Drupal has several modules to get the job done. We’ll explore the available tools, with a focus on one of the most powerful — the Rate module. Plus, you’ll get a detailed, user-friendly step-by-step guide to creating a simple rating widget. Let’s get started!
Why add a rating widget to your website?
Better Engagement
Humans are inherently social creatures, so they naturally want to share their opinions — it’s one of the ways to assert their identity and feel heard. This works in your favor, as rating widgets boost user interactions on your website. People feel especially encouraged to participate when they see others doing the same, so a well-implemented rating system creates a cycle of engagement.
A sense of ownership and belonging
When encouraged to give ratings, users feel more involved in shaping your organization’s offerings. This fosters a sense of belonging, increasing loyalty and long-term engagement. For example, if you give them a chance to vote for your new logo, they will feel they are a valued part of the decision-making process.
User-generated content boost
Ratings often lead to comments and discussions. For example, a highly rated article might encourage more people to share their perspectives, while a low-rated product review could spark debates or alternative suggestions. This helps expand your content ecosystem naturally.
Social proof and credibility
Ratings, especially when they are high, are often seen as a clear sign of quality, helping to build trust and encouraging new visitors to engage with your site. A well-rated article, service, or product immediately appears more trustworthy and worth exploring.
However, even moderate or lower ratings can foster trust. They show that feedback is valued and the system is transparent and open to both positive and constructive opinions.
Reducing hesitation and increasing conversions
By displaying ratings prominently, you can make it easier for new visitors to make informed decisions. When visitors see that others have positively rated content, products, or services, they feel more confident in their choice. They are less likely to second-guess their decisions and more ready to take action — whether that’s reading an article, participating in an event, or signing up for a course.
Valuable feedback and data-driven decisions
Ratings help you understand what users like or dislike, guiding improvements for your content or adjustments for your offerings. For example, by helping you understand which topics or content formats generate the most interest, ratings can shape your content strategy. Furthermore, you can make organizational decisions by asking potential participants whether they are going to attend the events you are planning.
More data, better personalization
One of the great ways to use the data obtained from ratings is to display personalized content. You can tailor content recommendations, product suggestions, or service offerings to individual preferences. Check out this article for more details about content personalization.
SEO and visibility boost
User-generated ratings can significantly boost your Drupal website’s SEO. This works especially well if ratings are added to your site’s structured data, such as schema markup. Search engines like Google can showcase star ratings or review counts directly in search results through rich snippets.
This makes your content both easier to find and more enticing to users. It stands out among all search results and has a higher click-through rate. The more engagement your site receives, the more likely it is to be recognized as relevant and authoritative, leading to even better rankings. So again, you get a cycle of permanent improvement.
An overview of Drupal modules for ratings
Here are some of the most popular tools that simplify and streamline the creation of rating widgets on your Drupal website.
Fivestar
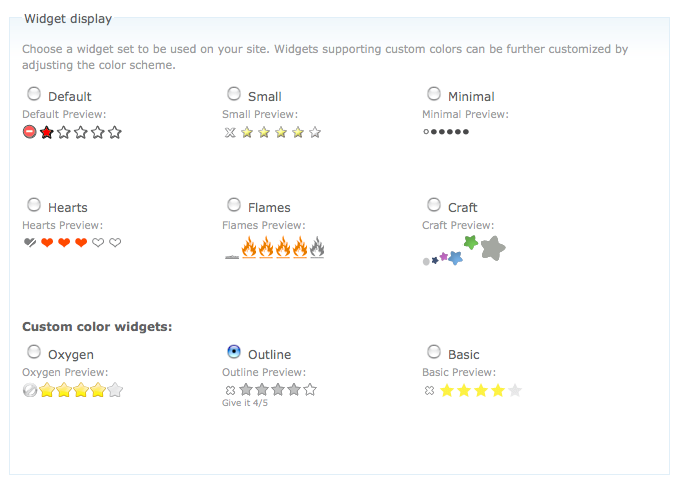
The Fivestar module adds an interactive voting widget to content, comments, or other Drupal entity types. It supports anonymous votes while offering spam protection.
You can use configurable sets of stars like hearts, flames, dots, and so on. The module features special effects like jQuery-based rollover — as the user moves their cursor over the stars, they light up or change color. It also supports AJAX voting where the results are displayed dynamically without a page reload.
The module integrates easily with Drupal Views, which enables you to create result listings, as well as sort or filter your content based on the user votes (like top-rated content). Fivestar depends on the Voting API module for vote storage.
Star Rating
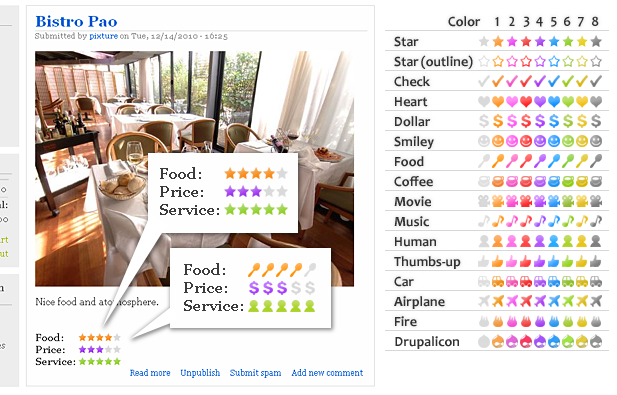
The Star Rating module is a simple solution for adding star ratings. Its use case is very specific — it is designed for authors to rate their own content. It doesn’t support end-user voting or interactive AJAX features.
You can create different types of ratings for content (“Price,” “Service,” etc.). Furthermore, you assign different icons and colors to each. This means that even the same piece of content can show several ratings for various categories of assessment, each of which has its own color and icon. The module requires no additional modules like Voting API. It fully integrates with Drupal Views.
Rate
The Rate module is one of the most powerful Drupal tools for adding ratings, enabling you to create any setup you need — from simple to complex. It works with content, comments, or other entity types.
The module supports a wide range of voting options, including up/down votes, thumbs up/thumbs down, star ratings, emotions, and more. The voting results are displayed dynamically without a page reload thanks to AJAX support.
Among the module’s exciting features are:
- voting deadlines
- the ability to undo votes
- read-only widgets based on permissions or deadlines
- integration with Views
- and more
It’s possible to add multiple rate widgets to a single content item or a single rate widget to multiple content items. You can customize anything from the widget label to the result positioning. Furthermore, front-end developers can use the Twig template engine to create result summaries that are highly tailored to the website’s requirements. Just like the Fivestar module, Rate relies on the Voting API module.
How to create a rating widget with the Rate module in Drupal
1. Installation
Install the module per normal. The recommended way to install modules is by using Composer:
composer require drupal/rate
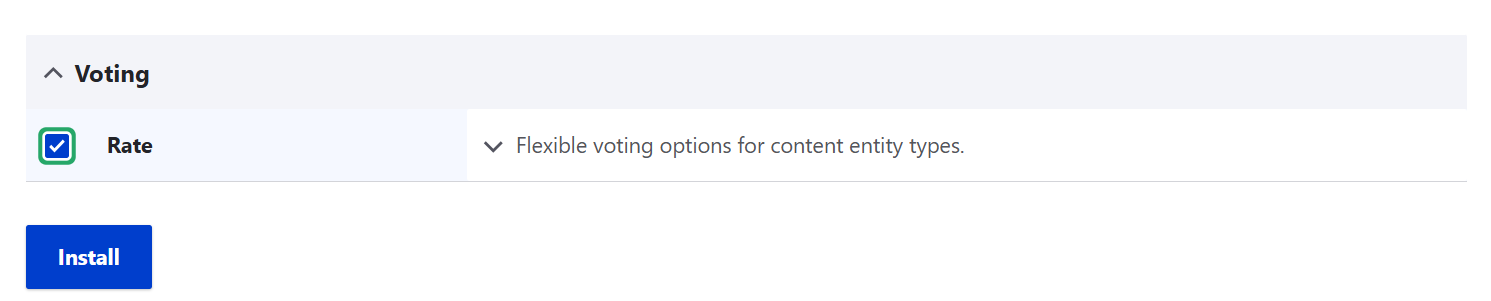
The Voting API module that the Rate module depends on will automatically be installed together with Rate if you’re using Composer. Alternatively, you can manually download both the Rate and the Voting API modules and enable them on the Extend page.
2. Site-wide settings (optional)
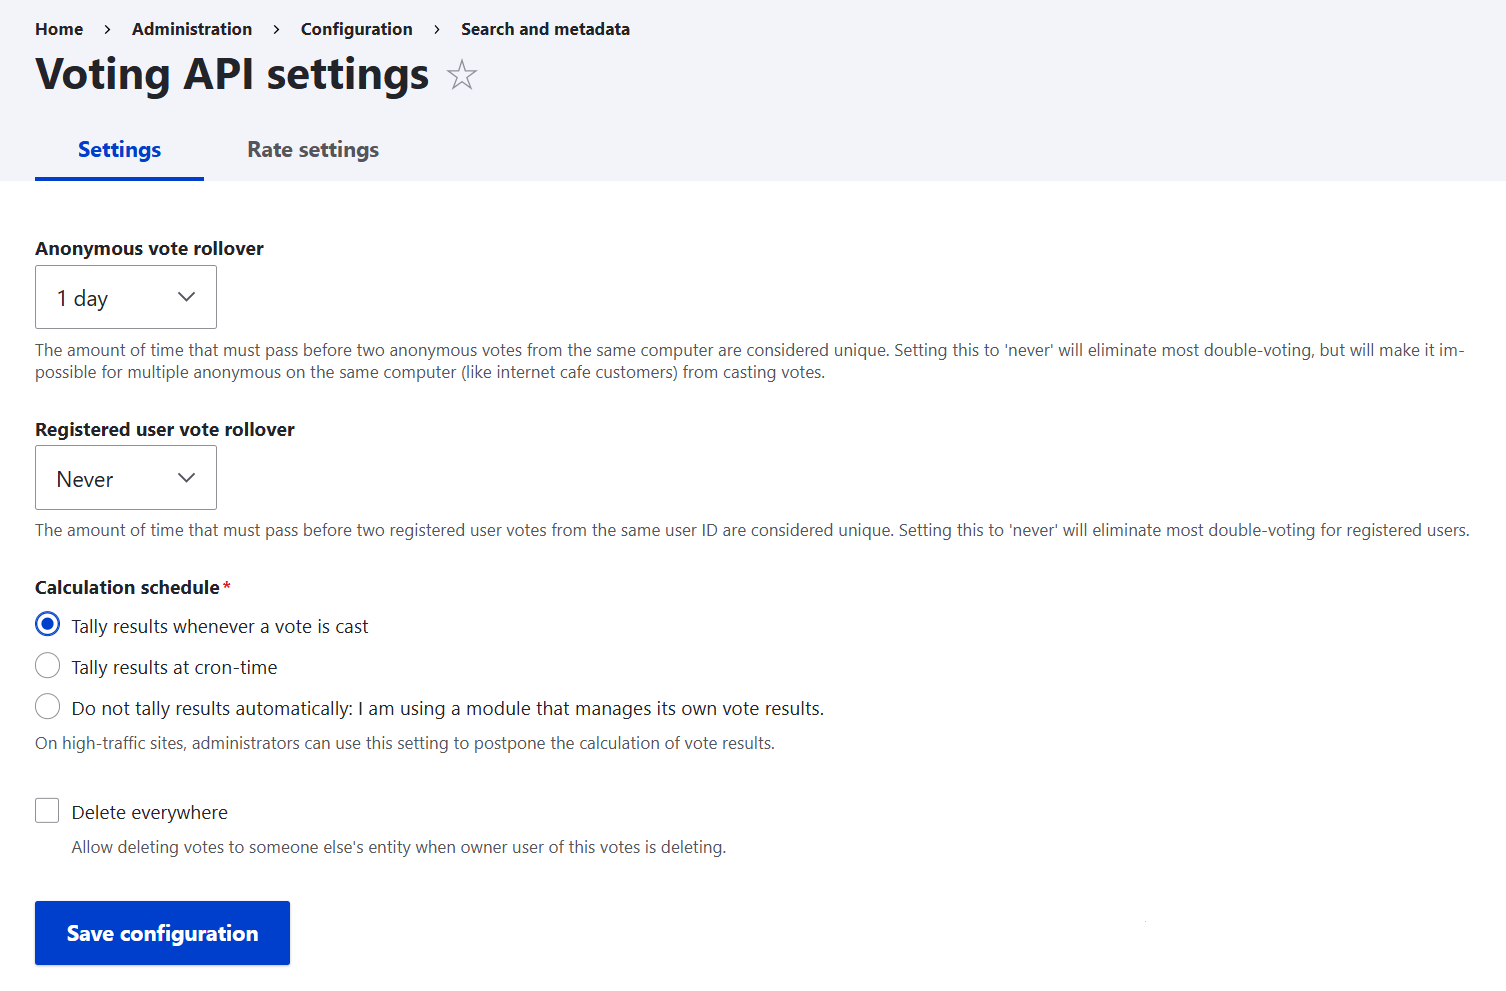
You can click “Configure” next to the Rate module on the Extend page or go to Configuration > Search and metadata > Voting API settings to find some site-wide settings. It has two tabs.
The Settings tab: key settings
Rollover. You can configure rollover — the amount of time that must pass before two anonymous votes from the same computer are considered unique. It’s a way to prevent rapid repeated voting from the same source. This setting is configured separately for anonymous and registered users.
Calculation schedule. You can configure when to calculate the total results: when the vote is cast, regularly with the Cron automatic task runner, or not calculate at all (for developers who have their own modules for this purpose).
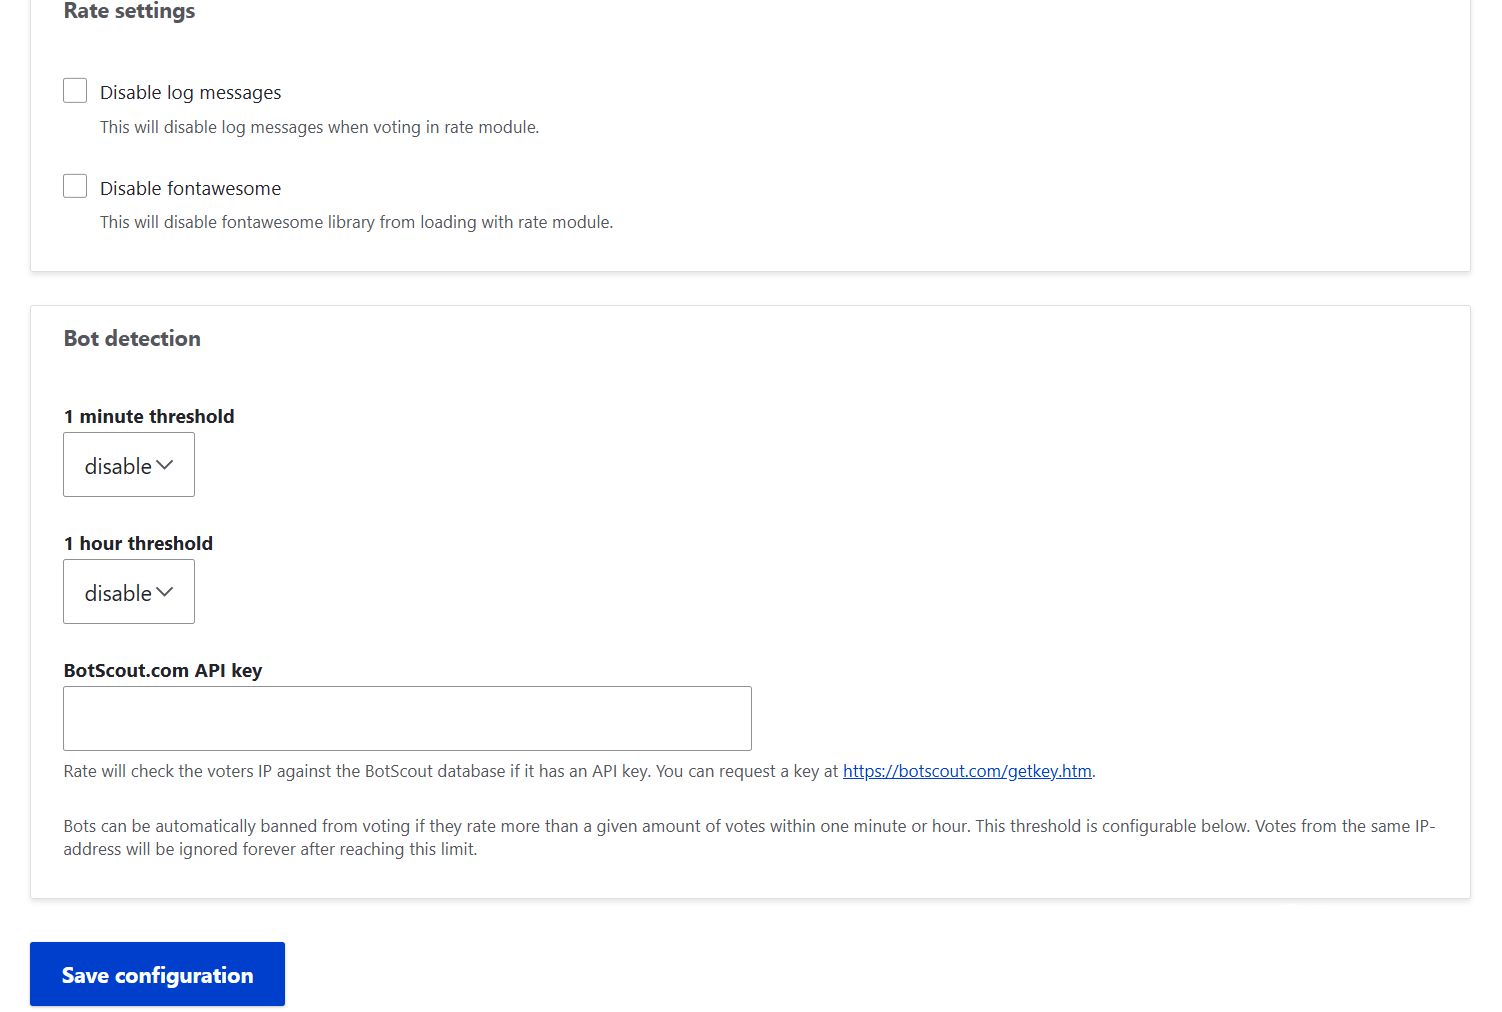
The Rate settings tab: key settings
Bot detection. To prevent automated or excessive voting you can set a limit on how frequently a single user (or IP address) can vote within one minute or one hour. If too many votes come from the same source within this short period, the system may flag them as suspicious or block them. There is also a field for entering an API key if you are using the BotScout spam protection tool.
If you are interested in comprehensive spam protection for your Drupal website, you might also want to check out how to fight spam bots with the Honeypot module.
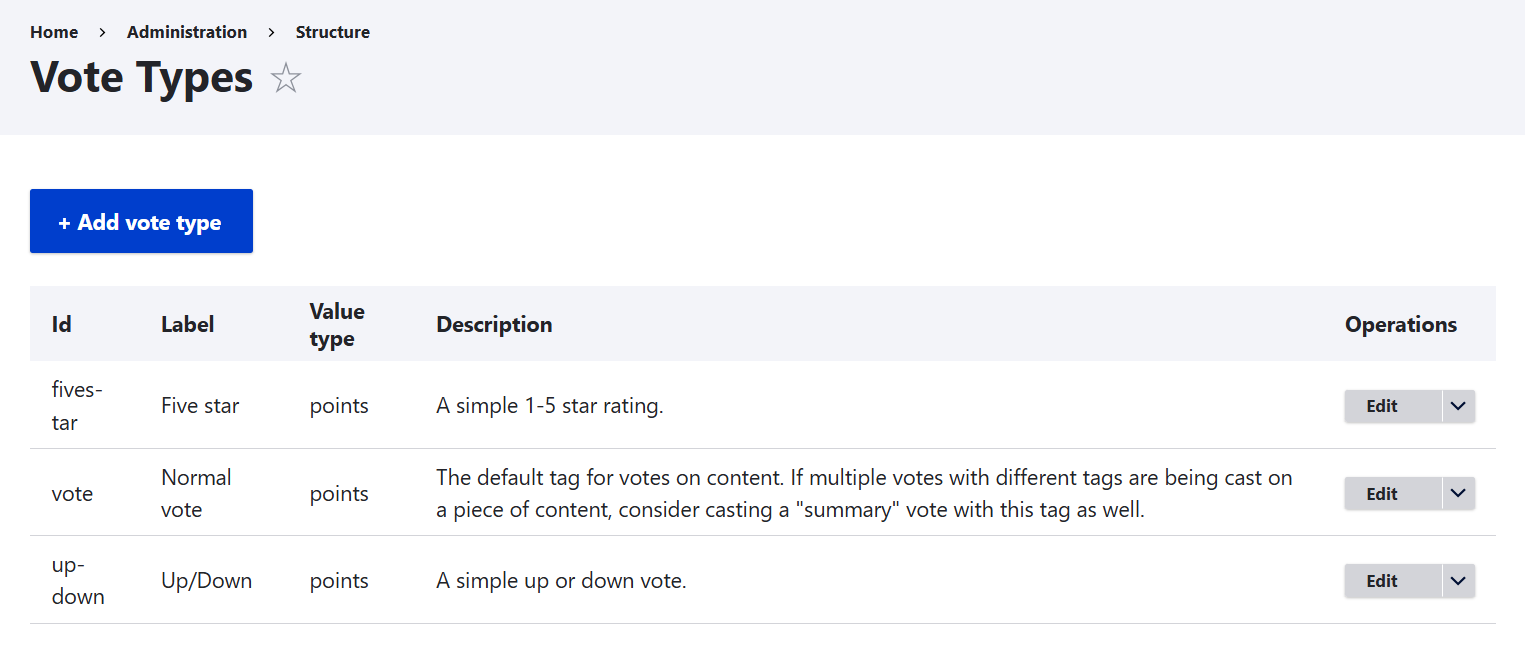
3. Vote types (optional)
By going to Structure > Vote types, you can administer the vote types (fivestar, standard vote, and up/down vote) at a higher level. If needed, you can change their names, value types, and descriptions.
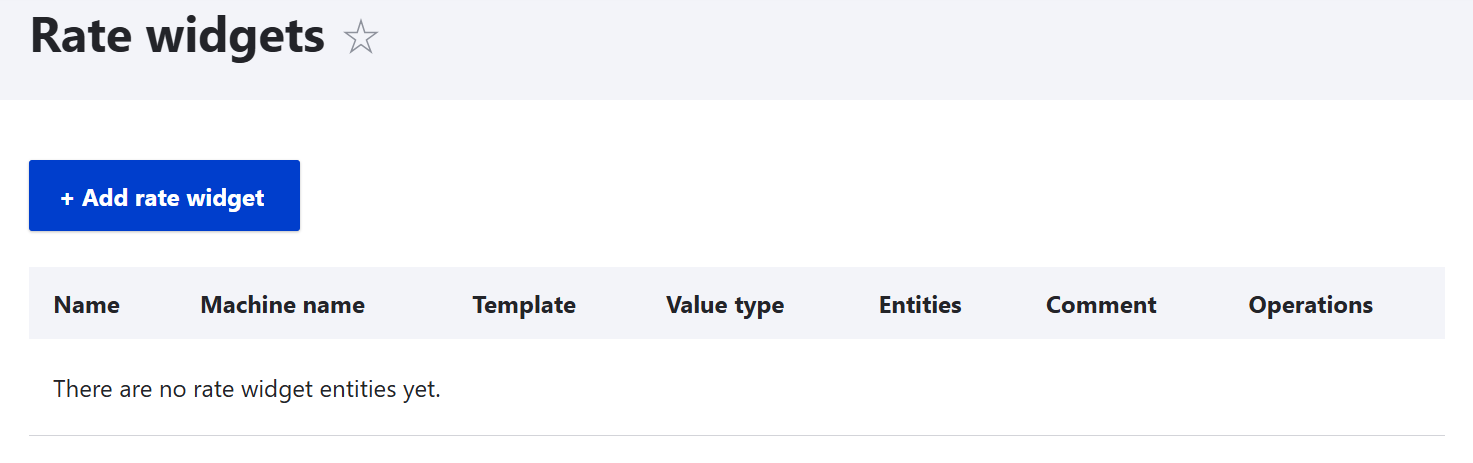
4. Adding a rate widget
Now it’s time for the most important part of the workflow — creating specific widgets. Go to Structure > Rate widgets and click the “+Add rate widget” button. You’ll have all your widgets listed on this page and will be able to edit or delete them.
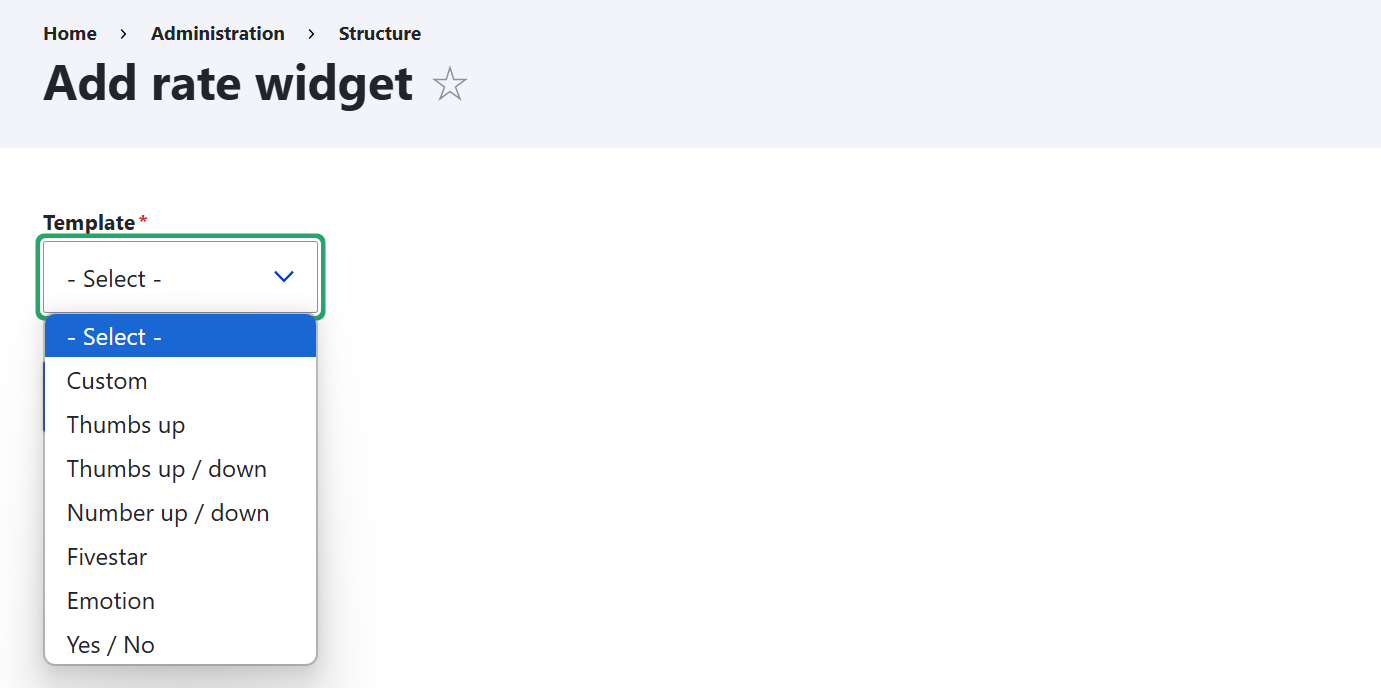
Open the dropdown menu and select whether you want your widget to be based on:
- thumbs up/down
- just thumbs up
- number up/down
- yes/no
- fivestar
- emotion
- a custom solution
In this example, let’s add a Fivestar widget that asks users to assess an initiative. After selecting the widget type and clicking “Next,” you are redirected to the widget’s settings page.
5. Configuring the values of the rate widget
On the widget’s settings page, give your widget a name that will help you recognize it among others in the admin interface. This name won’t be visible to visitors.
By default, the values for a Fivestar widget are 0, 25, 50, 75, and 100%. You can change them in the “Values” column to 1, 2, 3, 4, and 5 for more usability. Add more than 5 options if you need to.

6. Attaching the widget to content
The next section in the settings is for attaching the widget to specific content types or other entity types on your Drupal website. This is done by selecting the respective checkboxes.
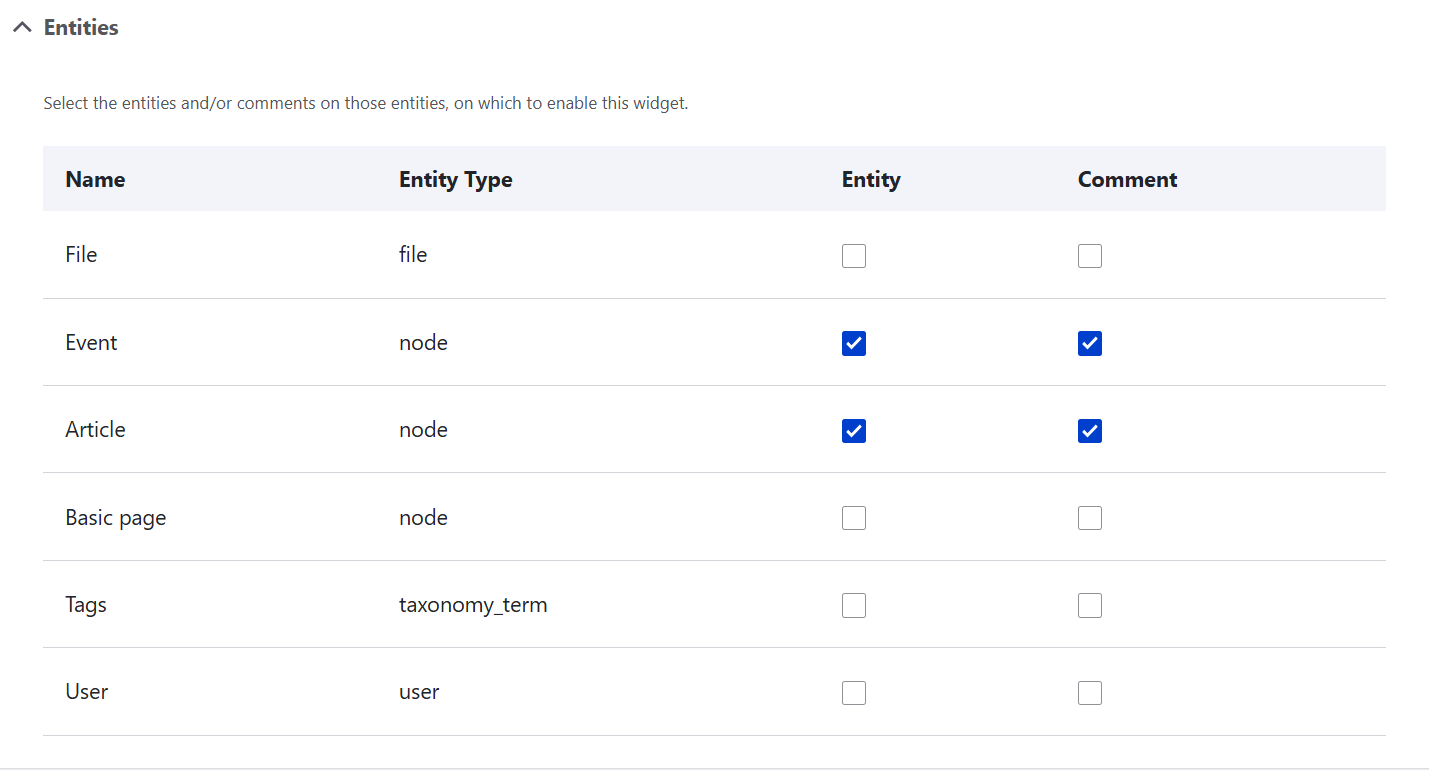
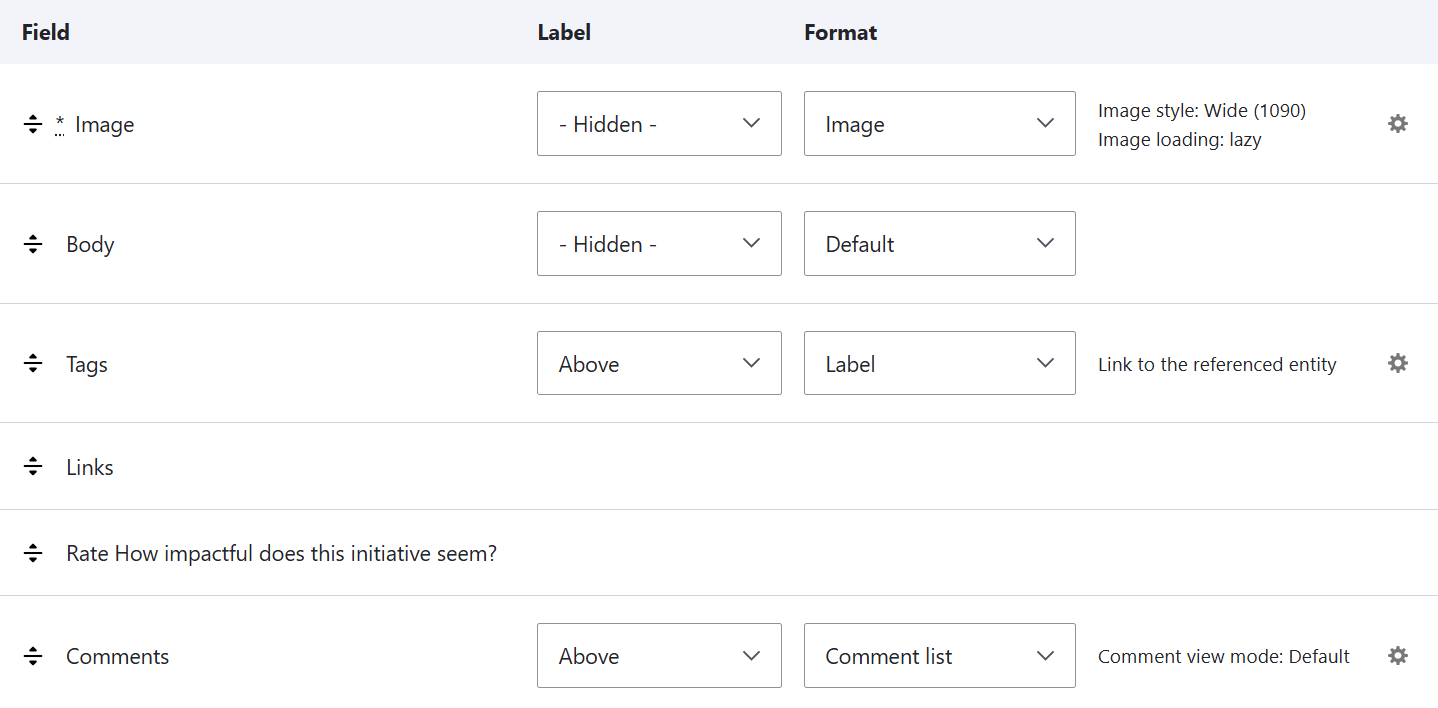
Once you attach a widget to a content type, it will also be displayed in the list of this content type’s fields at Structure > [Content type’s name] > Manage Display. However, it will have no useful settings there and will just serve for re-ordering the fields if you need to configure the order of content elements (body, image, rate widget, and so on).
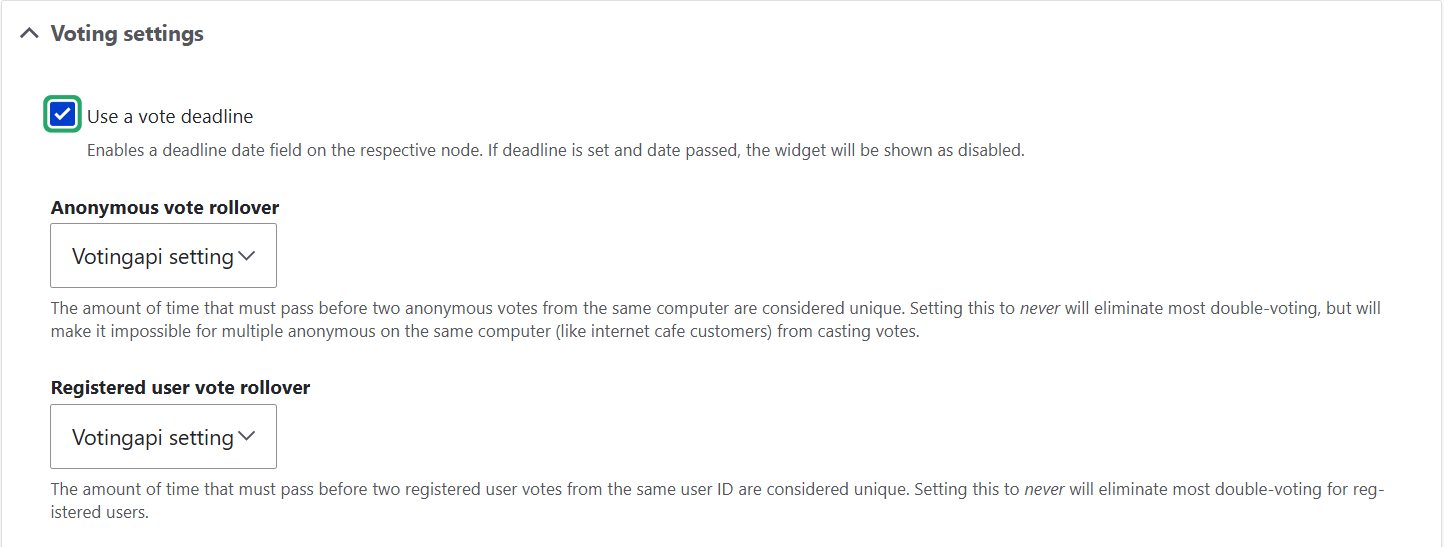
7. Voting settings
Next, in the “Voting settings,” you can enable the vote deadline, and specify the amount of time the votes from the same computer are considered unique. We’ve seen this before in the site-wide settings but here, you can specify this setting for a specific widget.
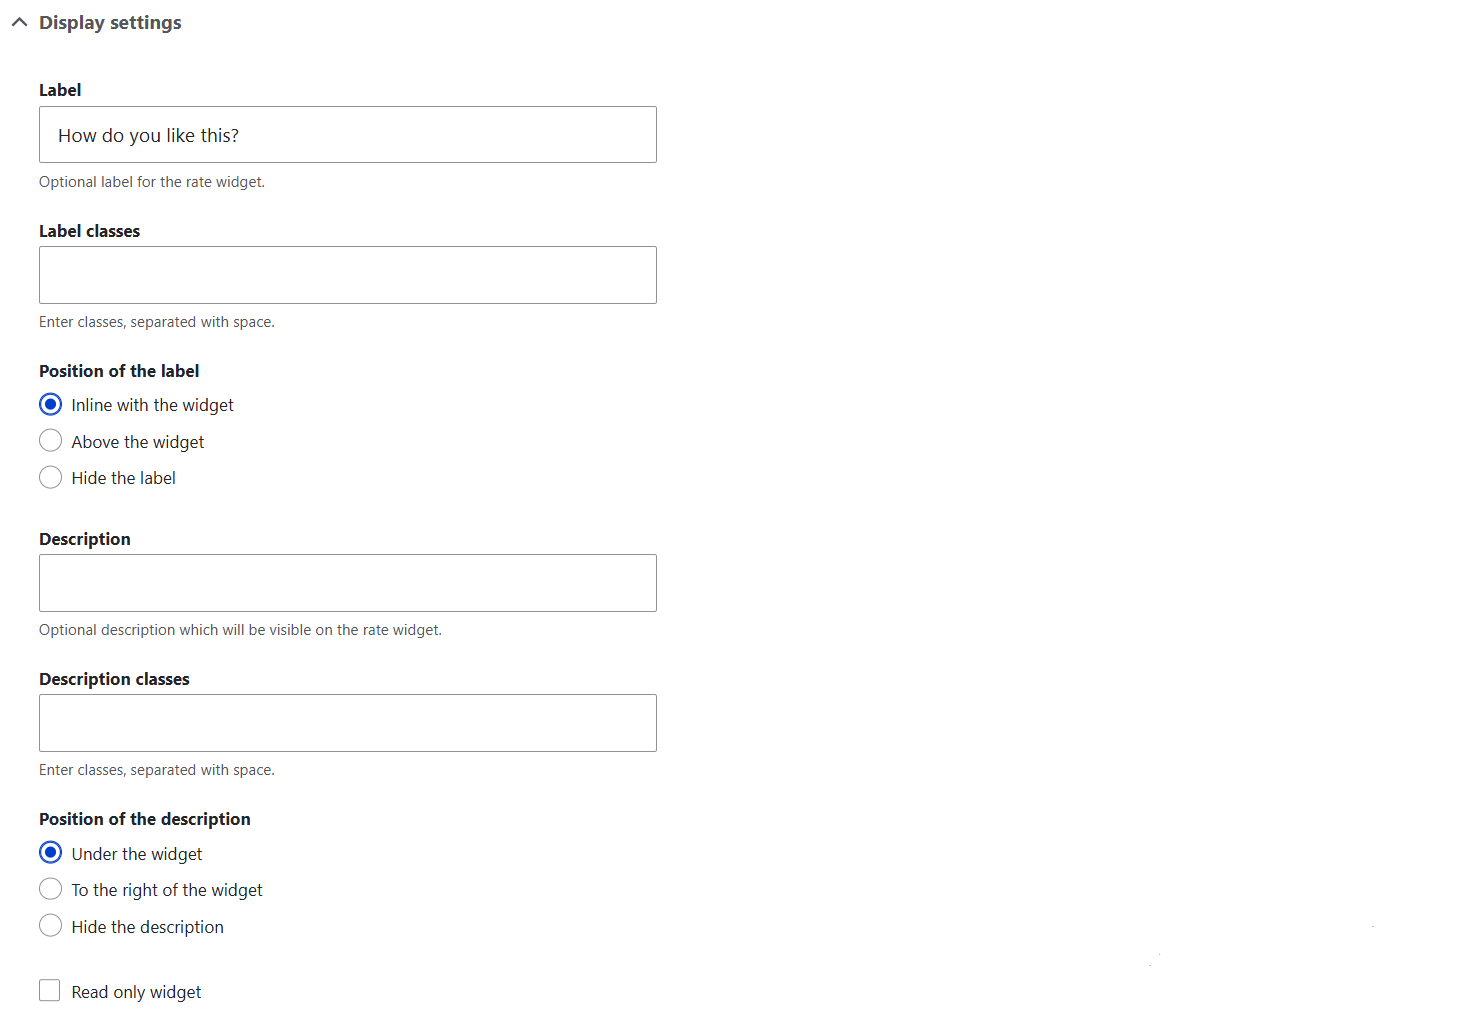
8. Display settings
The Display settings section enables you to:
- create the label and, optionally, the description that the users will see (for example, “How do you like this initiative?”)
- position the label inline with the widget or above it
- position the description under the widget or to the right of the widget
- hide the label and/or the description
There’s also a checkbox to make your widget read-only. Next, you’ll see the options for positioning and displaying the vote results.
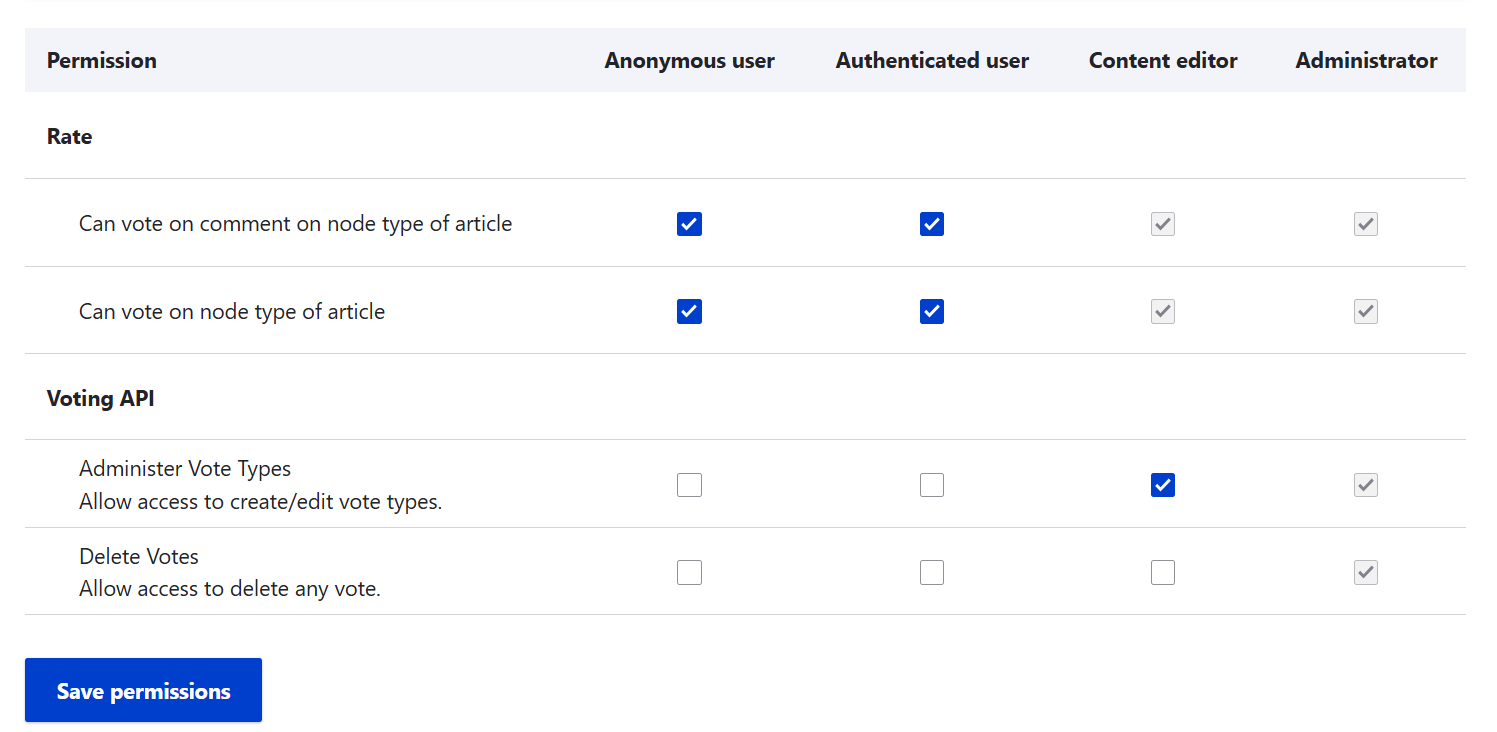
9. Permissions
By default, voting and administration permissions are highly restricted. To grant access, navigate to People > Permissions and assign the appropriate roles.
Voting permissions
Only admins and content editors can vote by default. You can expand this permission to authenticated users or anonymous users, based on your scenario. You’ll see separate voting permissions for articles or any other entity types that have widgets attached to them.
Additionally, you can configure permissions for specific user groups—for example, allowing only users with the "Volunteer" role to vote on events.
Administration permissions
Under “Voting API,” you’ll see the permissions to:
- administer vote types
- allow access to create and edit vote types
- delete votes
- allow access to delete any votes
By default, only administrators have these permissions but you are free to expand them to content editors or even create specific roles that will administer votes.
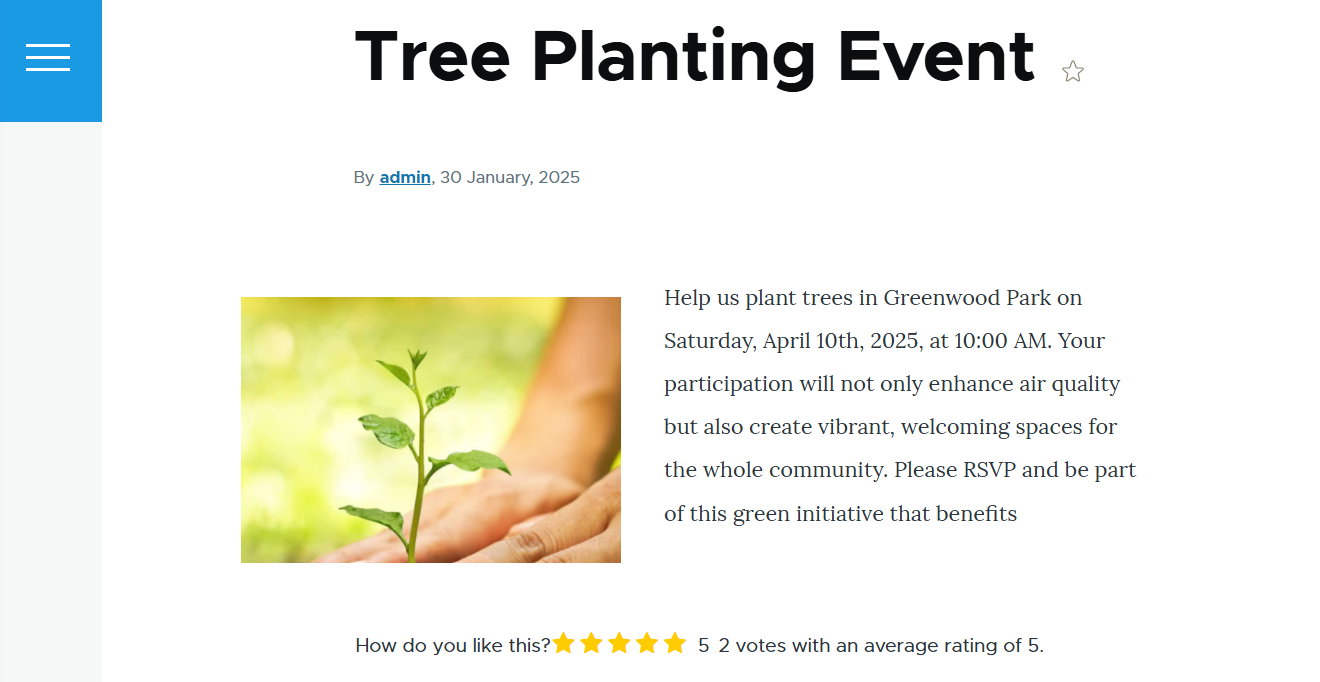
10. Adding content and checking the result
It’s time to add some content and see how the rating feature looks. If you’ve selected the checkbox with the rate vote deadline when configuring the widget’s settings, you’ll also see this option in the content creation form. This will enable you to select a date from the calendar.

Here is an example of a published event that has a five star rate widget below it. It shows the results of 2 votes with an average rating of 5.
Final thoughts
The simple example above is just one way to use the Rate module. With customization, your rating widgets can seamlessly align with your website’s branding and user needs. Aim high in boosting engagement and reach — we’re here to help you make it happen!