
How to Build Essential Online Form Types in Drupal

Online forms deliver communication from your users directly to you. These can be requests, applications, proposals, subscriptions, or even complaints, and all of them are a goldmine of valuable data. Every single submission is an opportunity to convert a lead, solve a problem, gather an insight, or streamline a daily business workflow.
How do you capture and manage these critical interactions reliably? If you are running a Drupal website, you don’t need to rely on third-party form builders like Typeform or Jotform. Drupal already provides everything needed to build and manage powerful online forms natively.
In this guide, we’ll guide you through the key steps of Drupal form creation and explore how to build five essential types of online forms most businesses need:
- A standard contact form
- A customer feedback survey
- A newsletter signup form
- A job application form
- A quote request form
This article is a part of our ongoing series on making Drupal forms shine, alongside our posts about Drupal form accessibility, creating interactive calculators, pulling third-party data into your forms, and an upcoming deep dive into building a complex, multistep Drupal form with conditional logic.
The basics of form creation with Drupal’s Webform module
The Webform module is truly an enterprise-grade form engine, an absolute powerhouse that firmly holds its place among the top Drupal modules. While it offers far too many features to cover in a single article, every form you build with it follows the same four-step lifecycle. Master this rhythm, and you can build almost anything.
The main Webform control center
Before diving into the lifecycle itself, let’s start with the main dashboard for managing your forms. At Structure > Webforms, you’ll find the central control hub where forms can be created, organized, and maintained.
The dashboard lists all existing forms, making it easy to search by keyword and quickly jump into managing each one individually. It also provides access to global configuration options, templates, submissions, add-ons, and many other Webform features.
The four steps of creating a form via Drupal Webform
1. Build (the elements)
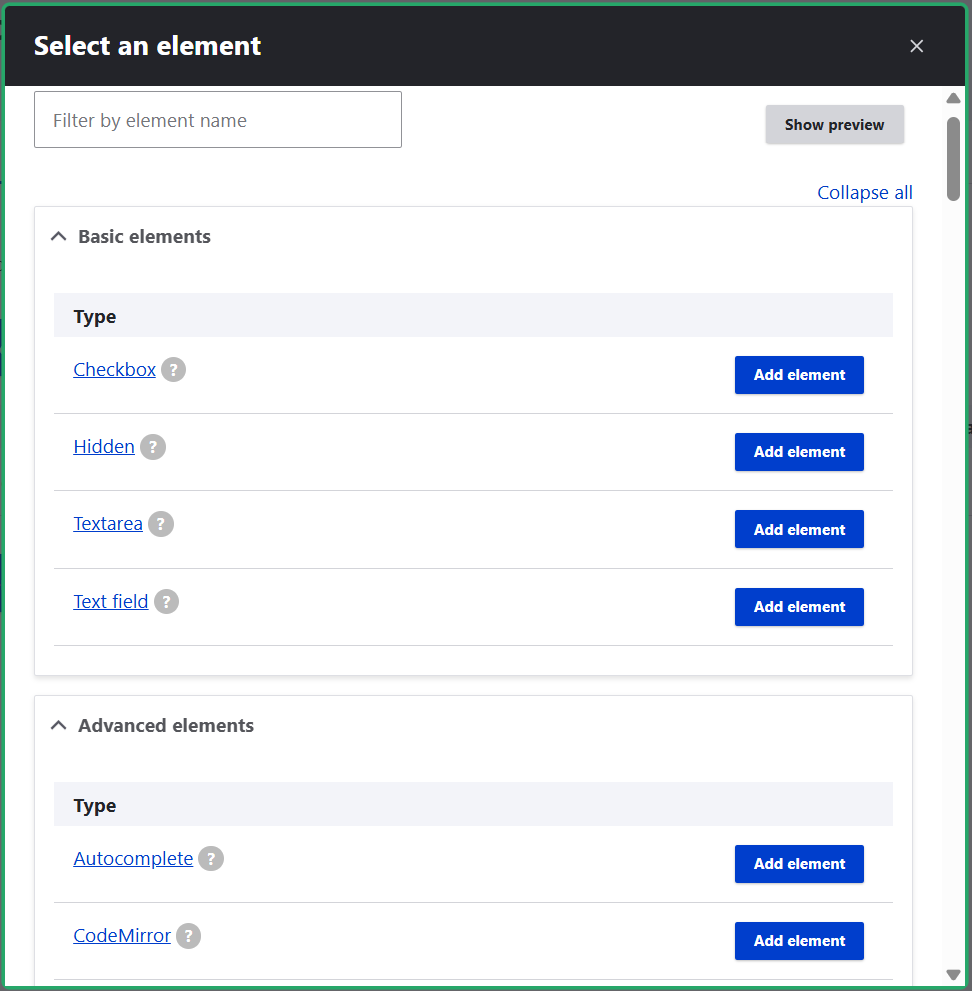
The first step of building a form is to map out exactly what information you want to collect from your users. As you create a new form, its “Build” tab lets you assemble your fields (referred to as “elements”).
You just click “Add element” and choose the fields you need, using the tooltip descriptions for a better choice. You’ll find standard items like checkboxes or text areas, advanced options like email confirmations or range sliders, composite elements that are pre-packaged blocks of fields, and more.
2. Settings (the behavior)
a) Configuring how a specific field behaves
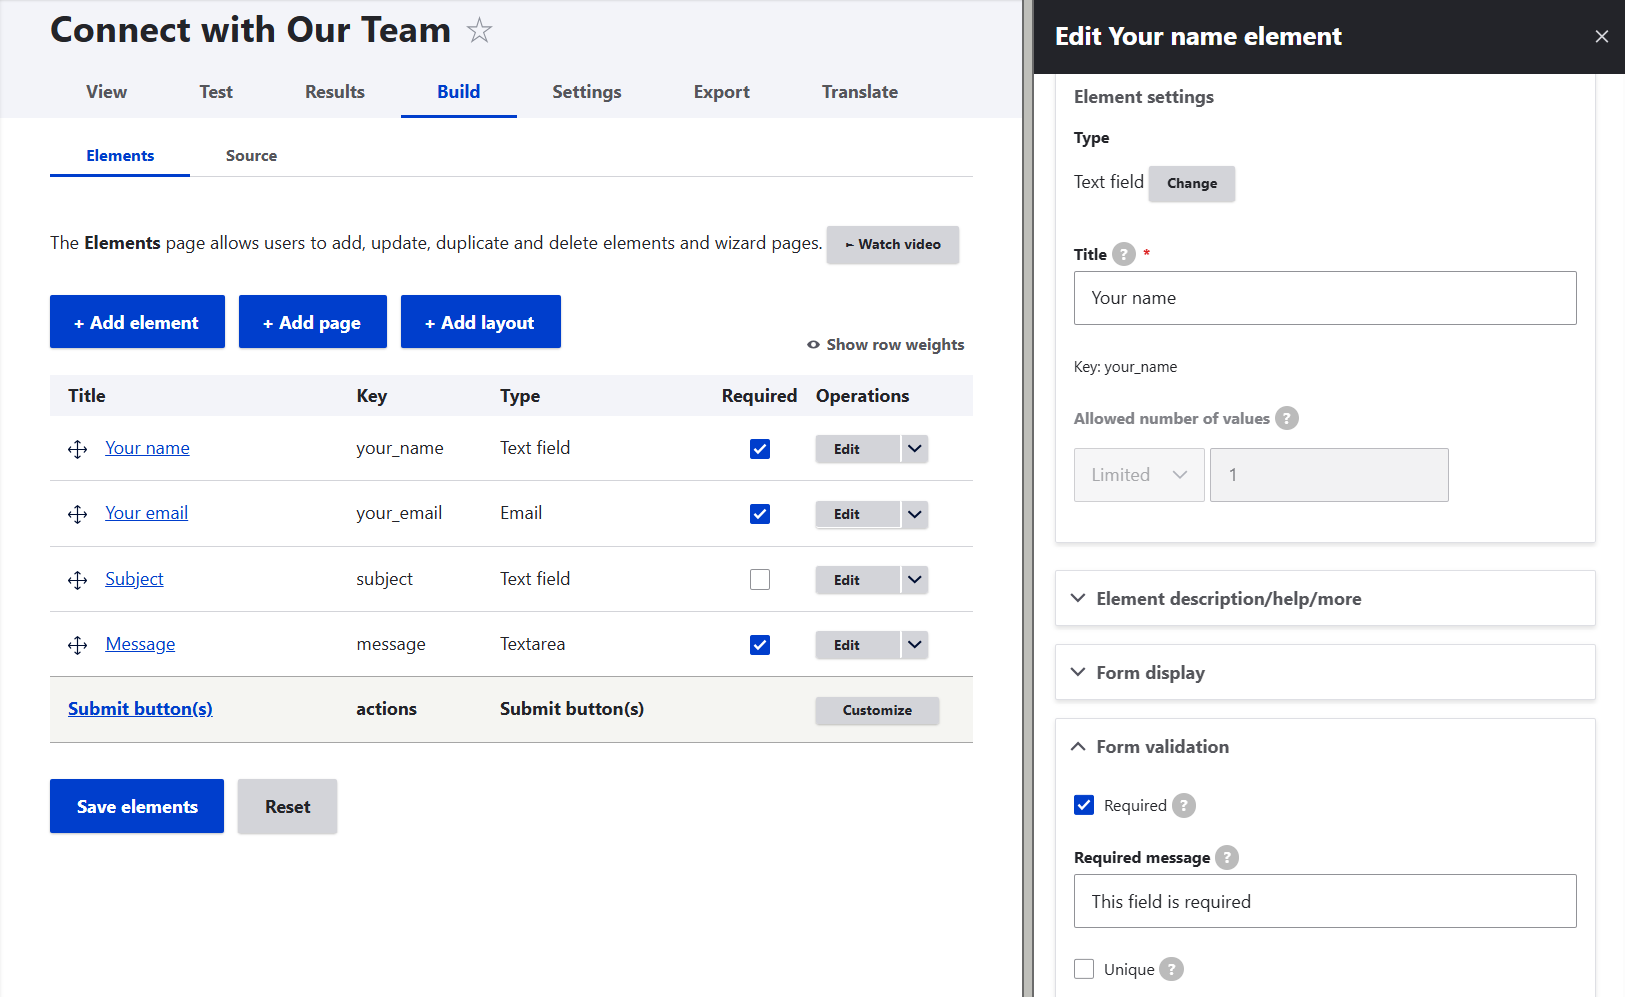
While creating or editing a specific field, you can manage its settings in the sidebar: make it required or optional in the “Form validation” subtab, add a personalized message if they leave it blank, choose who can manage or view the field, and more.
b) Configuring how a specific form behaves
On the main dashboard for every form, you can drag and drop fields in the needed order, make fields required or optional in bulk, and so on. The richest configuration options can be found in the form’s “Settings” tab with a bunch of useful subtabs. For example, you can:
- tweak the user-facing title (on the “General” subtab)
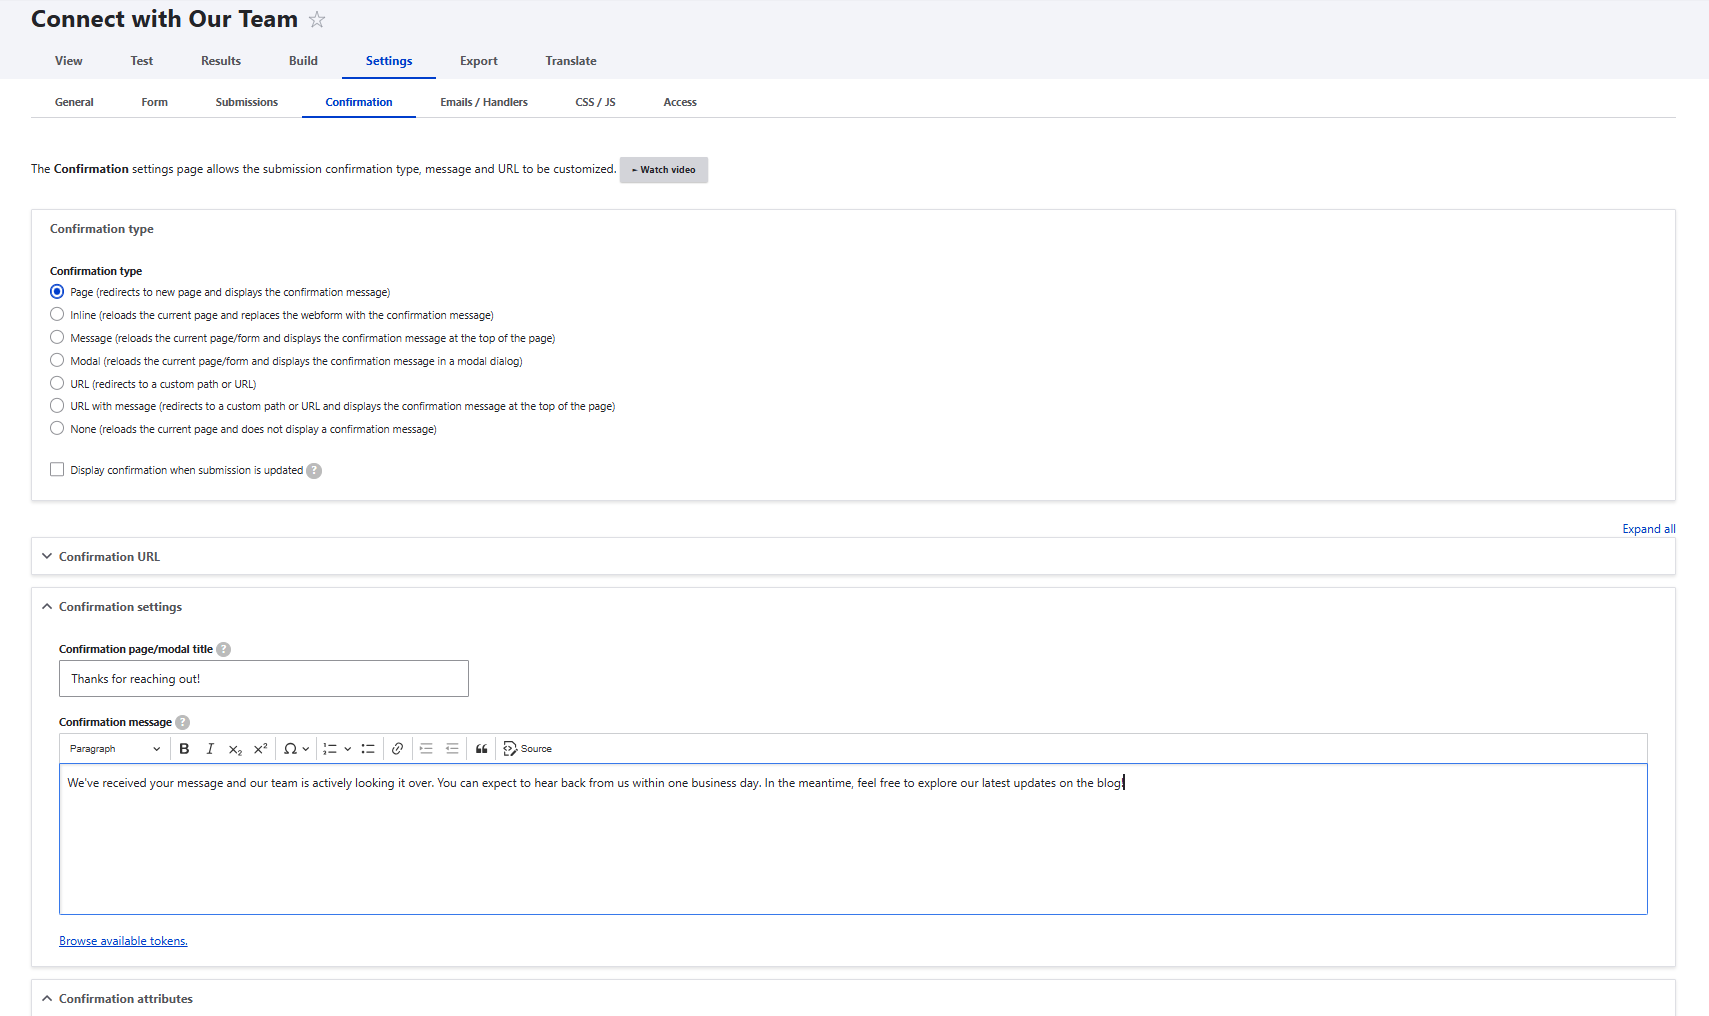
- customize the submission confirmation message and how it should be displayed (the “Confirmation” subtab)
- choose whether the form actions should happen without a page refresh (the “Use AJAX” checkbox on the “General” subtab)
- schedule precise start/end dates for the form to be open (the “Form” subtab)
- and much more
3. Handlers (the actions)
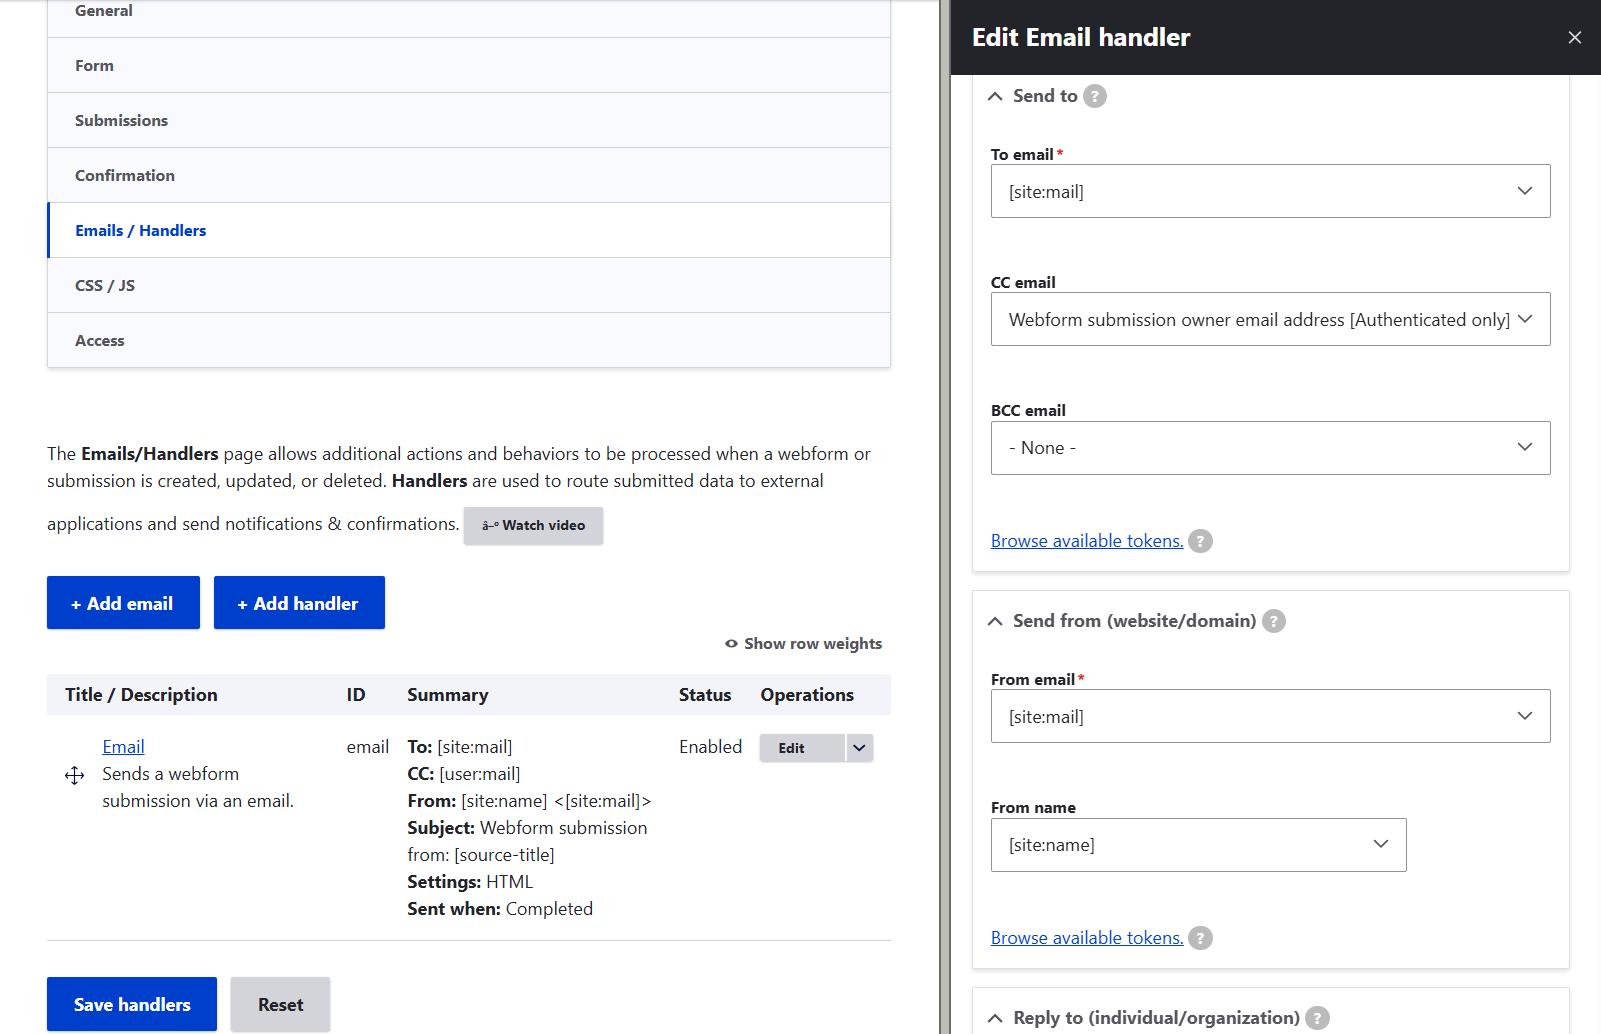
The Emails/Handlers subtab of the form’s settings lets you customize where the information goes once someone submits a form.
You can use the “Add email” button, which opens a quick setup panel. The great news is that Webform automatically fills in the standard data in the “From,” “To,” and “Reply to” fields using placeholder tokens for your site’s default email and name. You won't have to manually provide or edit them for every form you build.
While having the form submissions sent to the main site email, you can also make sure the sender receives a friendly confirmation receipt. Add the webform submission’s owner email address in “CC email.”
If you want to push data beyond an inbox, like adding a contact to Mailchimp or sending a lead straight to your CRM, the “Add handler” button opens up your toolkit for external plugins and automated connections.
It must be noted that Webform does the heavy lifting of packaging your submission data perfectly. However, to ensure these notifications actually reach your team and your customers, your website needs to follow standard domain authentication protocols. Pairing your Drupal site with a trusted transactional mail service (like SendGrid or Mailgun) ensures your emails are properly signed and verified.
4. Results (the data warehouse)
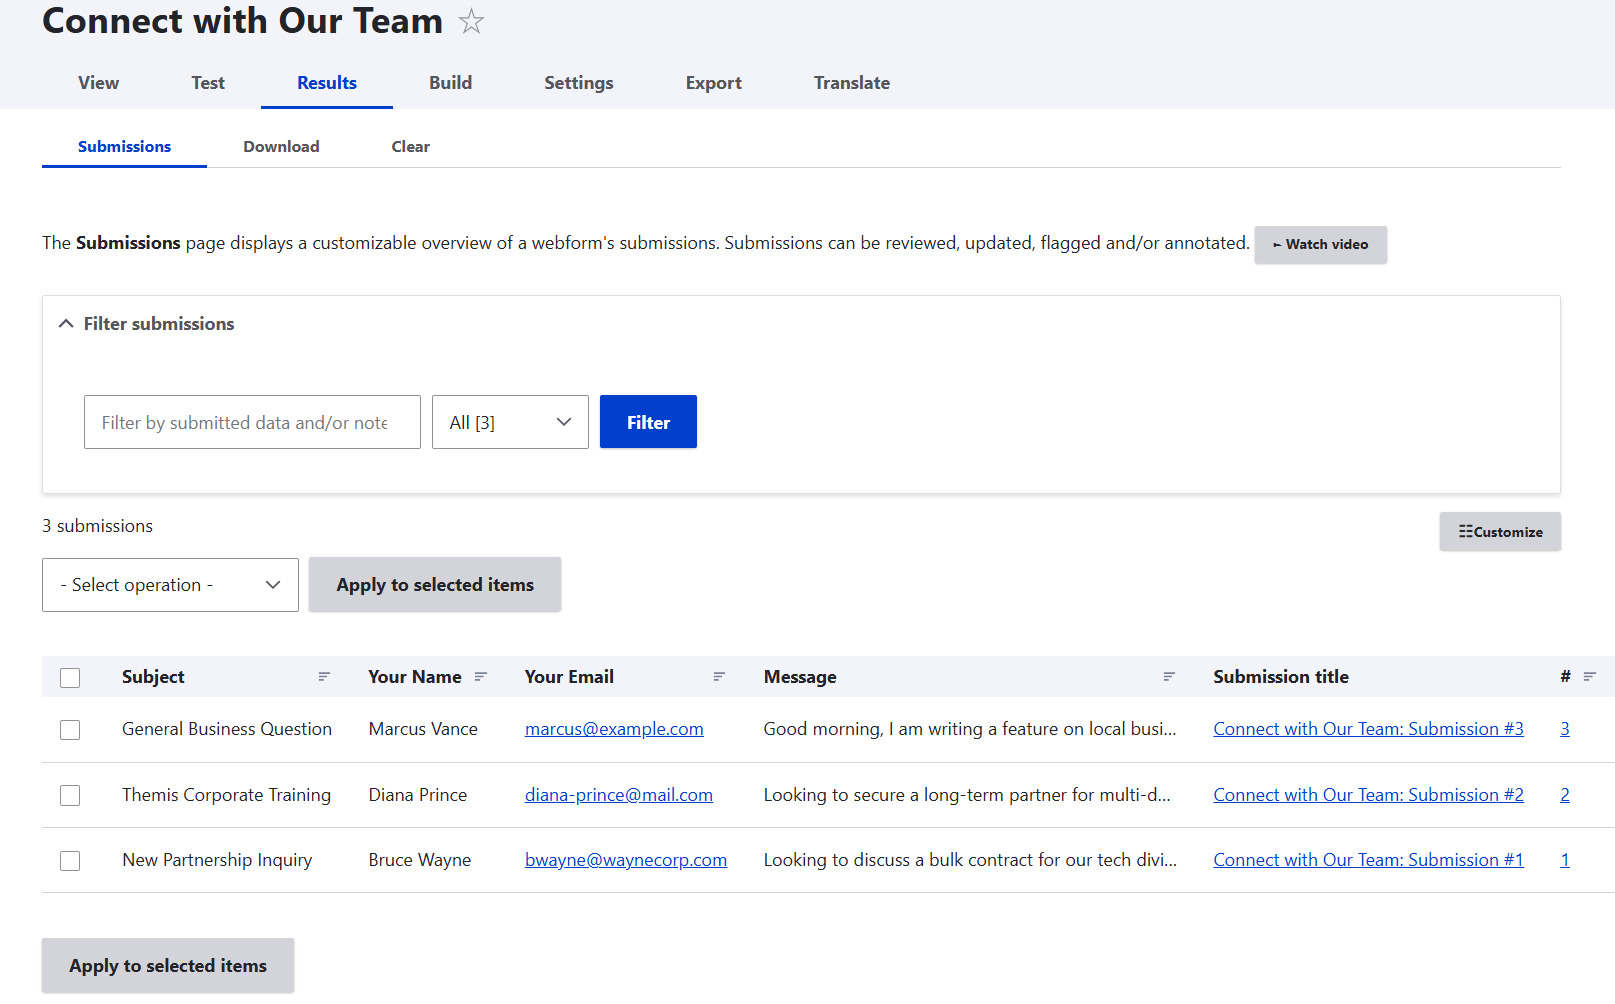
The Results tab has a clean, built-in dashboard where you can view and manage your collected insights. Among other things, you can find them, star or flag them, lock them from accidental change, or delete them.
The structure in which the submissions appear is customizable to meet your preferences (for example, subject and name first). It’s also easy to export the entire batch in CSV, HTML, JSON, or YAML.
How to create the most common types of forms in Drupal
With this four-step framework in mind, let’s explore our six essential forms and the specific setup tweaks that make them work. While we’ll look at standard blueprints, the actual selection of elements can easily be customized to fit your exact business requirements.
The standard contact form
A dedicated contact form is a must for every business. A structured form captures the exact customer data you need from day one.
Suggested structure:
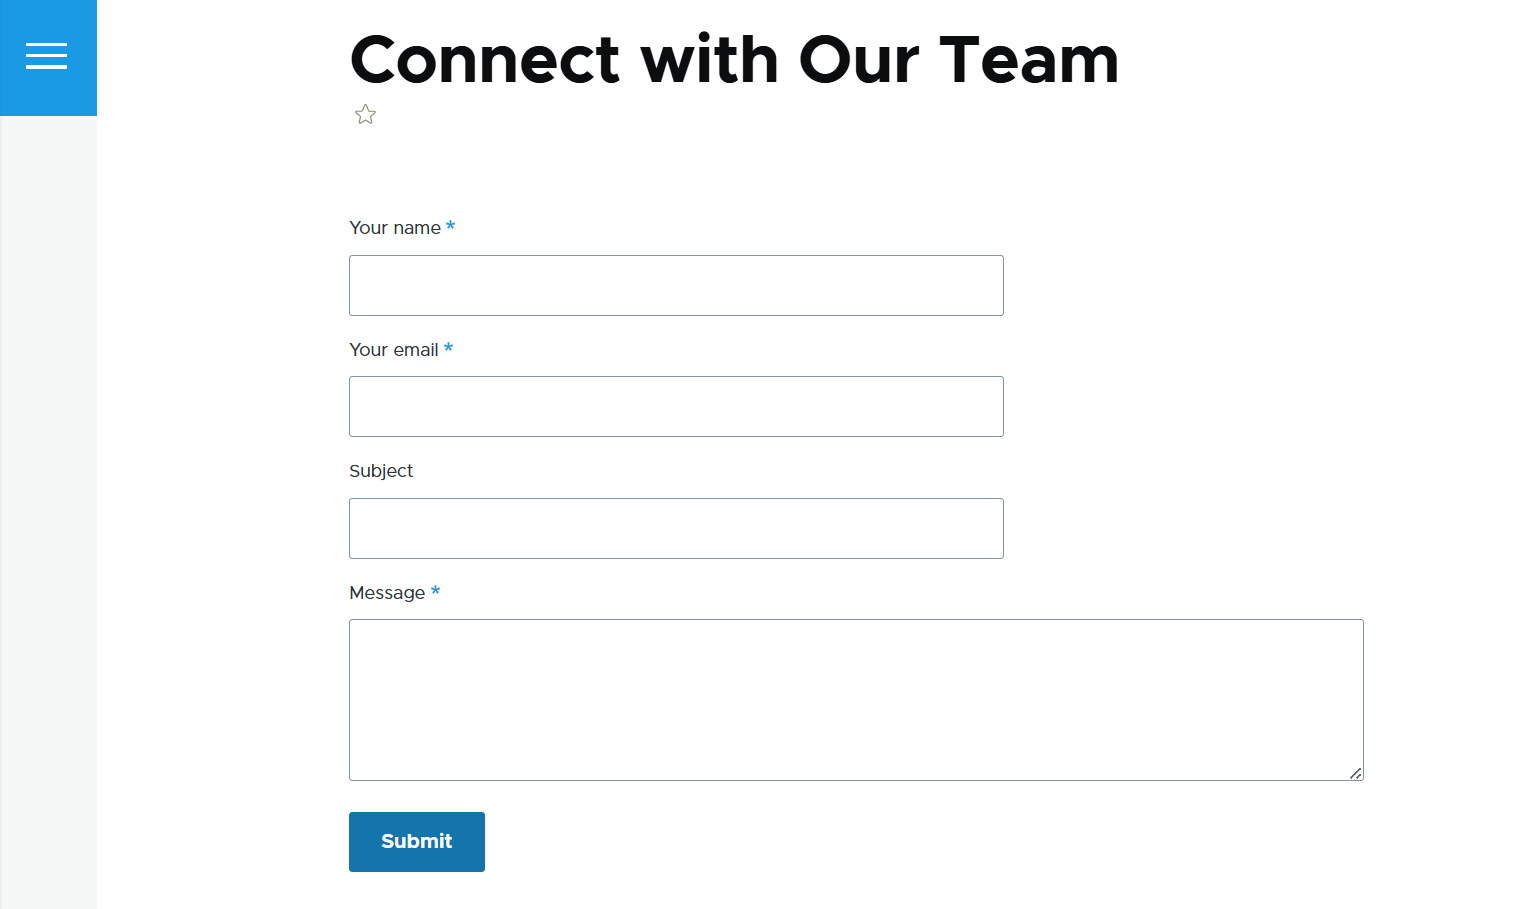
- Name
- Subject
- Message
The name and subject can be “Text field” elements, the message can be “Text area,” which is for a larger text, and for emails, there is a dedicated “Email” element in Webform.
Depending on your use case, you might also benefit from using composite elements like “Name,” “Contact,” “Address,” and “Telephone Advanced.” They instantly add pre-packaged groups of fields, with the option to uncheck everything you don’t need using the element checkboxes. Drupal manages these “composite elements” as a single unit, keeping your backend building screen cleaner and ensuring perfect mobile-responsive alignment on the frontend.
The customer feedback survey
Webform gives you a native, deeply integrated feedback system for your business, so you don’t need any expensive third-party platform like SurveyMonkey.
Suggested structure:
- Customer satisfaction rating
- Open-text feedback area (for an optional comment)
- Name (optional)
- Email (optional, just in case there is an issue to follow up with)
Two types of Webform elements are great for customer satisfaction forms:
- Rating - this gives a 5-star rating widget.
- Radios - provides an element with radio buttons.
- Scale - provides a scale with numbers.
- Table select - gives a table with radio buttons or checkboxes.
- Likert - a more complex element that organizes feedback into a grid where multiple items can be evaluated across the same scale.
You can combine multiple evaluation elements in the same form. For example, ask users to rate an event from 1 to 5 with the “Rating” element, and then discover what they think specifically about the sessions, the food, and the accommodation via the “Likert” element.
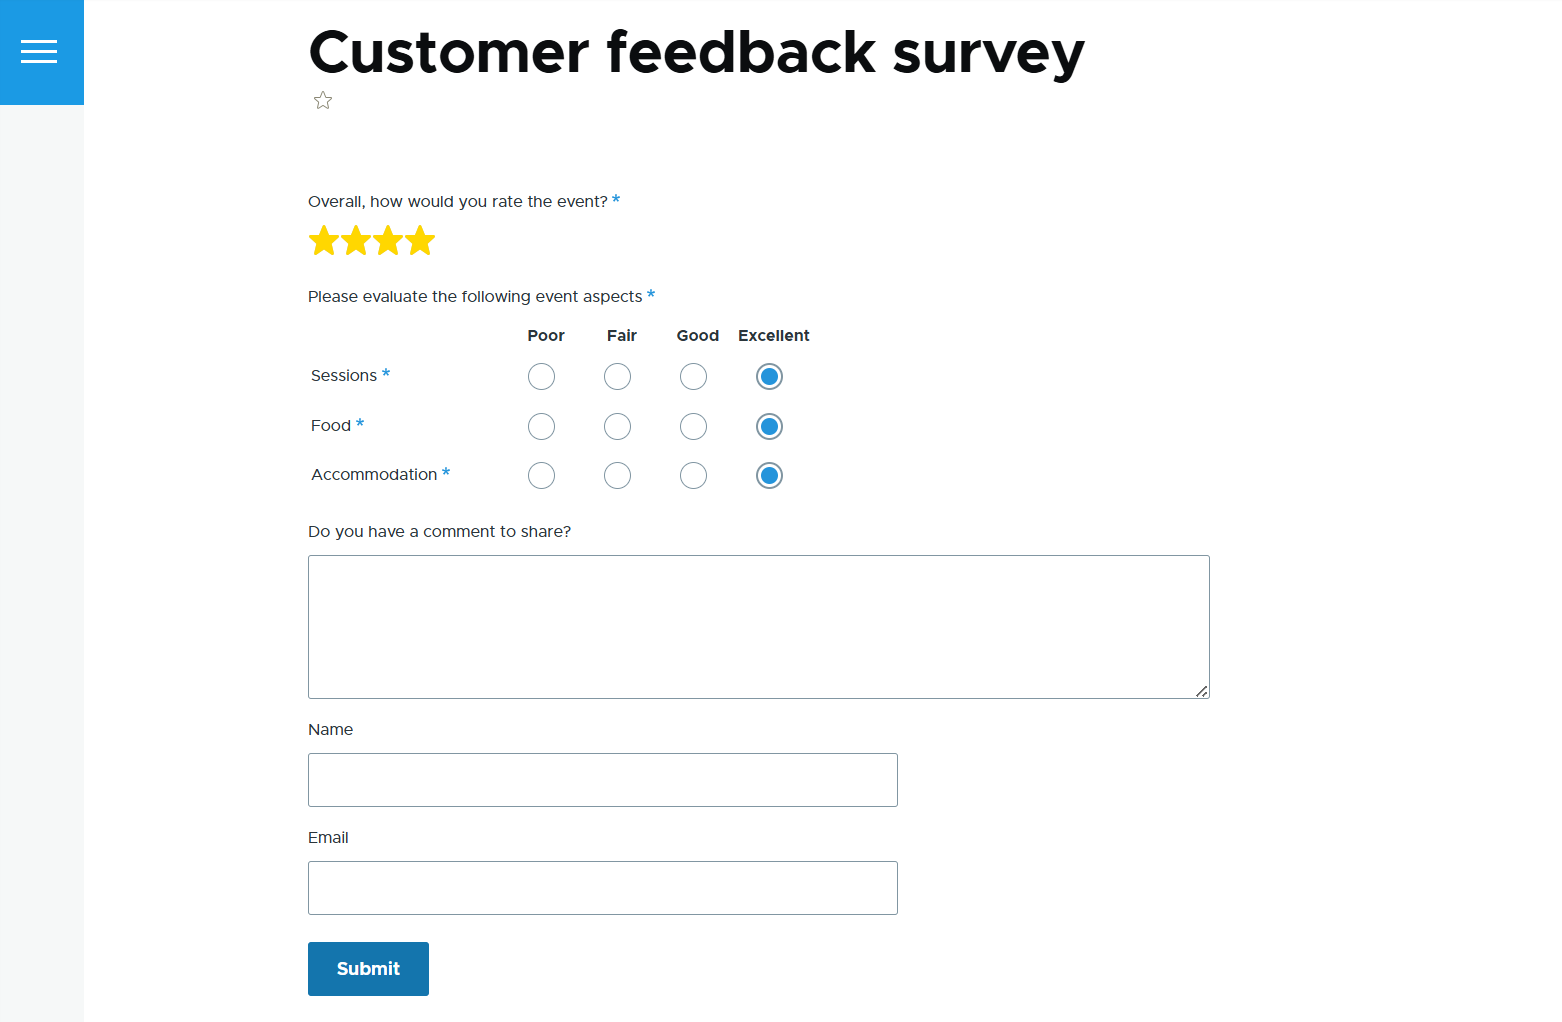
Start your form with the “Rating” element with a title like “Overall, how would you rate the event?” You can configure the minimum and maximum values, alongside the star size and other details.
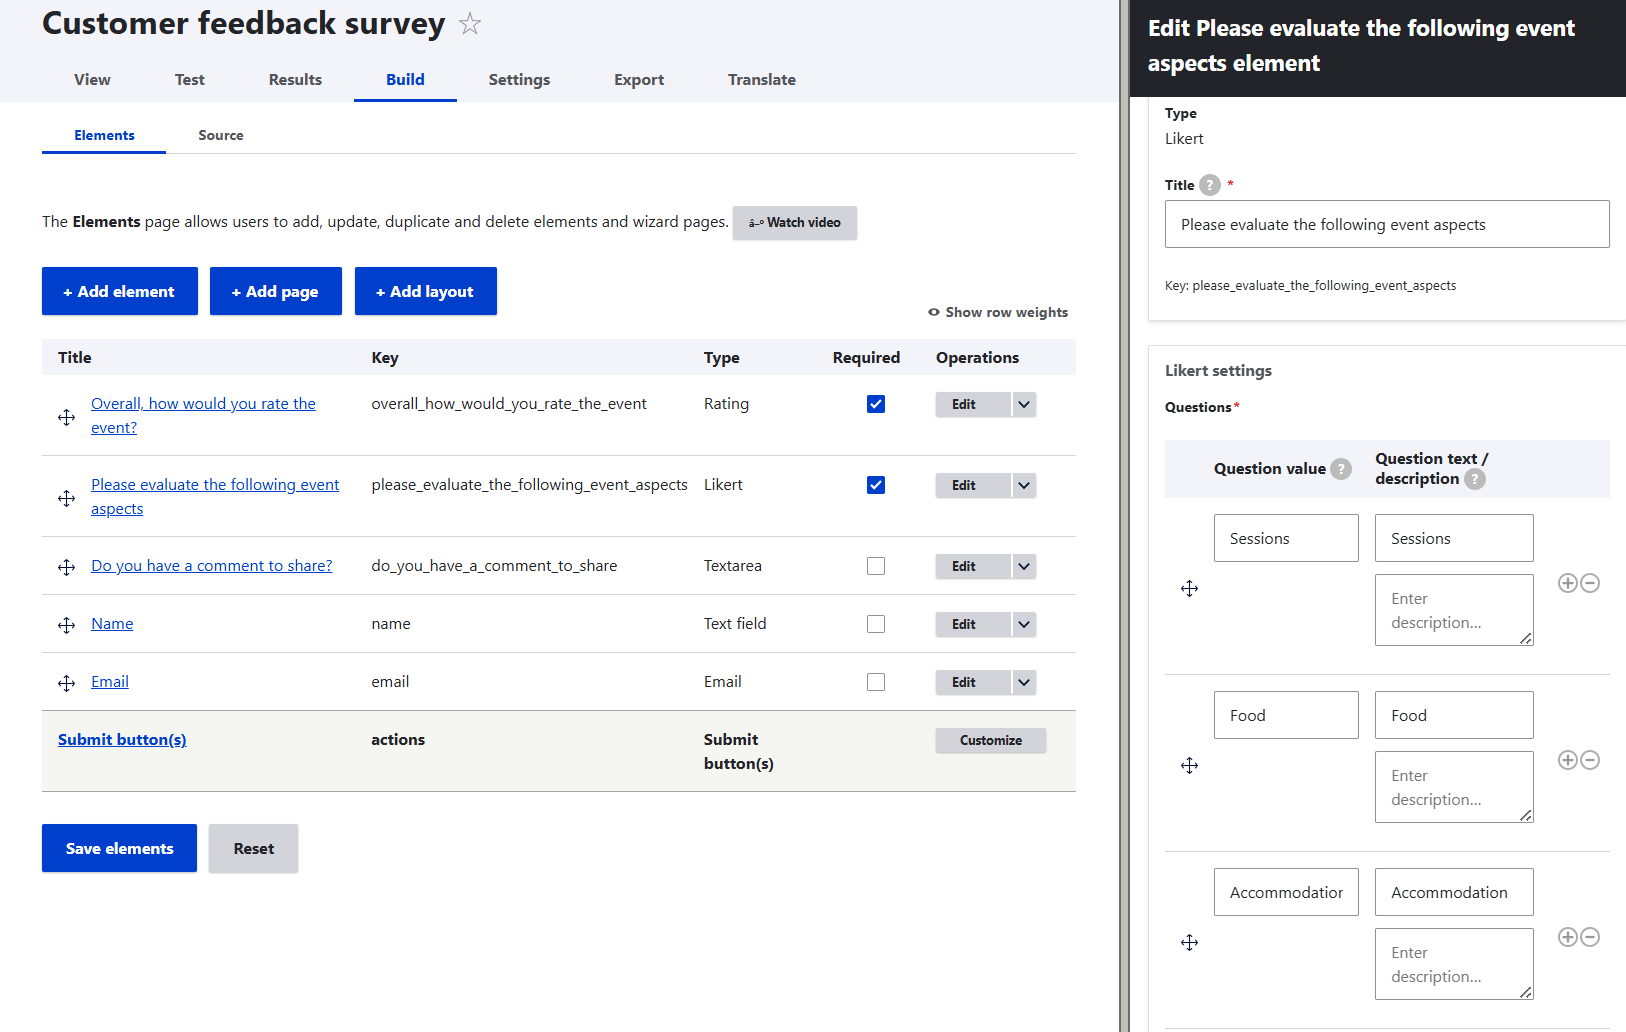
Directly beneath this, add the “Likert” element with a title like “Please evaluate the following event aspects.” Enter the aspects (such as Sessions, Food, and Accommodation) into the
“Questions” box, creating the horizontal rows. Finally, enter your satisfaction scale (such as Poor, Fair, Good, and Excellent) into the “Answers” box, defining the vertical columns.
As an option, you might check out a couple of ready-to-go evaluation widgets on the “Element options” subtab for the “Radios” element. They are meant for satisfaction, comparison, ten-scale assessment, and more.
If you want to know your audience’s feedback, you might also like to check out a post on adding rating widgets to your Drupal content.
The newsletter signup
A well-built newsletter signup form will help you gather subscriber emails as quickly as possible without getting in the users’ way.
Suggested structure:
- Privacy policy consent checkbox

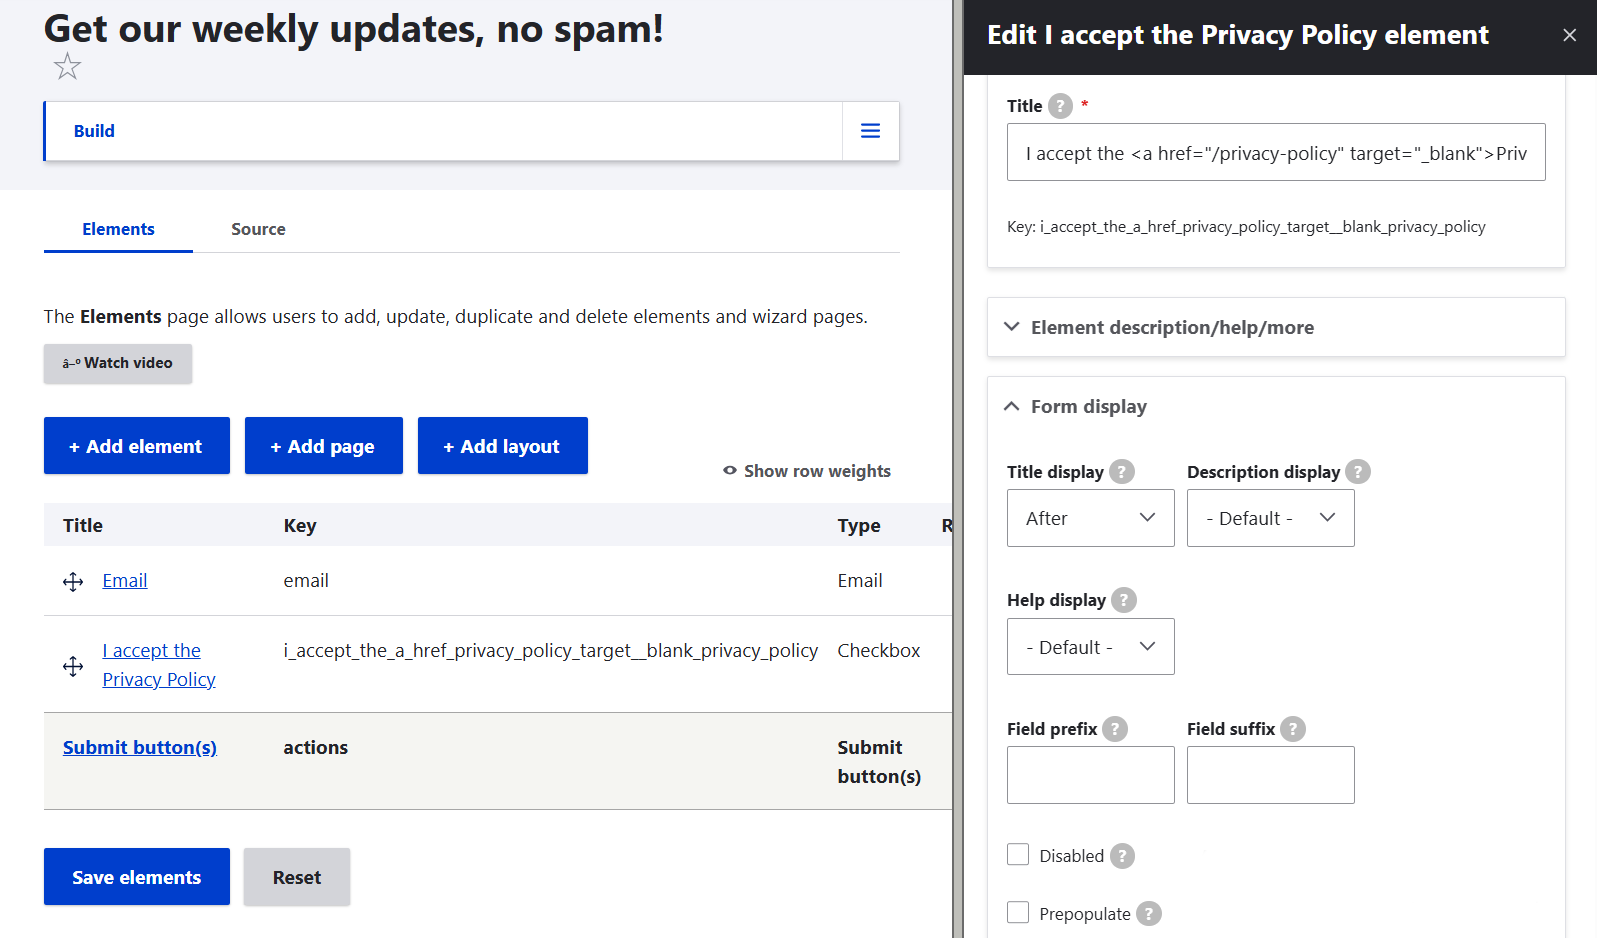
For the privacy policy consent checkbox, use a standard “Checkbox” element. To ensure it is legally compliant and user-friendly, you should include a link to your privacy policy page. Webform allows you to do it via standard HTML inside the element title. To create a seamless link that doesn’t take the user away from their half-filled signup form, use the target=”_blank” attribute so the privacy policy opens in a new tab:
I accept the <a href=”/privacy-policy” target=”_blank”>Privacy Policy</a>
The quote request form
An interactive quote form transforms passive website traffic into high-value sales leads by capturing structured project data.
Suggested structure:
- Name
- Type of project
- Text area for a comment
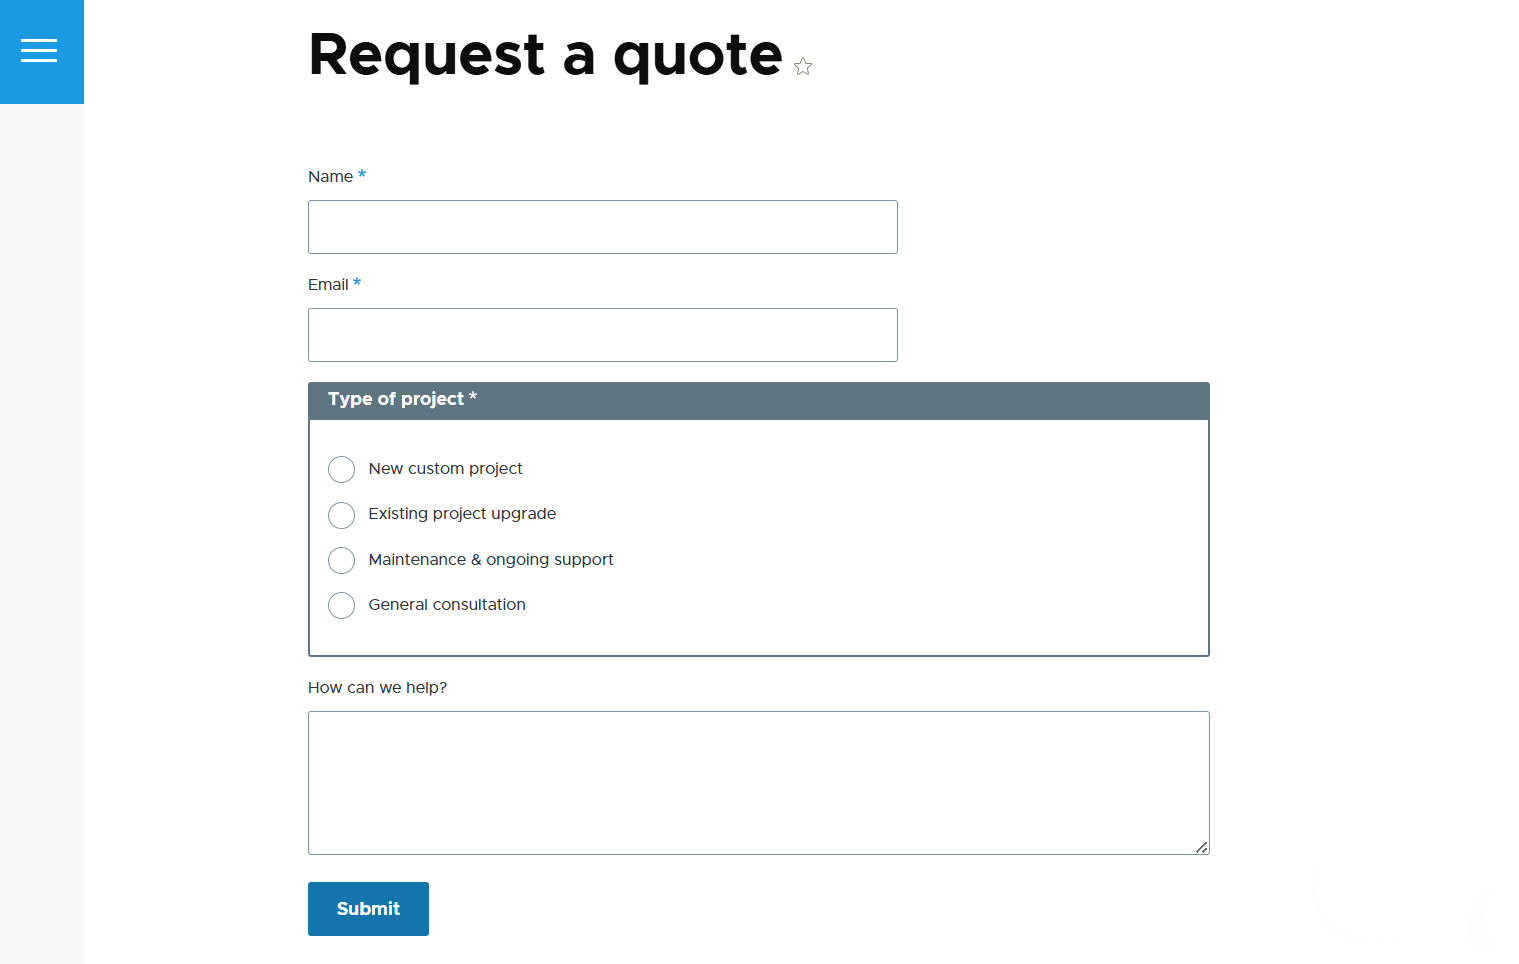
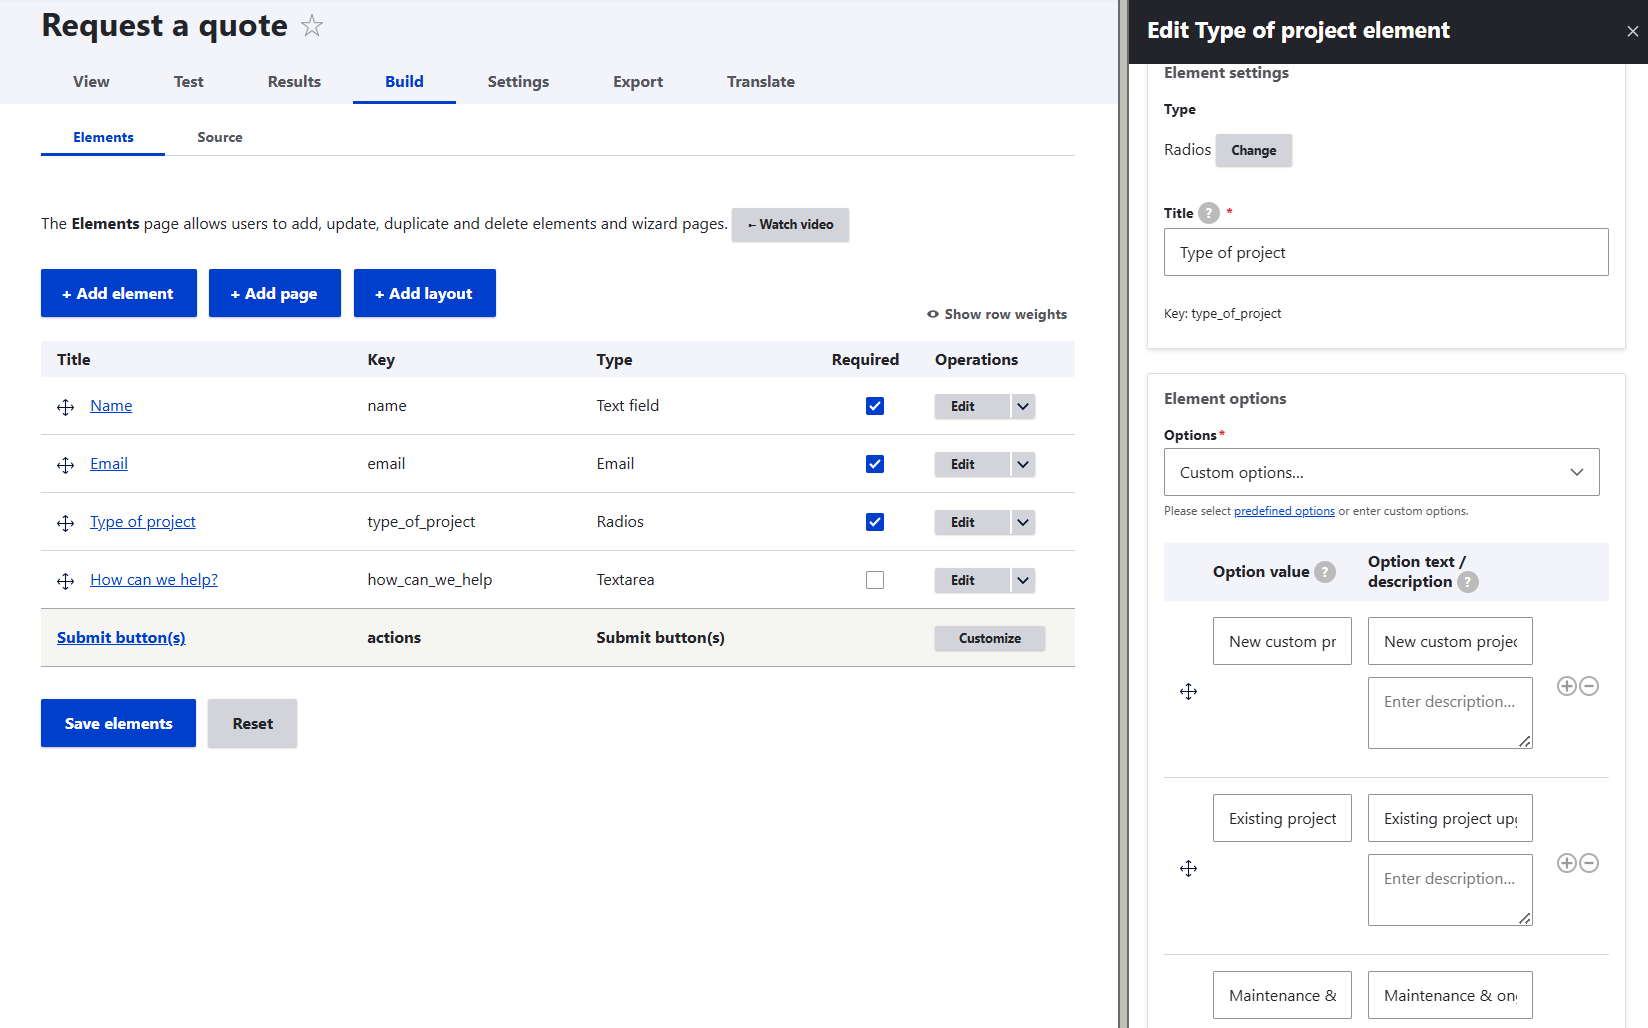
You can use the “Select” or “Radios” element for the type of project with a categorization based on your needs, for example:
- New custom project
- Existing project upgrade
- Maintenance & ongoing support
- General consultation
It might be great to add a standard “Text area” for the prospective customer’s comment on how you can be useful to them: “How can we help?” To set up smart routing to the sales team for manual follow-up, just provide their specific email in “Emails/Handlers.”
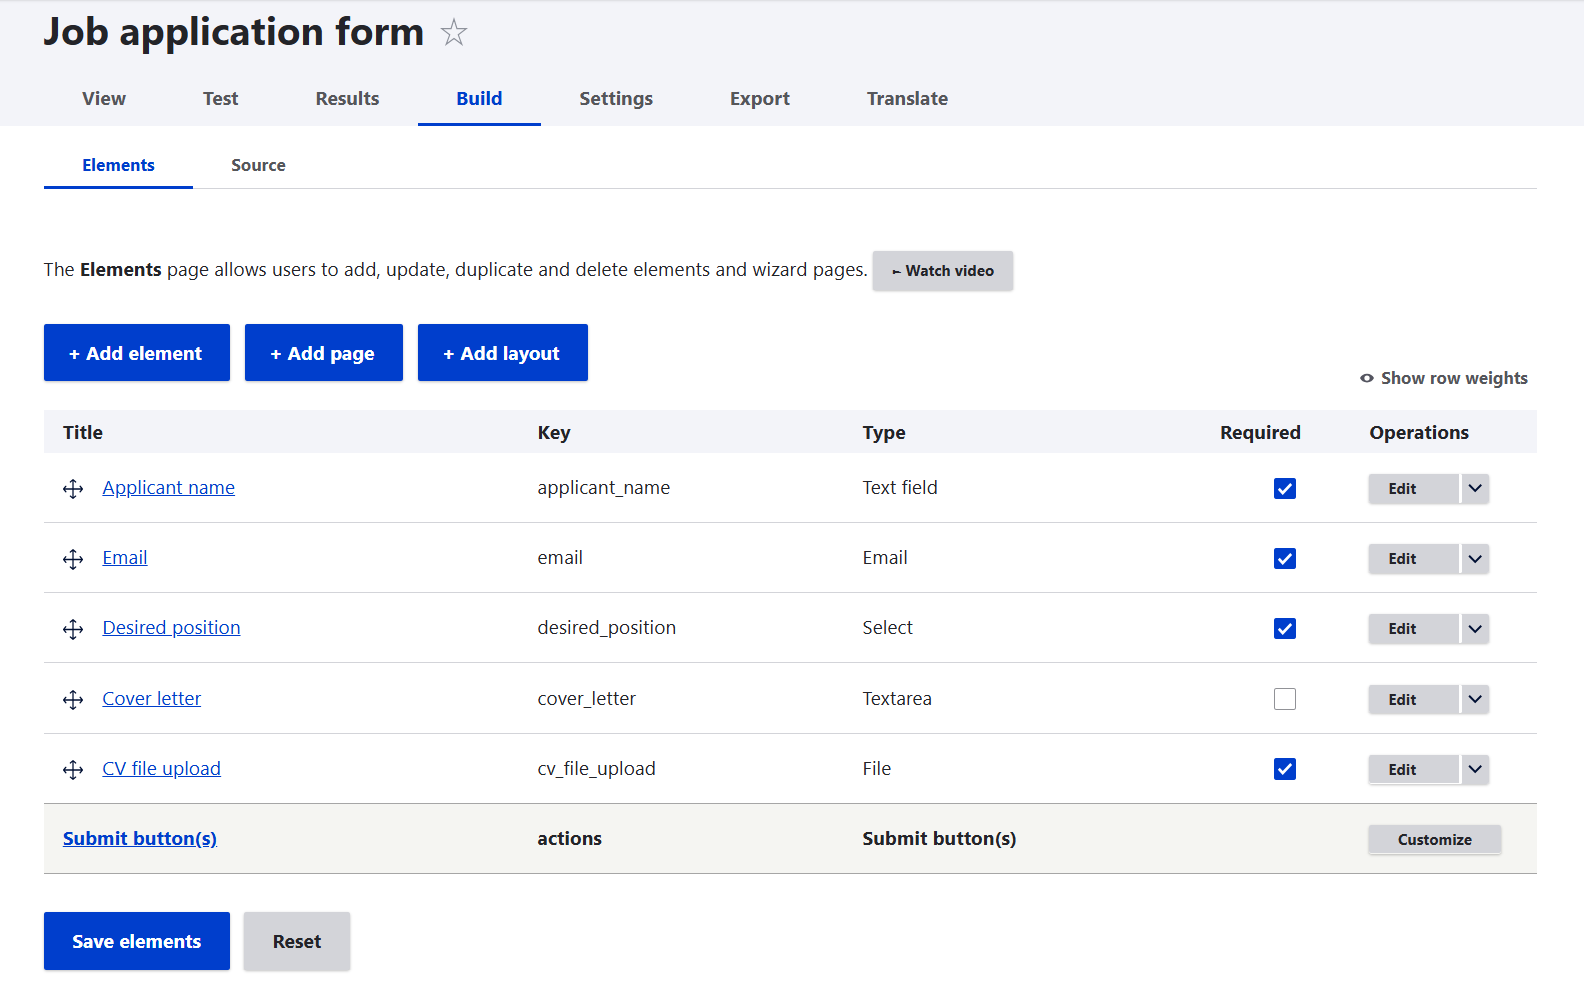
The job application form
A job application form turns your website into a powerful recruiting tool that streamlines how you attract and evaluate talent.
Suggested structure:
- Applicant name
- Desired position
- Cover letter
- CV file upload button
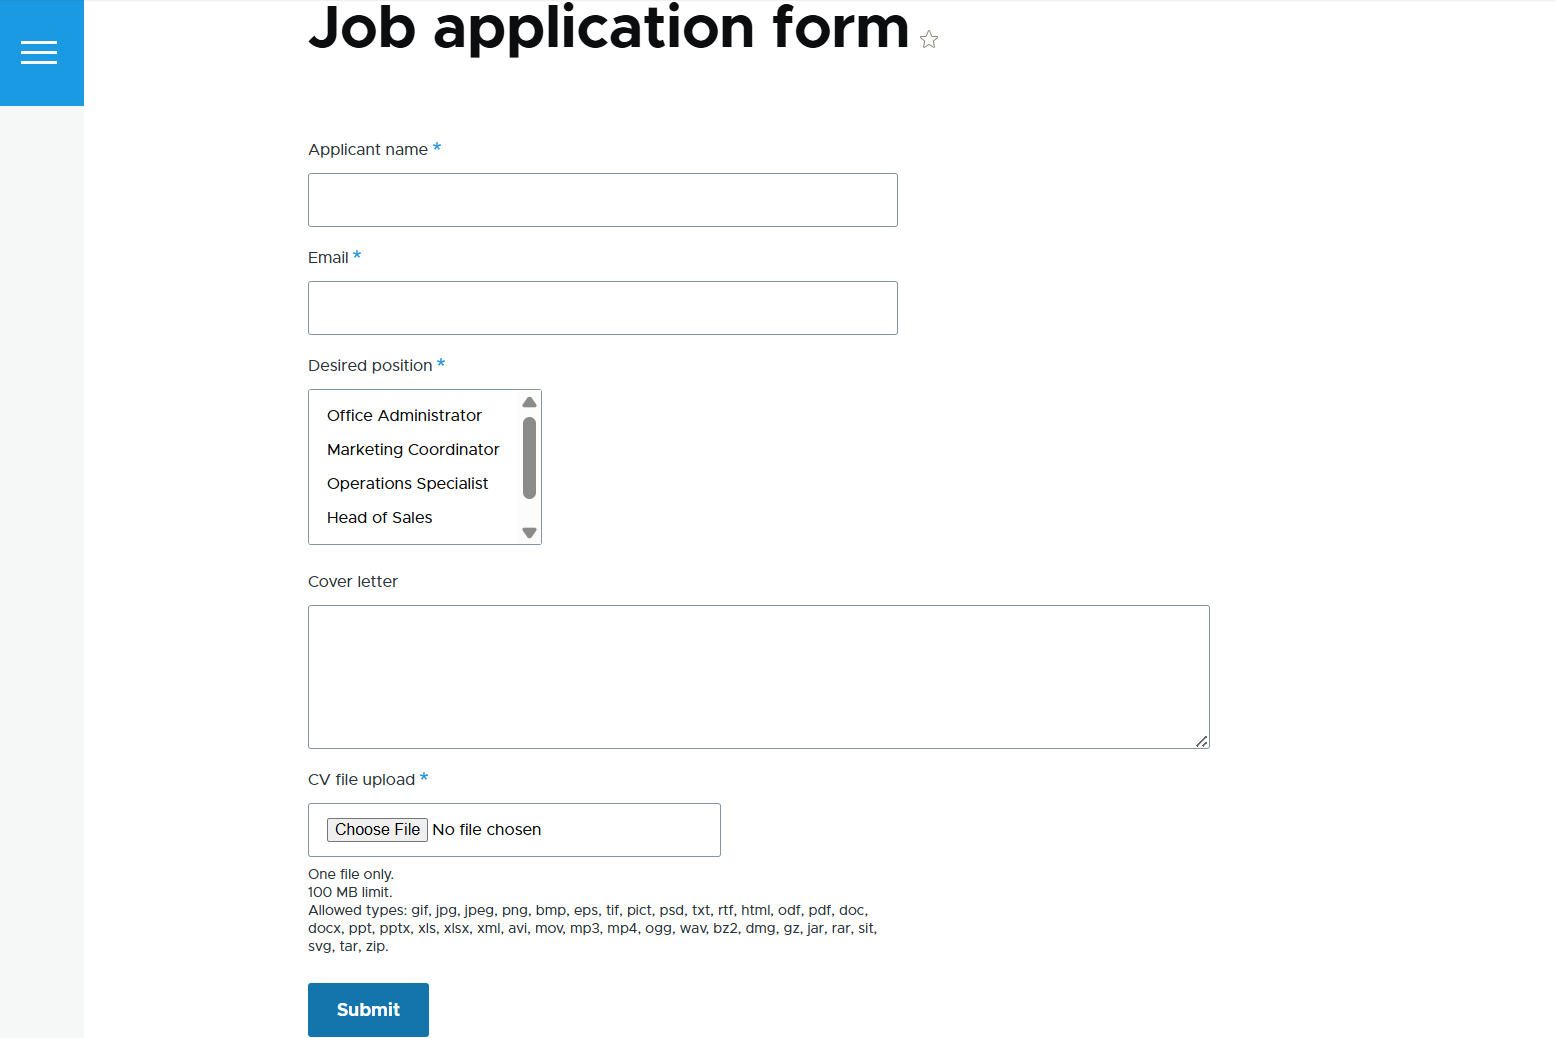
For displaying available job positions in a dropdown, you can use the “Select” or “Radios” element, where you specify the position options. For the file upload field, Webform provides the “File” element. You can then finish the setup in “Emails/Handlers” by specifying your HR team’s email address, where the job applications will be routed.
Need more customization for your Drupal online forms?
By showing you how to build these simple, but essential, online forms, we’ve only scratched the surface of the Webform module’s capabilities. Its built-in configuration settings can comfortably handle 95% of your standard business needs directly from the admin interface.
Furthermore, Drupal holds an even stronger card up its sleeve for complex enterprise workflows: the Form API (FAPI). If your organization requires deep, programmatic control, such as integrating form submissions with legacy databases, executing real-time server-side calculations, or building entirely bespoke interactive applications, Drupal lets developers construct forms purely via code.
The specific implementation depends on your use case and requirements, but one thing is certain: everything is possible with the right Drupal development team in your corner, so feel free to reach out if you need help bringing your form ideas to life.