
Let Your Team Shine: How to Create a Staff Directory on Your Drupal Site

A staff directory is usually one of the most heavily trafficked sections of a website. It introduces the human faces behind your institution, lets your audience learn more about them, and makes it easy to find the right contact.
Drupal has all the right tools to build a flexible, searchable, and visually appealing staff directory. This is one of the things Drupal does best: organizing information into clear structures and handling it efficiently.
Our guide will walk through exactly how to build a great staff directory on a Drupal site. We’ll demo one of the possible ways to build a staff directory, using just Drupal’s native administrative tools. Real-world, complex websites often require alternative or more extensive approaches, but this solution showcases Drupal’s built-in strengths very well. While it focuses on higher education institutions, this technical blueprint is fully adaptable to any industry.
Building a staff page in Drupal that all audiences will love
The faculty profile directory acts as the digital front door to the human side of a campus. It needs to accommodate completely different styles of searching because a university serves incredibly diverse user personas:
- The prospective student and family. Future students and parents are exploring the campus vibe and want to see who will be teaching them or their children. They are looking for friendly faces and approachable professional biographies.
- The rushed undergraduate. Current students are usually on their phones between classes, looking for immediate contact data. They need to find an email address, an office telephone number, or weekly office hours in two seconds flat.
- The peer researcher or journalist. These audiences are looking for collaborators or checking credentials. They need to see academic titles, published works, and specific areas of expertise.
The example staff profile pages in our guide will include all these details. Next, we’ll organize the profiles into a directory page that displays the key information, along with “Learn More” buttons that lead to full profile pages. The directory page will also feature filters to help users quickly and easily find the staff they need.
In Drupal, it’s a perfectly interconnected system: whenever a university team adds, edits, or deletes a specific profile, the information automatically updates across the directory itself.
How to create a staff directory in Drupal: step-by-step guide
Phase 1: Build your staff profiles
To build a staff directory in Drupal, we first need to specify exactly what information a staff profile should collect. We do this by creating a content type and pairing it with taxonomy vocabularies for easy categorization.
Step 1: Create departments and areas of expertise
Before building the profile itself, we need a clean way to organize staff by department and area of expertise. Instead of typing plain text on every profile, we will use Drupal’s taxonomy system to ensure consistency and power our search filters later:
- Navigate to Structure > Taxonomy in your Drupal admin dashboard, click “Add vocabulary,” name it “Departments,” and click “Save.”
- Click “Add term” to add specific departments one by one (like “Admissions,” “Biology,” “Computer Science”). Click “Save” after each one.
Similarly, create the “Areas of Expertise” vocabulary and populate it with terms (like “Artificial intelligence,” “Cybersecurity,” “Climate Change).
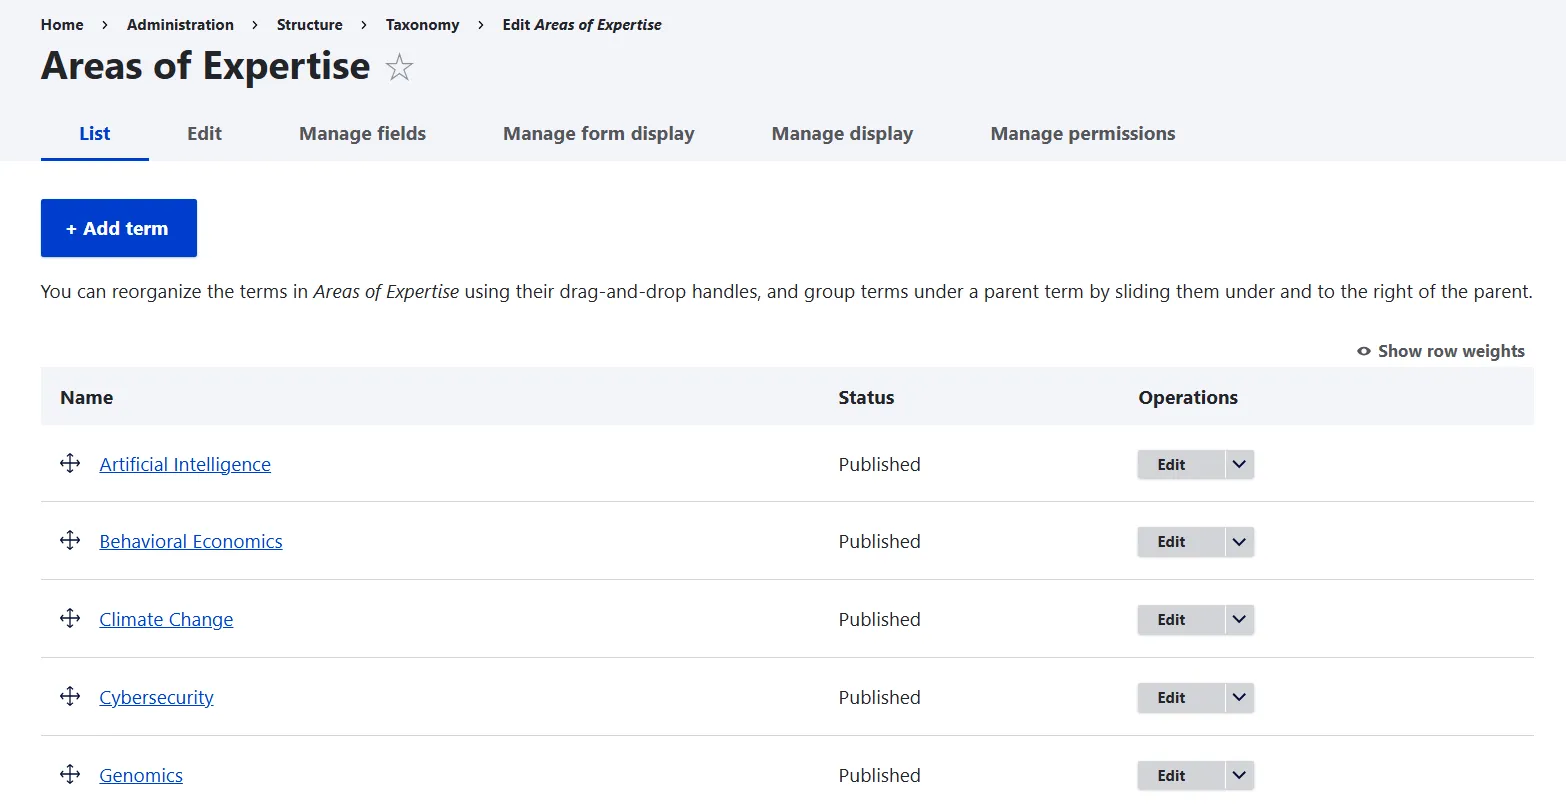
A Drupal taxonomy vocabulary for university staff’s areas of expertise
Step 2: Set up the “Staff Profile” content type
Now, we will create the dedicated “container” that will hold all our individual staff profiles. Navigate to Structure > Content types, click “Add content type,” and name it “Staff Profile.”
The title field in this content type can be used for the staff’s full names. Under “Submission form settings,” you can change the “Title field label” from “Title” to “Full Name” and save the result.
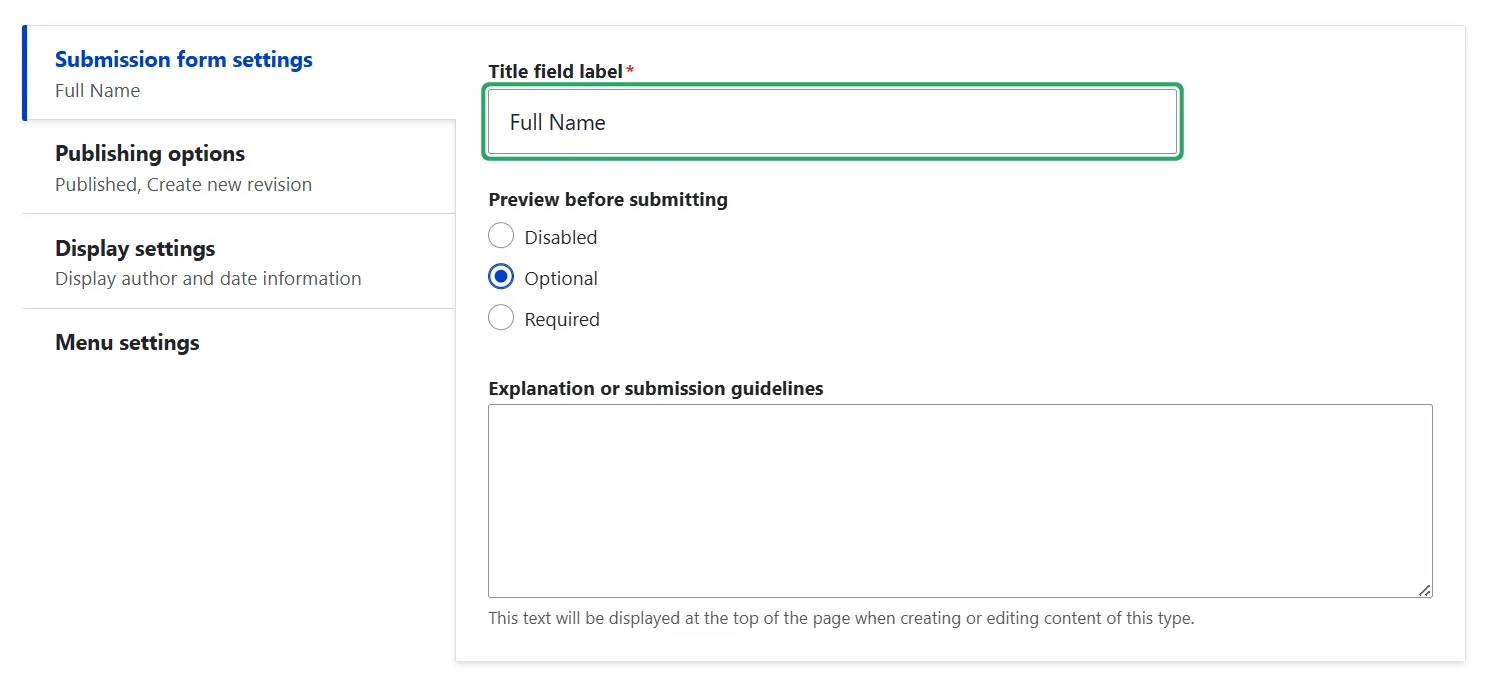
Step 3. Add the fields to the content type
Now, let’s add the specific Drupal fields needed to satisfy our different higher ed institution audiences. To add each field below, click the “Create a new field” button on the “Manage fields” screen. On each field’s settings page, you can check the box to make it a required field.
1) “Bio”
Field type: text (formatted, long)
Depending on your Drupal version, you can:
- re-use the default “Body” field by changing its label to “Bio”
- or will need to create a new one manually (the latest Drupal versions do not provide this field out of the box
A field’s label is what the users see: for this field, the label can be “Bio.”
2) “Profile Photo”
Field type: Reference > Media
For modern Drupal websites, the best practice is to use images from the Media Library. Alternatively, you could also select “File upload > Image” as the field type.
Media images are a different data type from content, so you’ll need a field of “Reference” type. Under “Choose a field type,” select “Other.” Then under “Type of item to reference,” choose “Media,” and under “Reference type,” choose “Image.”
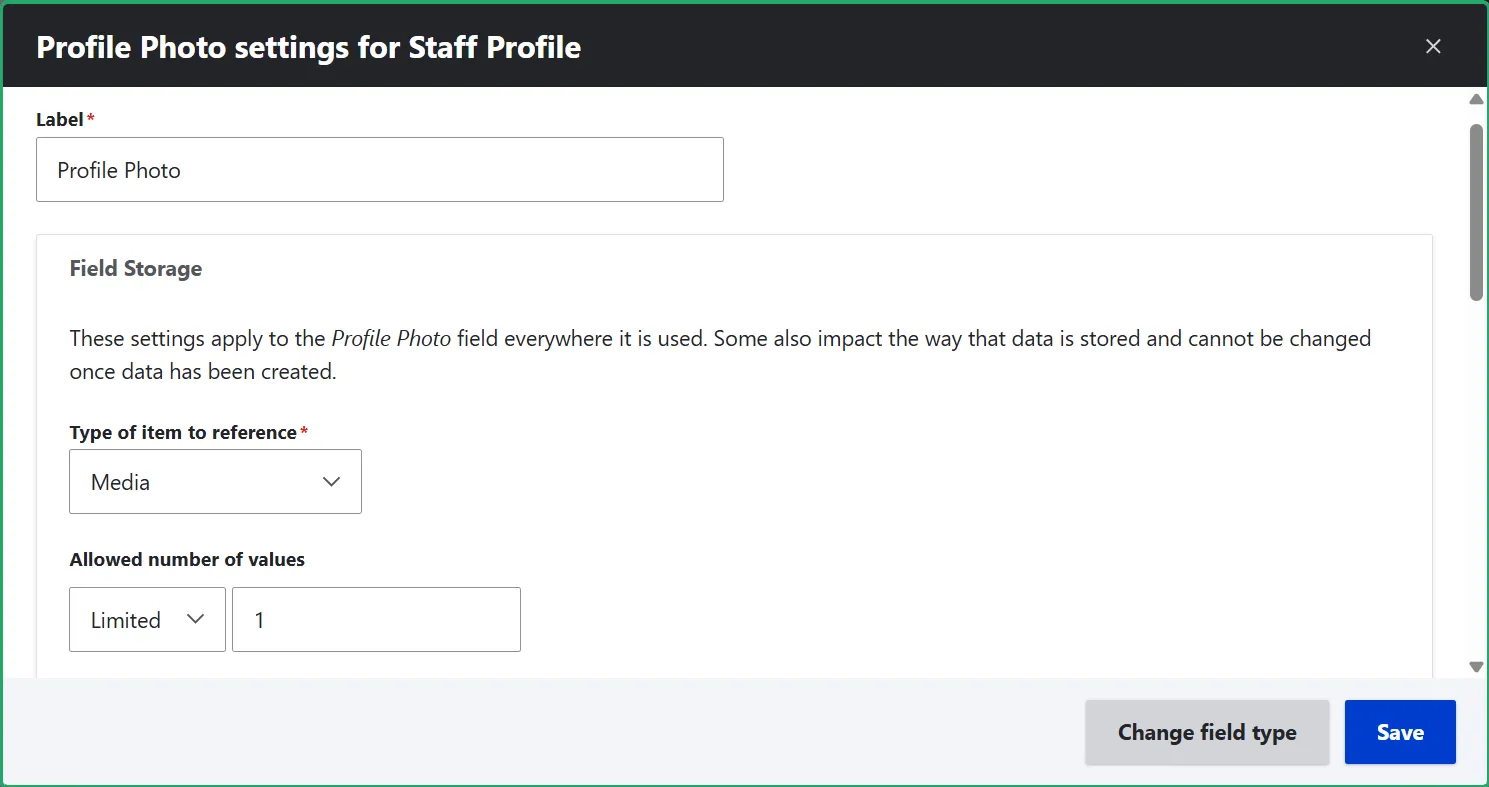
You can restrict allowed extensions to PNG, JPG, and JPEG. To make it easy to add university staff profile photos from the Media Library, you could also change the widget for this field from “Autocomplete” to “Media Library” on the “Manage form display” page.
3) “Academic Title”
Field type: Text (plain)
4) “Email Address”
Field type: Email
5) “Office Phone”
Field type: Telephone number
Alternatively, it’s ok to use a simple text field for telephone numbers. However, for the best field type, specifically suited to telephone numbers, you might need to enable the Telephone module on the “Extend” tab. It is part of Drupal core but not enabled out of the box.
6) “Office Hours”
Field type: Plain text
Keeping this as a plain text field allows editors to type simple notes like “Mon/Wed 2-4 PM” without needing a full text editor.
7) “Department”
Field type: Reference
This is where we connect the profile to the taxonomy vocabulary we created in Step 1. Under “Choose a field type,” choose “Taxonomy term.”
Under “Reference type > Vocabulary,” check the box next to “Departments.”
8) “Areas of Expertise”
Field type: Reference
The setup is similar to “Department,” but you’ll need to choose the “Areas of Expertise” as vocabulary.
9) “Publications”
Field type: Text (formatted, long).
It’s a rich-text area to list the published works.
Phase 2: Fill out your staff profiles
With these fields configured, your data structure is completely ready. Now it’s time to go to Content > Add content > Staff Profile and create your university staff profiles, filling out all the information about each staff member.
Phase 3: Design the profile layout
By default, Drupal will display all your new fields stacked in a single, unformatted vertical column. However, we can use Drupal’s native Layout Builder to quickly arrange them into a two-column layout instead.
Enable the Layout Builder module on the “Extend tab” (if it’s not yet enabled on your Drupal website). Navigate to Structure > Content types > Staff Profile > Manage display. Scroll to “Layout options,” check the “Use Layout Builder” checkbox, and click “Save.”
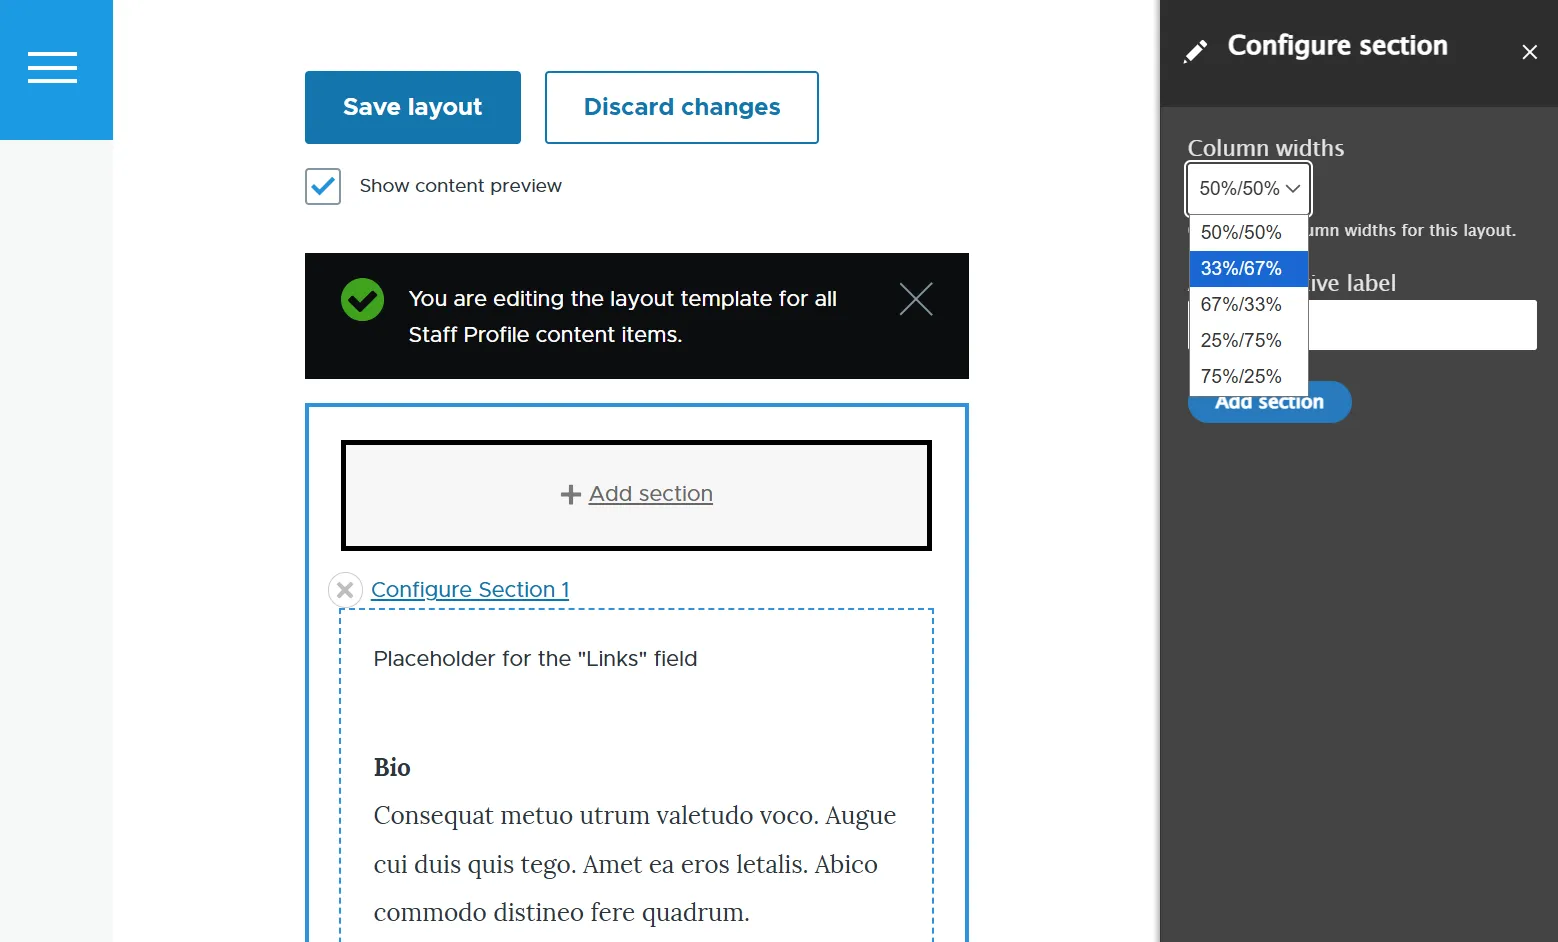
Click the new “Manage layout” button that appears. Click “Add section” at the top and choose a two-column layout (ideally a 33%/67% split).
Click “Add block” inside each column to populate them with blocks. The block selection sidebar will open. Scroll down to the “Content fields” category to find your university staff profile fields that we created in Phase 1.
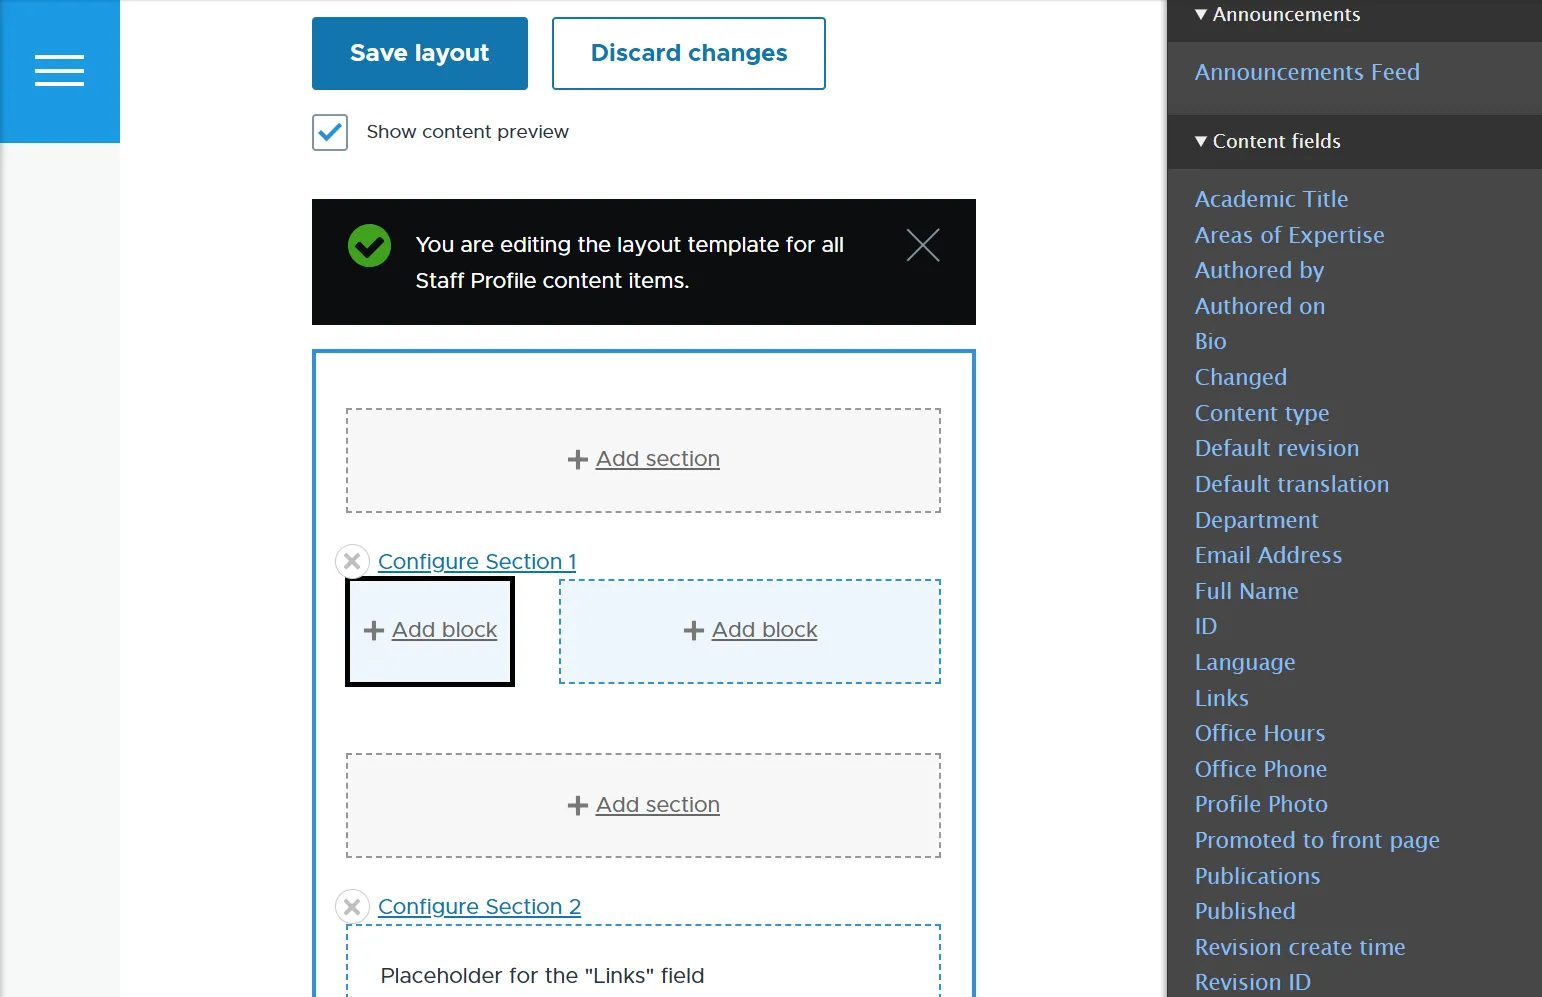
Click on the needed field in the sidebar to select it and click “Place block.” You can set each field label to “hidden,” “inline,” or “above.”
Here are the suggested fields for two columns, along with their specific settings:
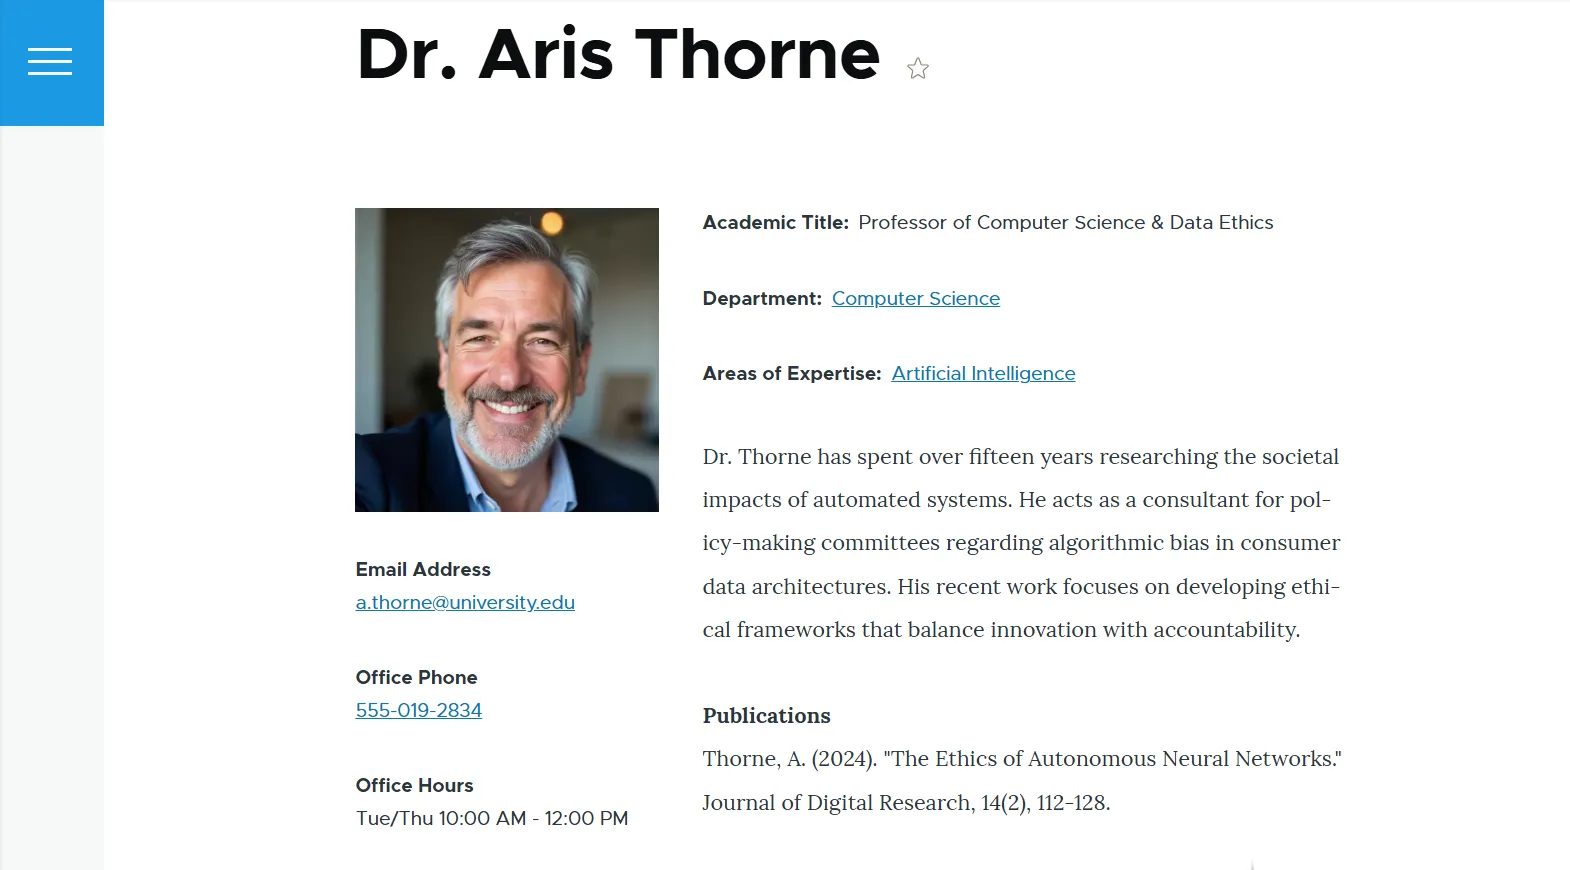
1) Left column (narrow sidebar). This column acts as a dedicated, high-visibility “Contact and quick facts” card.
- Profile Photo. Placed at the very top to anchor the sidebar visually. Set formatter to “Rendered entity.”
- Email Address. Set formatter to “Email.”
- Office Phone
- Office Hours
2) Right column (wide main content). This column acts as the main scholarly narrative, flowing naturally from the introduction to the research outputs.
- Academic Title. Set formatter to “Rendered entity.”
- Department. Check “Link label to the referenced entity.”
- Areas of Expertise. Check “Link label to the referenced entity.”
- Bio
- Publications
Click “Save layout” at the top of the page and check out the newly created staff profile layout for a higher ed institution.
Phase 4: Build the directory
To create the public-facing directory page, we will use Views, Drupal’s native builder of content listings. It is great for creating a clean grid of cards with interactive search filters.
Step 1: Create the view
Navigate to Structure > Views and click “Add view.” Here are the suggested settings:
- View name: Staff Directory
- Show: “Content” of type “Staff profile” sorted by “Title” to get your directory automatically alphabetized by the staff member’s full name. (Note: this default setting will alphabetize your directory by first name. If you need to sort by last name, you’ll need to create a special field for last name in your content type and configure the view to sort the profiles by last name instead)
- Page settings: Create a page
- Page title: Staff Directory
- Path: staff-directory
- Display format: Grid of fields.
- Items to display: Set this to the number of staff cards you want to be displayed per page, and check “Use a pager” if your staff directory is long.
Click “Save and edit.”
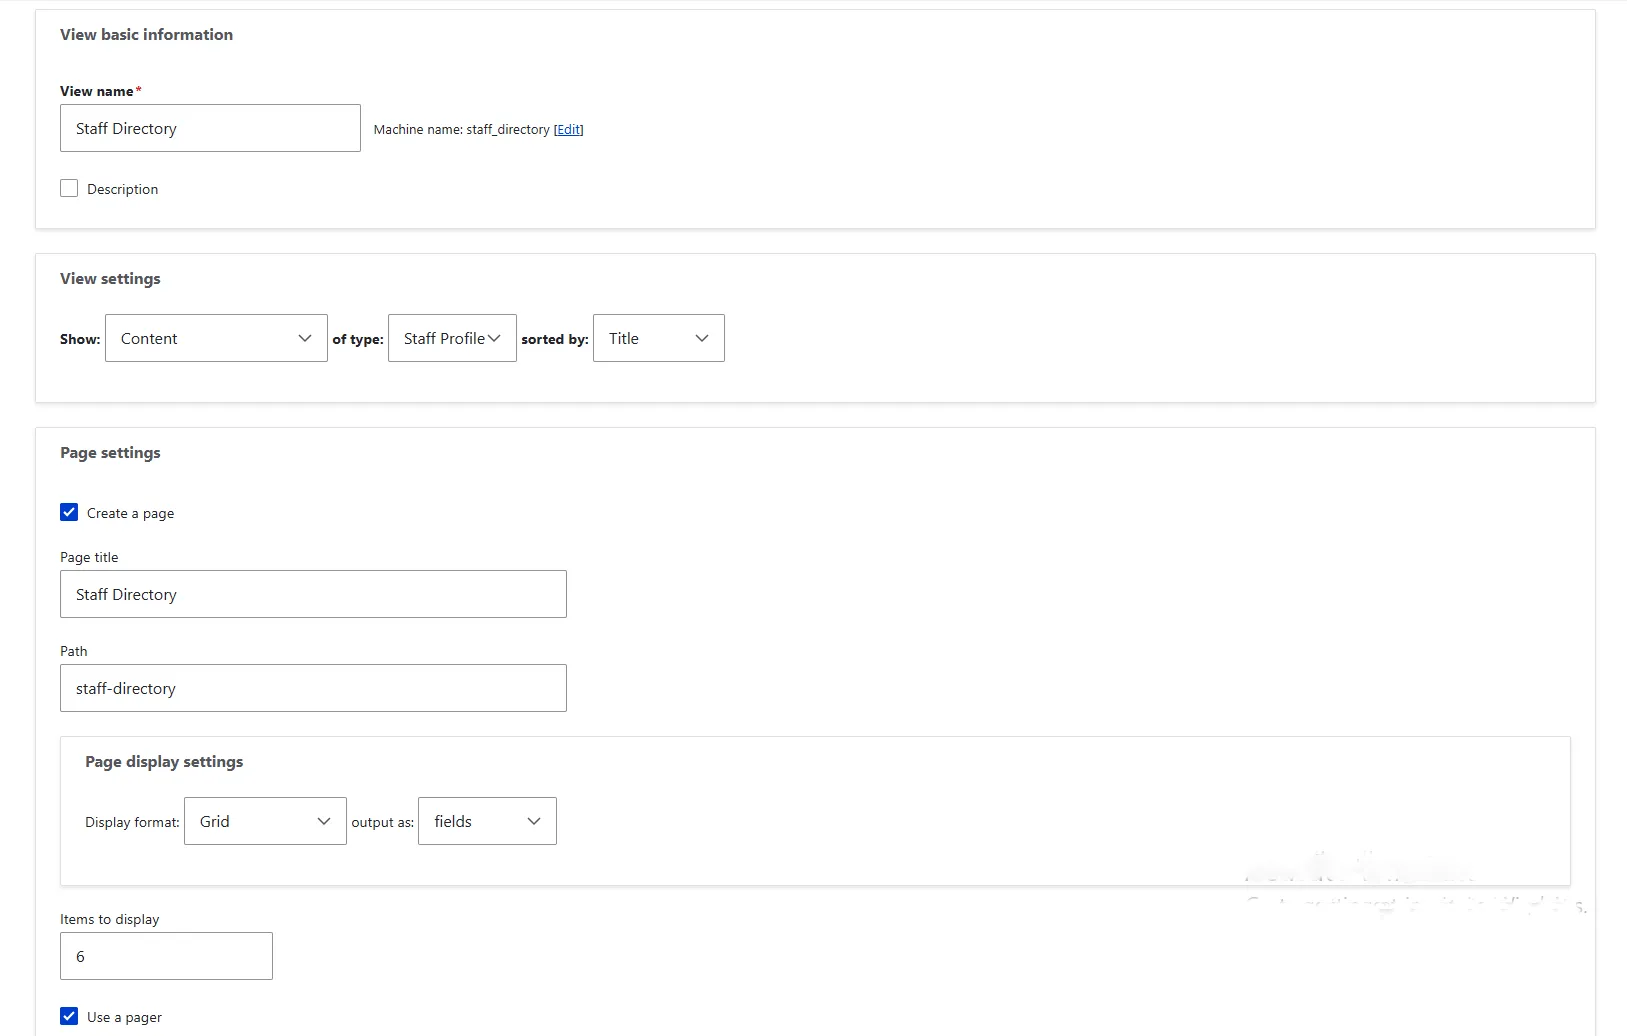
The Drupal view settings for a staff directory
Once redirected to the view settings, you can also specify the number of columns that you would like your grid to display. This is available under Format > Grid settings.
Step 2: Choose the fields to display
Right now, the view only shows the names of the staff members. To have their photos and key contact details right in the grid cards, we need to add the fields.
In the Views settings interface, look for the “Fields” section. Click “Add” and search for the needed fields. Add each field by checking the box next to it and clicking “Add and configure fields.”
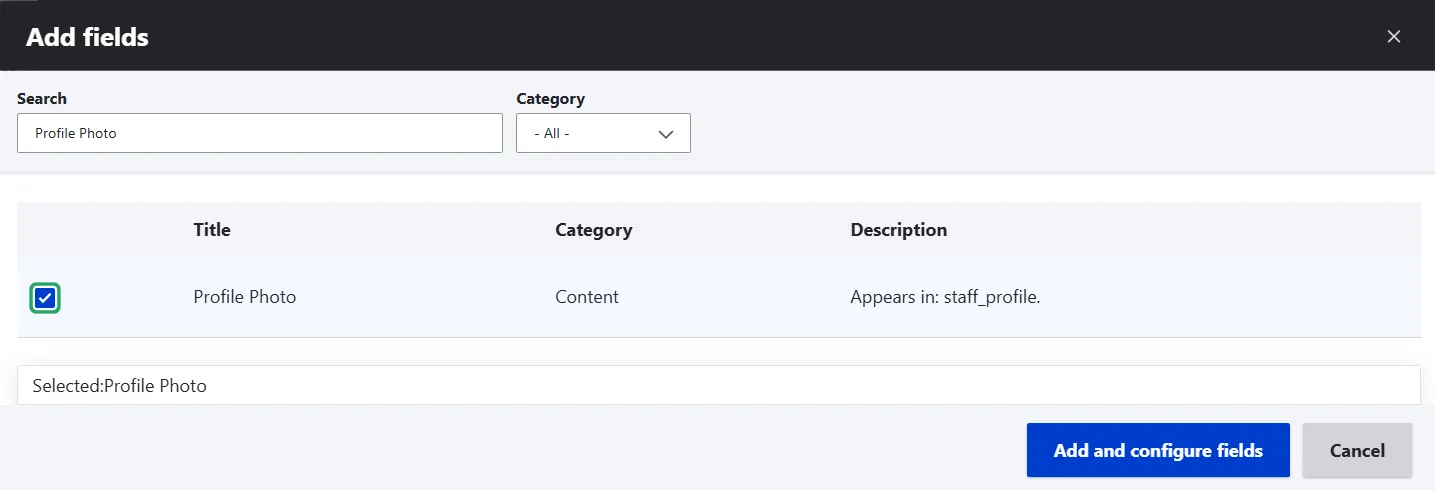
Each field’s settings have an option to create a label that users will see (like “Areas of Expertise”), and you can also click to add a semicolon after it.
Here is a suggested summary of the fields and their specific settings for this view:
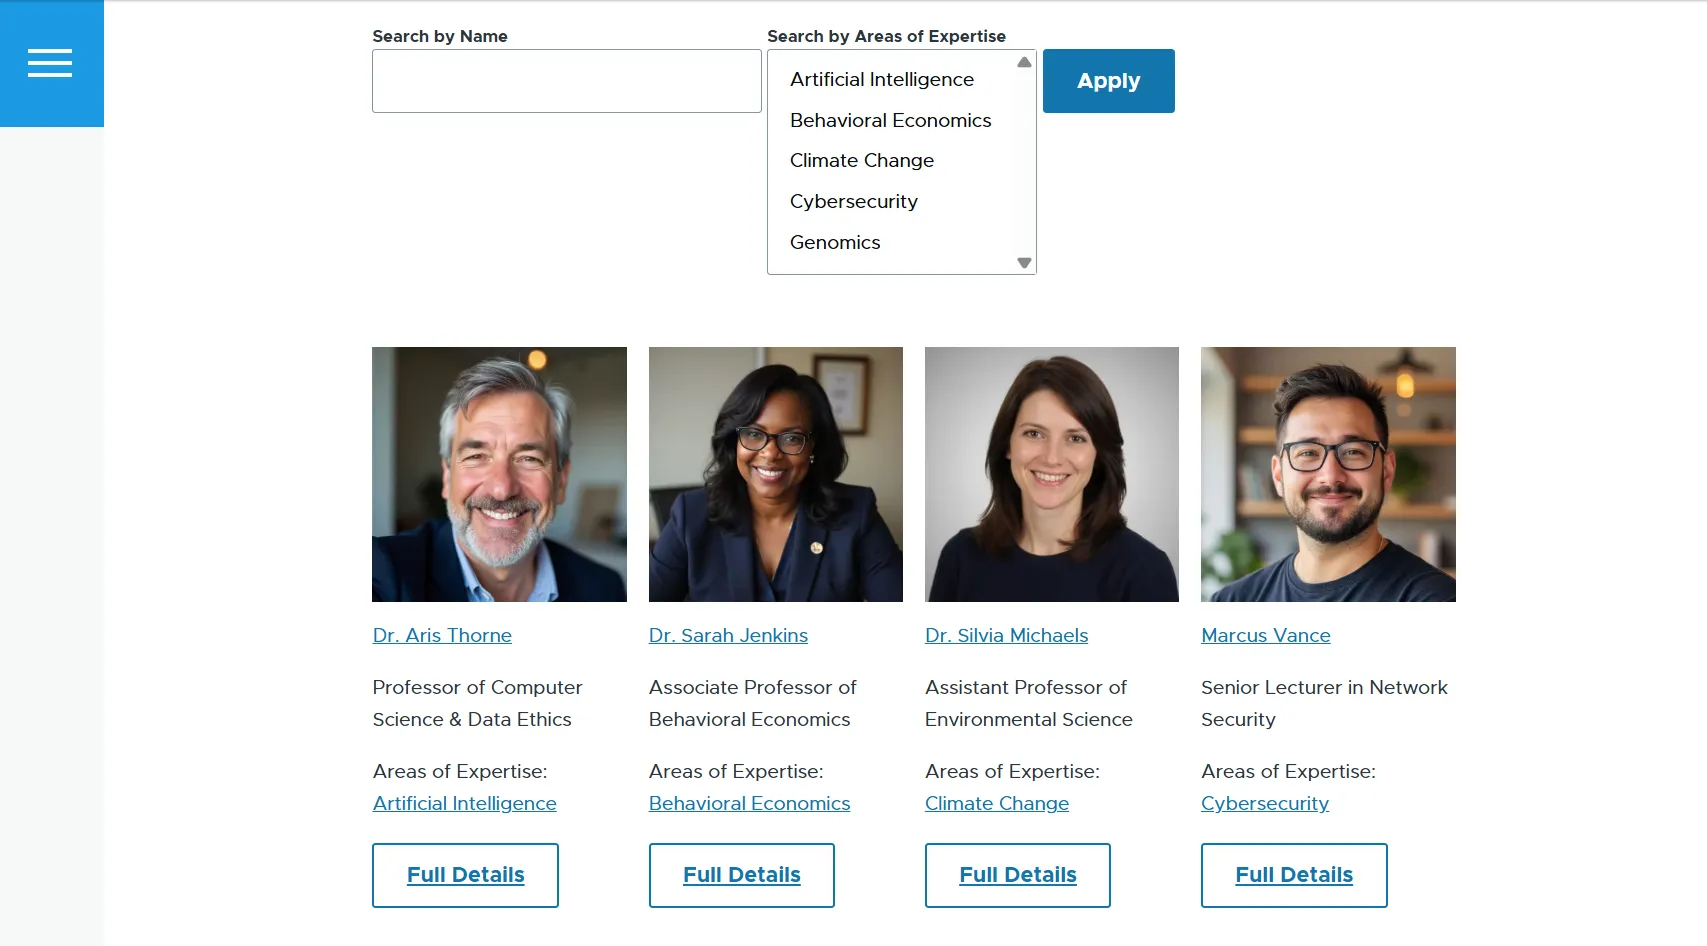
- Profile Photo. Change the “Formatter” dropdown from “Label” to “Rendered entity,” so it shows real photos. Also, especially if the photos do not have uniform dimensions or are large, it’s worth adding an image style that will trim them. It’s also great to have photos on top of every staff card, so you can use the “Rearrange” option next to the “Add” button to drag the “Profile Picture” field to the very top of the list.
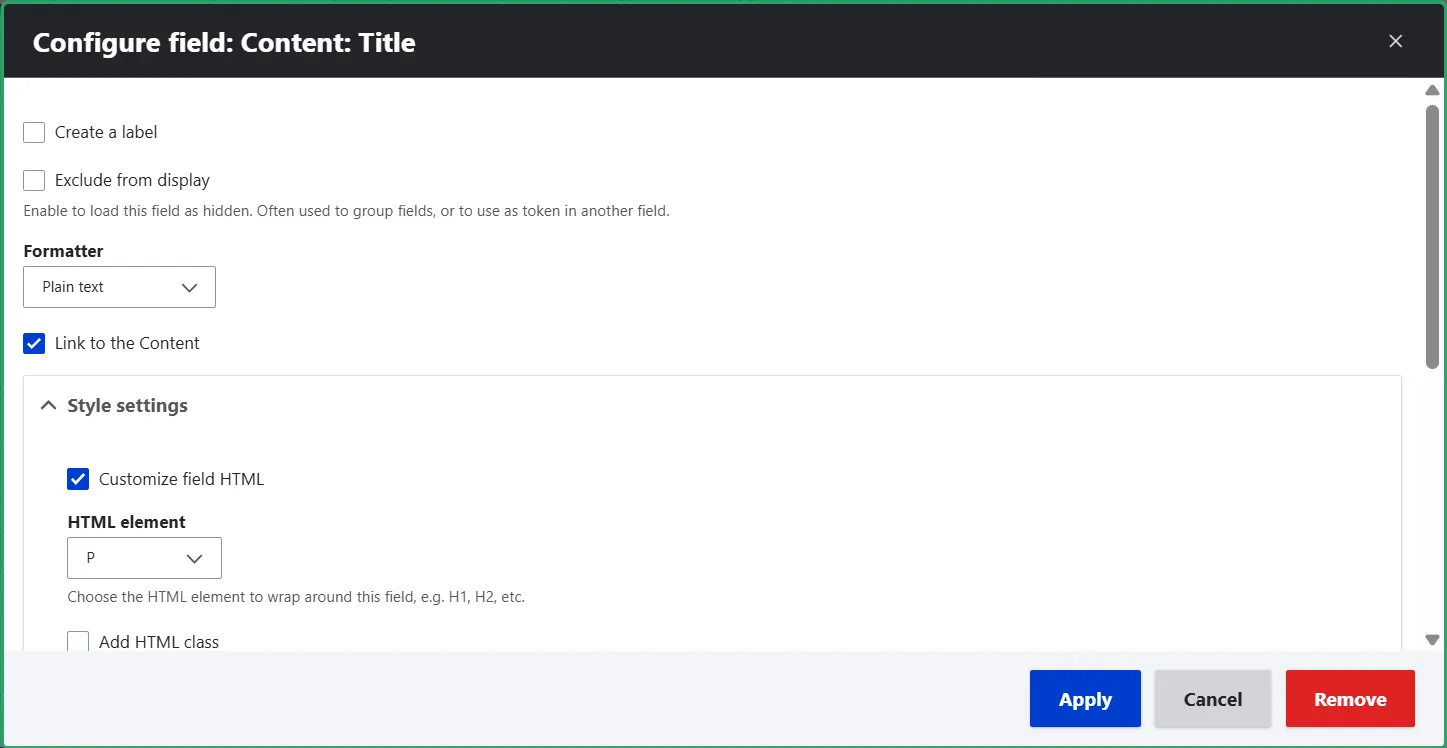
- Name. This field doesn’t need to be added manually: it will be there out of the box because the “Title” field is used for the names in this example. Note: if the profile picture and the name look too close in the view, you can add a space and separate these fields. To do it, go to the “Style settings” tab for the “Title” field, check “Customize field HTML,” and select the “P” element from the dropdown.
- Academic Title. No special settings are needed.
- Areas of Expertise. You might see two versions of this field, and you need to select the standard one (not the “delta” version).
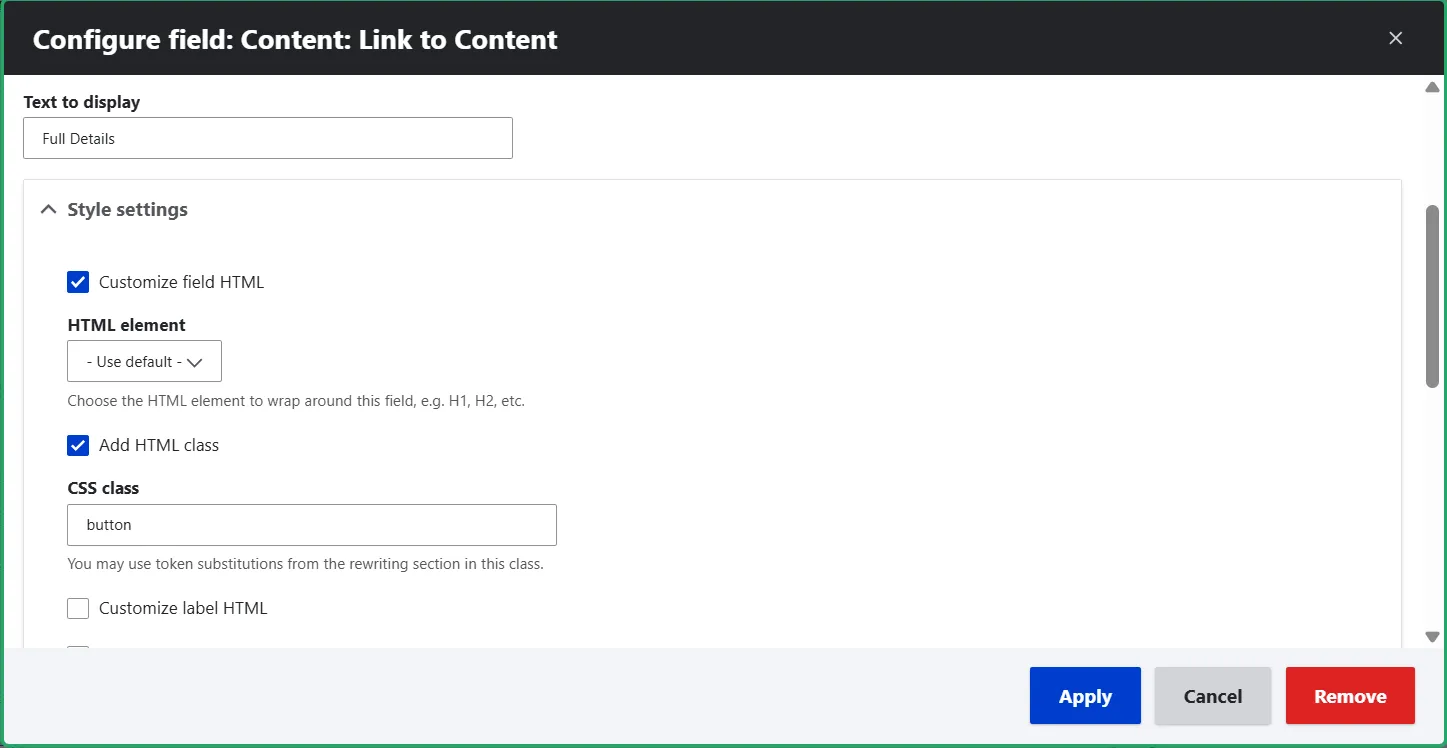
- Link to Content. You can add a “Link to Content” field and make a pretty “Learn More” or “Full Details” button from it. In its “Style settings,” check “Customize field HTML,” then check “Add HTML class, and write “button.” Under “Text to display,” write the desired button text.
Step 3. Add interactive search filters
To help students, peers, or journalists find the exact right university staff member, we need to turn on “Exposed filters.” “Exposed” means that the public can interact with them.
Look for the “Filter criteria” section (just below “Fields”). Click “Add” next to “Filter criteria.” Search for the field (like “Full Name” or “Areas of Expertise”), check the box, and click “Add and configure.”
Next, check the box that says “Expose this filter to visitors.” Make sure to edit the label so it looks exactly how you’d like the specific filter criteria to be named for users (like “Search by Name” and “Search by Area of Expertise”). Once all the settings are made, click “Apply.”
Special settings for various filters you could add:
Title. Change the operator from “Is equal to” to “Contains any word” (this allows users to type just either a first name or a last name).
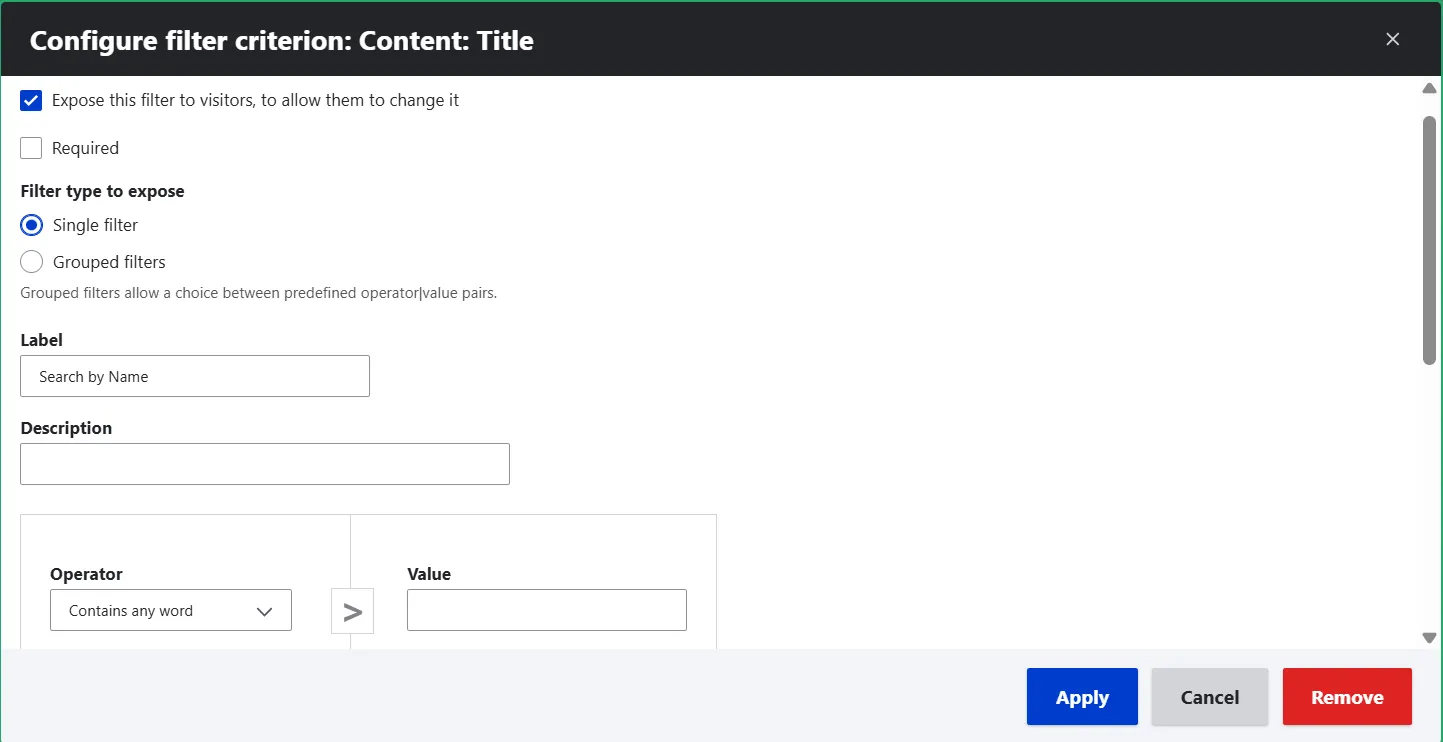
Configuring an exposed filter for searching by name in a staff directory Drupal view
Areas of Expertise. Select which vocabulary the filter should be based on (“Areas of Expertise”).
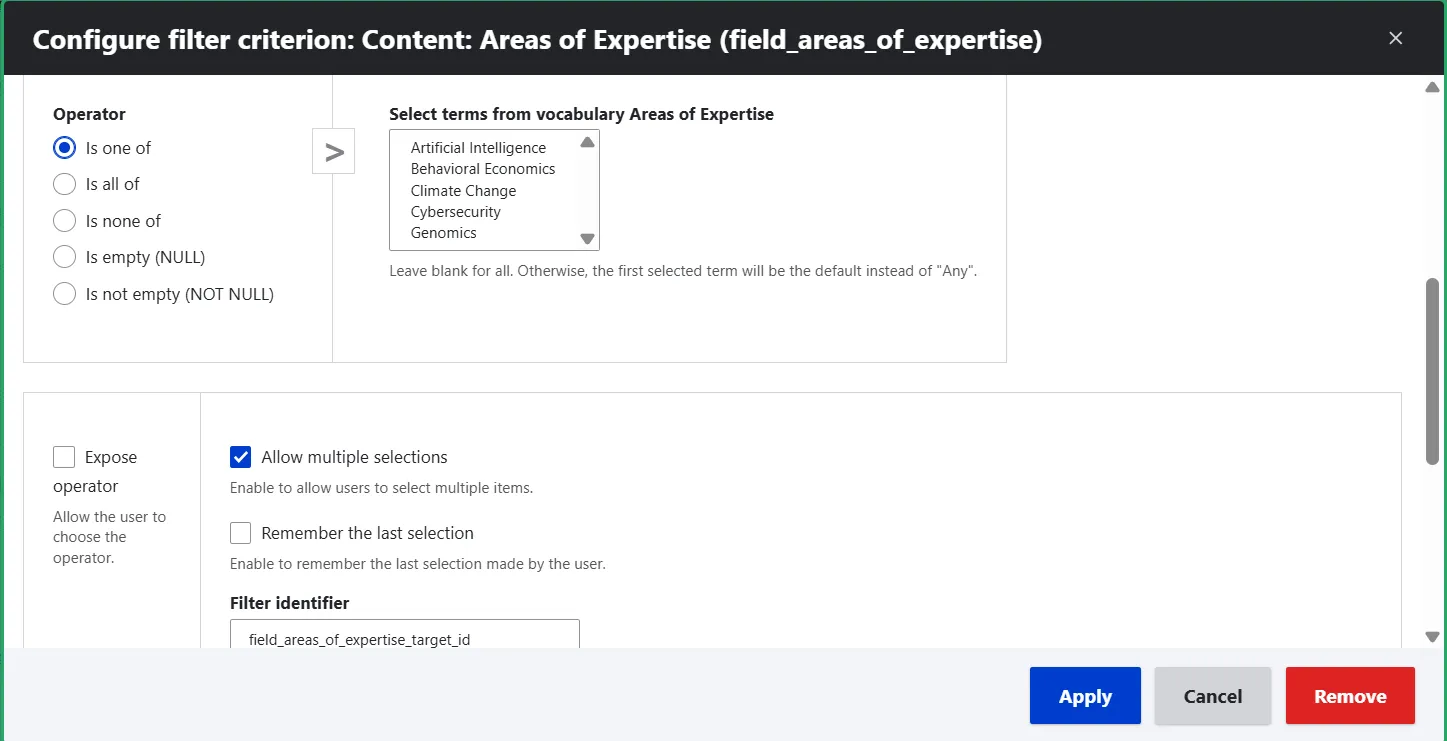
Configuring an exposed filter for searching by areas of expertise in a staff directory Drupal view
Finally, save the view and follow the URL path for your newly created directory page with filters for your higher ed institution staff’s names and areas of expertise.
Final thoughts
In this guide, we have shown you how to build higher ed staff directory profiles along with a page that organizes them into a searchable, filterable grid. This solution deserves attention as one of the possible ways to tackle the task using Drupal’s native “structural beauty.”
Your real-world project might demand deeper customization to handle complex layouts easily. Custom integrations, advanced search, and precise branding can help you create a directory perfectly tailored to your organization’s specific needs.