Drupal Content Categorization, #2: Scale Your Vocabularies with Ease Using Taxonomy Manager

Organizing your website’s content into categories is easy and intuitive, thanks to Drupal’s taxonomy, one of its best built-in tools. But what if your website has hundreds or even thousands of categories — especially in multiple languages — and you need to update or reorganize them frequently?
No problem. Even the most complex, content-heavy websites can be managed with ease using Drupal’s advanced taxonomy tools. We’ll show you how to streamline your processes to make content management faster, more consistent, and less prone to human error.
In this article, we will walk you through one of those tools. Enter Taxonomy Manager — an add-on module that offers a high level of efficiency for managing large sets of content categories. This is the second article of our two-part mini-series meant to help you manage categories with ease.
What are the key Drupal taxonomy concepts?
Before we move on to the Taxonomy Manager module, let’s quickly run through what Drupal taxonomy is based on. This should make it easy for all readers to appreciate the module’s capabilities, whether you already have experience with taxonomy or are just exploring the topic:
- Taxonomy vocabulary. This is a collection or group of related categories used to organize content. For example, “Programs.”
- Taxonomy term. These are the individual items or categories within a vocabulary. For example, “Youth Education,” “Community Health,” and “Environmental Advocacy” as part of the “Programs” vocabulary.
- Nested taxonomy. Sometimes (or often, if your website is complex), terms have a parent-child relationship, creating a hierarchy. For example, under “Youth Education,” you might have nested terms such as “After-School Tutoring,” “Scholarship Programs,” and “Mentorship.”
What are the benefits of the Taxonomy Manager module?
The Taxonomy Manager module offers an advanced interface for vocabularies where you can additionally benefit from the following features:
- A comprehensive view. Get a tree view of expandable hierarchical categories.
- Bulk actions. Easily add or delete your taxonomy terms with bulk actions available.
- Simple search. Find the terms you need via a simple search interface.
- CSV export. Export terms in CSV — a simple, text-based format that is very popular for data import and export.
- Multilingual support. Create and manage multilingual taxonomy vocabularies.
- Term merging. Use the Taxonomy Manager Merge submodule to merge duplicate or related taxonomy terms based on your content needs.
A note on dynamic features. The module also advertises AJAX-based interactions like drag-and-drop reordering or a mouse-over effect. However, the interface appears static in recent Drupal admin themes. Dynamic features may require enabling an additional library, or the module may rely on older components no longer active by default.
A step-by-step guide to using the Taxonomy Manager module
1. How to install the module
Install the Taxonomy Manager module per normal on your Drupal website. The recommended way is via Composer:
composer require drupal/taxonomy_manager
There is a full-fledged version of the module that works with the latest versions of Drupal websites (10.3+ for Drupal 10 and 11.0+ for Drupal 11). However, there is something that must be noted.
The module relies on the jQuery UI module to power its interactive features, such as the dynamic tree view and drag-and-drop term ordering. This is a contributed module that restores jQuery UI components removed from Drupal core starting with Drupal 9.1.
If you’re installing Taxonomy Manager using Composer, jQuery UI will be included automatically — no extra steps needed. However, if you are downloading the module manually, you’ll need to install the jQuery UI module as well.
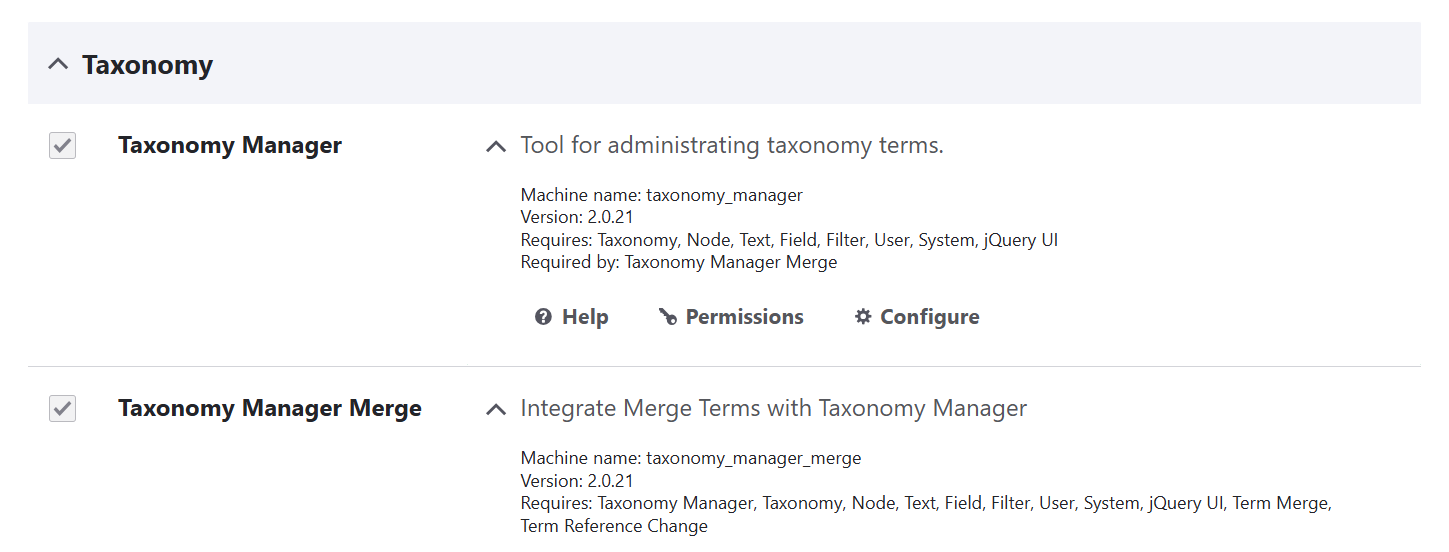
The Taxonomy Manager Merge submodule
The module comes packed with a submodule designed specifically for merging taxonomy terms. If you’d like to use this functionality, you can choose to select its checkbox on the Extend page in addition to the main module. It will require the installation of two other modules — Term Merge and Term reference change, which are currently in beta stability.
2. How to set up the Taxonomy Manager module
By clicking “Configure” from the Extend tab next to the module or by going to the Configuration > User Interface > Taxonomy manager section of your admin menu, you can see the module’s advanced settings page.
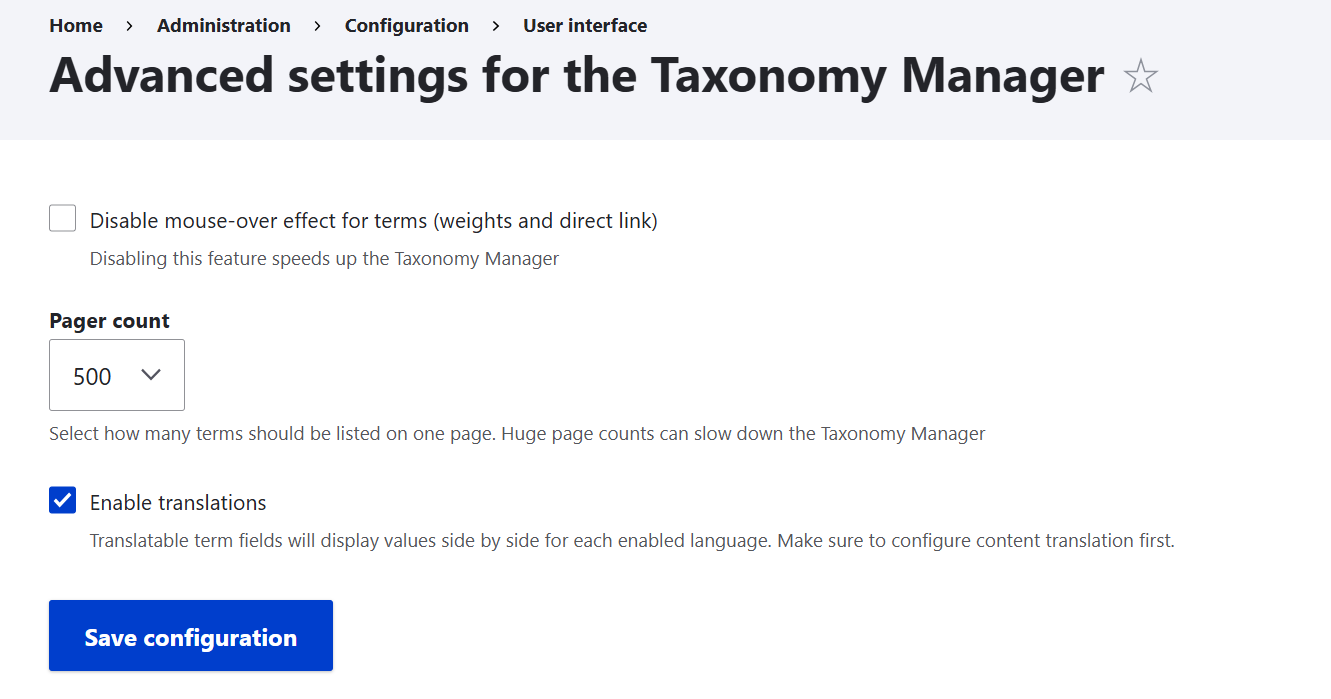
The number of terms per page
You can select how many terms will be listed per page. The default is 500. There is a note that too many terms can slow the module down.
Translation support (if you need it)
There is a checkbox to select if you want to include the available term translations on the taxonomy page. But before the checkbox even becomes active, you’ll need to make some multilingual tweaks in Drupal.
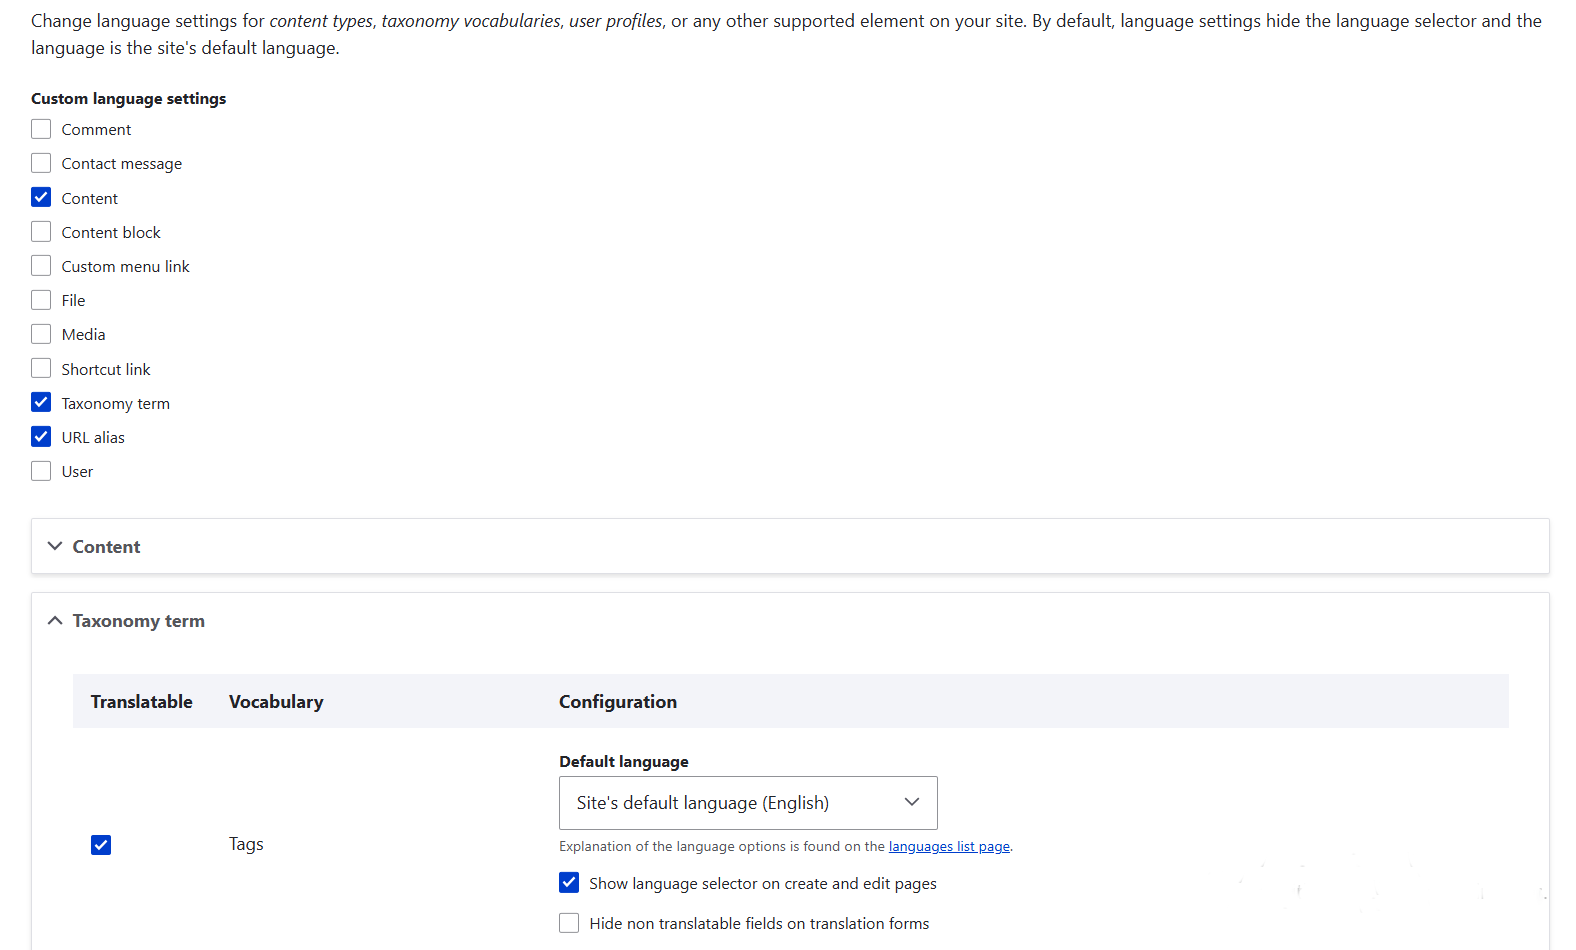
Let’s assume you already have a multilingual setup with one or more languages. You just need to make sure taxonomy is translatable on your website. Go to Configuration > Regional and language > Content language and translation, and select the “Taxonomy term” checkbox under “Custom language settings.”
You’ll then need to check the checkboxes for specific vocabularies that will appear below, along with the specific taxonomy fields (name, description, etc.). Each field will have its own checkbox for you to have the most granular settings for deciding what should be translatable.
There is just one final touch needed. Go to a specific vocabulary (Structure > Taxonomy > [Your vocabulary] > Edit) and select the “Translatable” checkbox.
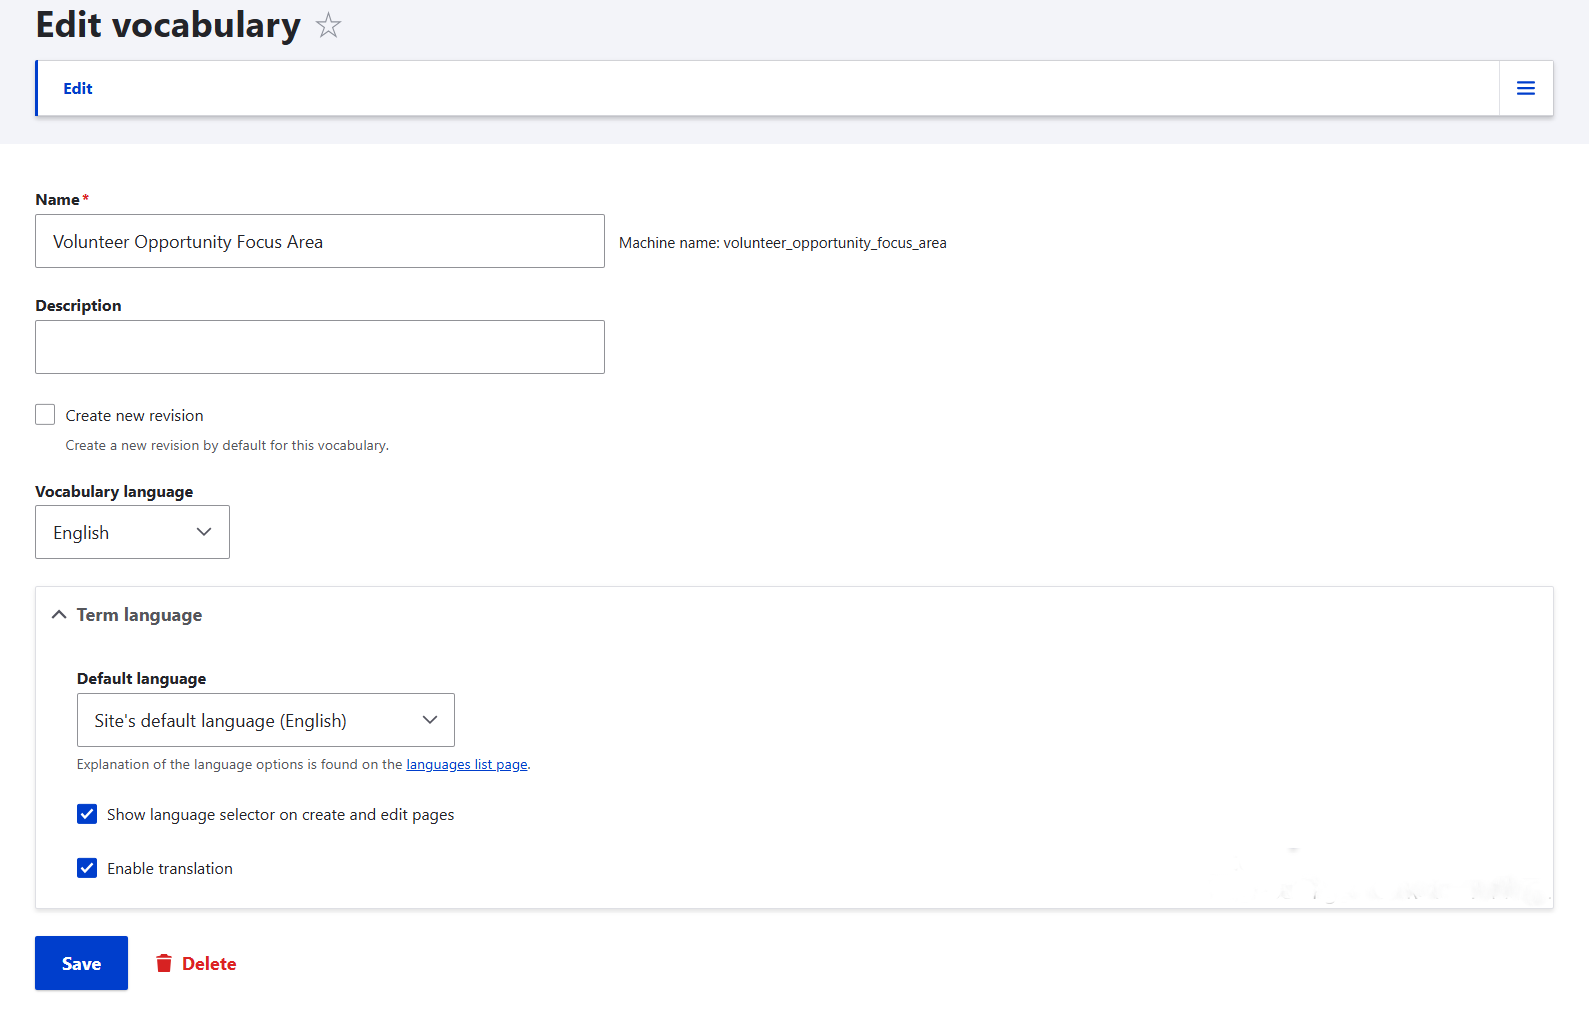
It might seem a bit confusing that Drupal offers two places to configure taxonomy translation. The good news is: when you check this box on a vocabulary page, it automatically syncs to the “Content language and translation” configuration — so you don’t need to set it in both places. However, it doesn’t work the other way around.
So if you’re adding a new vocabulary and you’ve already enabled taxonomy term translation globally, you can skip the “Content language and translation” page — just use the vocabulary’s own settings page to make it translatable.
Note: While checking “Translatable” on the vocabulary enables translation at the vocabulary level, the actual list of translatable fields (like name, description, or any custom fields) is still managed under Configuration > Regional and language > Content language and translation > Taxonomy term. By default, all standard fields are usually enabled for translation automatically, but it's worth reviewing this section if you’ve added any custom fields.
When the multilingual settings are made, you can go back to the Taxonomy manager settings, refresh the page, and select the “Enable translations” checkbox that will now become active.
2. How to manage a vocabulary with the Taxonomy Manager module
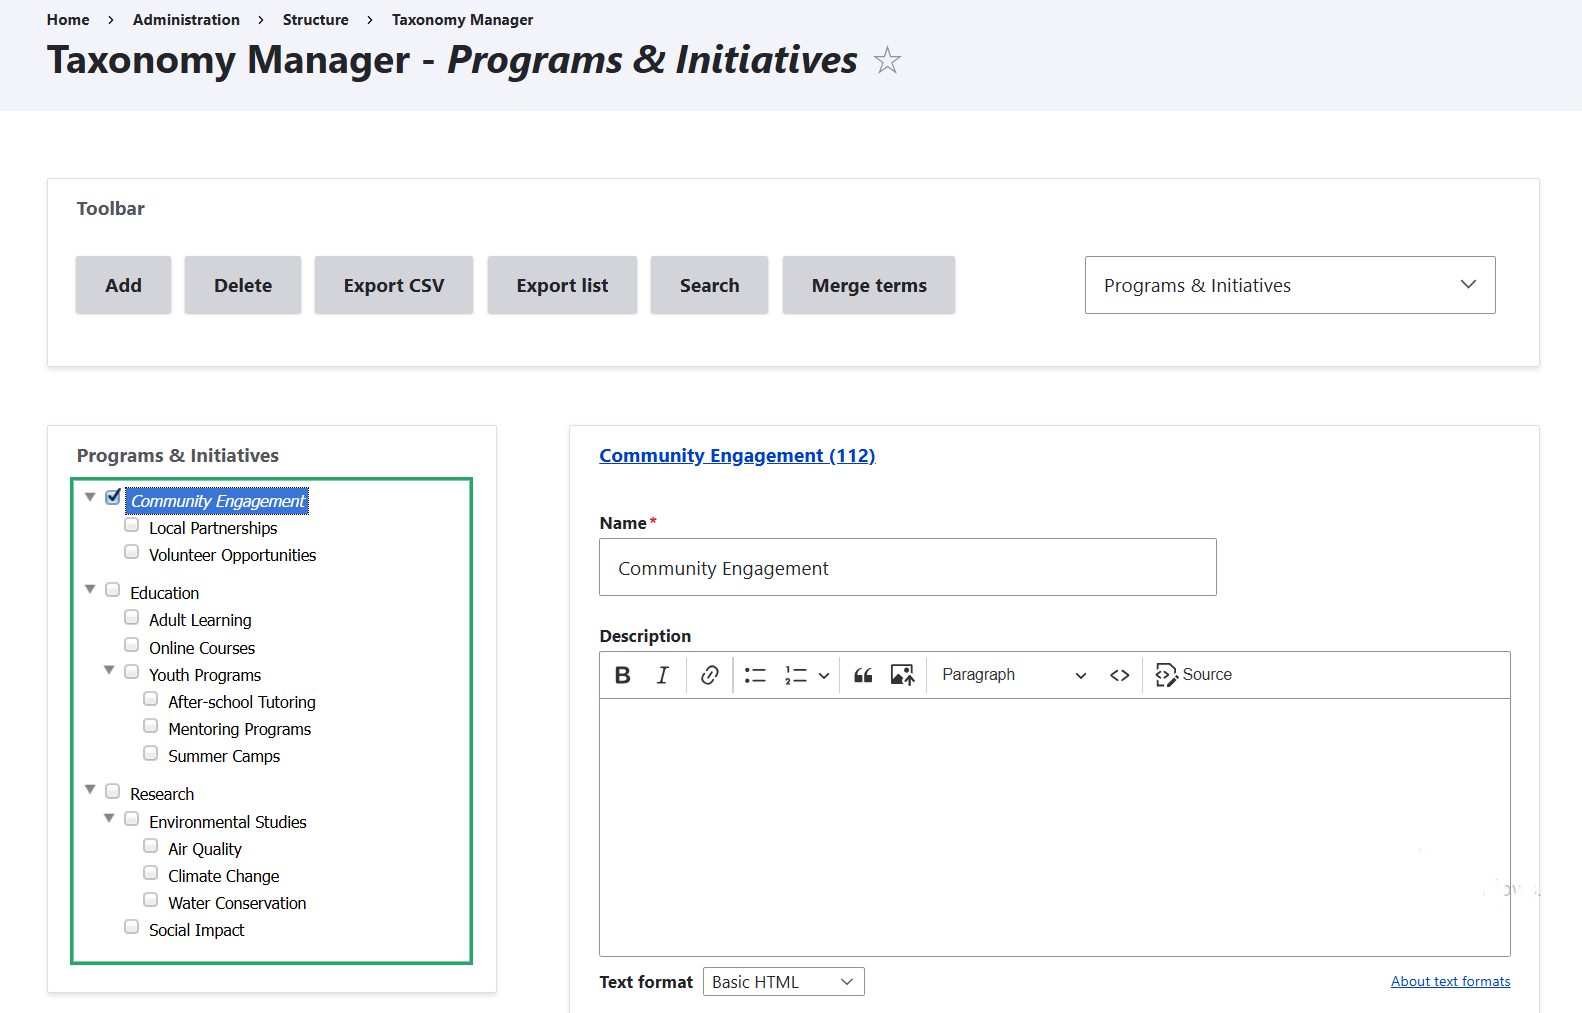
Just like for managing a vocabulary via Drupal’s built-in taxonomy, you go to the Structure section. However, choose the “Taxonomy manager” rather than the usual “Taxonomy” subsection.
You will see your vocabulary in the Taxonomy manager’s interface, where you can edit the whole tree structure and terms. It shows their hierarchical relations between categories, and you can expand the parent categories to see the child categories.
The toolbar with available actions is located above the taxonomy tree. To apply actions, select the checkboxes next to the desired terms. When you select a term, a form appears on the right side where you can manage its data — including changing its weight to adjust the order, setting a parent term, adding a translation, and more.
How to add terms in bulk
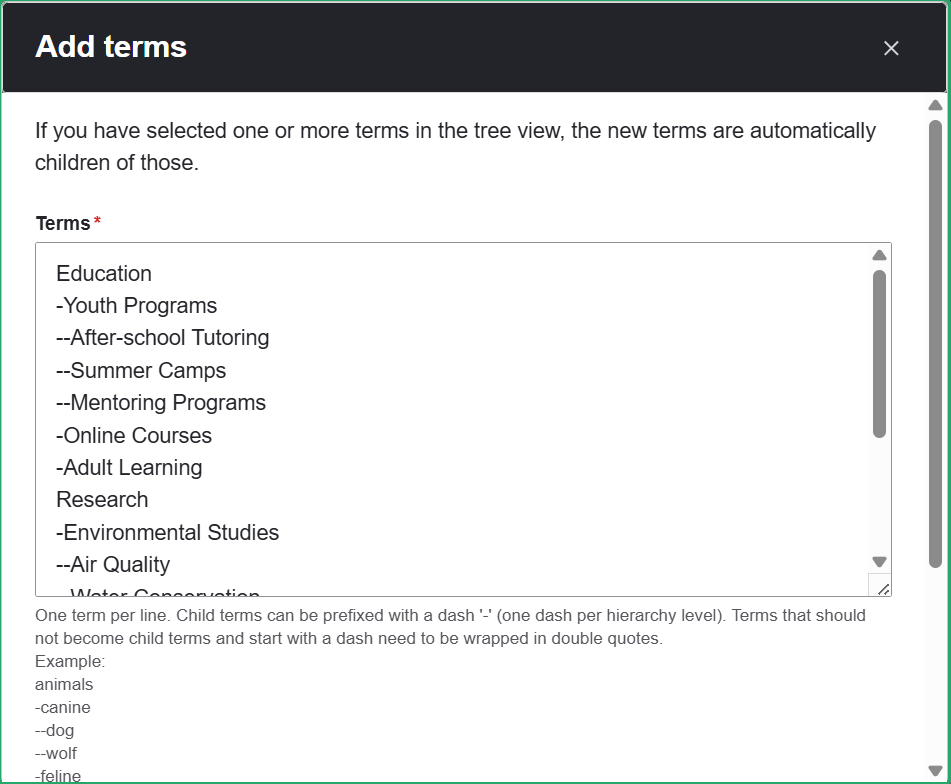
Click the “Add” button on the toolbar to add new terms. In the dialogue box, you can submit a list of categories with one category per line. The child items that should belong to a certain category need to have a small dash before them, without spaces.
To add child categories of the next level, you’ll need to put two small dashes instead of one, also without spaces. Finally, click “Save” at the bottom of the form, and the module will automatically add your terms to the tree, taking care of the right levels.
For example, to get a nested “Programs & Initiatives” vocabulary like in the previous image, you’ll need to submit a list like this:
Education
-Youth Programs
--After-school Tutoring
--Summer Camps
--Mentoring Programs
-Online Courses
-Adult Learning
Research
-Environmental Studies
--Air Quality
--Water Conservation
--Climate Change
-Social Impact
Community Engagement
-Volunteer Opportunities
-Local Partnerships
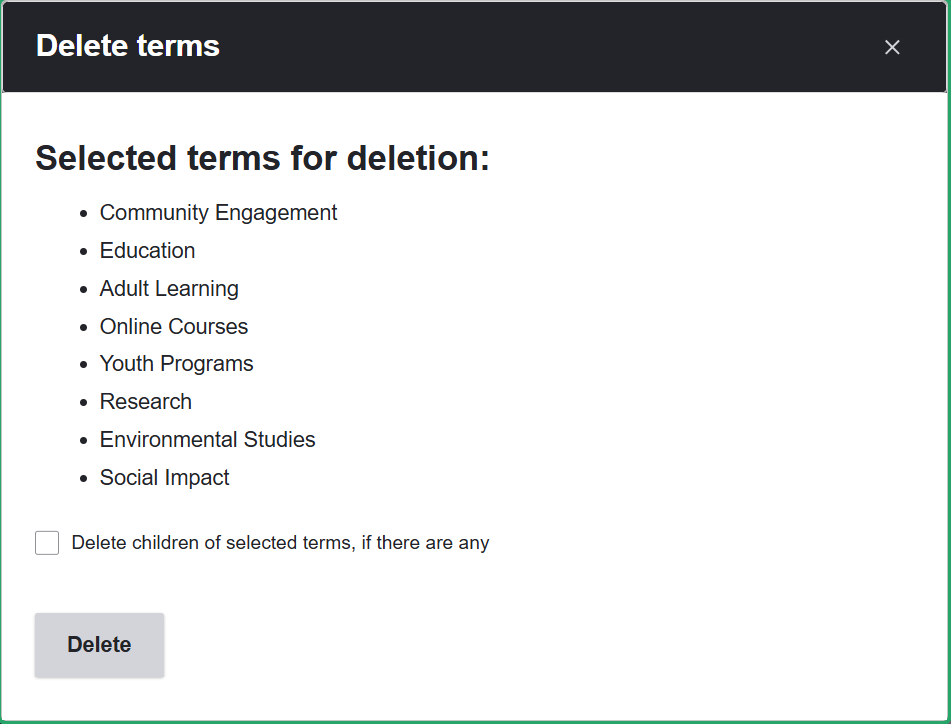
How to delete terms in bulk
You can delete as many terms as you need in one go by just selecting them and clicking the “Delete” button. When deleting terms, you’ll have an option to also delete their child items.
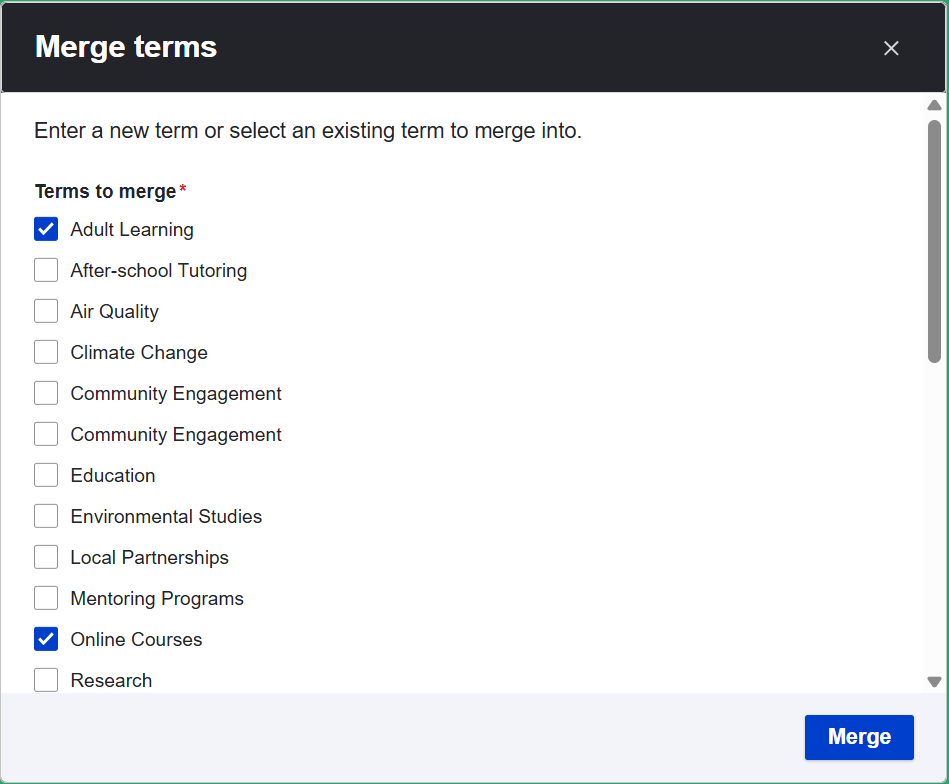
How to merge terms
With the Taxonomy Manager Merge submodule installed, you can combine multiple terms into a simple term by selecting the terms and clicking the “Merge” button. Then, choose an existing term or type a new one to merge into.
The merged term:
- replaces the old ones in all content where they were used
- becomes the “main” term, while the others are deleted
- inherits relationships (like parent or child terms) from the merged terms, if you choose to keep them
How to export terms in the CSV format
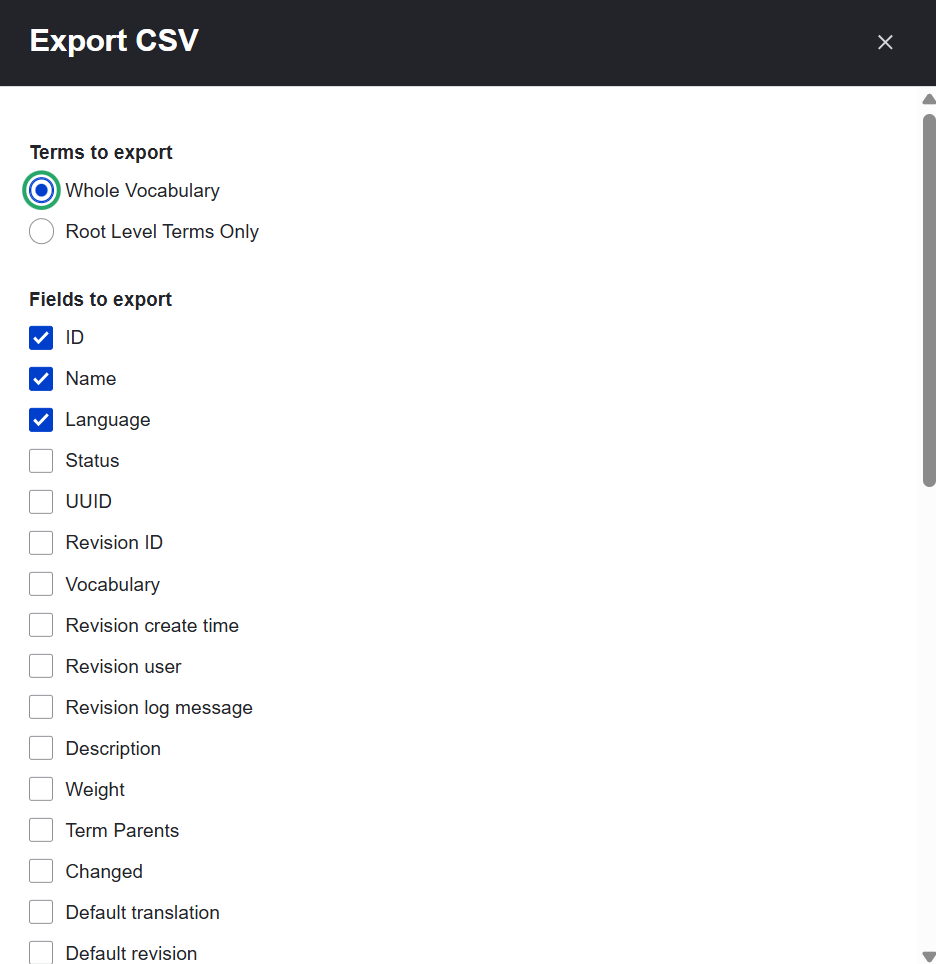
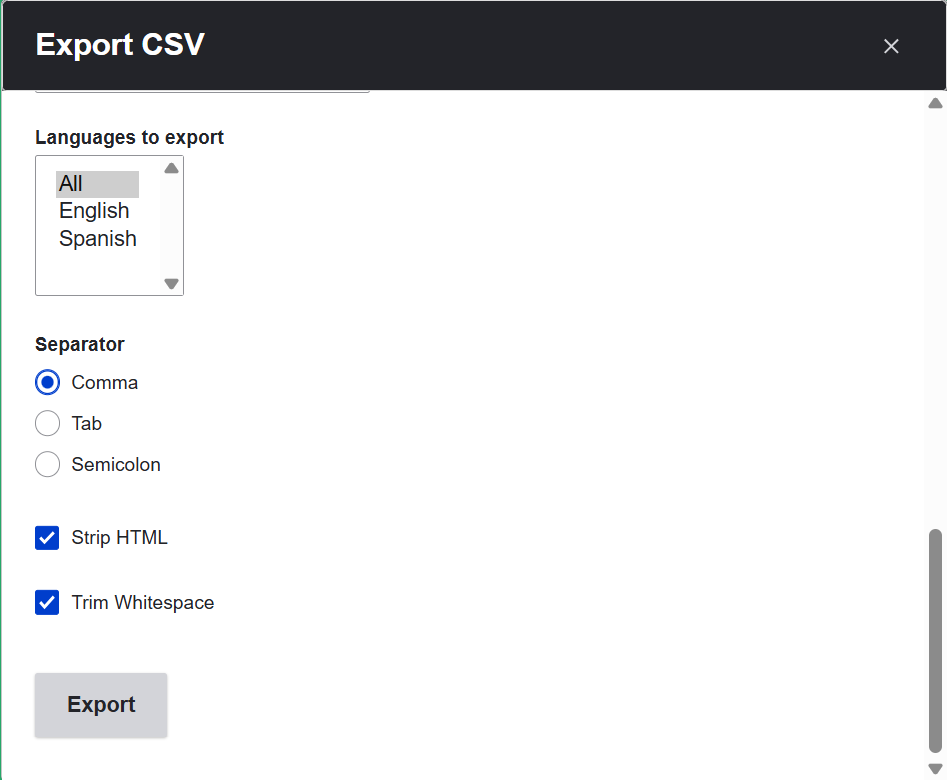
Click the “Export CSV” button button on the toolbar and you’ll see a dialog box offering you to fine-tune:
- which terms to export (whole vocabulary or only root-level terms)
- which elements to export (ID, name, language, or other fields)
- which languages to export
- what separator to choose for your CSV file (comma, tab, or semicolon)
- and more
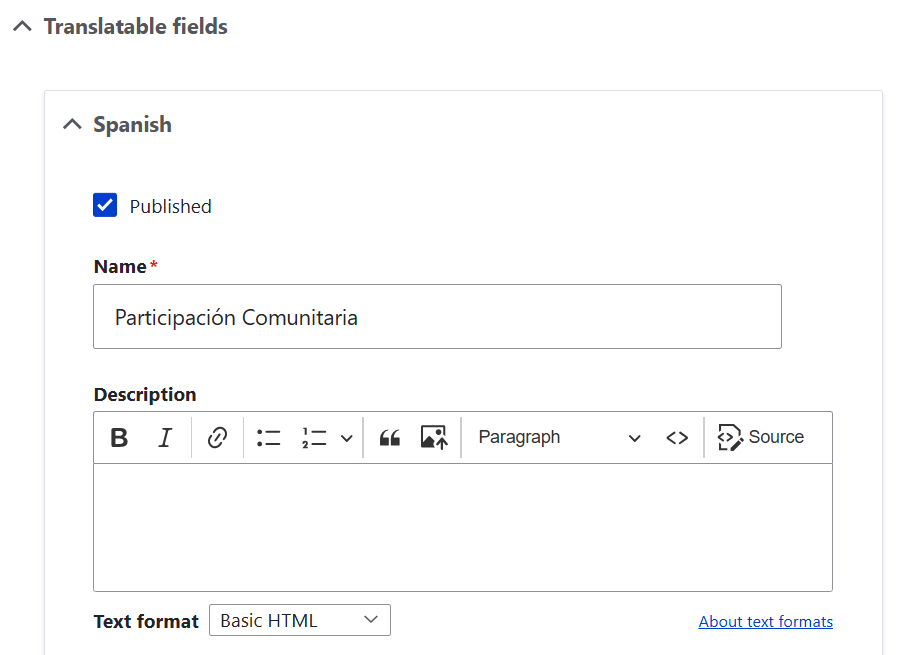
How to add translations to terms
One of the subsections of the right-hand menu for every term you select is “Translatable fields” where you can add term translations.
Final thoughts
This has been a quick tour of how the Taxonomy Manager module helps streamline category management in Drupal. For complex, multilingual, or content-rich websites — like those run by nonprofits or universities — it can save valuable time in day-to-day site administration. You might also benefit from checking out the first article of our content categorization series and discovering the available options for nonprofit and higher ed websites.
Stay tuned for more practical tips and tools on our blog — and remember, our Drupal team is here to help beyond just articles. Let’s simplify the complex and find the right approach for your unique website and organizational needs.