
The Uppy Tool in Drupal: Advanced File Uploading with Interactive Image Editing Features

Uploading files should be as seamless and intuitive as possible, especially if you’re managing a large and bustling Drupal website. Sometimes, third-party upload tools are a great choice because they bring special capabilities to the table, boosting editorial efficiency. One of them is the Uppy tool, a free and open-source JavaScript-based file uploader. It is not just easy to use but also empowers you with advanced features right at your fingertips.
Fitting with our ongoing contribution back to Drupal, one of our top developers built a Drupal module that smoothly connects the Uppy tool to Drupal websites. The module offers a sleek, modern interface for Drupal users to enjoy Uppy’s capabilities, including advanced inline image editing and multilingual support. We’ll explore the module and walk you through the steps of configuring and using it.
File uploader by Uppy: the key features of the Drupal module
The File uploader by Uppy module integrates the Uppy JavaScript-based file uploader tool with Drupal websites, enabling you to add Uppy to the content editing interface. “Content” is used here in a general sense while Uppy can also work with other Drupal entities that have fields.
The Uppy tool has a modular, plugin-based architecture, and the Drupal module supports several of Uppy’s plugins. Here are the main features that the module can provide for your Drupal website:
- An intuitive interface. Non-tech users can easily work with the user-friendly, straightforward, and visually appealing interface for uploading files. Files can be uploaded from a PC or simply dragged and dropped directly into the tool’s UI.
- Advanced image editing. It’s exciting to have a file uploader and a feature-rich image editing studio in one tool! Users can crop, rotate, zoom, and do other actions with image files directly within the uploader before finally saving them. This reduces the need for external image editing tools.
- Plenty of customization options. You can customize lots of things in the file uploader’s work — image thumbnail dimensions, available image editing features, the progress bar, and so on. This is a matter of simply checking/unchecking checkboxes in the settings.
- Seamless integration with Drupal’s file system. The module is designed to work flawlessly with Drupal-managed file fields. Thanks to Uppy’s XHR plugin, Drupal’s storage system handles file transfers directly. Furthermore, the module relies on another Drupal module, the File Uploader, which is a JavaScript file uploader framework providing a set of tools to facilitate the integration of third-party JavaScript-based file uploaders.
- Multilingual support. The File uploader by Uppy module also supports Uppy’s internationalization features. This means that the file uploader’s interface can be translated into multiple languages, which makes it adaptable for global audiences and multilingual websites.
- Always getting better. There is a new version of the module currently in the works, which is going to add the possibility for anonymous users to upload files, support the new version of the Uppy tool, and more.
How to use the Uppy JavaScript file uploader module in Drupal
Step 1: Installation
You can install the module on your Drupal website in several ways:
- Option 1 (recommended): by using Composer
Open your terminal or command prompt, navigate to your Drupal root directory, and run the following command:
composer require drupal/file_uploader_uppy
- Option 2: via the Extend page of the Drupal admin dashboard
Download the module from drupal.org, install it, and enable it on the Extend page. When choosing this option, you will also need to install and enable the File Uploader module.
Step 2: Enabling Uppy for a specific field
The next step is to enable Uppy in a field of a content type that you are going to use for file uploads. Go to Structure > Content types > [Your content type] > Manage fields and look through your fields.
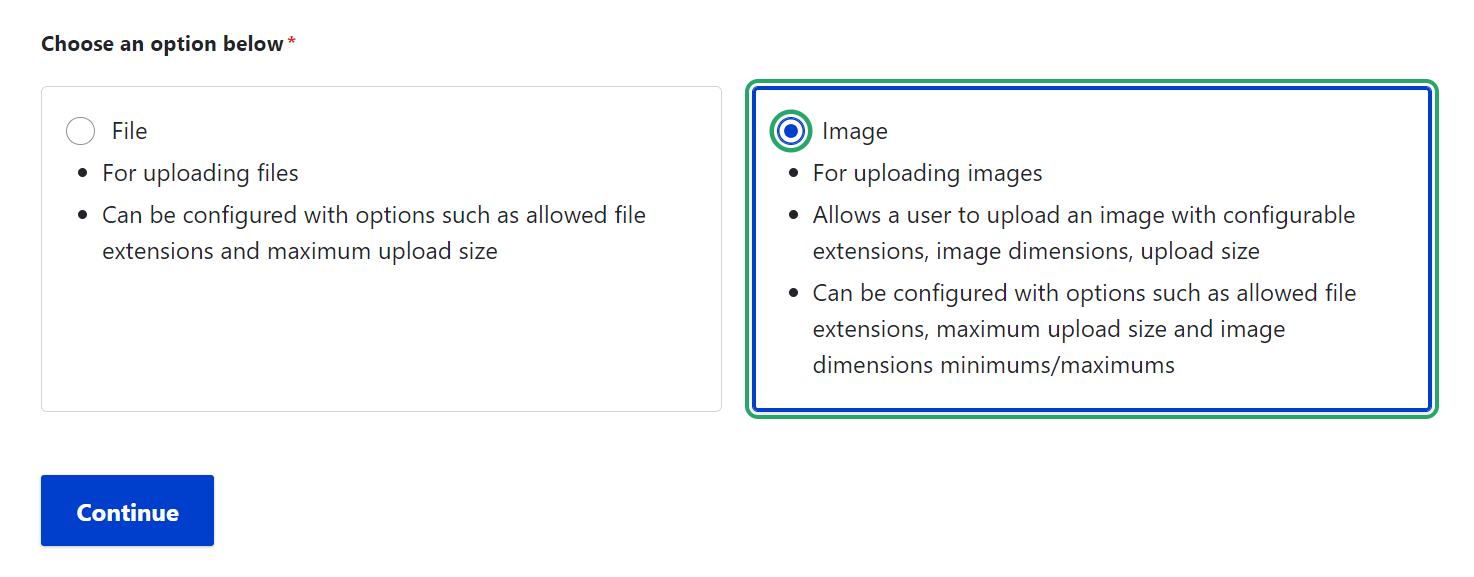
Choosing the right field type. The field type is specified next to each field on the “Manage fields” tab. When it comes to choosing the field type for file uploads, it can be a file field or an image field. Since Uppy provides inline image editing, choosing the image field type in our example will be more in line with showcasing Uppy’s inline image editing features.

Creating a field from scratch. If you don’t yet have the needed field, you could also create one right on that tab. When creating a field in Drupal’s new Field UI, you first need to choose the general “File upload” field type and then you will be asked to choose between a file field and an image field.
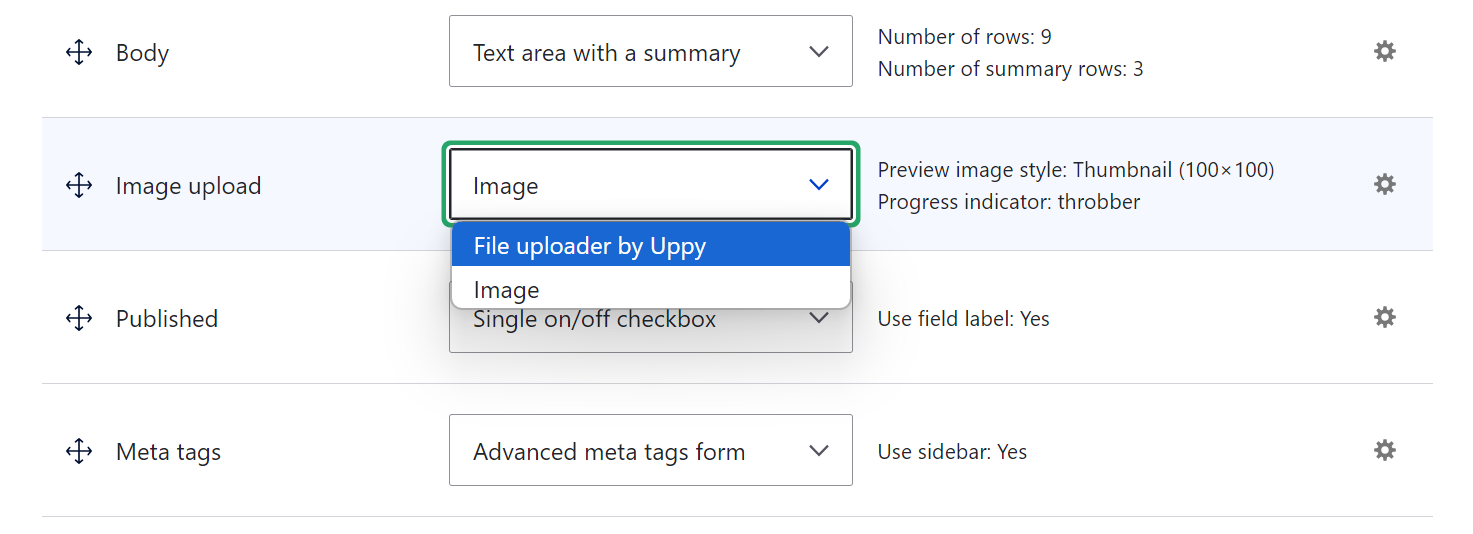
To enable Uppy for a field, go to the neighboring tab — “Manage form display.” Next to the needed field, you’ll see a “Widget” dropdown where you’ll need to select “File Uploader by Uppy” from the options.
You can rely on the widget’s default settings and just click “Save” at the bottom of the page. Alternatively, you can proceed to the next step — configuring Uppy’s settings with various options. One of them will be enabling the Image Editor which is not enabled by default.
Step 3: Configuring Uppy’s settings
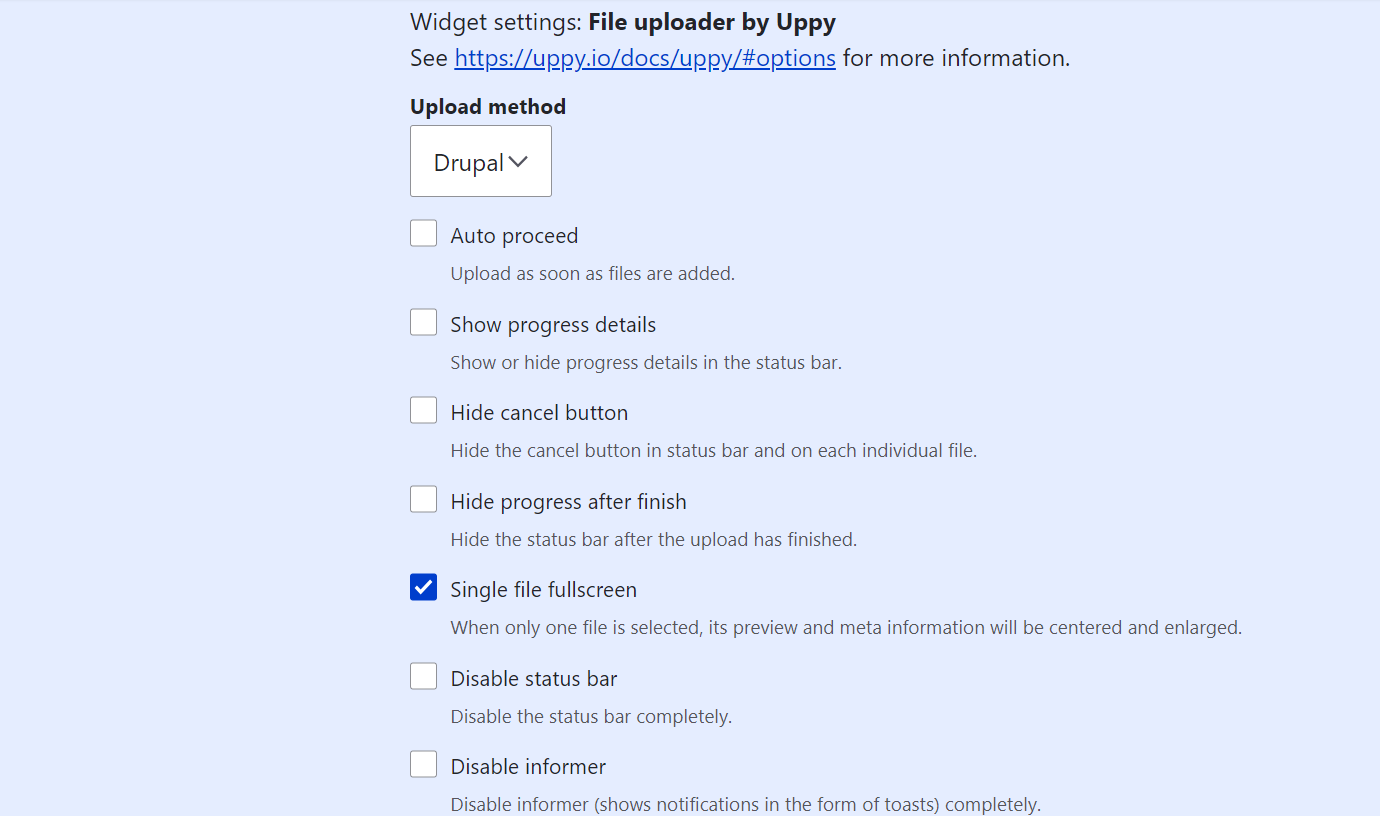
As you’ve selected “File Uploader by Uppy” in the previous step, you can click on the gear icon next to it and you’ll see additional configuration options specific to Uppy:
- Upload method. Choose how files are uploaded, with “Drupal” set as the default method. It’s also currently the only available option.
- Autoproceed. Automatically start uploading files as soon as they are added.
- Show progress details. Display the detailed progress information in the status bar during the uploads.
- Hide cancel button. Remove the cancel button from the status bar and individual file previews.
- Hide progress after finish. Hide the status bar once the file upload is complete.
- Single file fullscreen. Display a file’s preview and metadata centrally and in a larger format when only one file is selected. This option is enabled by default.
- Disable status bar. Completely remove the status bar from the upload interface.
- Disable informer. Turn off the informer, which usually displays notifications as toast messages (a type of messages that appear briefly on the screen and then disappear automatically after a few seconds).
- Disable thumbnail generator. Turn off the automatic creation of thumbnails for uploaded files.
- Wait for thumbnails before upload. Delay the upload process until all thumbnails are generated.
- Thumbnail width and height. Set the dimensions for generated thumbnails. The default width and height are 200 x 200 px.
- Enable image editor. Allow users to crop, rotate, zoom, flip, or do other actions with images before they are uploaded. This option is only available for new image uploads.
- Auto open image editor. If you’ve enabled the image editor, another option will become available — to automatically open the image editor for the image file in an upload batch.
- Image editor actions. If you have enabled the image editor, you can also select actions that should be available to users (revert, rotate, granular rotate, flip, zoom in, zoom out, crop square, crop widescreen, and crop widescreen vertical). You can leave it blank to have all actions available. Be sure to not accidentally leave specific options selected while scrolling through them. To have all actions, either all or none should be selected.
- Theme. Choose the appearance of the uploader interface — light, dark, or automatic based on system settings. By default, the theme is light.
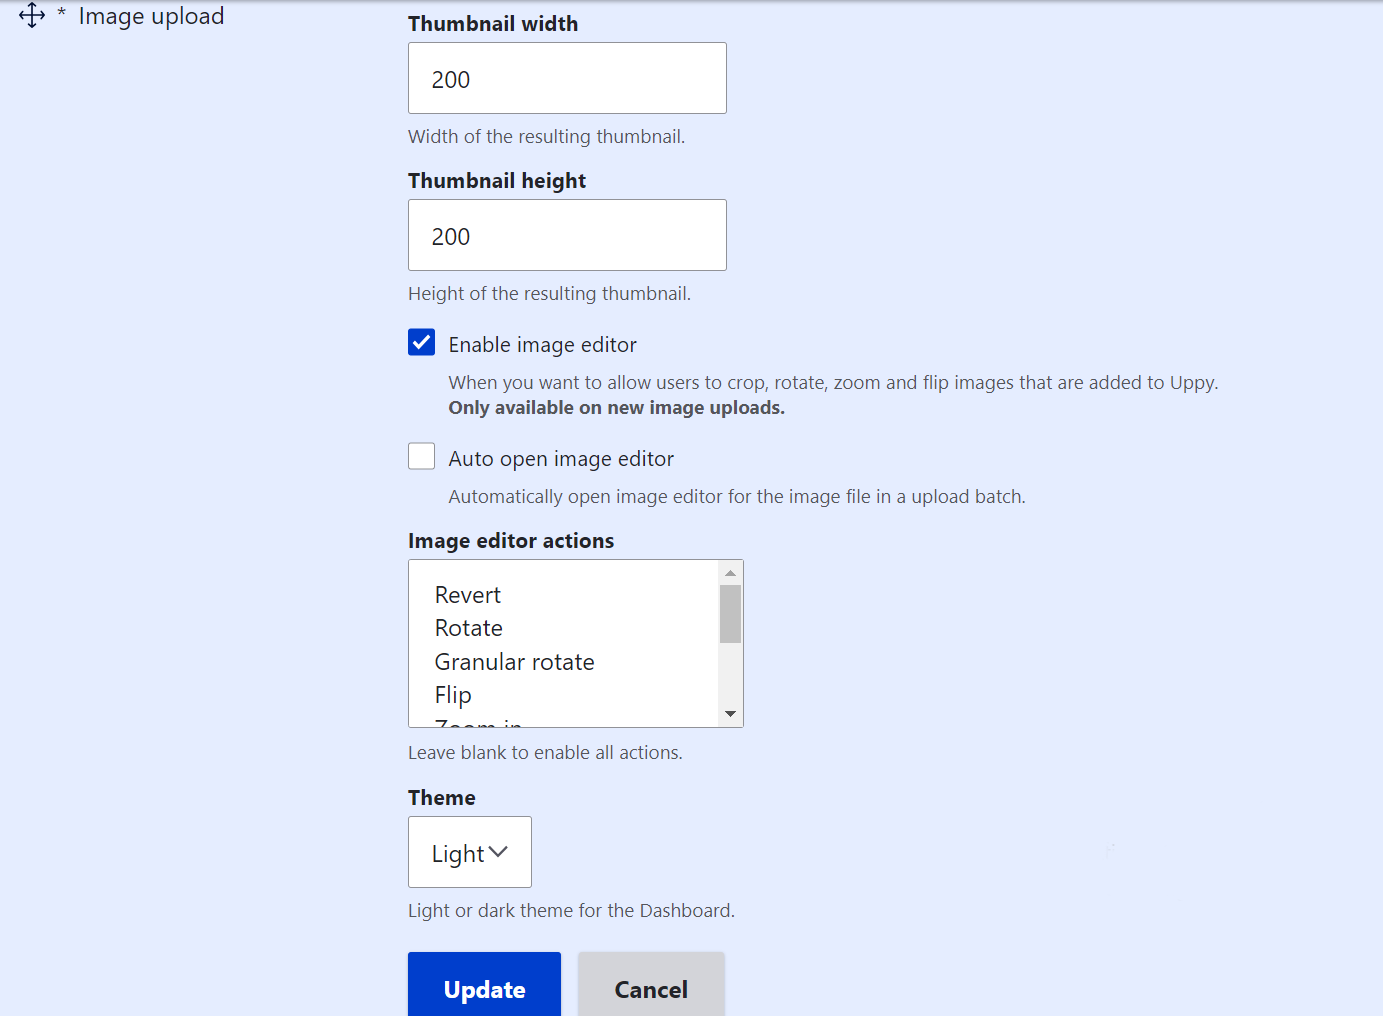
Once you’ve done your settings, click “Update” and then also click “Save” at the bottom of the “Manage form display” tab. You can see more technical details about the options directly at Uppy’s website.
Step 4: Testing the file uploads in action
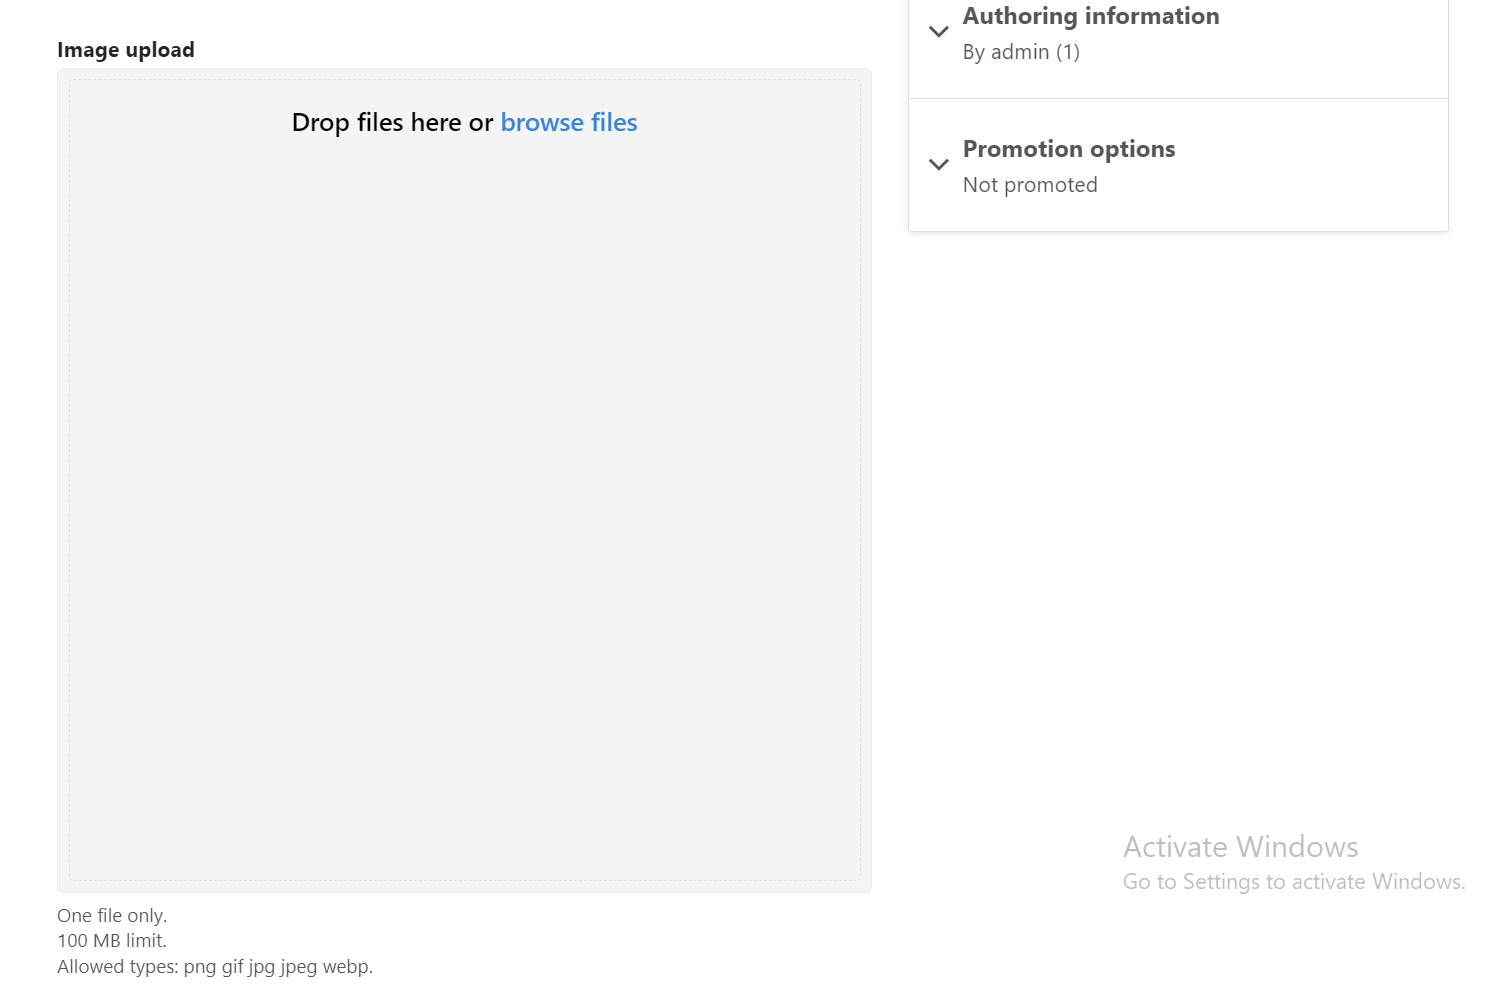
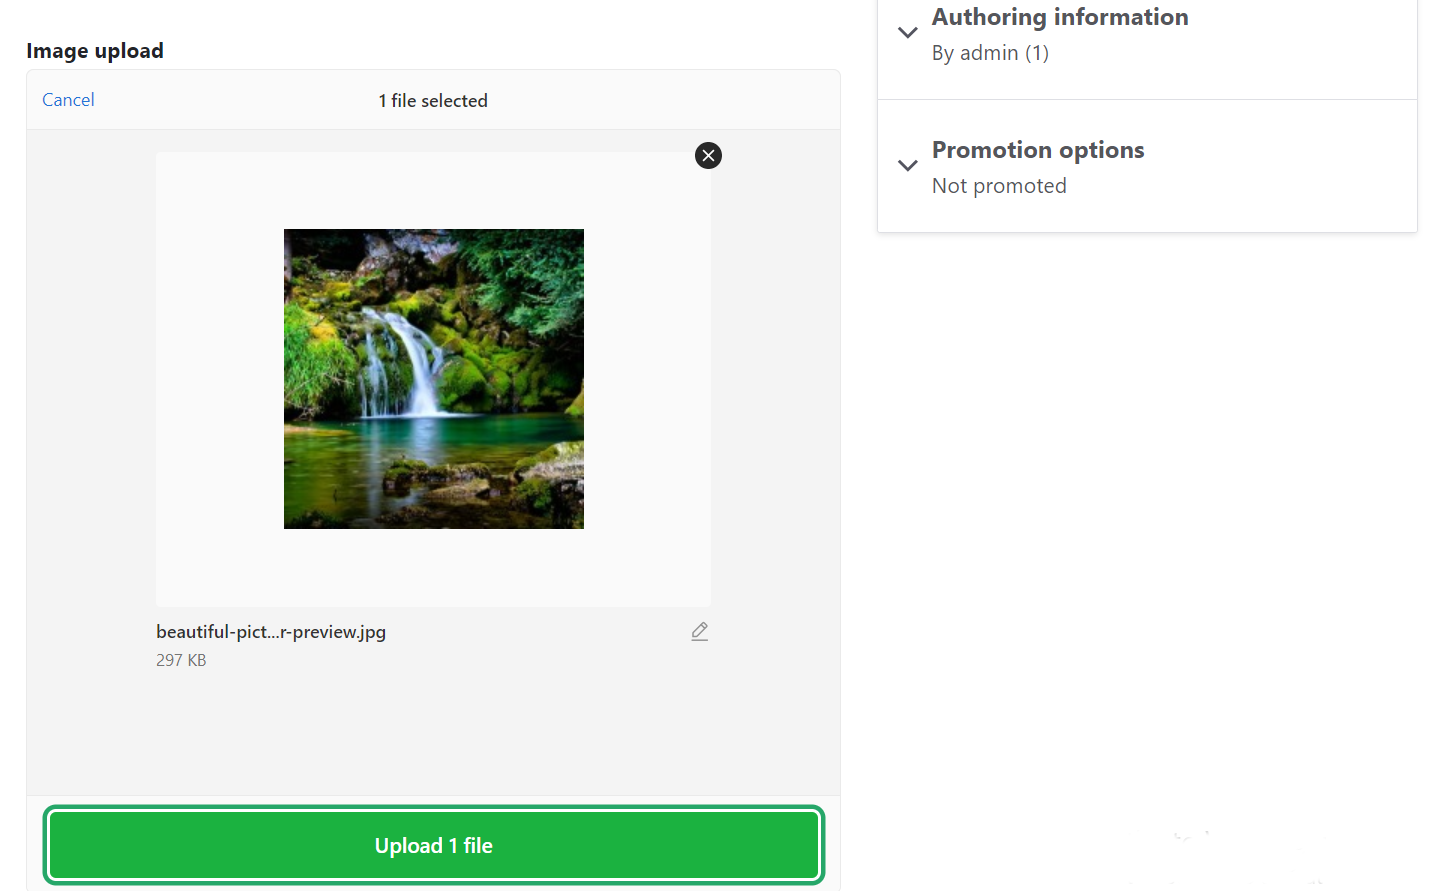
Go to Content > Add content and add a new item of the content type you’ve just configured to use Uppy. You should now see the Uppy uploader when you try to upload an image file by browsing or dropping it there directly.
The limitations that are listed in the bottom left corner (1 file only, 100 Mb limit, and allowed file types) are not related to Uppy but to the specific Drupal field’s configuration.
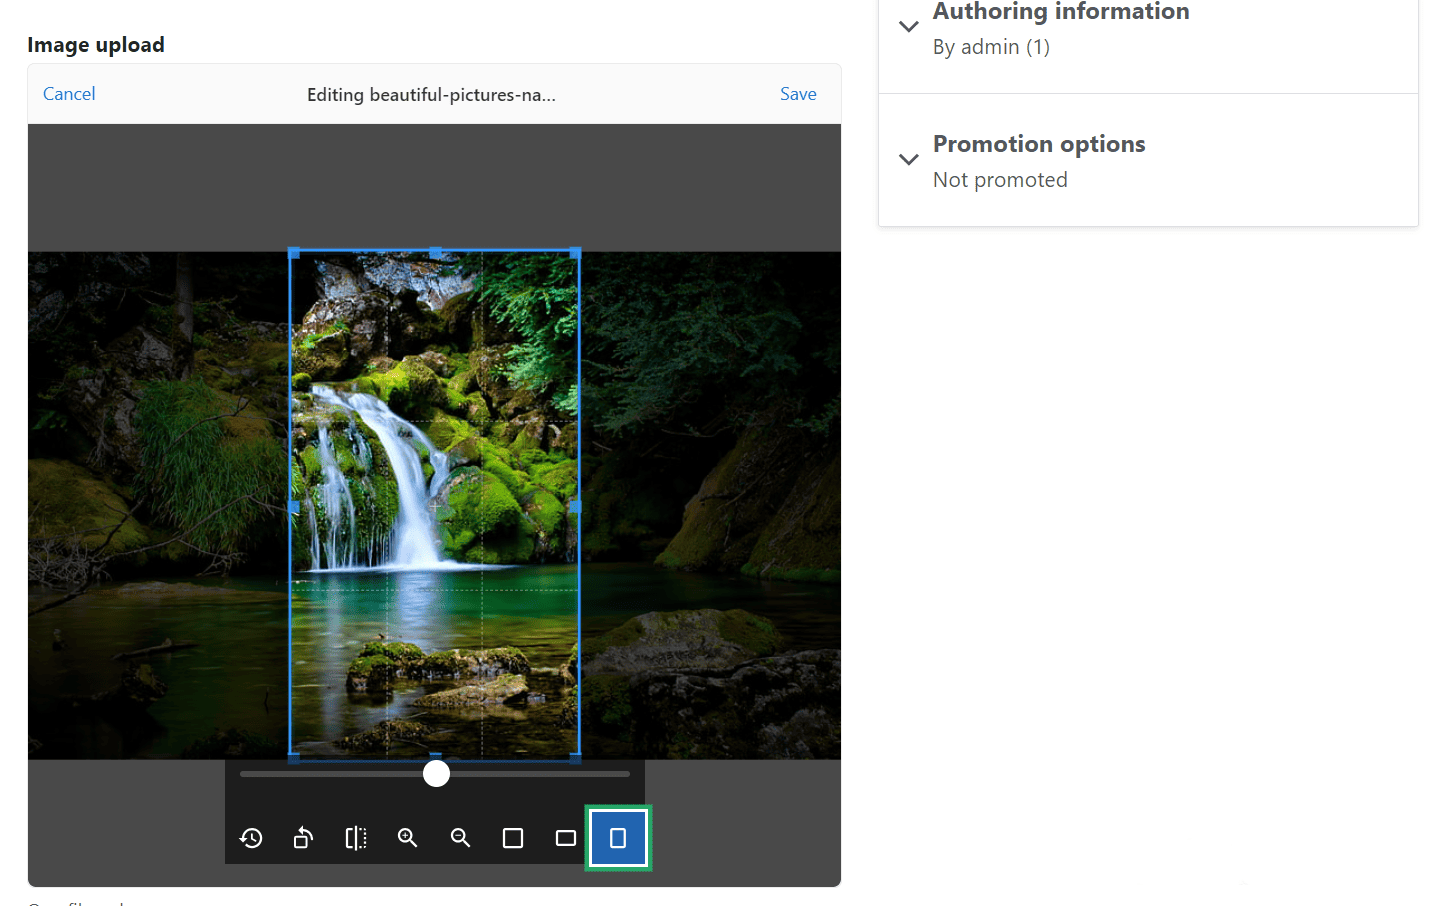
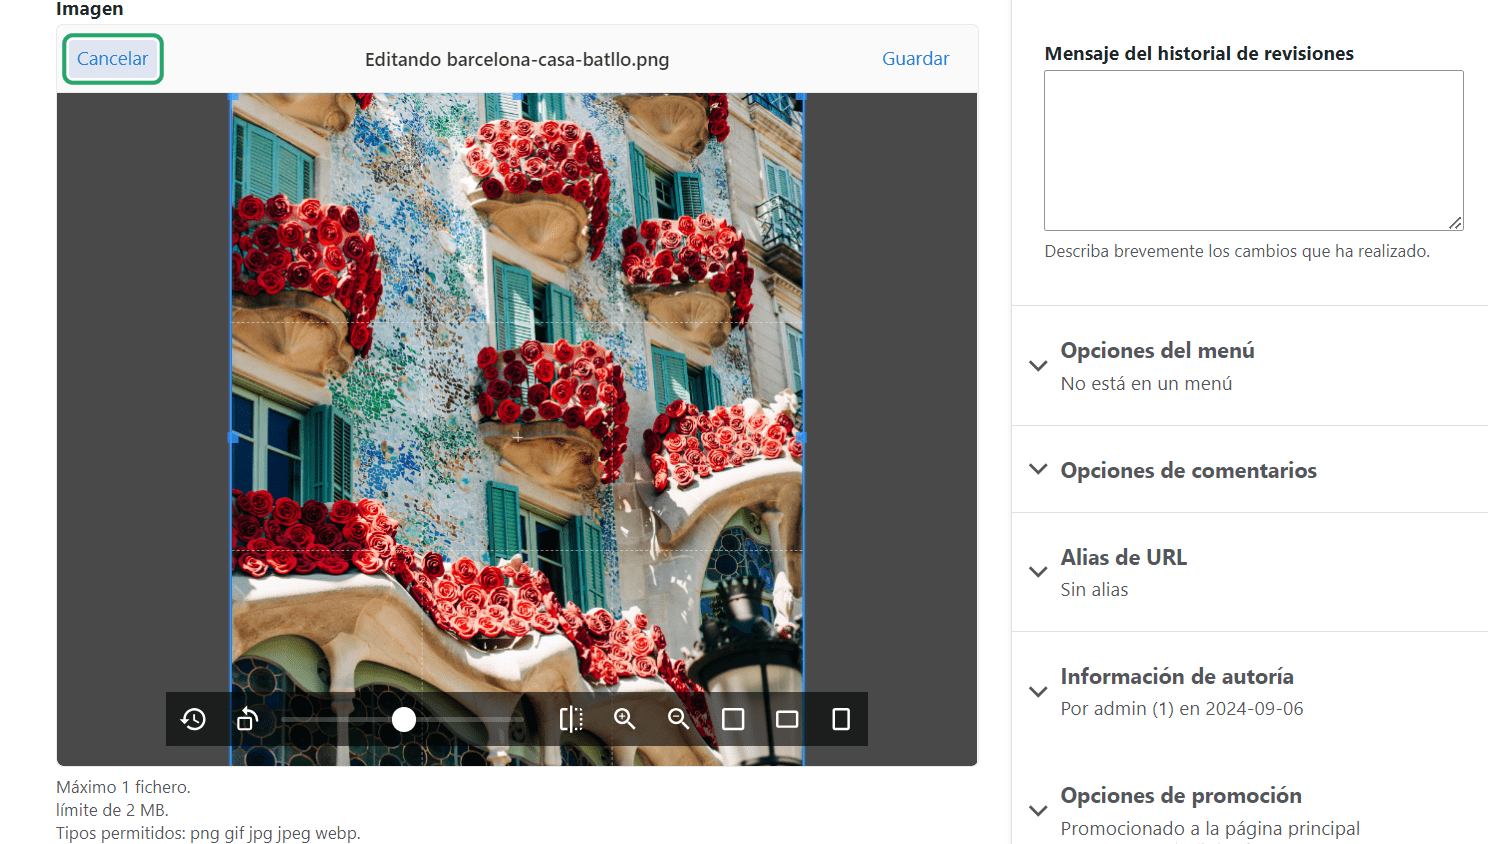
When uploading an image, you will see its thumbnail in Uppy’s interface. You can click on the pencil icon to open it in the Image Editor. There will be a toolbar below the image with all the available actions.

Here are at least some examples of what you can do with an image. You can crop the image in various ways:
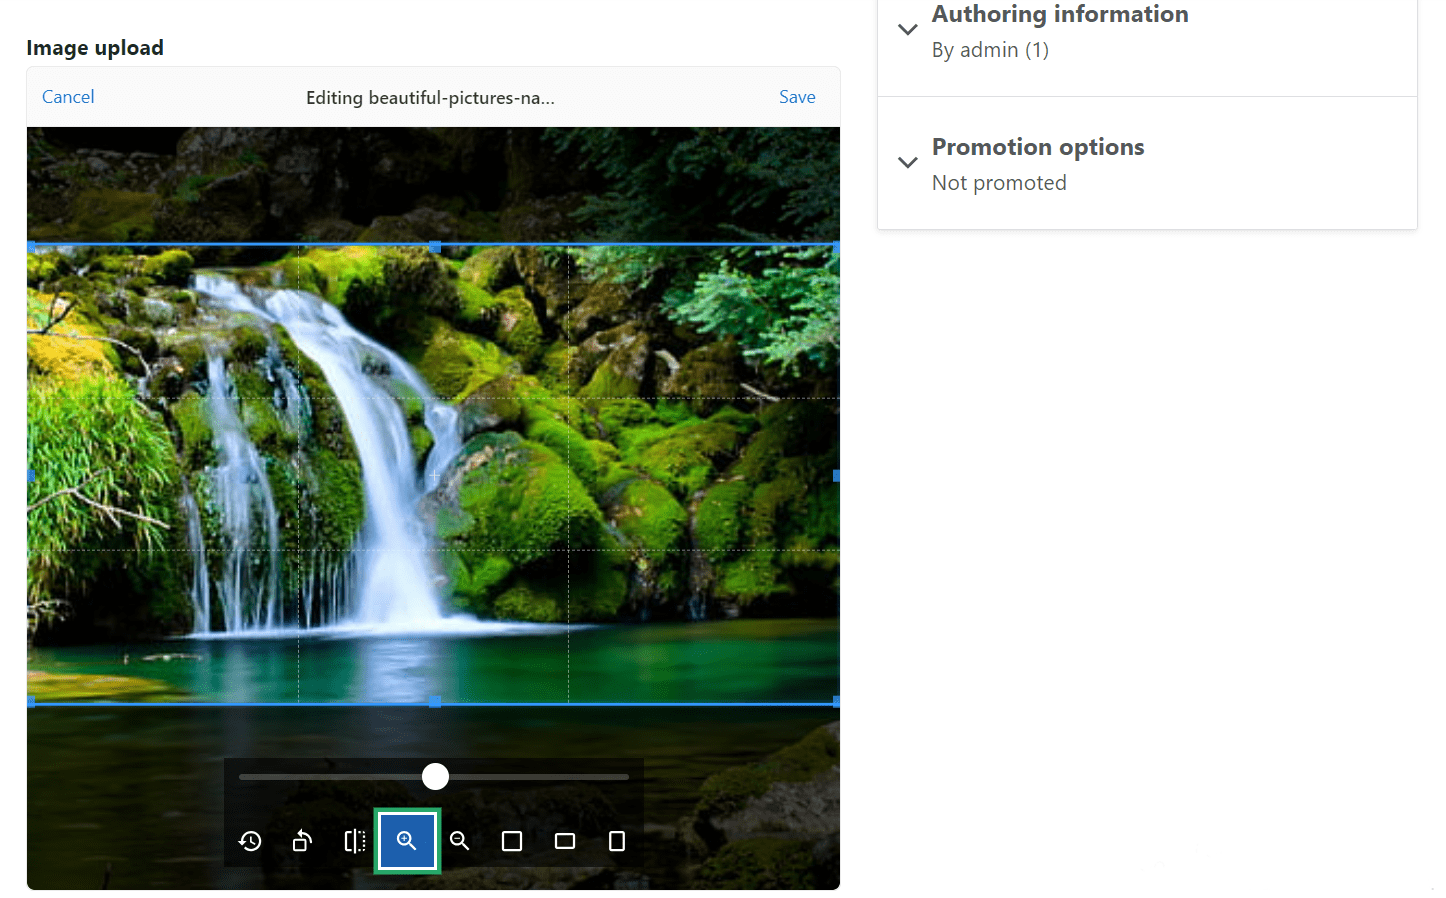
You can zoom in and out:
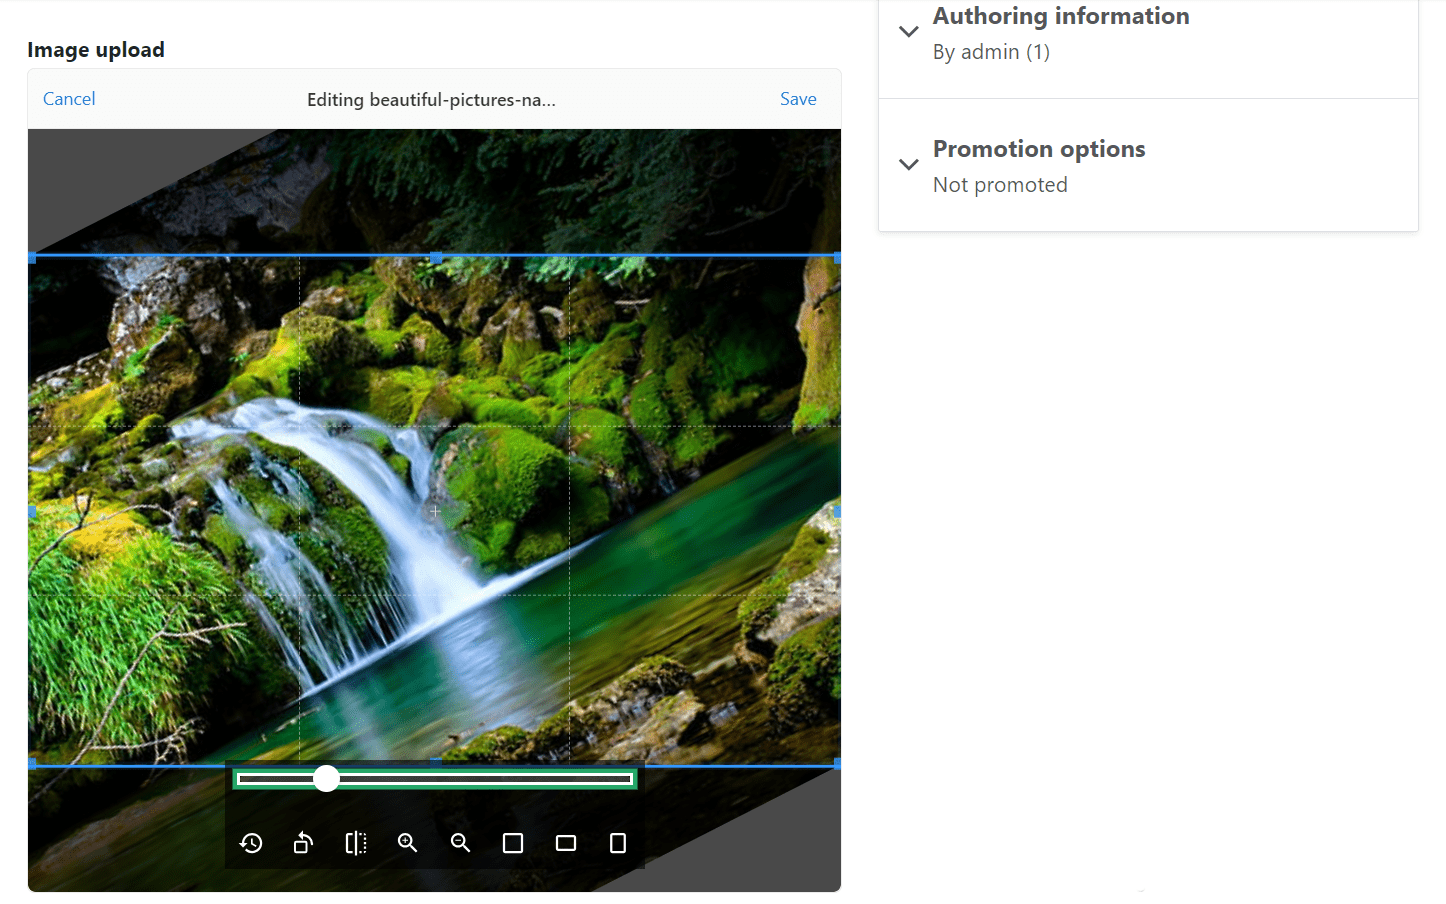
You can rotate in any direction, including rotation at a custom angle:
The far left button on the Image Editor toolbar lets you cancel your specific action.
Above the image, there also are the “Cancel” and the “Save” buttons:
- by clicking “Cancel,” you will go back to the starting point of your image uploading
- click “Save” once you're happy with the results of your image editing, and then finalize the process by clicking the green “Upload” button at the bottom of the file uploader
Uppy on multilingual Drupal websites
Drupal has robust multilingual capabilities, enabling you to seamlessly add languages to your website. So let’s see what happens with Uppy if you switch to another language on a multilingual Drupal website. This can be done either via a language switcher or by pasting the language code directly into the web page’s URL (for example, “website.com/es” for Spanish). Then just start adding content and Uppy’s interface will be automatically available in Spanish, just like all the other text in Drupal’s admin dashboard.
Final thoughts
Whether you’re uploading images or other files, the Uppy file uploader module brings a new level of efficiency and ease to the process. With its robust features like advanced image editing, multilingual support, intuitive interface, and seamless integration with Drupal’s file system, it makes your file-uploading workflows faster, smarter, and more enjoyable.
Contributors