Your Definitive Guide to Using Drupal's Media and Media Library
Colorful images, informative PDFs, catchy videos, and other multimedia assets add the secret sauce to your website’s engagement power. However, it can be overwhelming to manage them all on a large website. Fortunately, Drupal ships with a robust built-in system for consistent and editor-friendly multimedia management. Let the ImageX Drupal team guide you through the ins and outs of using the Drupal core Media.
A brief overview of Drupal’s Media system
The Drupal core provides the ultimate set of features for adding, finding, reusing, editing, deleting, configuring and displaying multimedia assets. It’s possible to embed these assets in the WYSIWYG text editor or add them to your content via a media field. It doesn't matter where they are hosted — you can save them to the Media Library from a local PC or embed them from third-party sites like YouTube (using oEmbed). The Library offers a slick, intuitively understandable interface.
Media assets can be anything — images, documents, slideshows, tweets, Facebook posts, Vimeo videos, and so on. Media entities are grouped into media types, which is similar in many ways to how content entities (nodes) are grouped into content types. We will discuss this and many other exciting features in more detail soon.
Media as part of the Drupal core
The Media system is listed among Drupal’s much-awaited advancements that it received on its journey from version 8 to version 9. Previously, part of its current functionalities existed in the form of contributed Drupal modules. Thanks to the Media Initiative, the final set of great multimedia management features landed in the Drupal core to make the life of content editors much easier.
The Media module first appeared as a hidden API in the Drupal 8.4 core, and the Media Library module arrived as an experimental module in Drupal 8.6. As both modules were reaching stability, they continued being improved and getting new features. The Drupal 8.8 core finally welcomed the Media system as we know it today — with WYSIWYG integration finalized. According to Drupal’s creator Dries Buytaert, this feature completed the final milestone in the decade-long transformation of Drupal media management.
It’s also worth mentioning the Easy-Out-of-the-Box Initiative plans to make the Media system, along with the Claro theme and Layout Builder, enabled from the start on all Drupal websites.
Your guide to using Media and Media Library in Drupal
Getting started: enabling the modules
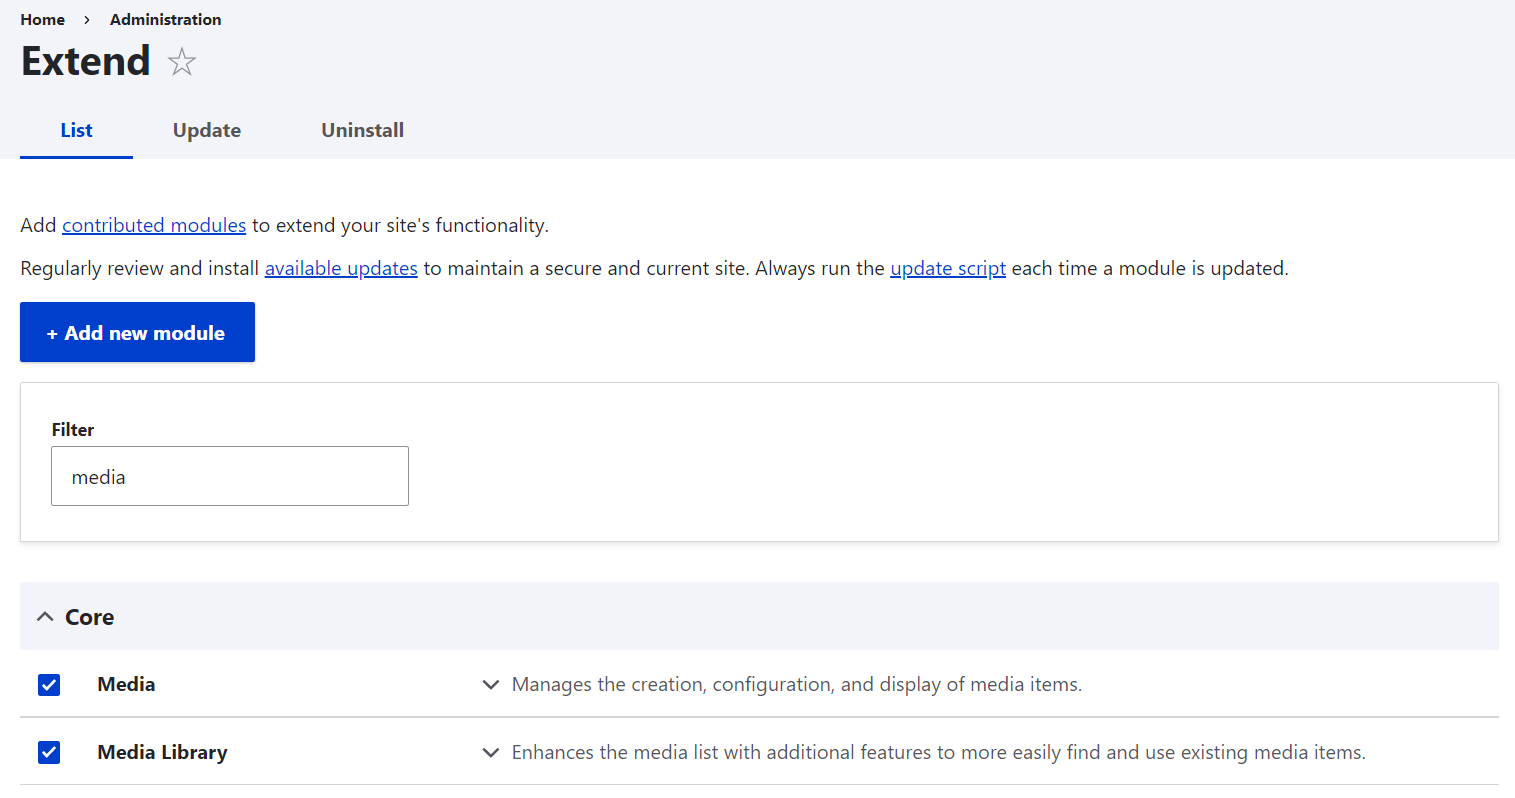
Let us start this step-by-step guide with some great news for you — there is nothing to download. However, the modules are not enabled out of the box, so you will need to enable them on the Extend tab of your Drupal admin dashboard.
Understanding Drupal’s media types
If you visit the Structure page, you will see 5 media types provided by Drupal out of the box:
- Image
- Document (for files and documents such as PDFs, etc.)
- Remote video (for remotely hosted videos on services like YouTube or Vimeo)
- Video (for local video files)
- Audio (for local audio files)
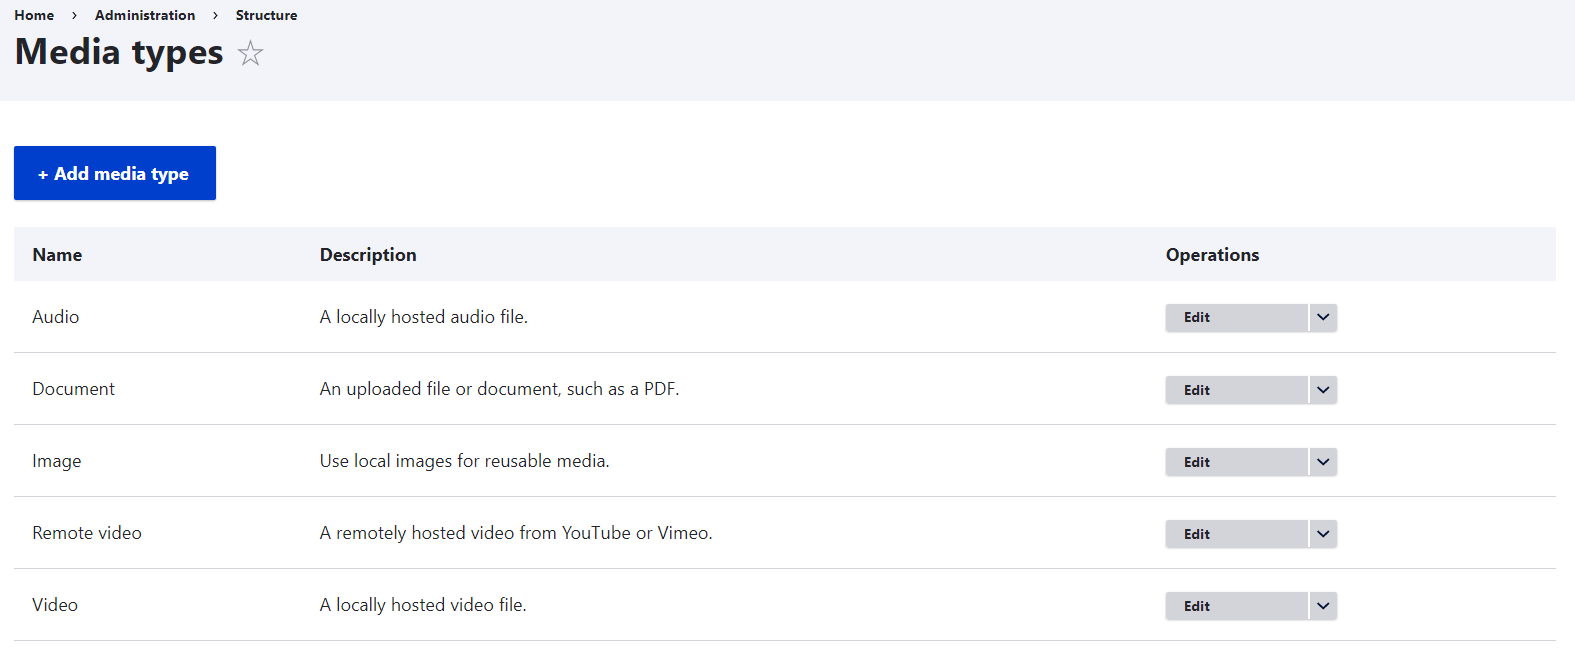
These are pre-configured and ready to go, so editors can create media entities based on them. Drupal site builders can also modify the built-in media types by adding fields or creating new ones. Media types are similar to content types except for one major difference.
Each media type is responsible for dealing with a specific type of asset, that’s why it has specific capabilities. For example, one of the tasks the Remote Video media type is configured to do is to retrieve a video thumbnail from a third-party website. The essential knowledge is contained in the respective media source plugin that is the basis of each media type.
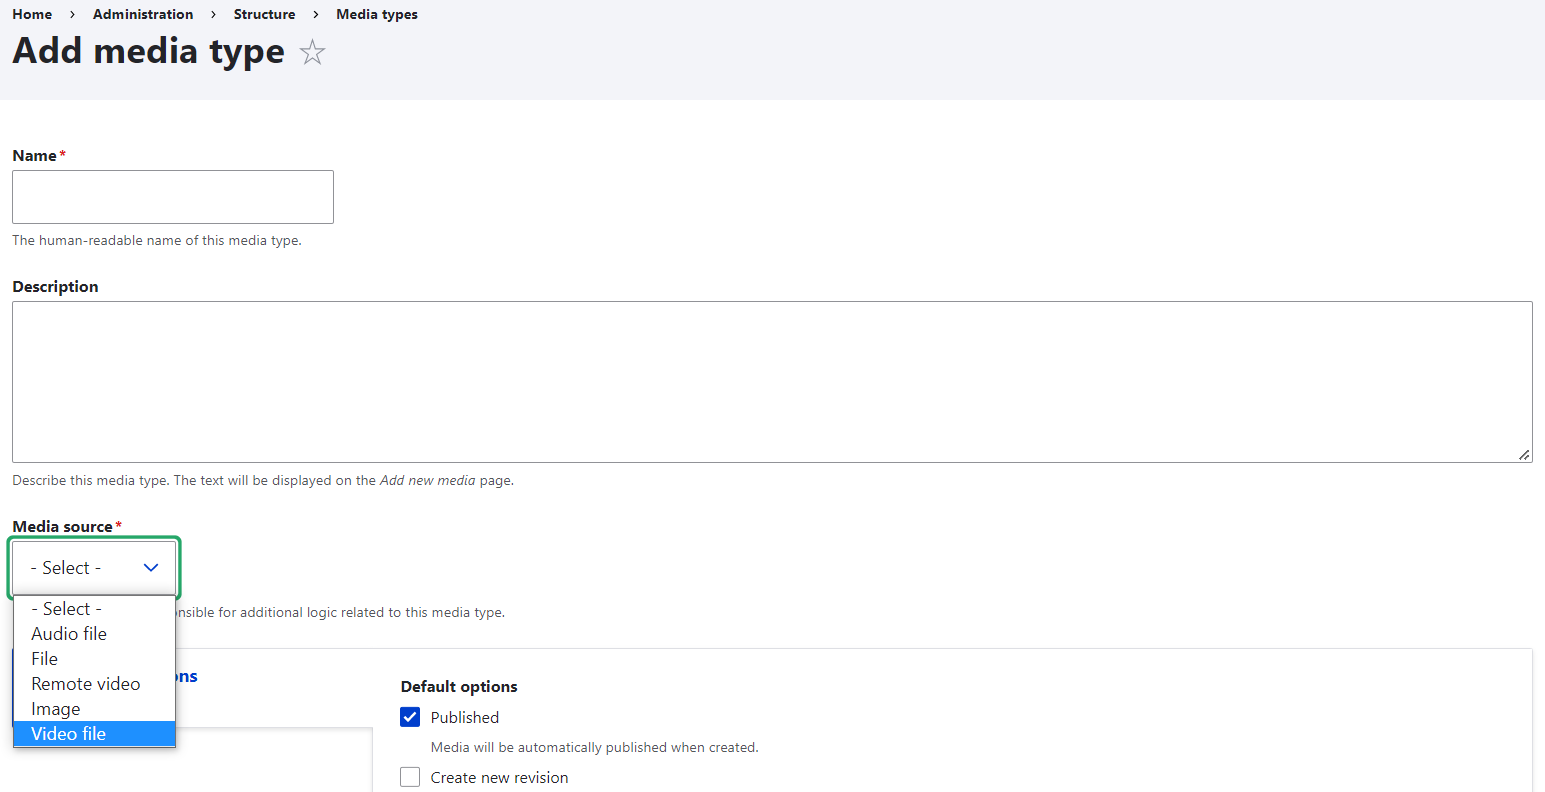
When creating a new media type, site builders need to select a media source for it. These can be built-in sources or additional ones provided by contributed modules like Media entity slideshow, Media entity Instagram, Media entity Twitter, or custom modules.
Adding items to the Media Library
Let’s move on to the most exciting part for editors — working with the Media Library. You can find the Library on the Media tab under Content.
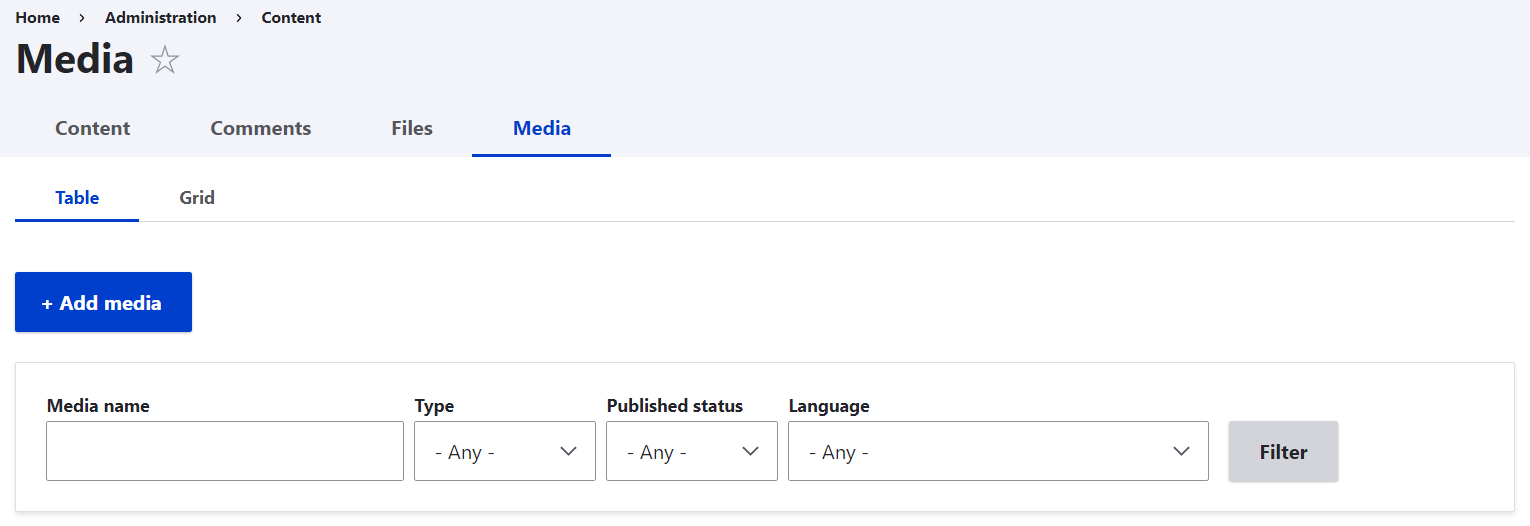
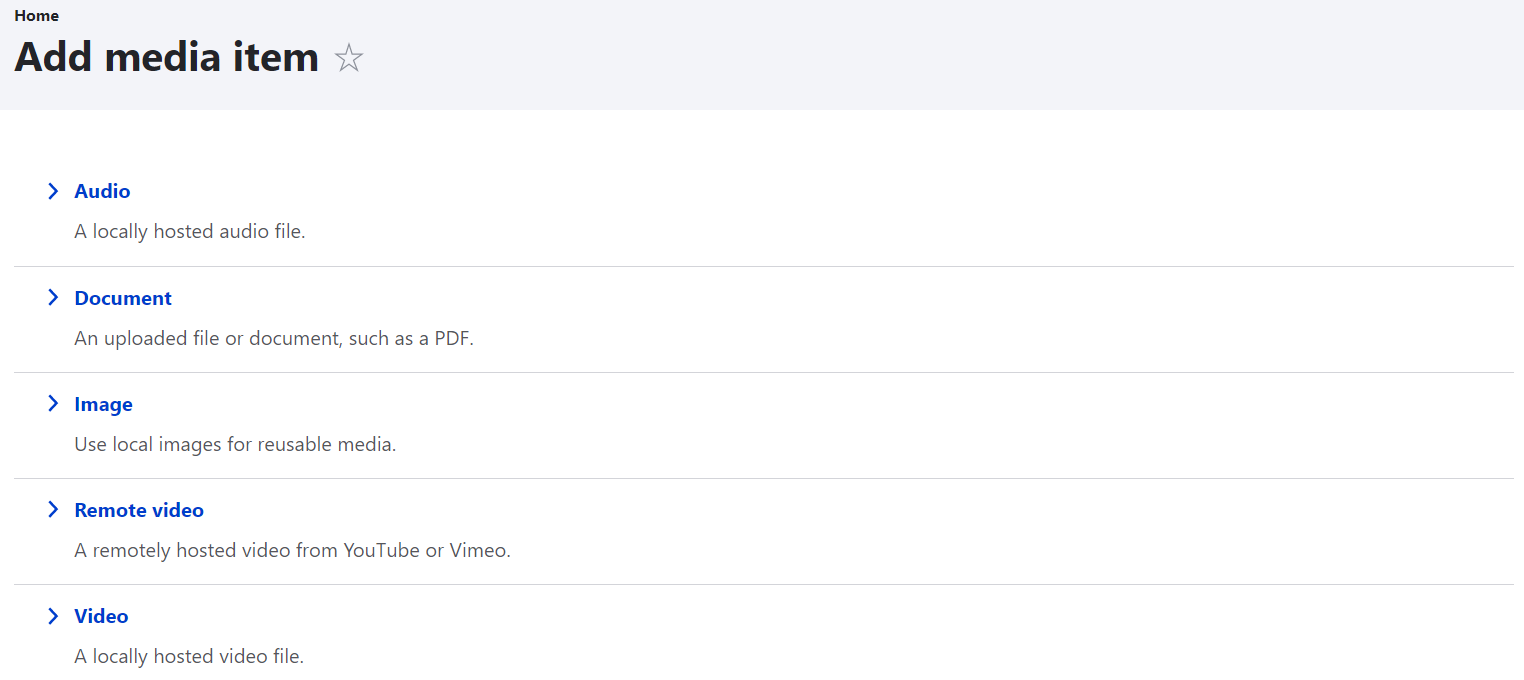
To add items to the Library, just click the “Add media” button. You will be redirected to a page where you can select which type of media you want to add (for example, an Image).
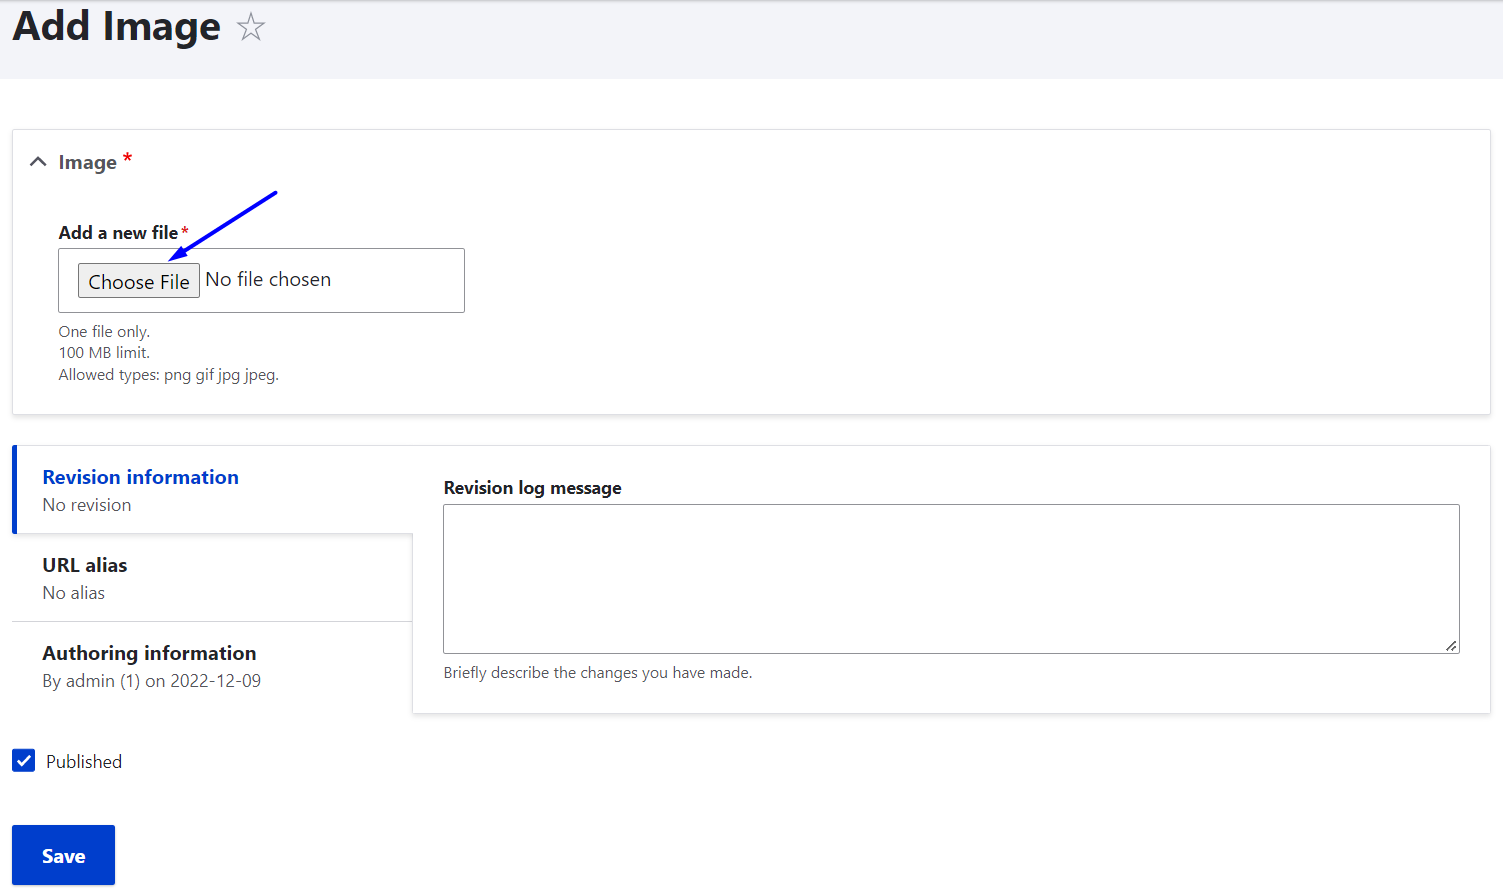
On the next step, just click the “Choose file” button and upload images from your computer.
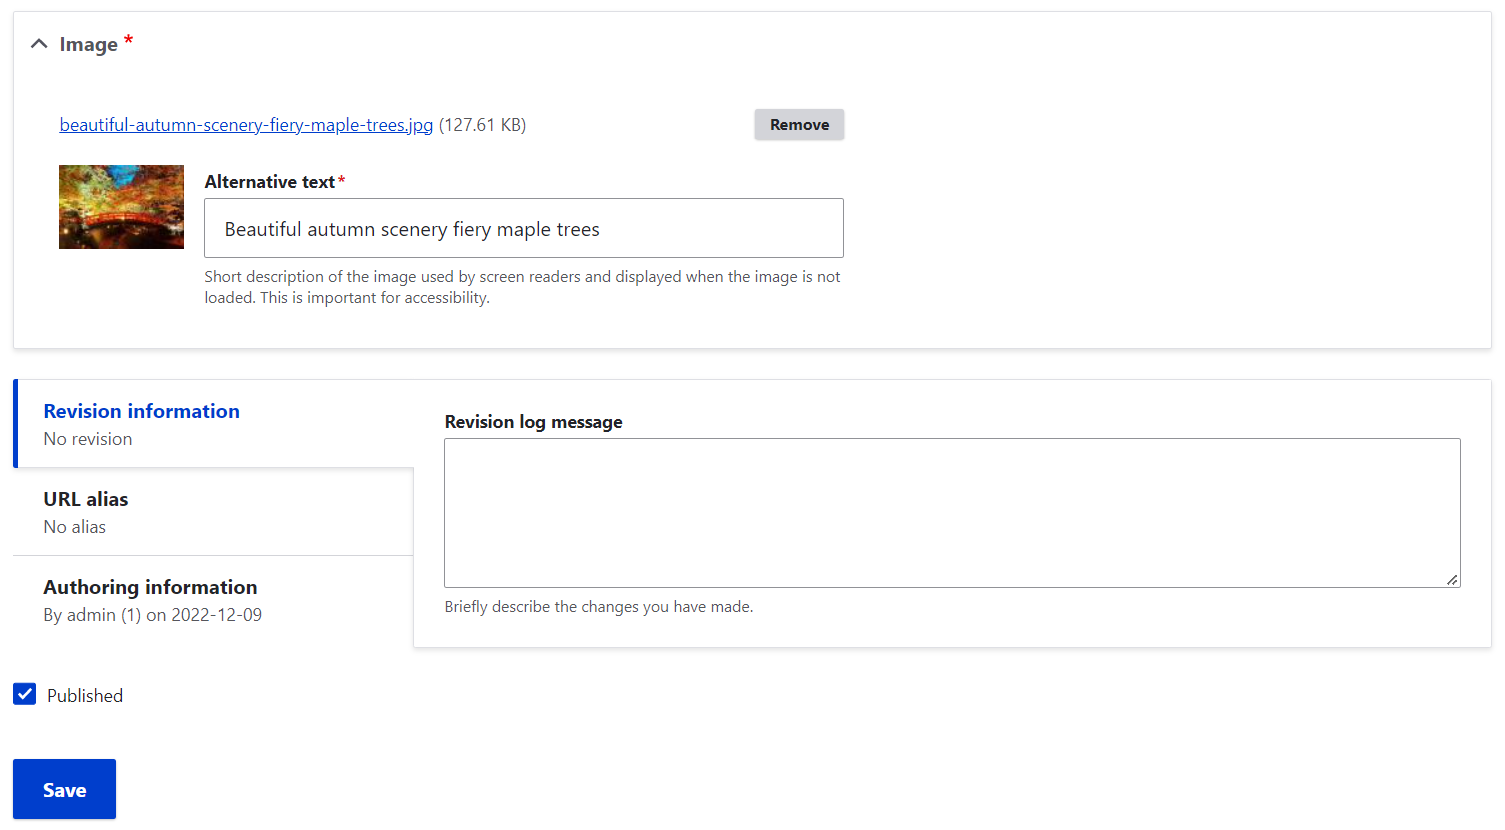
You will then be asked to fill out some information about each item you are adding. The type of information depends on the media type and its configuration. The standard Image requires you to provide an alternative text for screen readers, which is an important part of content accessibility guidelines.
Handling your items in the Library
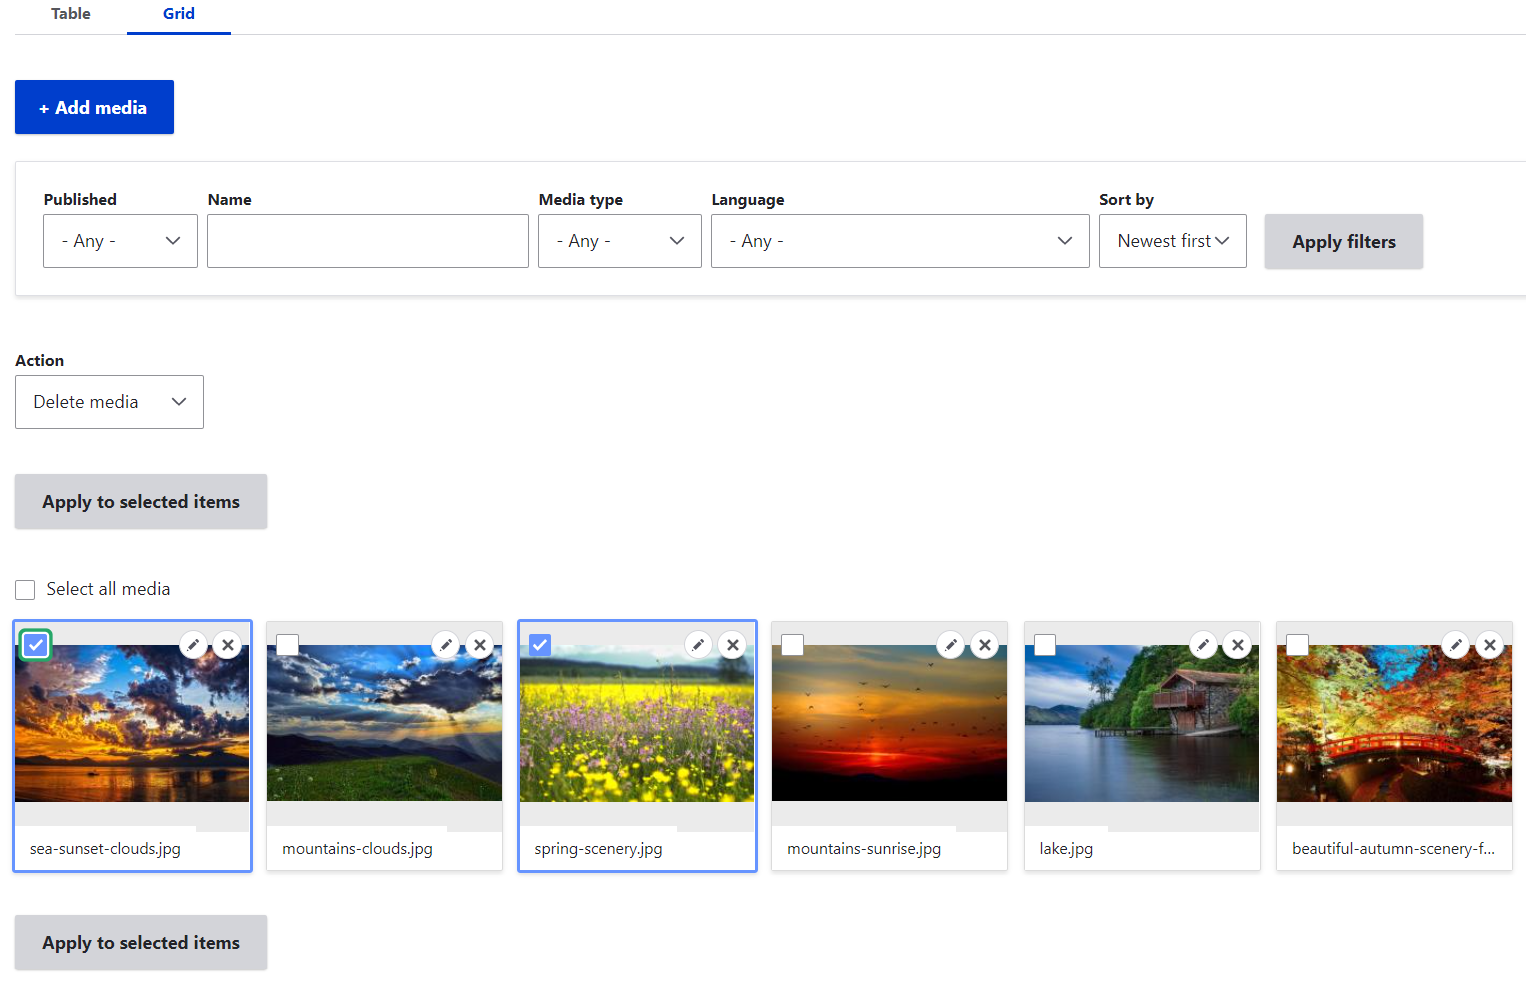
- Viewing. You can view all your saved items in the Library in a table or in a grid layout. Switching between the layouts will not impact the filters or other settings you may apply.
- Finding. It’s possible to quickly find the needed items in the Library by filtering them by published status, name, media type, and language. The order in which they are displayed is defined in the “Sort by” dropdown. By default, they are sorted by “Newest first,” but you can choose to sort them by name (A-Z or Z-A).
- Editing, deleting, publishing/unpublishing. By clicking the box for an item or multiple items in the Library, you are selecting them for a specific action to be performed with them. Use the Action dropdown menu to choose if you would like to delete, publish, save, or unpublish the items and then click “Apply to selected items.”
Media embedding in the WYSIWYG text editor
1. Preparatory steps (adding the Library button to the WYSIWYG toolbar)
There is a button for the WYSIWYG (CKEditor) toolbar that enables you to quickly embed media assets in text. However, the button is not there out of the box. It’s necessary to add this button to the toolbar by going to Configuration > Content authoring > Text formats and editors on your Drupal admin dashboard.
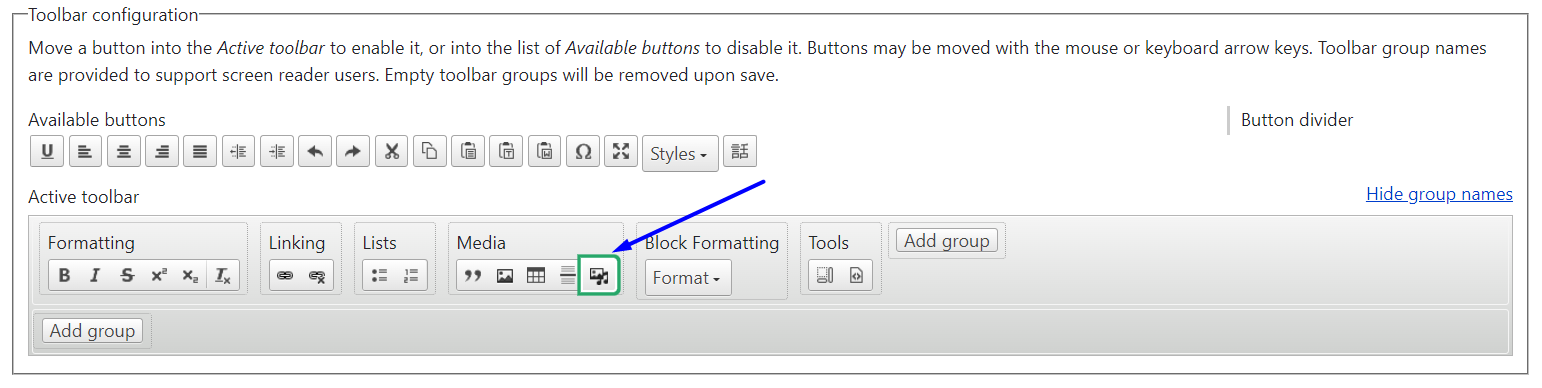
Once you are there, click “Configure” for the text format you are using, scroll to the Toolbar Configuration section, and find the Library icon (it shows a photo with a musical note). Drag the button from the “Available buttons” to the “Active toolbar” and place it anywhere within the toolbar.
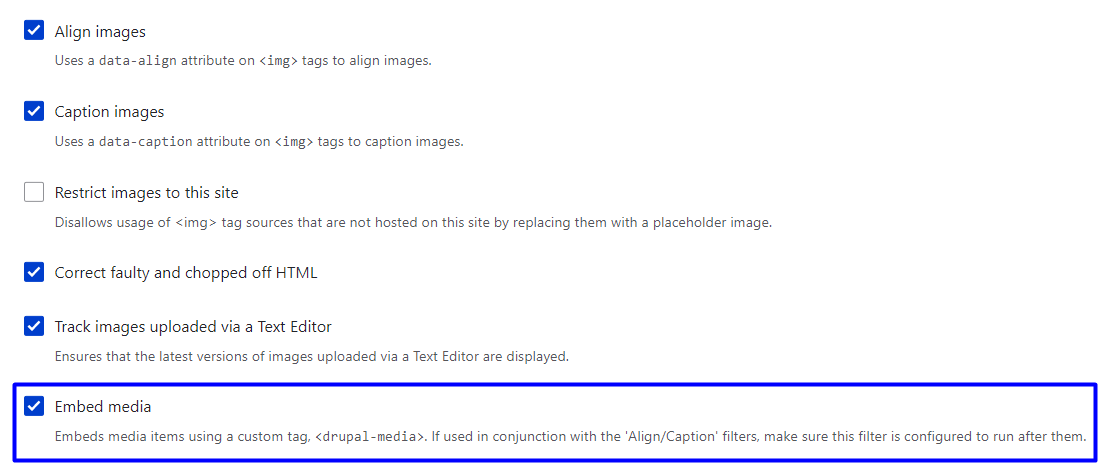
The “Embed media” filter then needs to be enabled on the same settings page. This filter must be located below all other filters such as “Align images,” “Caption images,” etc.
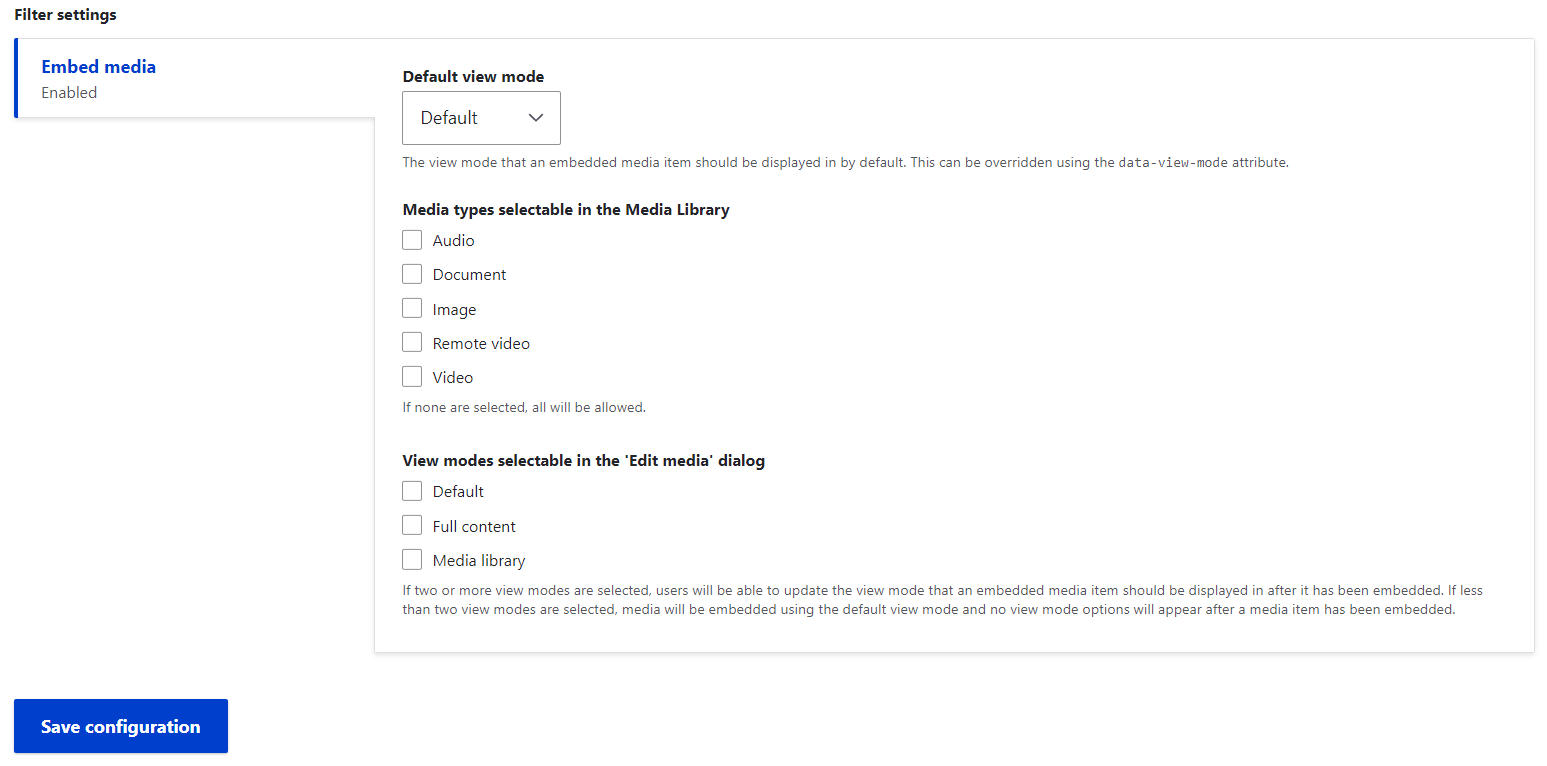
More advanced settings for the filter allow site builders to restrict which media types can be selected via WYSIWYG, as well as add “view mode” options to the “Edit media” dialog that will appear in the text editor.
2. Actual WYSIWYG embedding
Once the Media Library button is available on the WYSIWYG toolbar of the content editing form, editors can use it in their everyday content creation, and here is how.
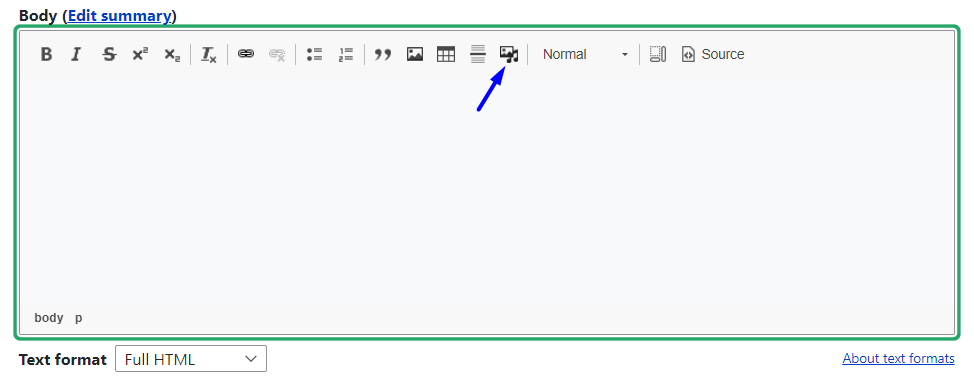
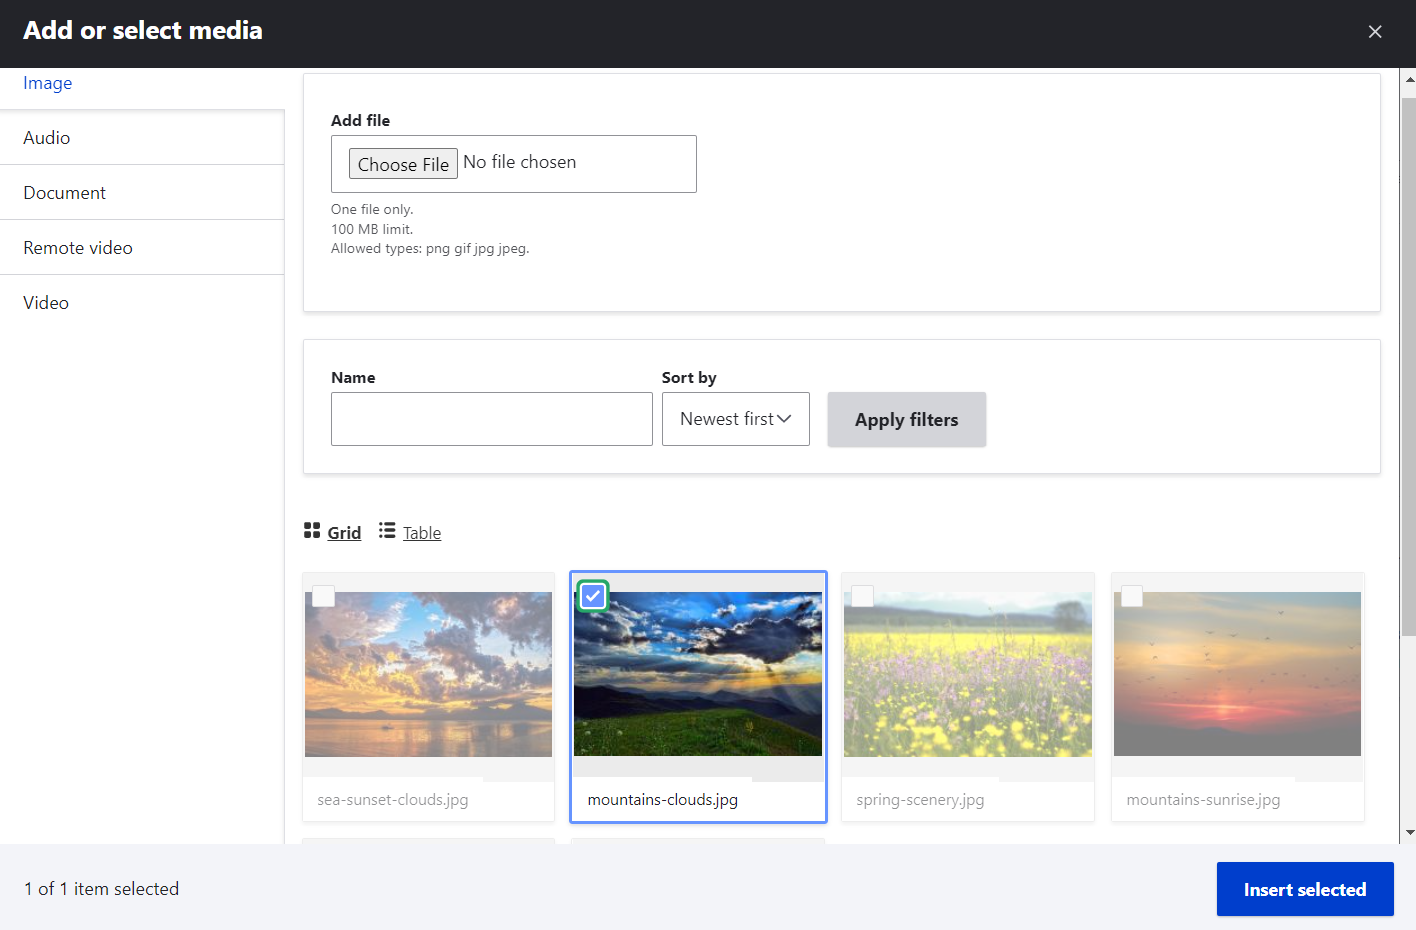
By clicking the button, you open the Library modal window where you can search for the needed assets using filters. It is still possible to upload files to the Library at this point if you need to. Once you’ve found the item that you want to select, check its box, and click “Insert selected.”
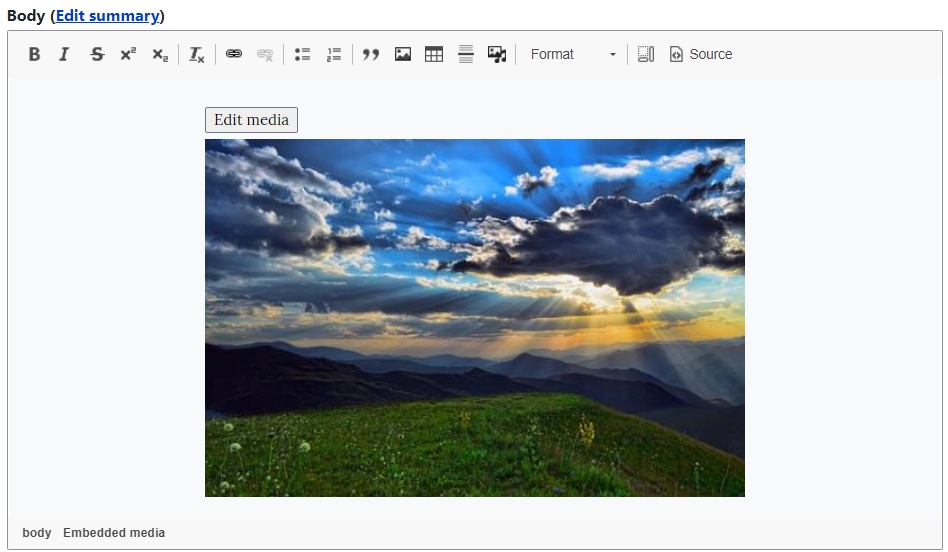
The item is immediately embedded in the text editor. In this example, there is an embedded image.
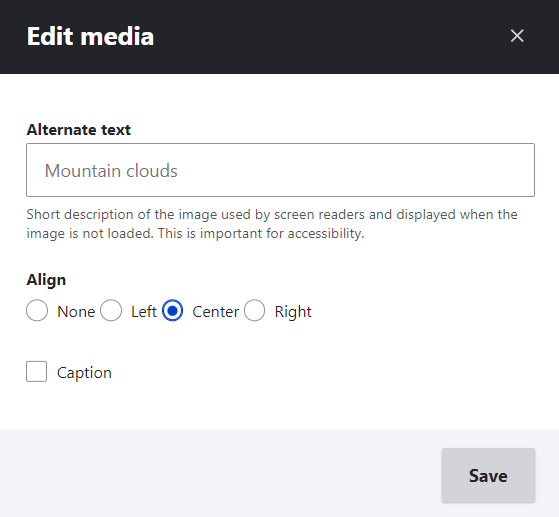
The “Edit media” button opens a dialog box that enables you to edit the alternate text, align the image, and optionally add a caption for the image.
Adding the Media field to content
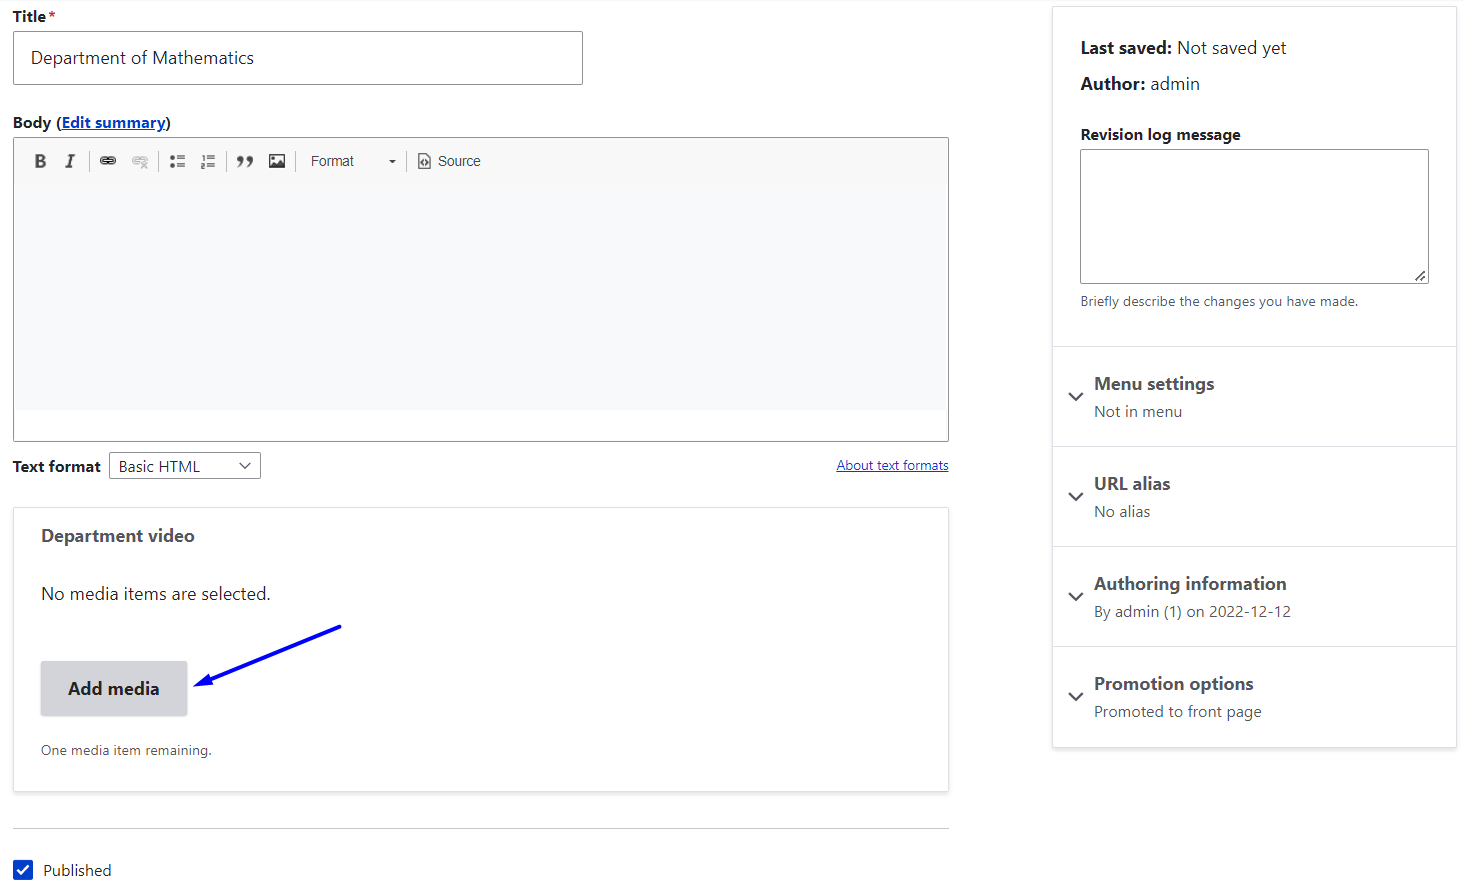
The next option is to add media as fields to content types or user profiles. Imagine, for example, a Department content type on a university website that structurally includes a video about the given department. This means the field for adding a video will be available on the content editing form for every department node. Editors will be able to click on this field and go directly to the Library for choosing videos.
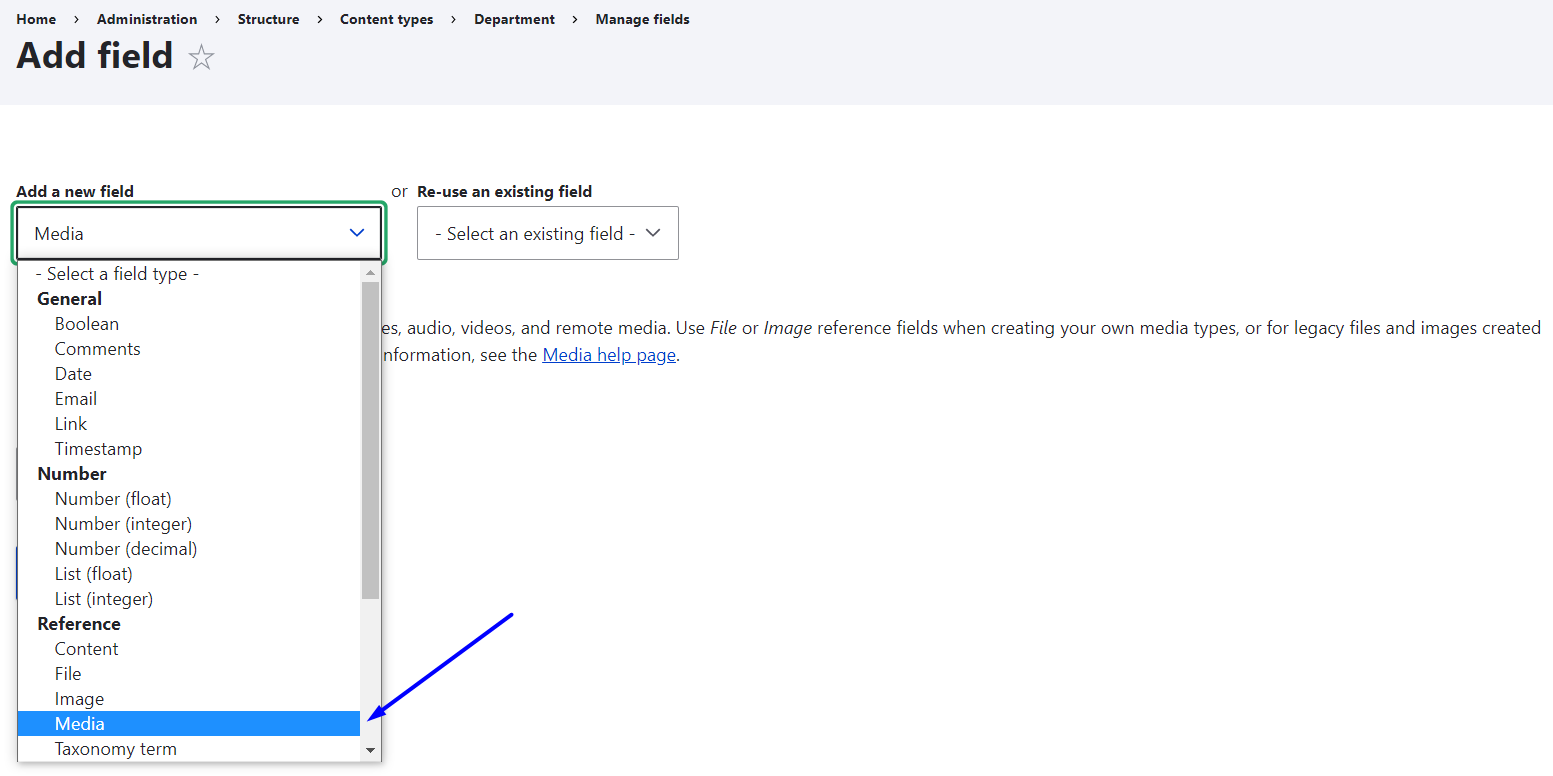
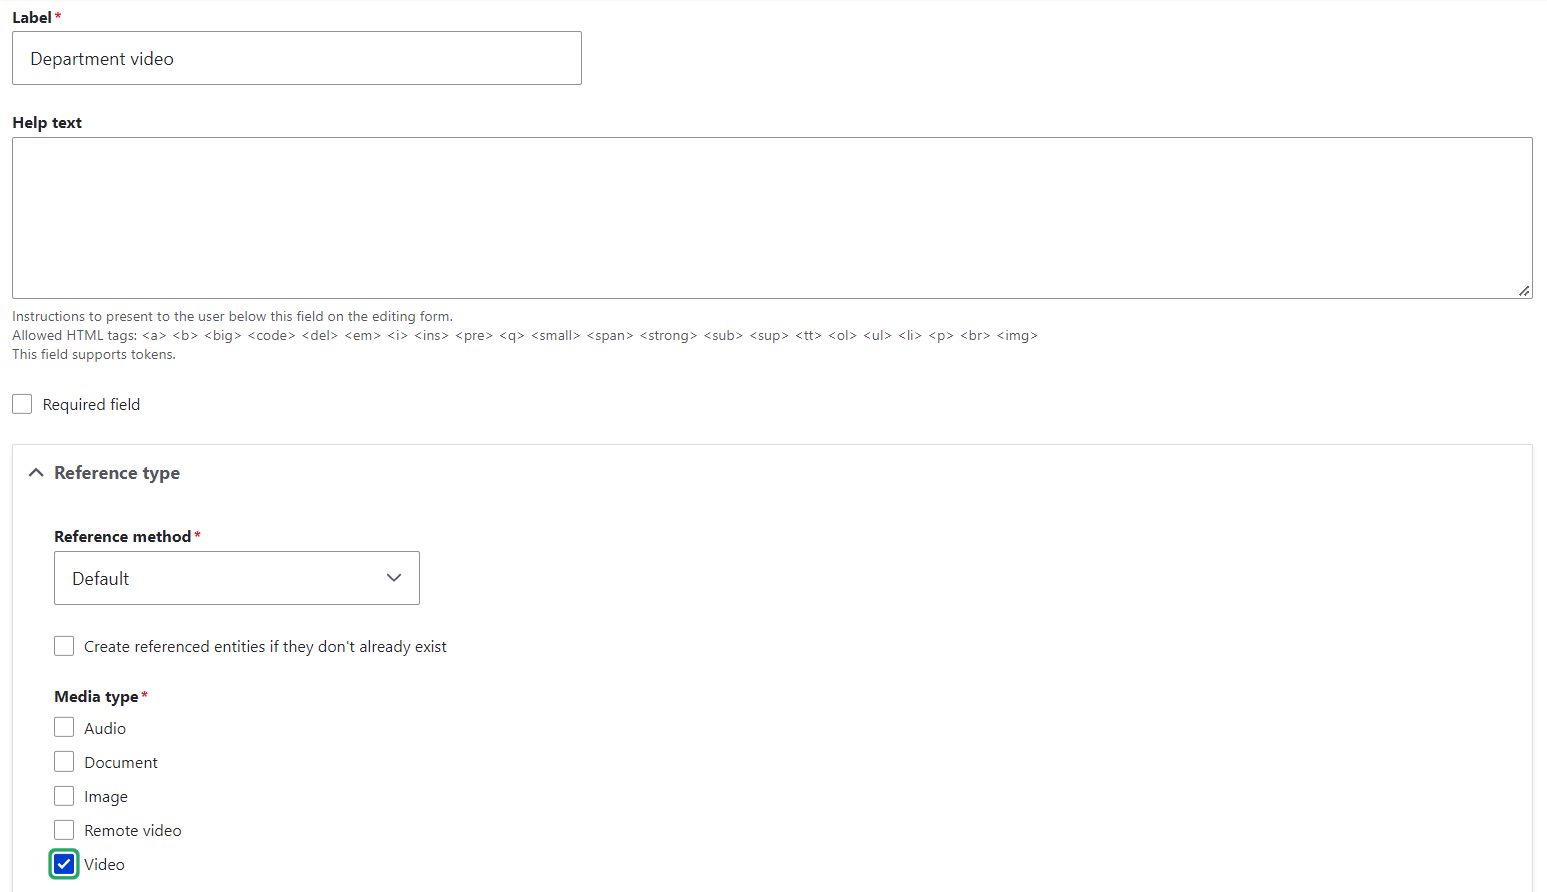
All you need to do is to go to Structure > Content types> {your content type} > Manage fields, click “Add a new field,” and select the Media field in the dropdown under “Reference.” Give it a label (e.g. “Department video”).
During the next step of this field setup, set the allowed number of values which defines how many videos you want to allow to be published in one node. Step 3 will offer you some important settings such as making the field required or not, and, of course, selecting the media type. In this example, we can select “Video.”
Save the settings and you are ready to go. Every node of the Department type that you want to edit or create now has a field for adding a video from the Library. To add assets from the Library, editors can follow similar simple steps to those we described earlier in the WYSIWYG embedding part.
Final thoughts
The Drupal core Media takes care of every aspect of efficient media management. Our Drupal development team will be glad to help you create a perfect media configuration based on your website’s requirements. You can also reach out to us if you are using an older Drupal version and need a seamless migration. Drop us a line whenever you are ready to discuss the options with our experts.