
Top Drupal Newsletter Modules and a Mailchimp Integration Guide

Newsletters are meant to keep audiences connected in a consistent way, building familiarity and trust. They carry updates, stories, and ideas straight into inboxes. It’s a format that rewards consistency over noise, and clarity over clever tricks. A good newsletter feels less like marketing and more like a friendly letter that arrives just when you need it.
To make that spark easy to kindle, the process of creating and sending newsletters should feel as natural as striking a match. It should be easy to shape, send, and refine your message, letting you focus on the essence rather than the mechanics.
That’s why Drupal’s ecosystem offers modules designed to make newsletter creation seamless. In this article, we’ll review the top options available today. We’ll also take a closer look at one of the most popular modules for creating newsletters and walk you through its capabilities and setup.
Top Drupal modules for creating newsletters
Drupal offers a range of modules for sending newsletters, each serving different needs. Some connect your site to external email platforms like Mailchimp, SendGrid, or CleverReach, while others, like Simplenews, provide a built‑in solution.
- Simplenews. The Simplenews module sends newsletters directly from Drupal to subscriber lists. Supports both anonymous and registered users, multiple newsletter categories, customizable templates, subscriber management, and optional confirmations. It integrates with Drupal Views and mail modules.
- Simplenews Scheduler. This tool extends Simplenews by allowing newsletters to be sent on a recurring schedule (daily, weekly, or monthly). It generates new editions of a newsletter content page at each scheduled time, triggered by Drupal’s automated task runner, Cron.
- Mailchimp. This module provides full integration with Mailchimp, enabling list management, campaign creation and sending, and email tracking. Visitors can manage subscriptions, while admins can map Drupal fields to Mailchimp lists. Submodules add signup forms, campaign tools, e‑commerce, and transactional email support.
- Mailchimp Marketing. This tool offers lighter integration, focusing on specific features such as syncing taxonomy terms with audience groups and creating RSS‑based campaigns. Uses Mailchimp’s official library but offers fewer features than the full Mailchimp module.
- Mailchimp Transactional. This tool is designed for transactional emails like password resets, order updates, and shipping confirmations.
- Webform Mailchimp. This module connects Webform submissions to Mailchimp, automatically adding users to selected audiences when they submit a form.
- SendGrid.The SendGrid module routes Drupal’s email sending through SendGrid for improved reliability and deliverability. It does not handle newsletter creation or subscriber management.
- Webform SendGrid. Similar to how Webform Mailchimp sends Webform submissions to Mailchimp, this module sends Webform submissions to SendGrid.
- SendGrid Integration. This tool connects Drupal’s mail system to SendGrid’s cloud delivery service for fast, reliable email sending.
- SendGrid API. It’s a low‑level helper module that links Drupal to SendGrid’s API. Provides the foundation for other SendGrid modules but has no user‑facing features on its own.
- SendGrid Mailer. This module enables sending HTML emails through SendGrid by working with the MailSystem and SendGrid API modules.
CleverReach® — Newsletter Marketing. This tool integrates Drupal with the CleverReach® email marketing platform, letting you design and send professional newsletters. It synchronizes Drupal user data (like names, roles, and content) with CleverReach, supports legally compliant signup forms, and offers responsive templates, analytics, segmentation, and automation tools. It must be noted that the module isn’t compatible with Drupal 11.
More Drupal tools that can help you create newsletters
Besides dedicated newsletter modules, broader tools in the Drupal ecosystem can help you automate, personalize, and streamline newsletter workflows.
Drupal AI
While not a newsletter module itself, Drupal AI and similar AI tools can help you generate newsletter content, personalize messages based on user behavior or interests, analyze audience engagement patterns, assist editors with tone, clarity, or template suggestions, and more.
Drupal’s AI adoption is in full swing, so AI agents and automators can be harnessed to automate newsletter tasks.
ECA (Event‑Condition‑Action) Tools
The ECA module triggers actions based on certain events and conditions, so it can help you automate parts of the newsletter pipeline, like:
- auto‑subscribe users when they register
- add users to specific lists based on taxonomy terms they follow
- trigger internal notifications that feed into newsletter drafts
When combined with Mailchimp, ECA becomes even more powerful. There is the Mailchimp ECA submodule that extends automations directly into Mailchimp.
Using the Mailchimp module on your Drupal website
1. Installing the module
Install the Mailchimp module on your Drupal website. The recommended way is to use Composer:
composer require drupal/mailchimp
Use the Extend tab to enable the needed submodules:
- Mailchimp (base) connects Drupal with Mailchimp’s email service.
- Mailchimp Audiences lets you manage and sync Mailchimp audiences.
- Mailchimp Campaign creates, sends, and imports Mailchimp campaigns.
- Mailchimp ECA automates Mailchimp actions using ECA (Event-Condition-Action) workflows. It also needs the ECA module to be installed.
- Mailchimp Event Examples provides sample forms for testing Mailchimp events.
- Mailchimp Events adds events for Mailchimp’s behavioral targeting.
Mailchimp Signup offers signup blocks and pages for user subscriptions.
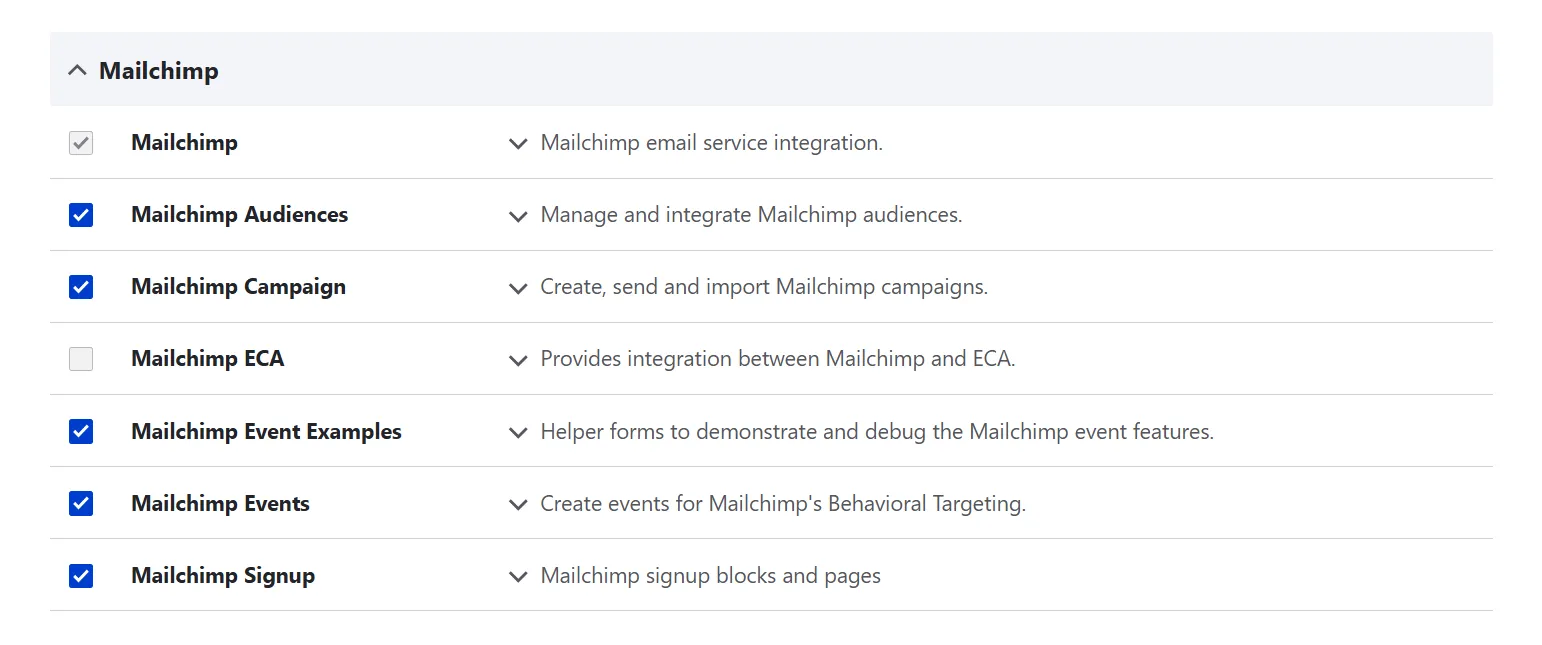
The submodules for Drupal’s Mailchimp module
2. Connecting your Drupal site to Mailchimp
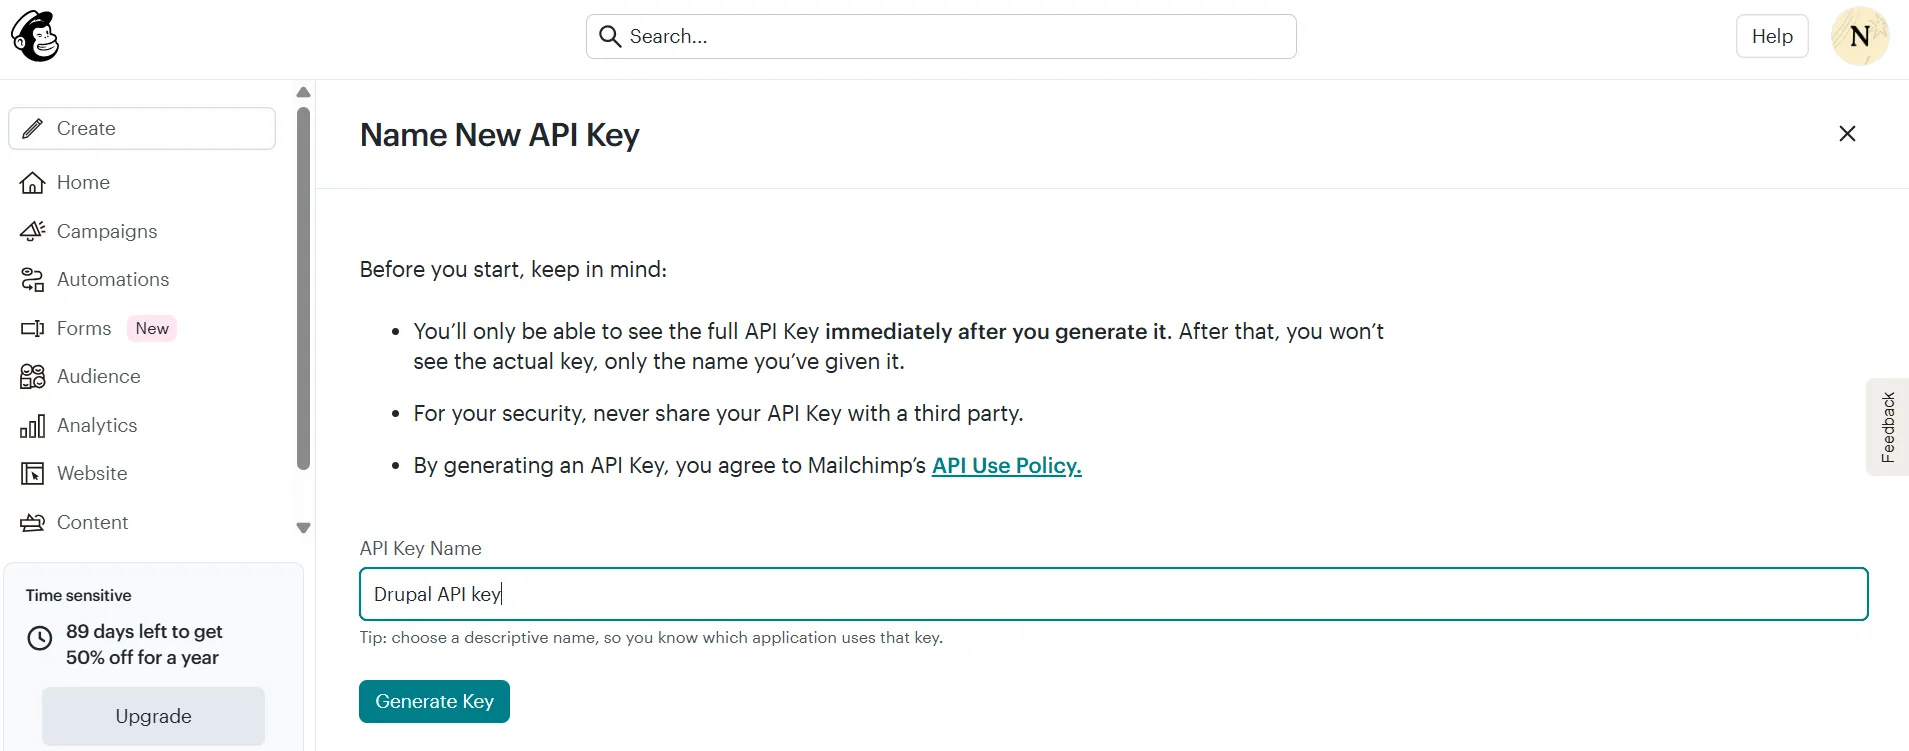
If you use one of the older versions of the module, you’ll need your Mailchimp credentials. In your Mailchimp account, you’ll find them at the ‘Extras > API keys’ tab of your user profile. You can use the “Create a key” button to generate a new API key, give your key a name, and click “Generate key.”
In the latest version of the Mailchimp module, the step of generating an API key in Mailchimp is no longer needed. The module has moved to OAuth authentication instead.
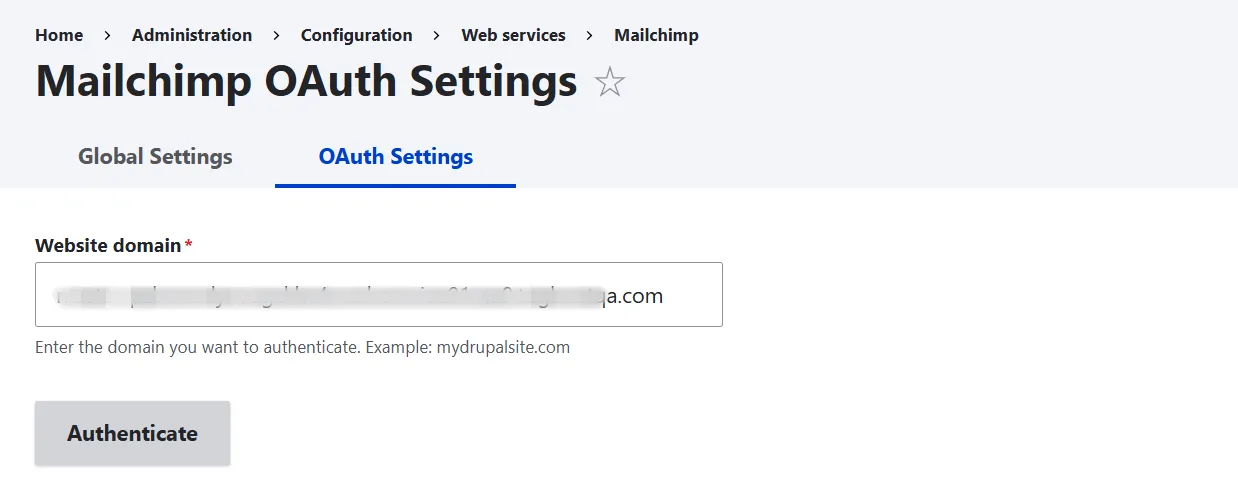
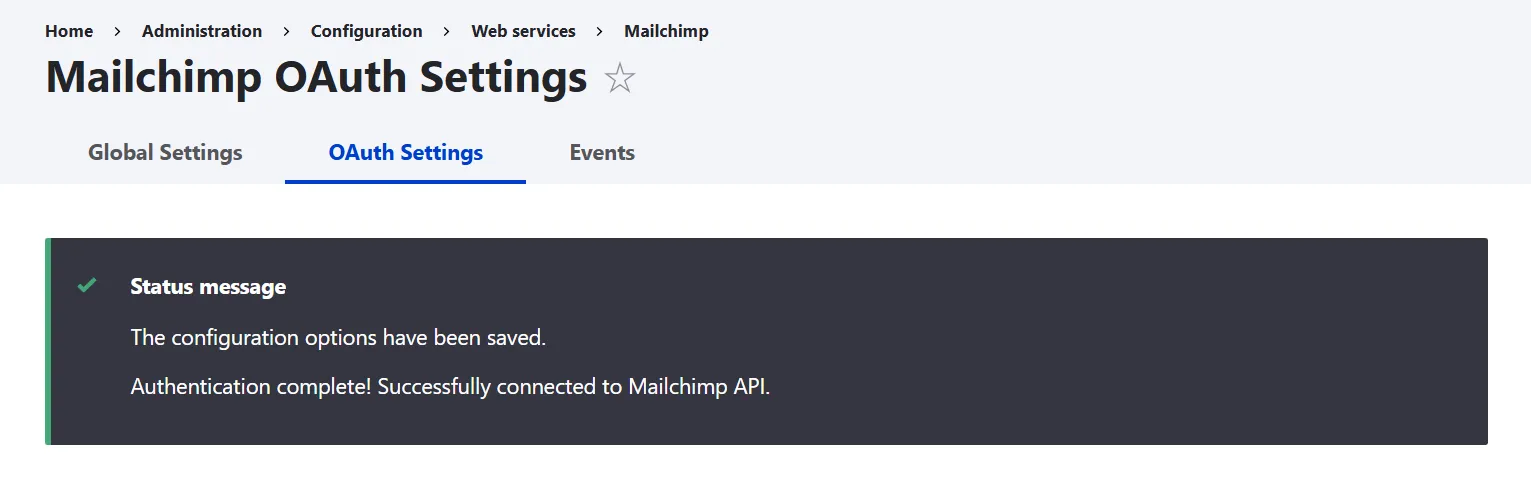
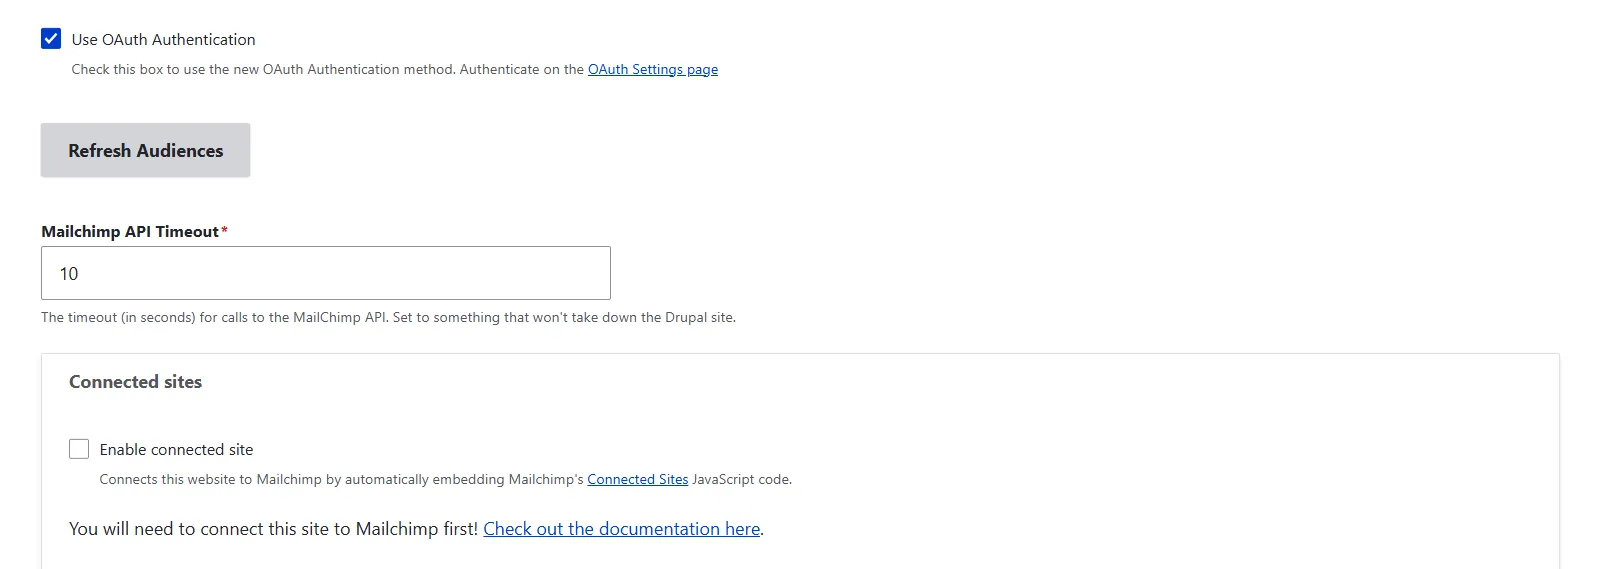
To connect Drupal with Mailchimp in the latest version of the module, go to Configuration > Web services > Mailchimp > Global Settings. Make sure the “Use OAuth Authentication” checkbox is checked, then switch to the OAuth Settings tab.
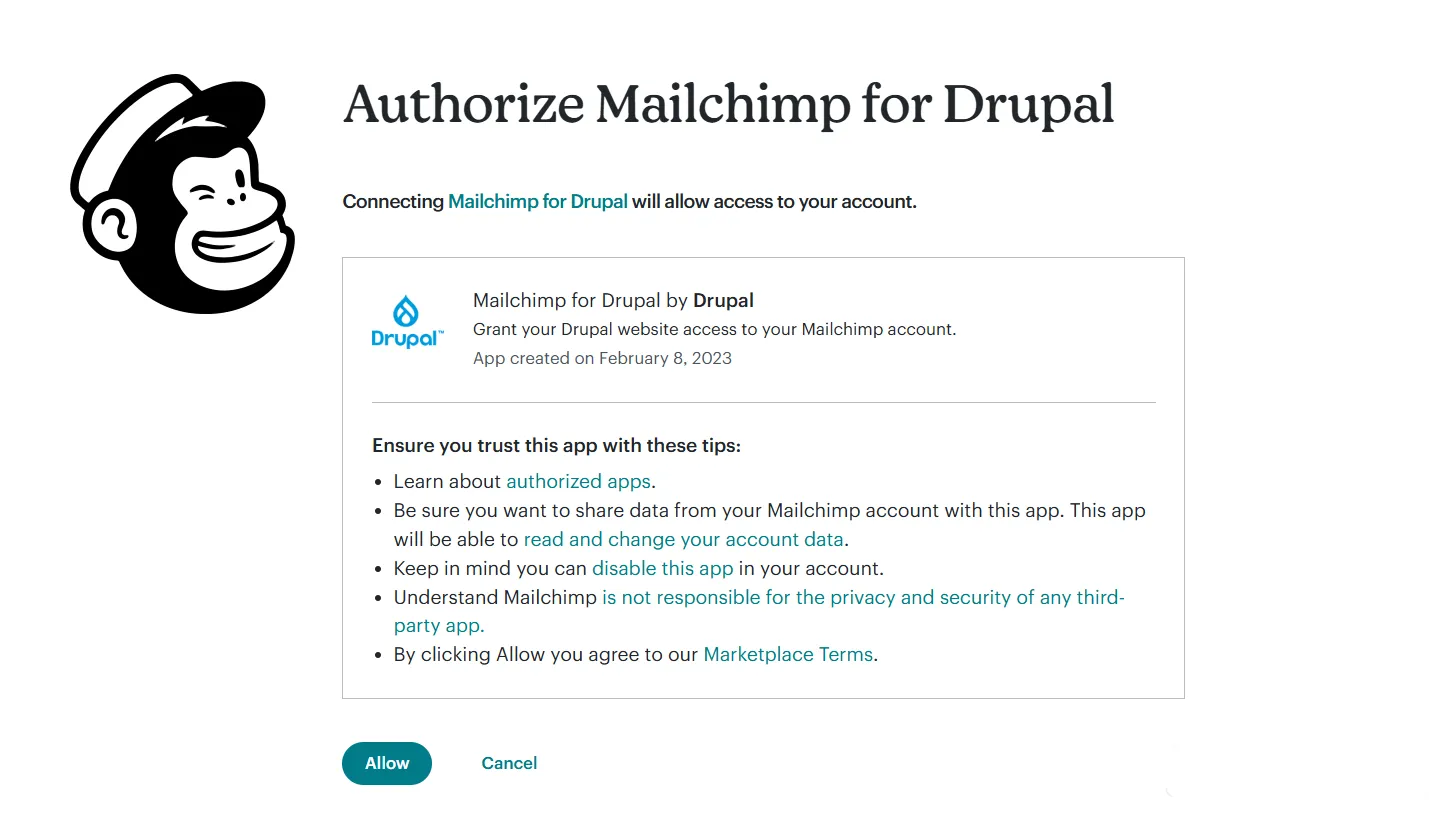
Click “Authenticate,” and you’ll be prompted to log in to your Mailchimp account. After signing in, you’ll be asked to grant Drupal access. Once you approve, you’ll be redirected back to Drupal with the connection established. From that point on, Drupal stores the OAuth token securely and uses it for all communication with Mailchimp.
You’ll see a confirmation of the completed authentication. Success, the integration of Mailchimp with your Drupal site is complete!
It must also be noted that the Global Settings tab has yet another option, “Connected Sites.” This setting links your Drupal site to Mailchimp by adding a small tracking script. It allows Mailchimp to collect visitor behavior data (such as page views) for more advanced targeting and personalization. It’s not required for basic newsletter functionality or syncing audiences, so you can leave it disabled unless you plan to use these marketing features.
3. Syncing your audiences
On the Global Settings tab of your Mailchimp settings in Drupal, click “Refresh Audiences.” The message “Audiences were updated” means Drupal has synced its local copy of your Mailchimp audiences.
If you have not added any audience already, you can do it on the Audience tab of your Mailchimp account. It must be noted that subscribers ultimately live in Mailchimp audiences rather than in Drupal, and once they’re there, they can immediately receive campaigns.
4. Creating a campaign
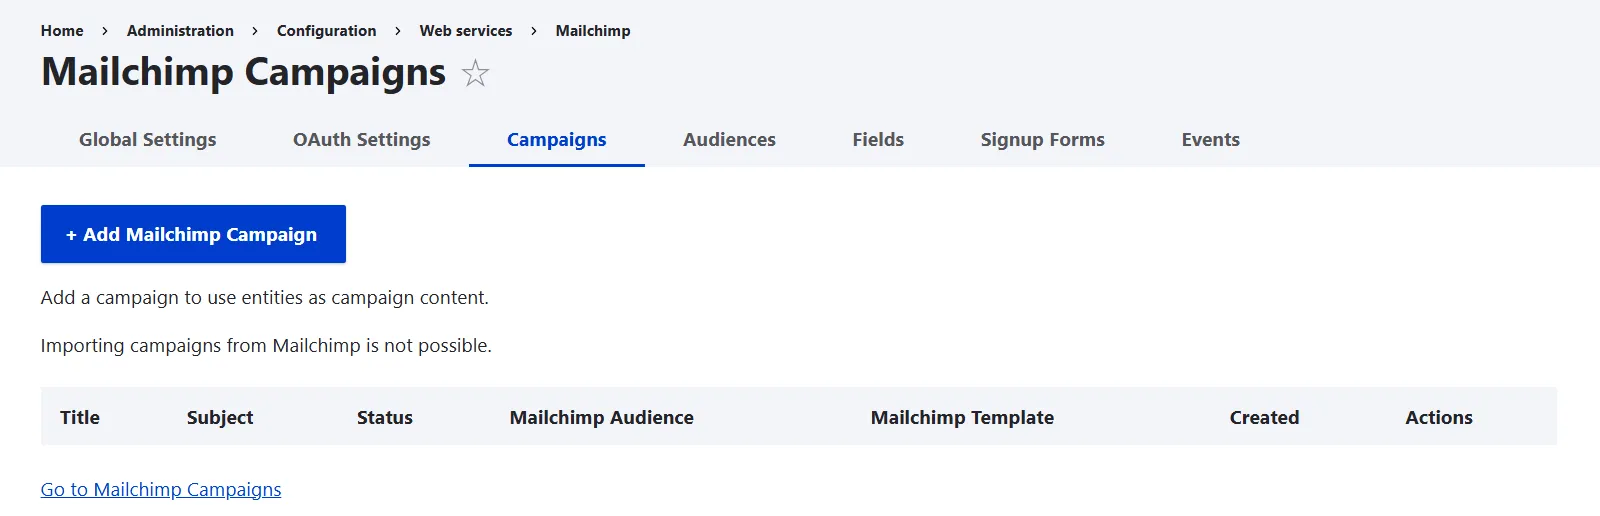
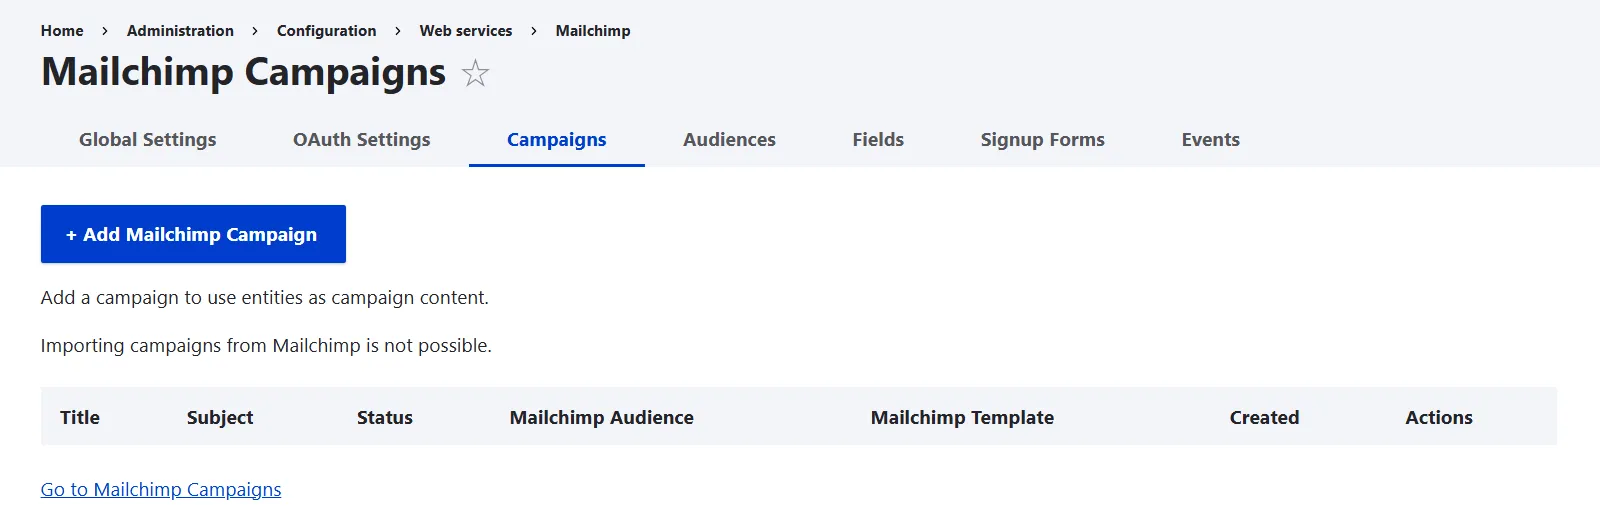
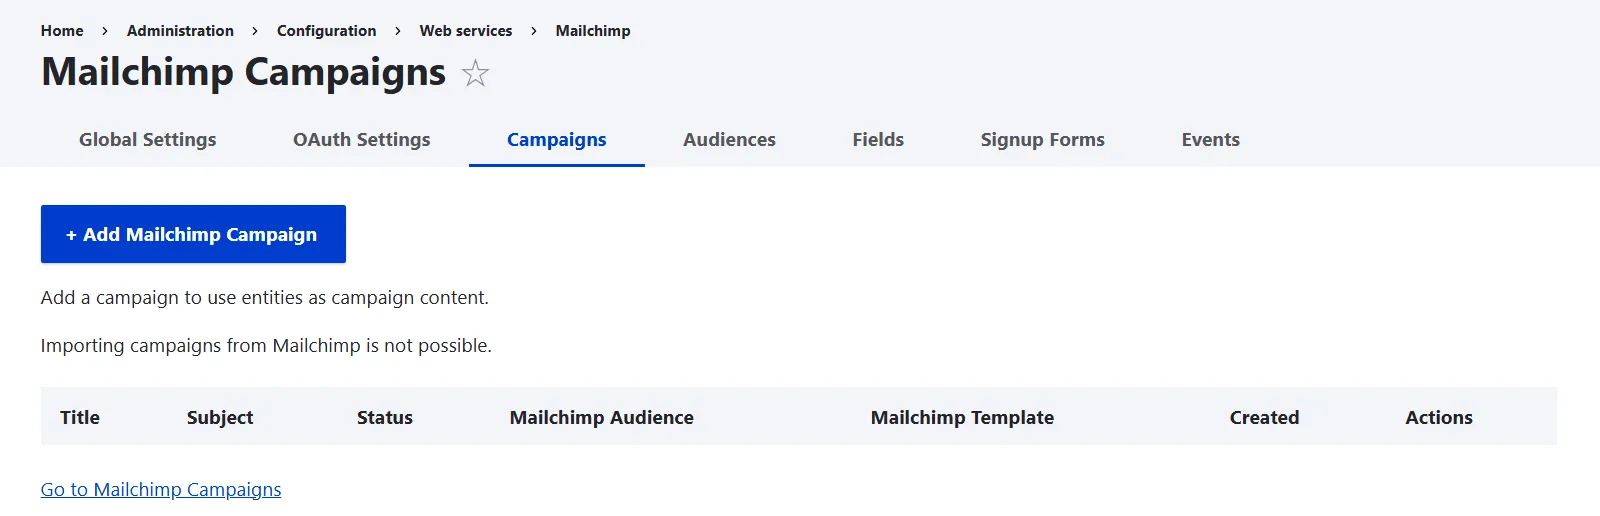
With the Mailchimp Campaign submodule enabled, you can click “Configure” next to it on the “Extend” tab or go to the “Campaigns” tab of your Mailchimp settings in Drupal to create a campaign. Once redirected to the submodule’s settings, click “Add Mailchimp Campaign.” Alternatively, you could choose to go directly to the campaigns stored in your Mailchimp account by clicking “Go to Mailchimp Campaigns.”
- Add title, subject, and preview text of your campaign. For example, title: “Summer Newsletter — June 2026,” subject: “Fresh Updates for You,” and preview text: “Discover new features, upcoming events, and exclusive offers inside.”
- Select the Mailchimp audience data from the dropdown that is pulled directly from your Mailchimp account. This includes the specific Mailchimp audience you want this campaign to be sent to (like “Newsletter Subscribers”), and, optionally, the audience tags for segmenting your audience, in case you use those in Mailchimp (like “Member”).
- Specify the email address and the sender’s name as they should appear to the users.
Select a Mailchimp template for your newsletter.
Creating a Mailchimp campaign in Drupal, part 1
In the Content section, add your newsletter content. There is also an option to insert your Drupal site content here by selecting the content type, specific view mode, and the content item’s title.
5. Adding a Signup block or page
With the Mailchimp Signup submodule enabled, you can click “Configure” next to it on the “Extend” tab or go to the “Signup Forms” tab of your Mailchimp settings in Drupal and create a signup block or page. When users subscribe through Drupal, their information is stored locally first, then synced into Mailchimp audiences via the module.
Main settings
- Title. This is what visitors see at the top of the form, like “Subscribe for Updates.”
- Description. It appears under the title, giving context, like “Stay informed with our latest announcements and special offers.”
- Display Mode. A block with the signup form can be placed in a sidebar or footer, while a page will show the form as a full page. For a newsletter signup, you might choose Page so it’s the main focus.
- Page URL. This is the path to the signup page, like “newsletter/signup.”
- Submit Button Label. Instead of just “Submit,” you can customize it to make it more action‑oriented, like “Sign Up Now.”
- Confirmation Message. This is what users see after the submission, like “Thanks for subscribing!”
- Form Destination Page. You can leave this blank to stay on the form page, or add a path to the thank you page, like “/thank-you.”
AJAX Form Submit Mode. If enabled, the form submits without reloading the page. It’s nice for a smooth user experience.
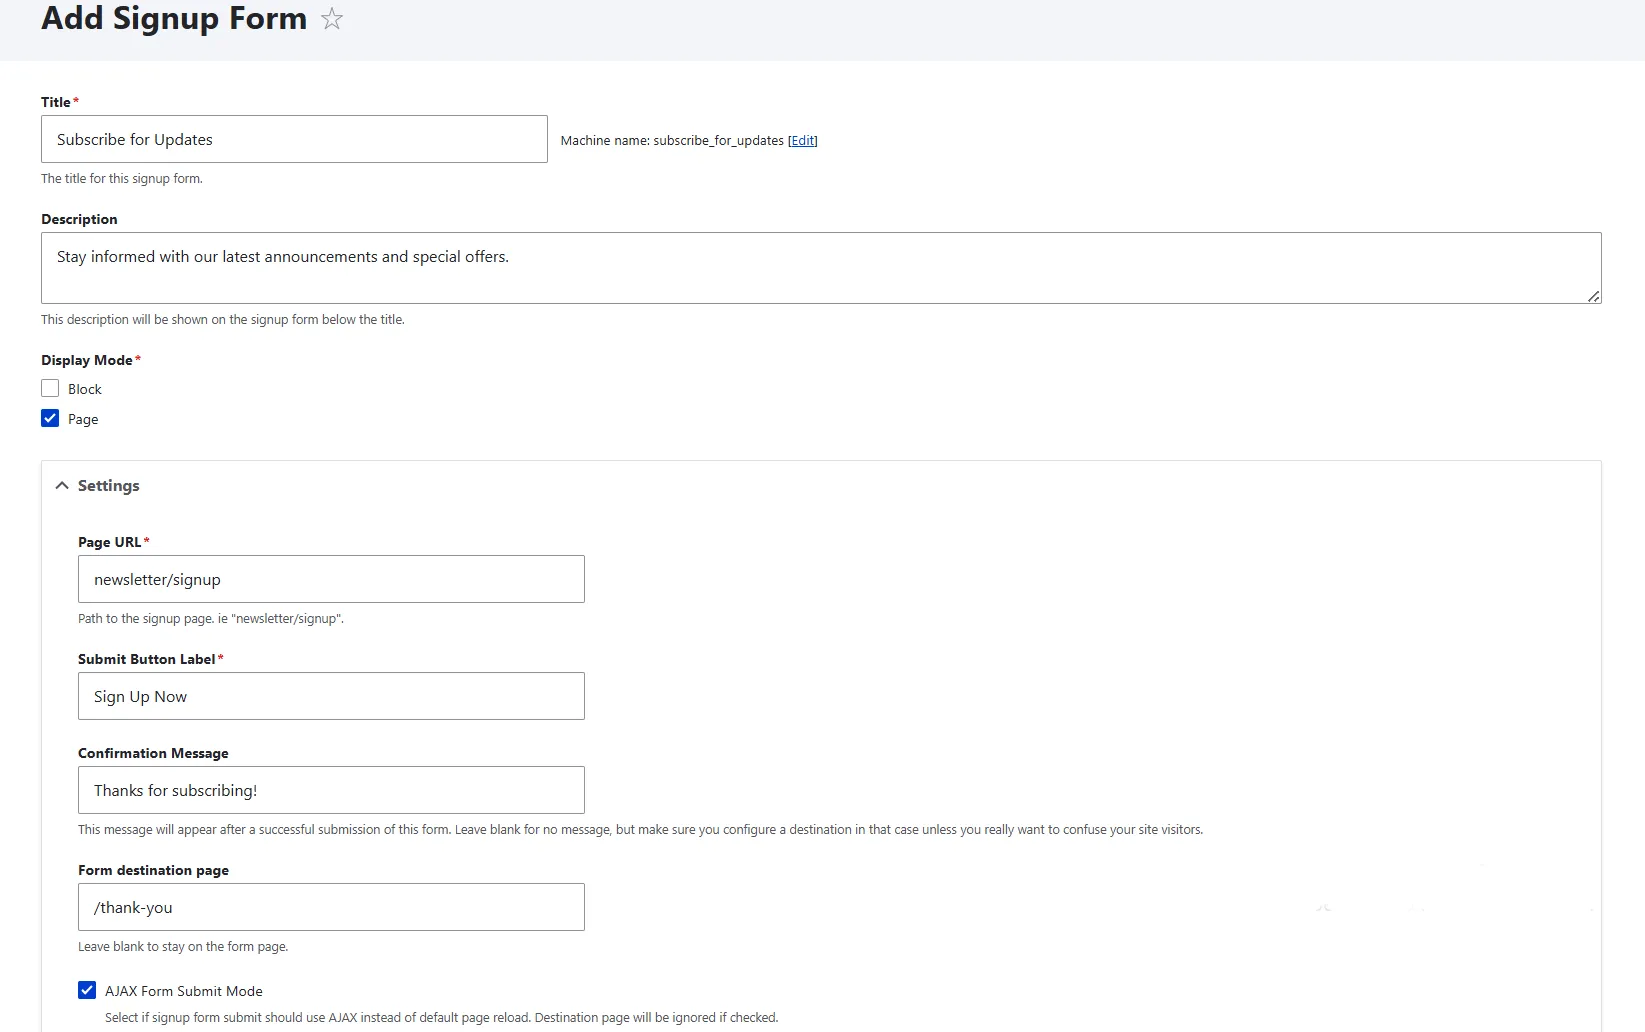
Creating a Mailchimp signup form in Drupal: main settings
Mailchimp Tags & Audience Selection/Configuration
- Mailchimp Tags. You can optionally add some tags from your Mailchimp setup that help you segment your audience, like “Member,” “Newsletter Subscriber,” and more.
- Mailchimp Audience. Choose which Mailchimp audience this signup feeds into, like “Newsletter Subscribers.”
Merge Field Display. You can select which extra fields to merge (beyond the required email address), so they appear in the form for people to fill in. They include birthday, first name, last name, city, country, and so on.
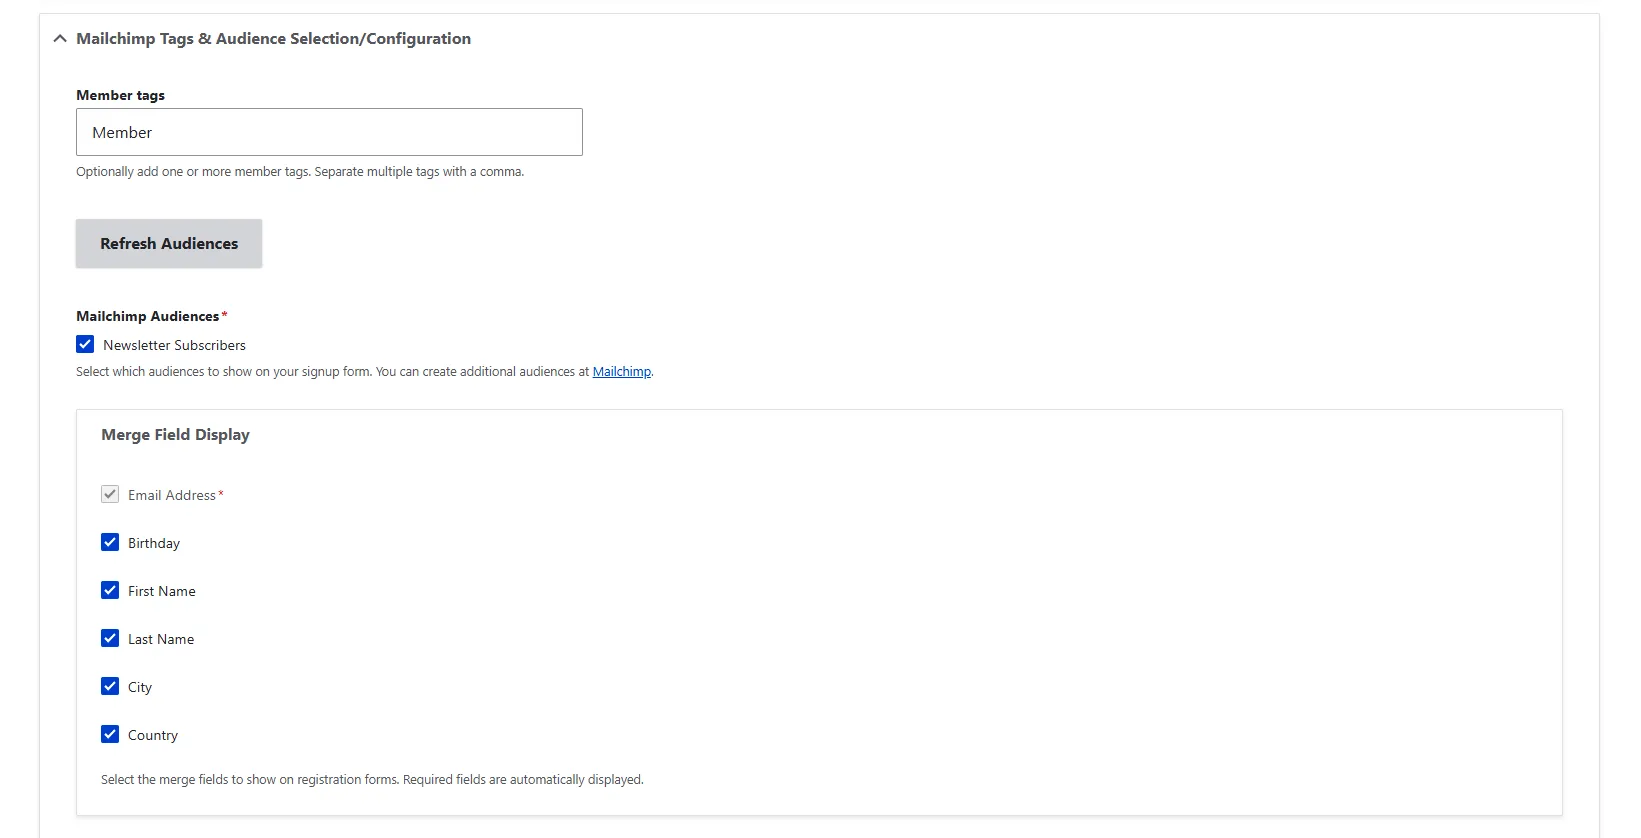
Creating a Mailchimp signup form in Drupal: audience settings
Subscription Settings
- Require Double Opt‑in. Check this if you want extra confirmation (safer, reduces fake signups, required in some regions). Leave this unchecked if you want fewer steps and faster list growth, but risk lower quality addresses.
- Include Interest Groups. Check this if you want subscribers to choose categories. This helps you segment your audience. Leave this unchecked if you don’t need segmentation and just want a simple signup.
Add GDPR Consent Checkbox. Check this if you have subscribers in the EU or want to be fully compliant with data protection laws. Leave this unchecked only if you’re certain GDPR doesn’t apply to your audience.
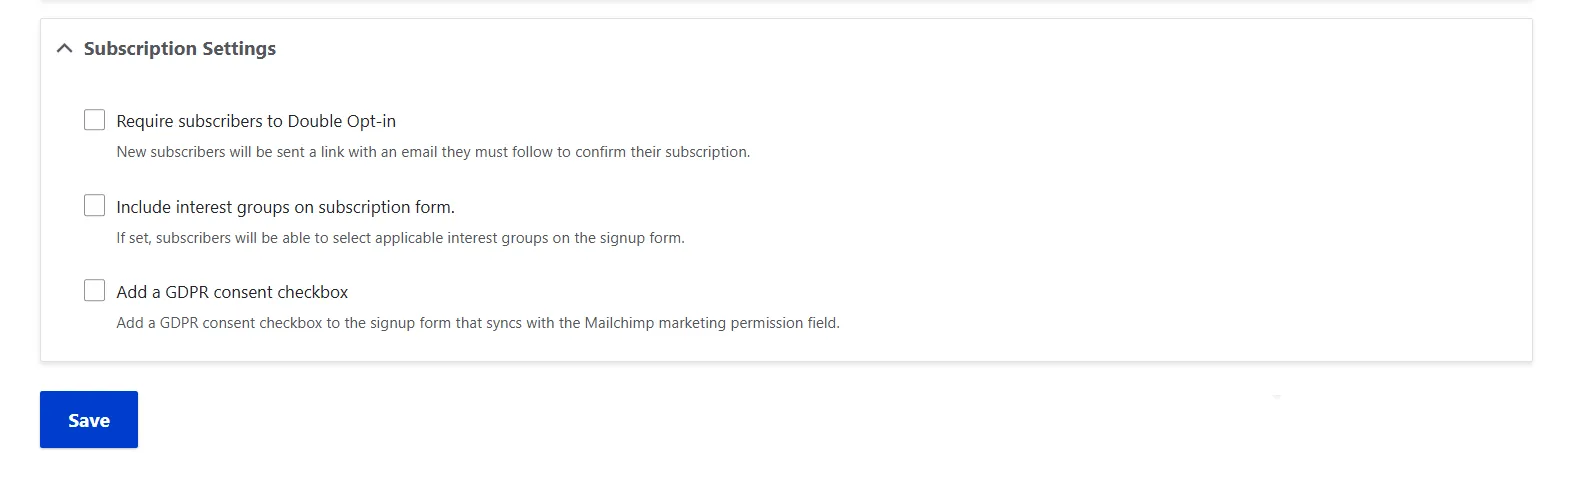
Creating a Mailchimp signup form in Drupal: subscription settings
Final thoughts
All top newsletter platforms can be at your fingertips thanks to great Drupal modules that integrate them with your website. The Mailchimp modules and other tools cover various aspects of newsletter creation, making workflows smoother for you. If you’d like tailored guidance on choosing or setting up the best solution for your project, consider reaching out to Drupal experts who will help you unlock the full potential of your newsletter strategy.