
The ECA Module: Setting Up Automated Actions For Various Scenarios on Your Drupal Website
Authored by Nadiia Nykolaichuk.
Your Drupal website is an advanced, powerful, and intelligent system capable of performing remarkable tasks. One of them is triggering automatic actions in response to certain events, which opens a treasure trove of options to meet your needs.
This functionality is provided by a Drupal module named ECA. Just like a film director calls “Action!” to start a scene, the ECA module triggers actions on your Drupal website, orchestrating various scenarios based on the settings.
The module is relatively new but has already captured the spotlight in the Drupal world. Its impressive set of capabilities has automatically triggered its rising and well-deserved popularity. Prepare for an exciting tour that’ll dive into how the ECA module works.
The ECA (Event-Condition-Action) paradigm
Presented as a simple formula, the Event-Condition-Action (ECA) logic looks like this:
If one or more specific events occur and, optionally, one or more conditions are met, then one or more actions are automatically triggered.
Let’s now take a closer look at all the three ECA components:
- Event. An event is something that happens, like a user logs in, a user submits a form, a user clicks a button, a new content item is created, and so on.
- Condition. A condition is an optional check that defines whether or not the event or context meets certain criteria for triggering the action. It can add additional logic to your scenarios. For example, you might want to send a notification to administrators not only when a new content item is created but also only if its state is “Draft.”
- Action. An action is a task that you want your Drupal website to perform when an event occurs and the conditions are met (if those have been specified). An action can be anything from redirecting a user to a different page to sending an email notification or displaying a message on the website.
ECA can be very helpful in a wide variety of use cases, for example:
- notifying administrators or editors when new content is submitted for review
- sending welcome emails and providing introductory resources when a new user registers on the site
- automatically clearing the cache for specific sections of the website when content is updated or deleted to ensure that users see the latest information
- setting up alerts for specific log messages or errors to quickly address issues that arise on the site
- automatically following up with users who complete forms or submit content with personalized thank-you messages
- and many more
Introducing the ECA module for Drupal
The ECA module is a powerful no-code solution that leverages the Event-Condition-Action logic for Drupal websites from Drupal 9 onwards. For specific events and conditions, the ECA module executes the corresponding actions based on the customizable Event-Condition-Action models.
The ECA module is “the new Rules” for Drupal
The readers who have worked with or heard about the Drupal Rules module have definitely noticed that the above-described ECA logic fully applies to it. However, while the Rules module was rocking it in pre-Drupal 8 times, it “never really landed in the Drupal 8-9-10 world.” One of ECA’s key maintainers, Jürgen Haas (jurgenhaas), said it when giving a session at Drupal Developer Days 2023 called “ECA, the no-code solution that empowers you to orchestrate your Drupal sites.”
Jürgen told the audience that they were working on a huge intranet project migrating from Drupal 7 to 9. The website had an incredible number of rules created by the Rules module, and Jürgen and the team were considering getting Rules over the finish line. However, repeated research fully convinced them Rules wasn’t ready for the mission. Replacing it all with a custom module would make the website hard to maintain over the years. So they decided that something fresh was needed — and that’s when the ECA module idea was born.
ECA events, conditions, and actions
Events, conditions, and actions are implemented as plugins. Therefore, they can be extended by other Drupal modules. The ECA module uses events and actions provided by Drupal core and provides its own plugin manager for conditions.
Jürgen mentioned during the session that there were around 500 actions, 70 conditions, and 200 events within Drupal core and ECA. They are automatically available based on which ECA submodules are enabled and which other Drupal modules are installed that provide their own events, conditions, or actions.
ECA models
An ECA model is a workflow or a rule that determines the logic of what needs to happen when a certain event occurs. For example, when a user logs in, a greeting message should be displayed on the website. This could be a “Greeting on login” ECA model.
ECA models can cater to a great variety of scenarios on your Drupal website. ECA models are stored as configuration entities so they can be imported and exported via the admin UI or the Drush command-line tool.
ECA modellers
ECA works behind the scenes executing the ECA models available on the site. However, you can have a user-friendly interface to create and manage ECA models. The UIs are provided by integrated front-end tools called modellers.
You can add your own modeller for ECA or use an existing one. Currently, the following modellers are integrated with the ECA module and the Drupal admin dashboard. They can be installed as additional contributed modules:
Library of example ECA models
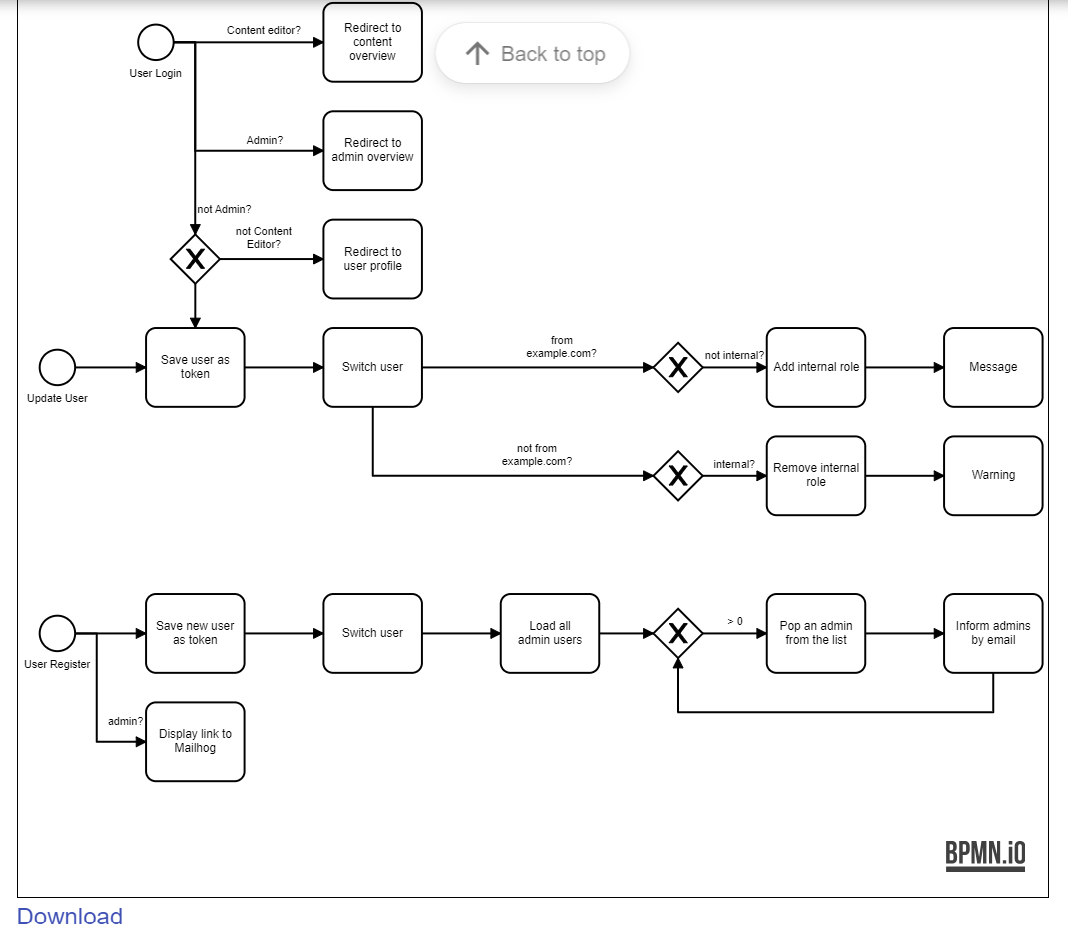
On the ECA documentation website, you can find a growing library of ECA models that can be downloaded and then imported to your website at the click of a button. Jürgen demonstrated an example called “ECA Feature Demo,” explaining its logic:
- A user logs in, and if they are a content editor, they are redirected to the content overview because that’s where they are most likely to go.
- If the user is an admin, they are redirected to the admin overview.
- If they are neither a content editor nor an admin, they are taken to the user profile.
This is the starting point of the ECA diagram that contains many other complex sequences of events, conditions, and actions.
Here are at least a couple of other examples of ready ECA models from the library:
- Notifications are sent to admins about user login, registration on the website, error messages, new comments, etc.
- If a user has just registered on the website, they receive an email, the text of which differs based on how the registration form fields have been filled out.
- If a user tries to view a page that would normally respond with “403 Access denied,” they are redirected to the login form.
Friendly to non-tech stakeholders
Thanks to the possibility of working with a user-friendly interface, including the visualization of the ECA workflows in diagrams, non-tech customers can be more involved in the process. Multiple times during the session, Jürgen emphasized the importance of this part of the ECA module’s mission.
You are often losing important stakeholders in a project if you can’t involve them in the process, said Jürgen. But if decision-makers or people who are knowledgeable about the workflow in a client’s organization can participate in the workflow setup, it makes an unbelievable difference, he said. Their role is probably not building workflows but reviewing them and signing off.
Robust integrations
There is a growing ecosystem of modules created specifically to integrate ECA into various processes on Drupal websites. It works with some of the top Drupal modules so there are some particularly outstanding integrations such as ECA Commerce, ECA Webform, ECA Metatag, and more.
In line with one of the latest trends, ECA also integrates with AI modules such as Augmentor AI and OpenAI for creating AI-powered automated workflows. For example, it might automatically generate tags as soon as new content is created.
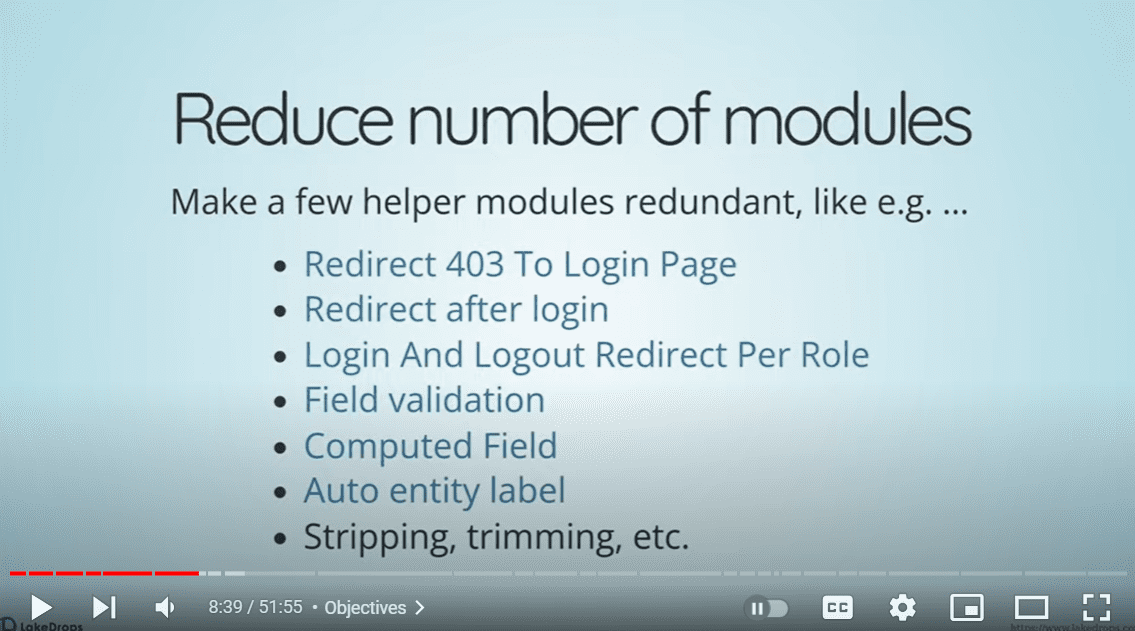
Reducing maintenance overhead
One of the great things about ECA is the possibility of cutting the number of custom and contributed modules on the website, which results in making website maintenance significantly easier. For example, as Jürgen mentions in his slide, ECA can replace the modules that redirect 403 pages to the login page, that do redirects after login, that take care of field validation, and more.
How to work the ECA module in Drupal
Installation
The ECA module is a complex module that consists of a large pack of submodules. They cover miscellaneous aspects of its work from offering content and user-related events to creating a URL endpoint.
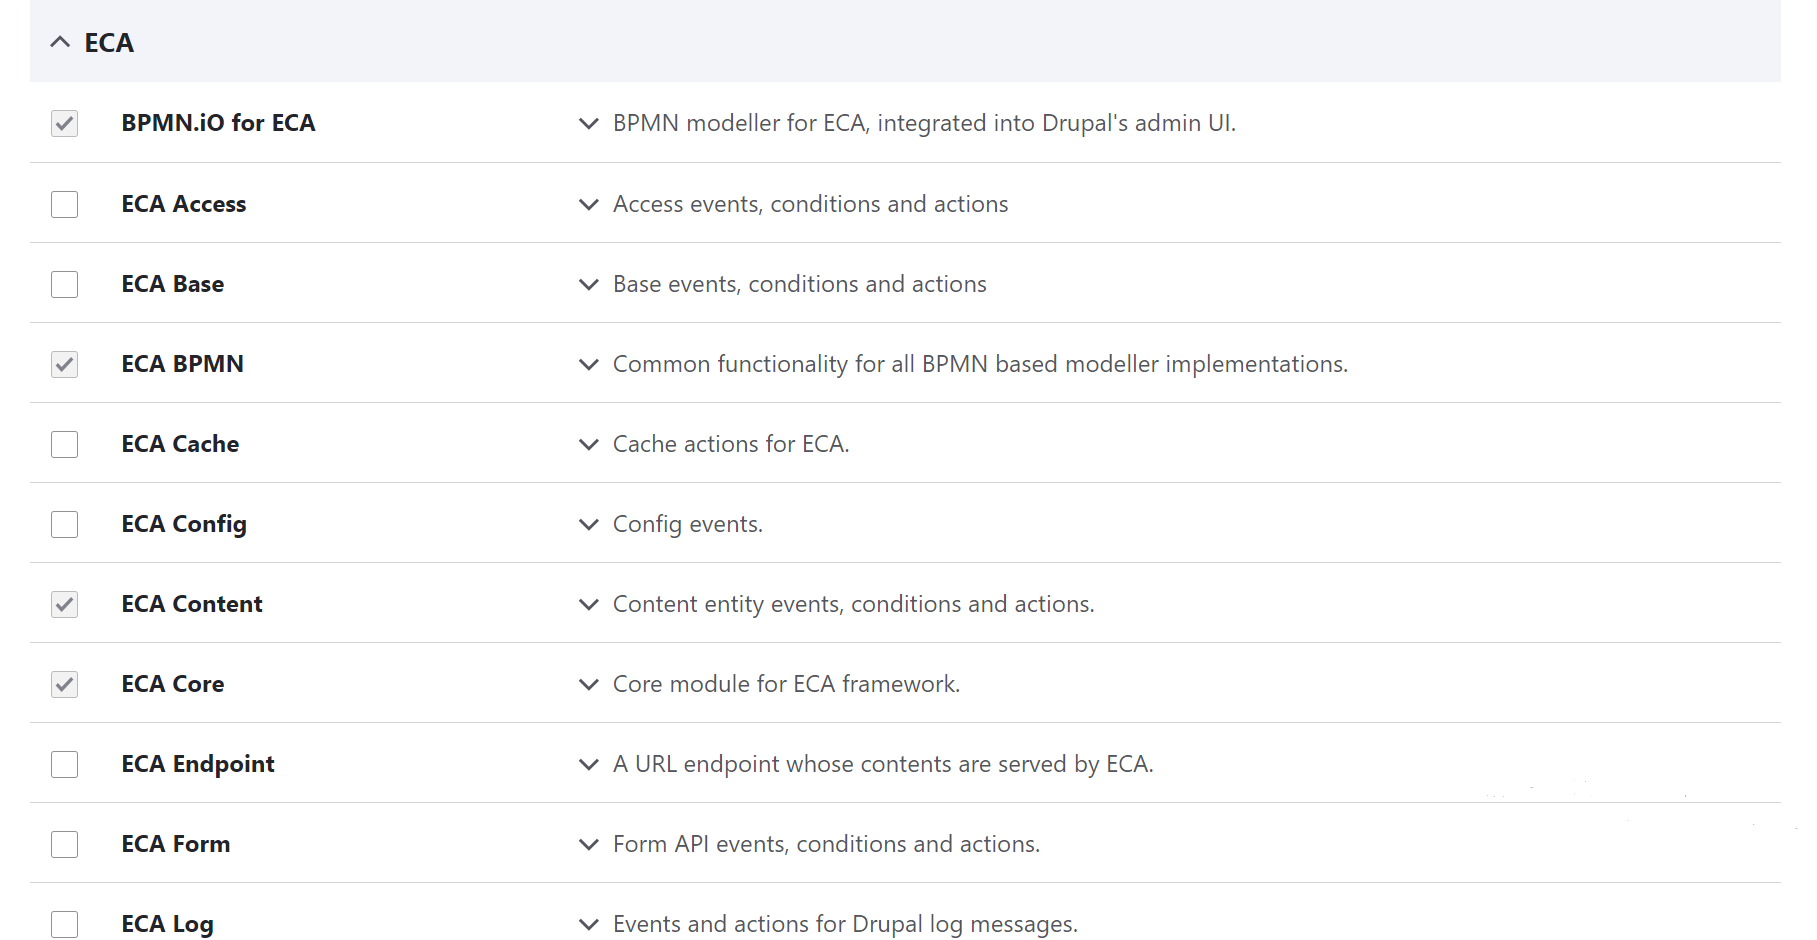
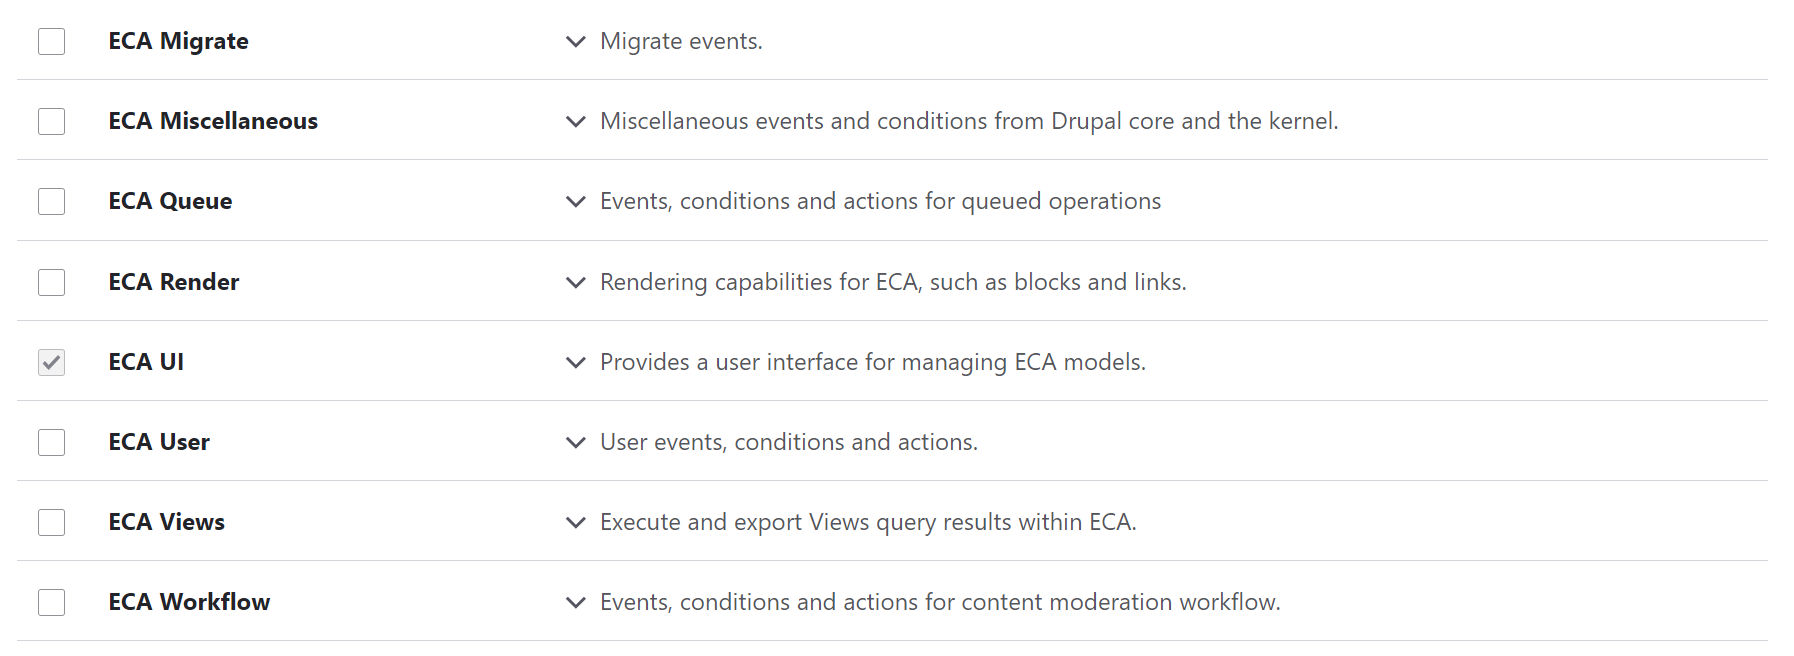
To keep your website lightweight, you can enable only those that are responsible for the features you are interested in and leave the others turned off:
- For example, you might want to enable the ECA Content submodule to get a bunch of ready events related to content editing.
- As an opposite example, if you don’t currently need ECA to work with Drupal Views, you might leave the ECA Views submodule turned off for the moment.
- The ECA Core and ECA UI modules are enabled by default.
- Additionally, if you’d like to use a UI, you need to install a separate modeller module (in the example, the BPMN.iO module is installed).
- Finally, enable the ECA BPMN submodule that provides common functionality for all the BPMN-based modeller implementations.
With all the needed modules installed and enabled, clear your Drupal cache via the Drupal admin UI (at the Configuration > Development > Performance page) or via the Drush command-line tool.
Setting up a simple ECA model
At the session, Jürgen gave a simple example of creating an ECA model via the BPMN.iO modeller. In his example, when a user saved an article, a specific message was displayed on the website. Based on it, we have prepared a similar simple example for our little step-by-step guide.
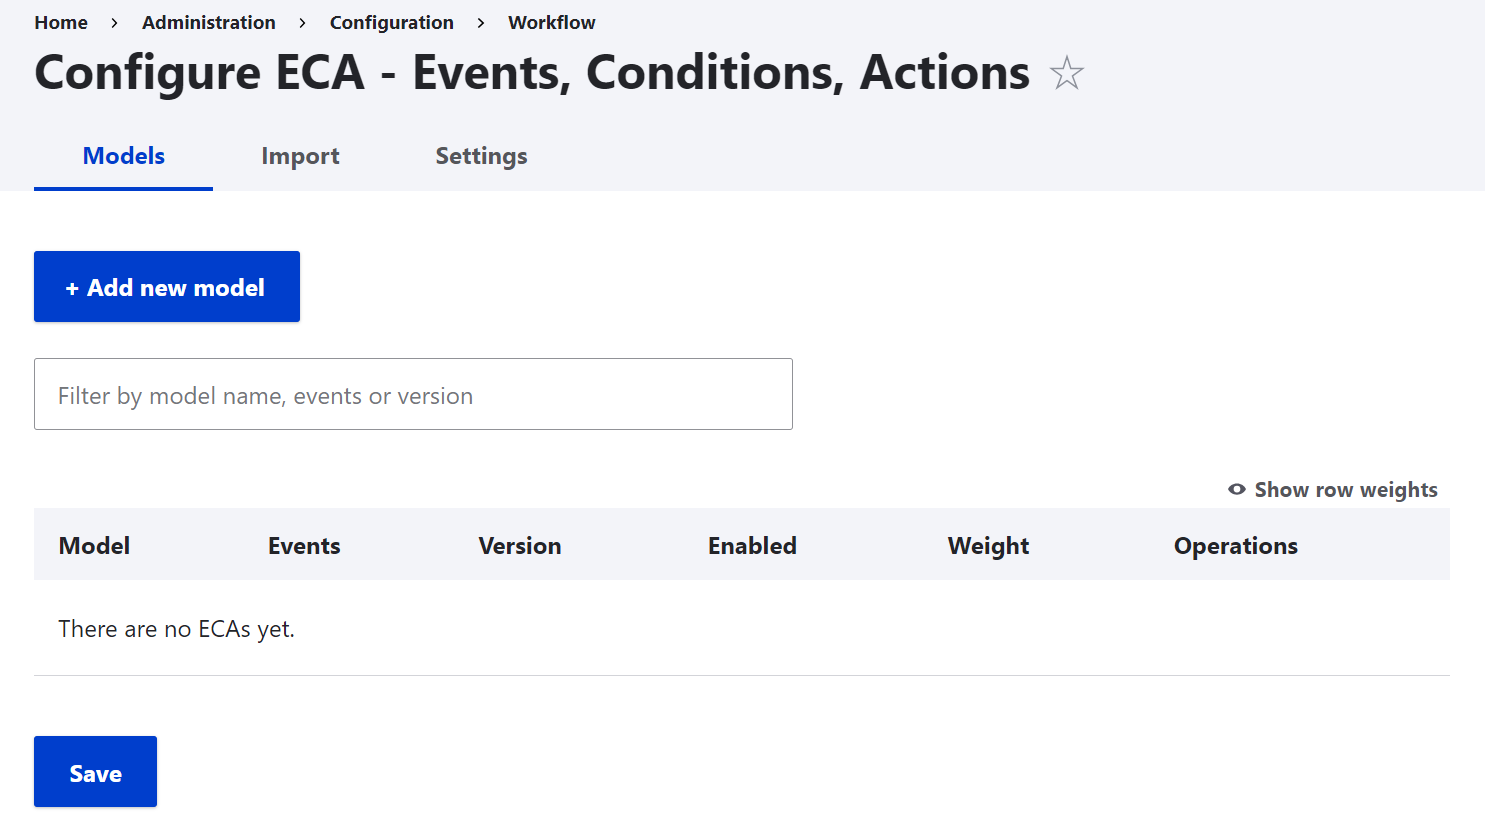
First, you’ll need to go to the Configuration > Workflows > ECA page of your Drupal admin dashboard. This page shows an overview of all the existing ECA models. You can add a model by clicking the “Add new model” button.
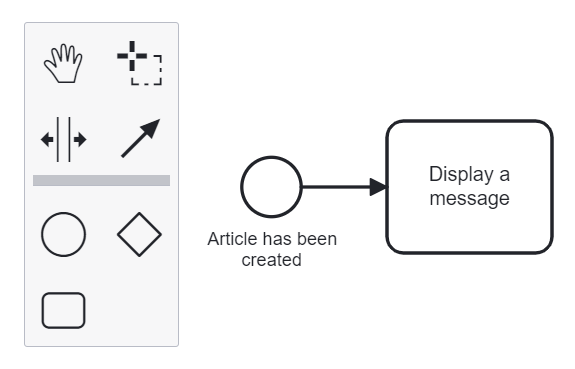
You will see the graphical user interface provided by the BPMN.iO modeller (short for BPMN means Business Process Modelling and Notation). It represents ECA models as interactive diagrams with specific geometrical shapes for events, conditions, and actions. Arrows show that certain events trigger certain actions.
It must be noted that in BPMN, events, conditions, and actions are also named very specifically:
- An event is a “StartEvent.” It is visualized as a circle.
- A condition is a “Gateway.” It is visualized as a diamond.
- An action is a “Task.” It is visualized as a rounded rectangle.
In addition, there is an arrow between the event (StartEvent) and the action (Task) that represents a “Sequence Flow.” A model is referred to as a “Process” in BPMN.
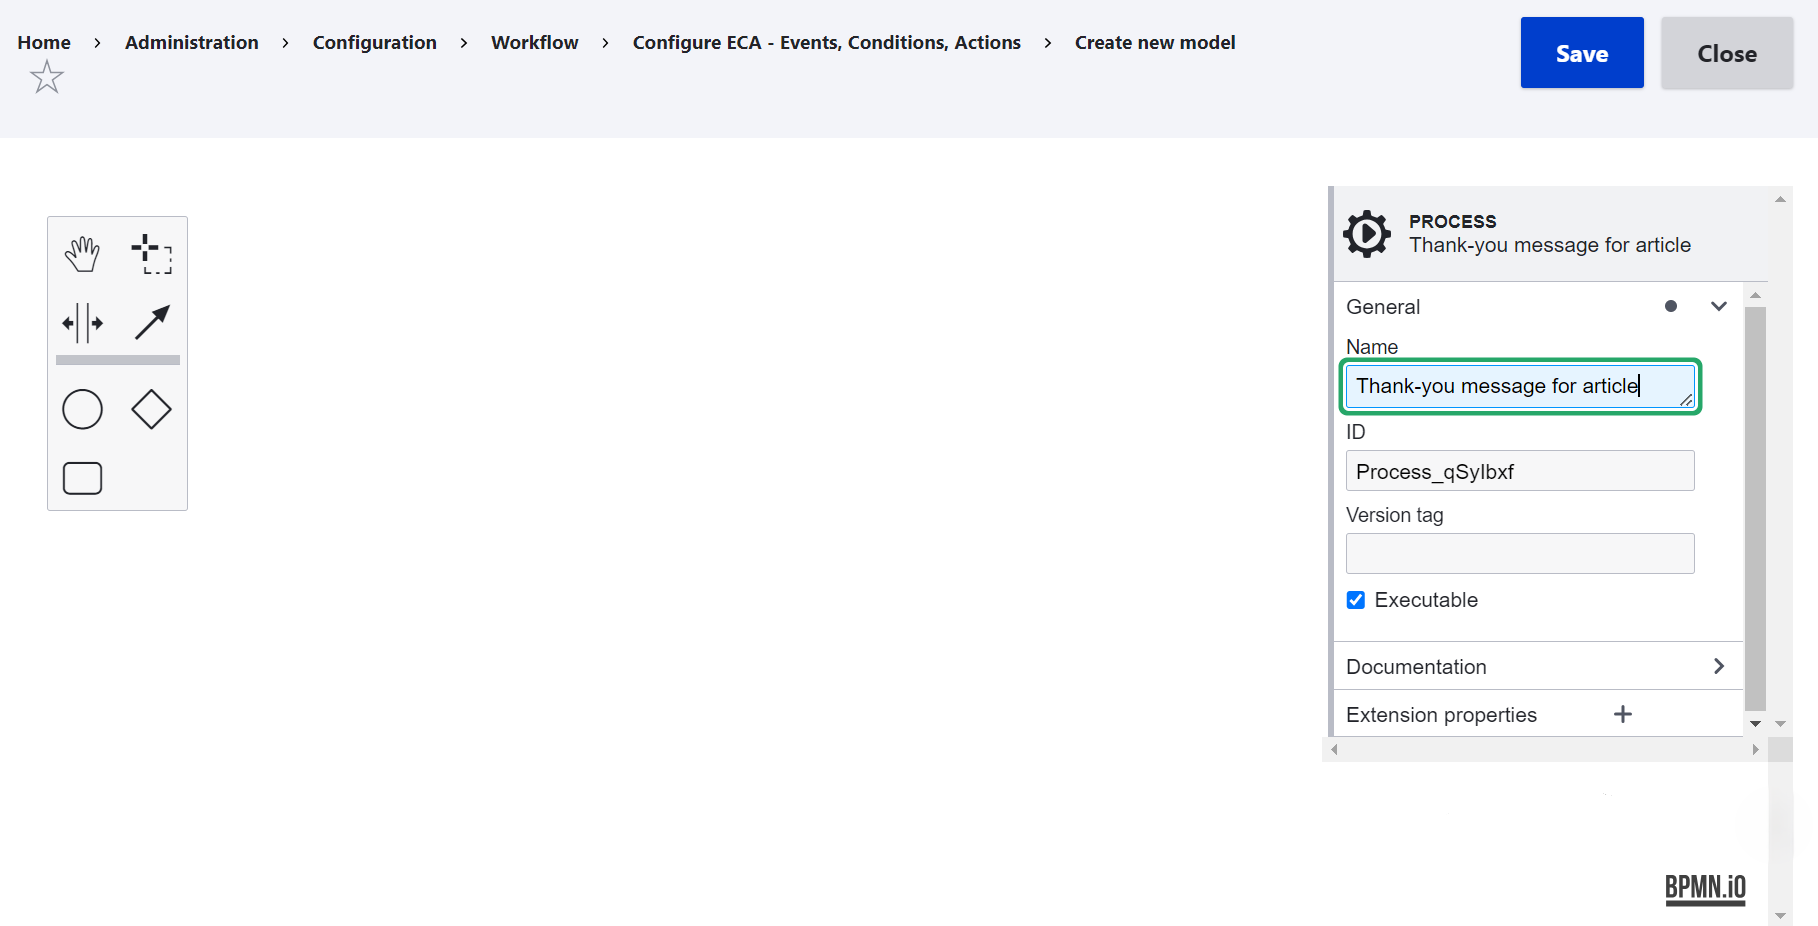
In the right-hand part of the screen, there is a property menu. You can use it to configure your model and all its elements. The panel will show settings for the element that you are currently working with. When you begin to create a new model, the panel will show you the settings for your future model (“Process”). In this example, let’s create a model that displays a thank-you message after an article has been created. Go to the property panel and write a name like “Thank-you message for article” under “Name” in the “General” tab.
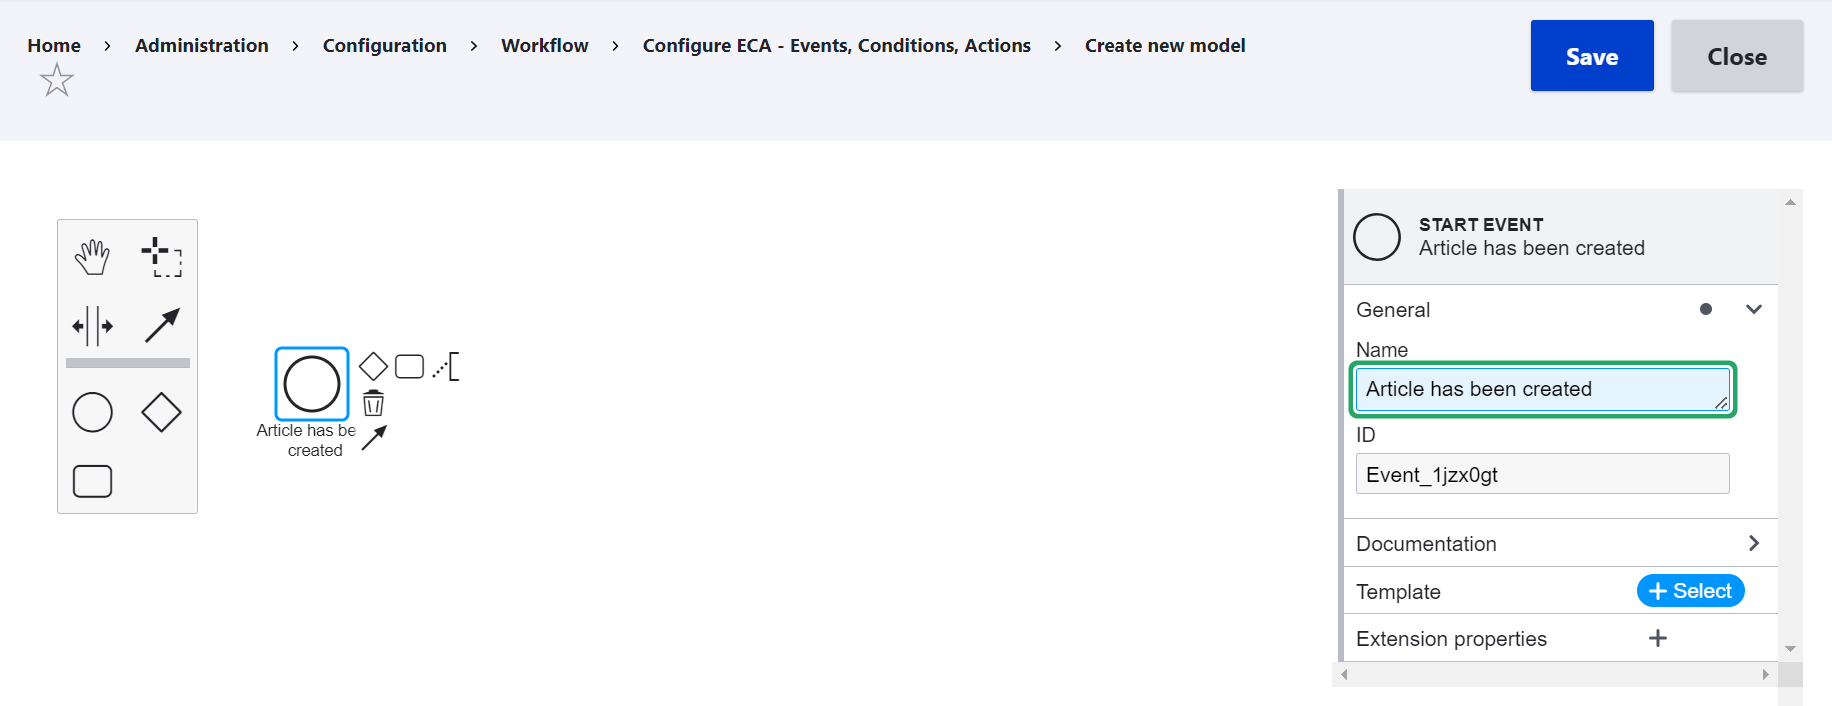
Next, let’s proceed with creating an event for the model. Click on the circle and drag it into the main canvas. It will appear there together with smaller shapes for conditions and actions associated with these specific events.
The property panel will switch to displaying the settings for the event (“StartEvent”). Let’s name the event something like “Article has been created.”
Click “+Select” next to “Template” and you’ll see a “Choose element template” dropdown with all event templates available on your Drupal website. Here is just a little reminder that the content events will only show if you have the ECA Content submodule enabled.
For this example, the “Insert content entity (After a new entity has been saved)” event template looks like a good choice. By clicking on it, you are applying the template.
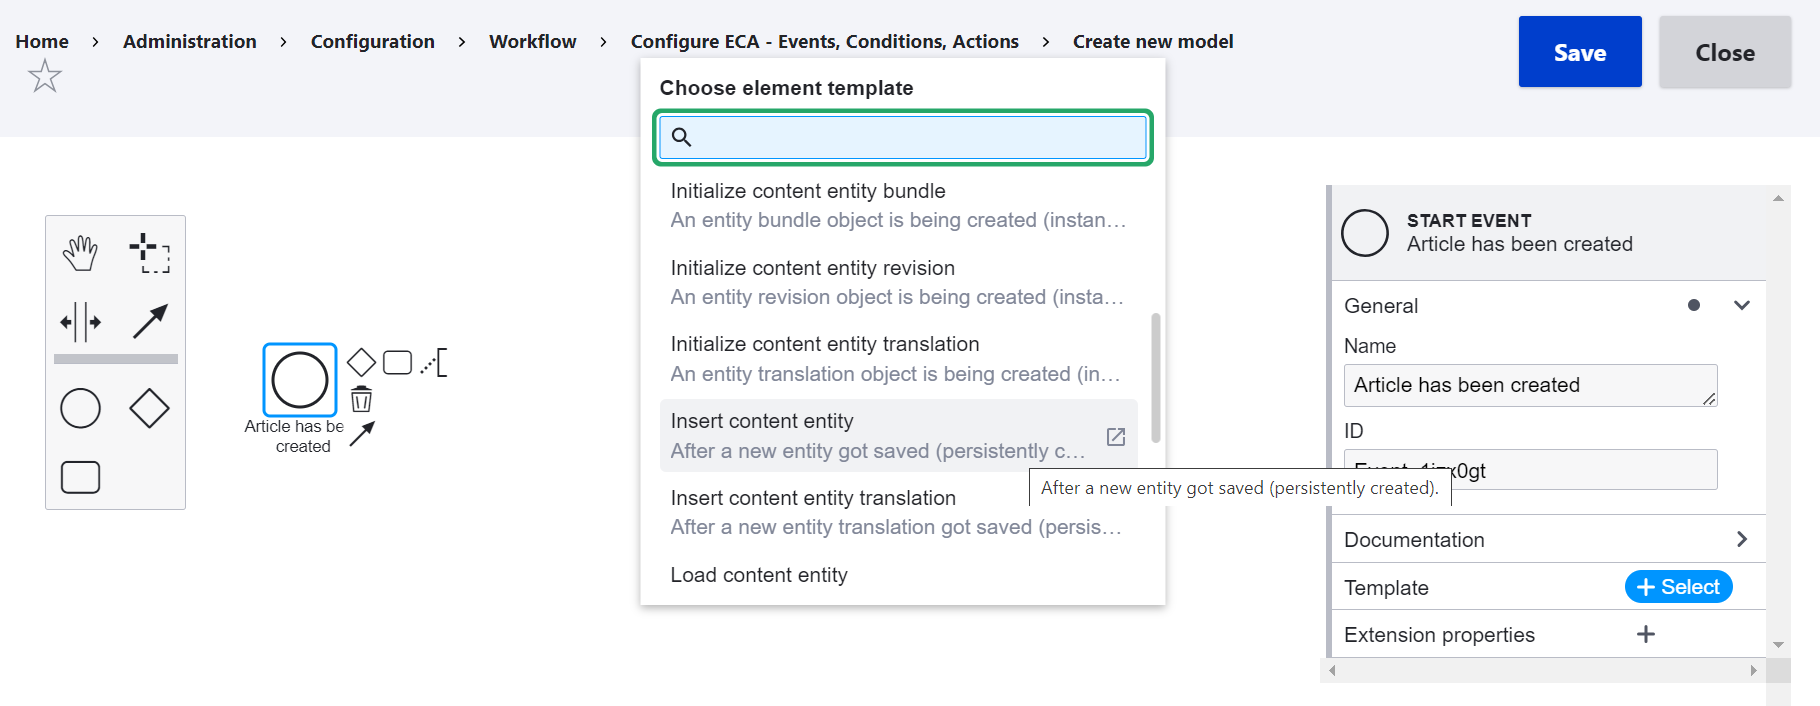
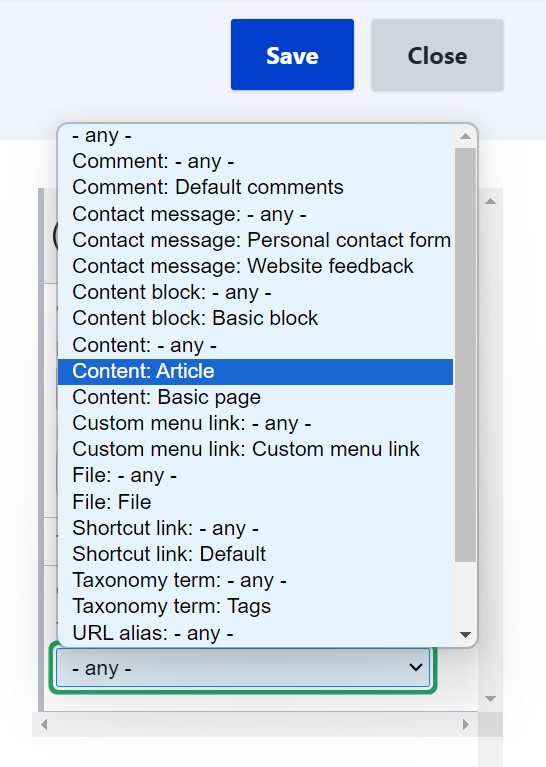
You can also limit the content entity type to “Article” in the property panel.
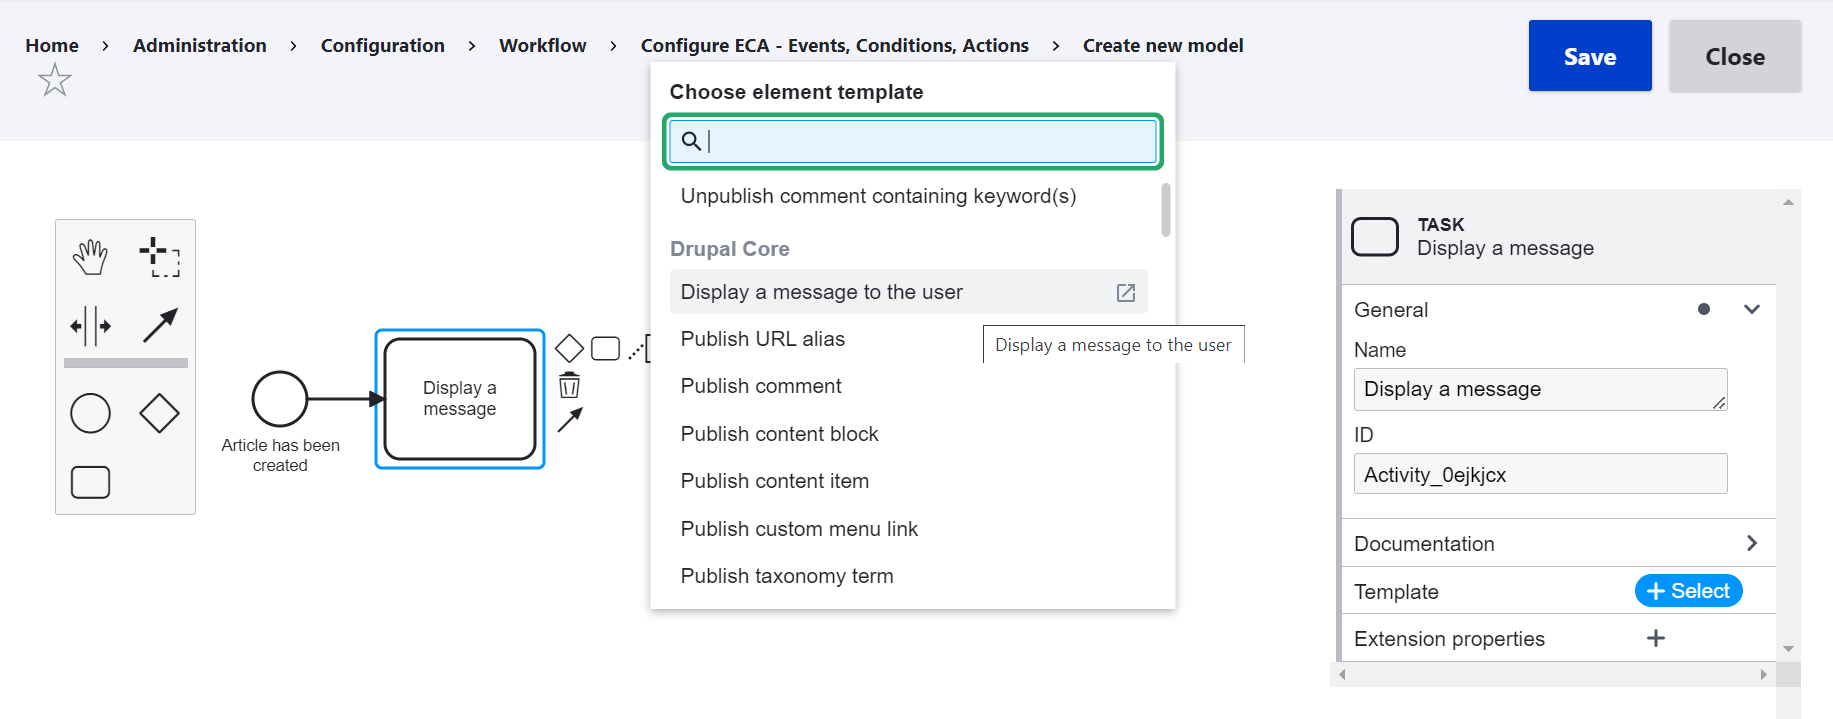
Next, let’s create an action by clicking the small rectangle in the diagram inside the canvas. The property panel will switch to showing the settings for the action (“Task”). In this example, a certain message on the website needs to be displayed, so let’s name the action “Display a message.”
Similarly to the event settings, let’s click “+Select” next to “Template” and choose the needed action template from the list. “Display a message to the user” is the perfect option.
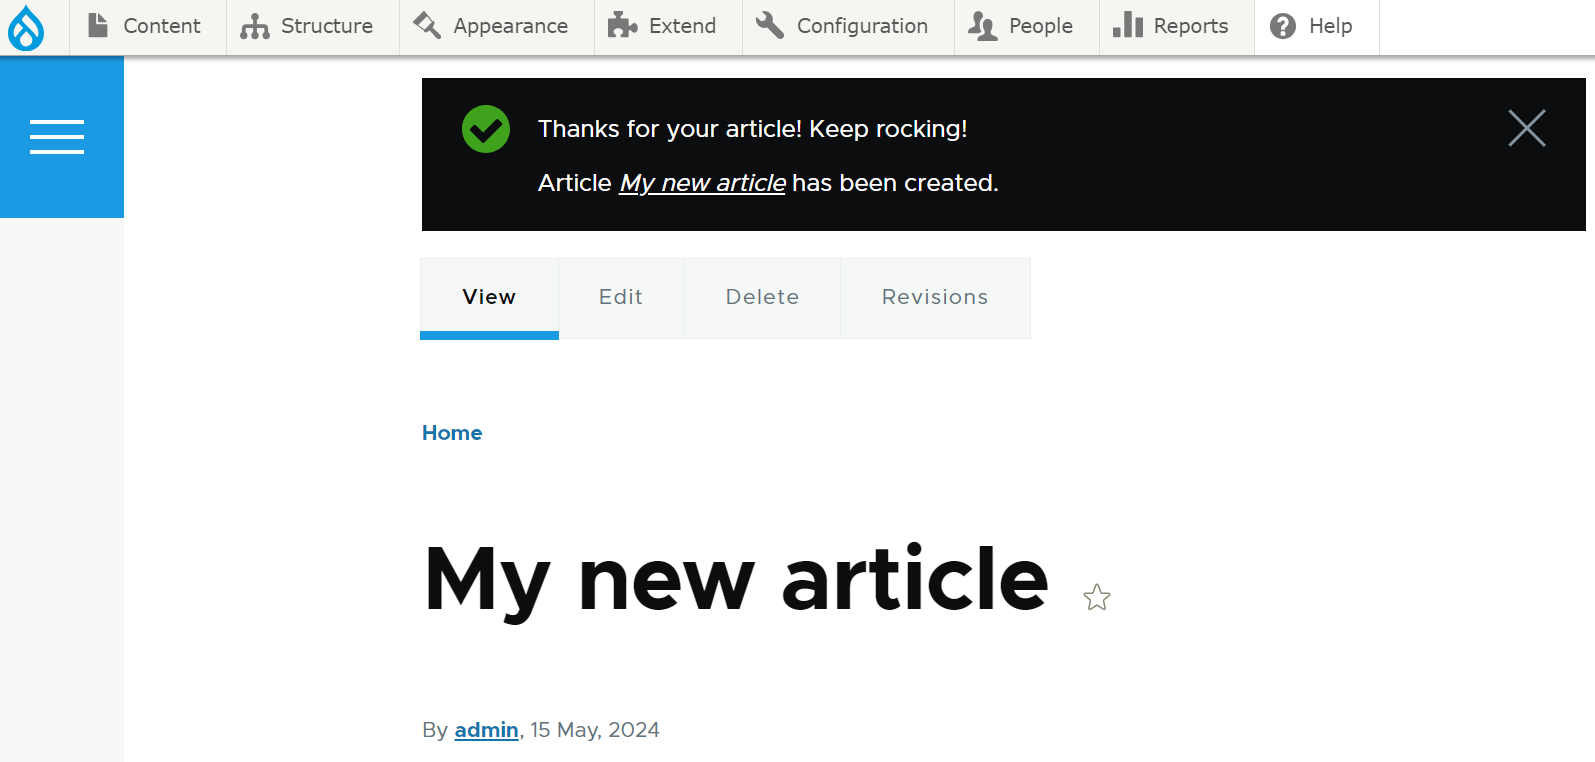
After this, you’ll be able to write the actual message text in the property panel in the “Custom properties” section. Let’s make it “Thanks for your article! Keep rocking!”.
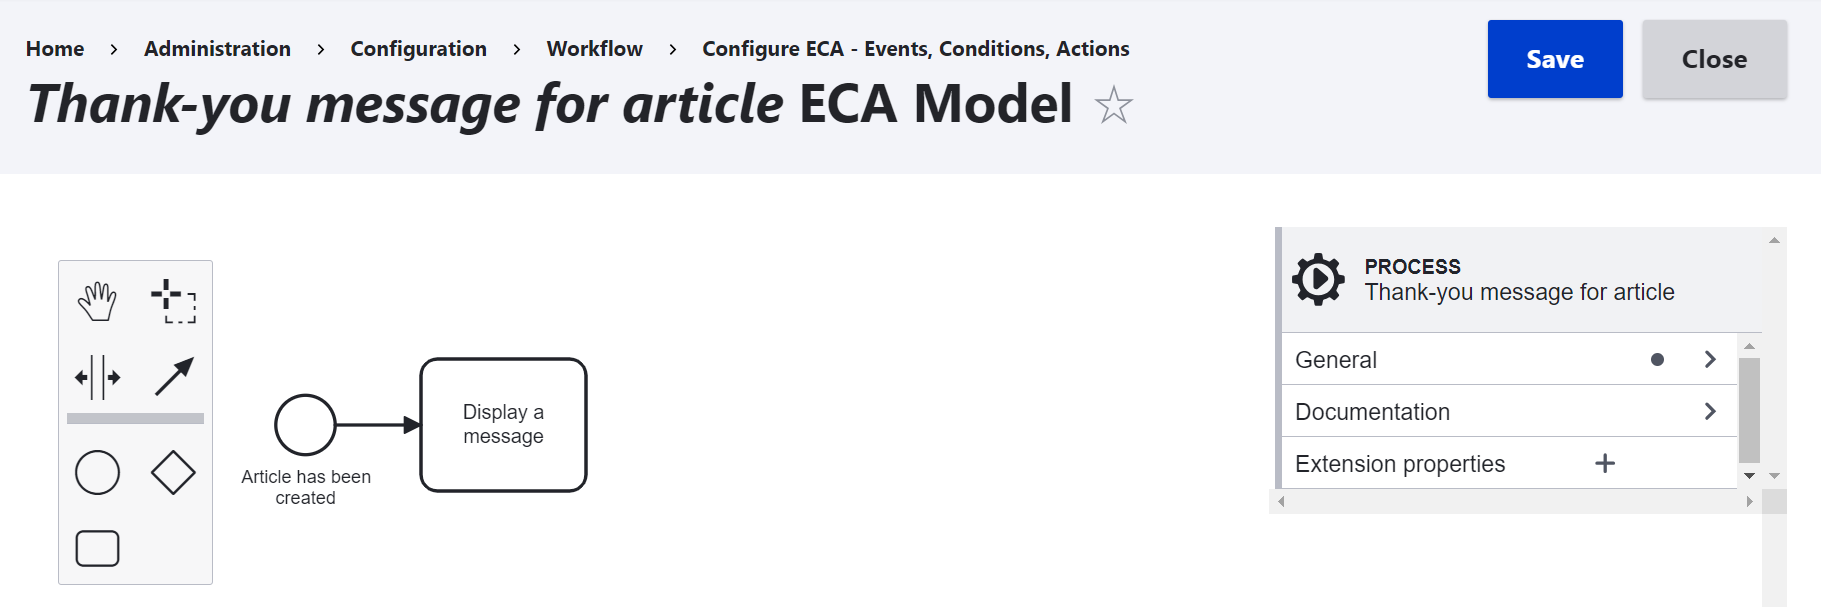
As you specify the details of the model, they are visualized in the diagram. It already depicts the event “Article has been created” with an arrow leading to the action “Display a message.”

Click “Save” to save the model.
Finally, let’s try and create a new article. After it is saved, there is a “Thanks for your article! Keep rocking!” message displayed on the website.
Final thoughts
By triggering automated actions in response to events, the ECA module turns Drupal websites into especially efficient assistants for teams working with them. It streamlines various processes and makes website maintenance and development significantly easier. Thanks to the user-friendly visualization, business owners understand ECA models even without technical knowledge, though, of course, a developer’s input and control are required for such a powerful module. Add robust ECA automation to your Drupal website and enjoy the benefits it brings!