
Simplify Multi-Step Admin Forms with this User-Friendly Drupal Module

It’s well known that a seemingly overwhelming task often becomes easier if divided into smaller chunks or steps. This rule is equally applicable to Drupal admin workflows! Especially when working with content-rich websites, lengthy forms with numerous fields can often feel daunting.
Just like for every idea in Drupal, there is a module for splitting lengthy admin forms into easily manageable and logically arranged steps. This module, known as Entity Form Steps, is user-friendly and offers nice customization options. We should highlight that the module was created by our own Rob Phillips, and ImageX is an official supporter of the project.
It’s fantastic to know that someone’s workflows can be simplified and optimized due to smart tools! Several months ago, we described yet another tool like that, guiding you through bulk-updating your content in the blink of an eye with the Field Defaults module, also built by our team. Let’s now dive into how the Entity Form Steps module can create better admin experiences via multi-step admin forms on your Drupal site. Of course, we’ll also provide a guide to using the module, breaking the instructions down into easy steps.
A glimpse at what makes multi-step forms great
Multi-step forms divide the input fields into smaller, organized steps, requiring users to complete them one at a time. This method, known as progressive disclosure, enhances the user experience and engagement by reducing visual clutter and the overwhelm of facing too many fields simultaneously.
With multi-step forms, cognitive load, confusion, and fatigue are minimized. Users can focus on a few fields per step, gaining a sense of accomplishment as they progress. This approach leads to more consistent, systematic data entry with reduced chances of errors and increased accuracy.
Choosing between a multi-step form and a single-page form depends on the complexity and volume of the information. Multi-step forms are especially effective for handling intricate or extensive data.
The key features of the Entity Form Steps module
Here is what the Entity Form Steps module offers for the smooth creation of multi-step admin forms:
- A user-friendly interface. The module offers a drag-and-drop interface for arranging fields within steps which is fine even for those who may not be very tech-savvy.
- Customization options. You can customize buttons, labels, and the order of the steps, creating more tailored experiences and ensuring that the form aligns with the site’s branding and functional needs.
- Field Group integration. The module relies on a famous Drupal module called Field Group, allowing users to group fields together and present them as individual steps in the form.
- Further customization for developers. Developers can further customize the behavior of the multistep forms by using the hooks provided by the module.
Types of forms and use cases
As the name suggests, the Entity Form Steps module works with Drupal entities. This includes content types (like articles, events, research papers, project reports, etc.), user profiles, and so on. The module helps you arrange the fields that a specific entity type is composed of (like name, date, email, department, or any other).
More specifically, the module operates in the Form Display modes of entities. This means that it defines how the fields will be organized in the admin dashboard for you to fill out in the process of creating or editing content.
That’s why, in the context of this module, we’re primarily talking about admin forms — the ones that will be managed by admins or editors. However, the Form Display modes can also be exposed to non-admin users in scenarios where user-generated content, data collection, applications, or community participation is encouraged. For some typical frontend forms though, there is a renowned module in Drupal called Webform, which also offers multi-step functionality.
Some example use cases for multi-step admin forms that the Entity Form Steps module could be great for:
- Administrators of a higher ed website might need to fill out detailed user profiles with sections like “Personal Information,” “Educational Background,” and “Membership Details.”
- A non-profit organization’s website could have a detailed form for grants logically divided into the following steps: “Applicant Information,” “Project Details,” and “Funding Requirements.”
- An academic institution might conduct internal surveys or data collection that require admins to input structured responses in multiple sections, such as “Demographics,” “Research Data,” and "Conclusions.”
- A lengthy event form on a website might be logically split into “Event Overview,” “Speaker/Participant Information,” and “Registration and Attendance.”
- An organization’s website might keep track of projects by submitting detailed project reports, which might be conveniently divided into “Project Overview,” “Progress and Milestones,” and “Budget and Resources.”
How to create multi-step forms via the Entity Form Steps module
Step 1. Installation
Install the Entity Form Steps module as you usually do on your Drupal website. The recommended way is by using Composer. Run the following command in your Drupal website’s root directory:
composer require drupal/entity_form_steps
As an easier alternative, you can download the module from its page on drupal.org and then install and enable it via the “Extend” page of the Drupal admin dashboard. The module depends on the Field Group module which you will also need to install and enable. This step is only needed for manual installation — if you’re using Composer, the dependencies will be taken care of automatically.
Step 2 (optional): Creating a content type
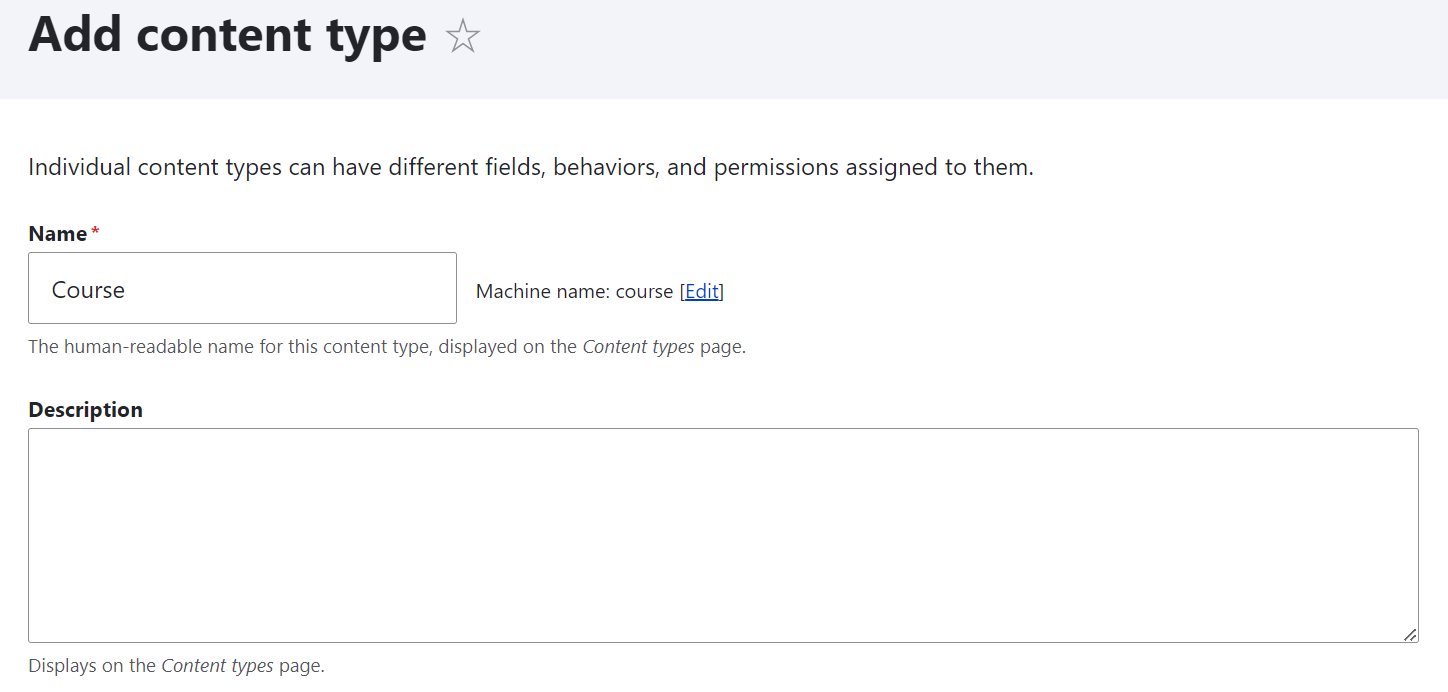
If you don’t yet have an entity type you’re going to work with, you can create it from scratch at Structure > Content types > Add content type. Give it a name (in this example, “Course”) and save the result.
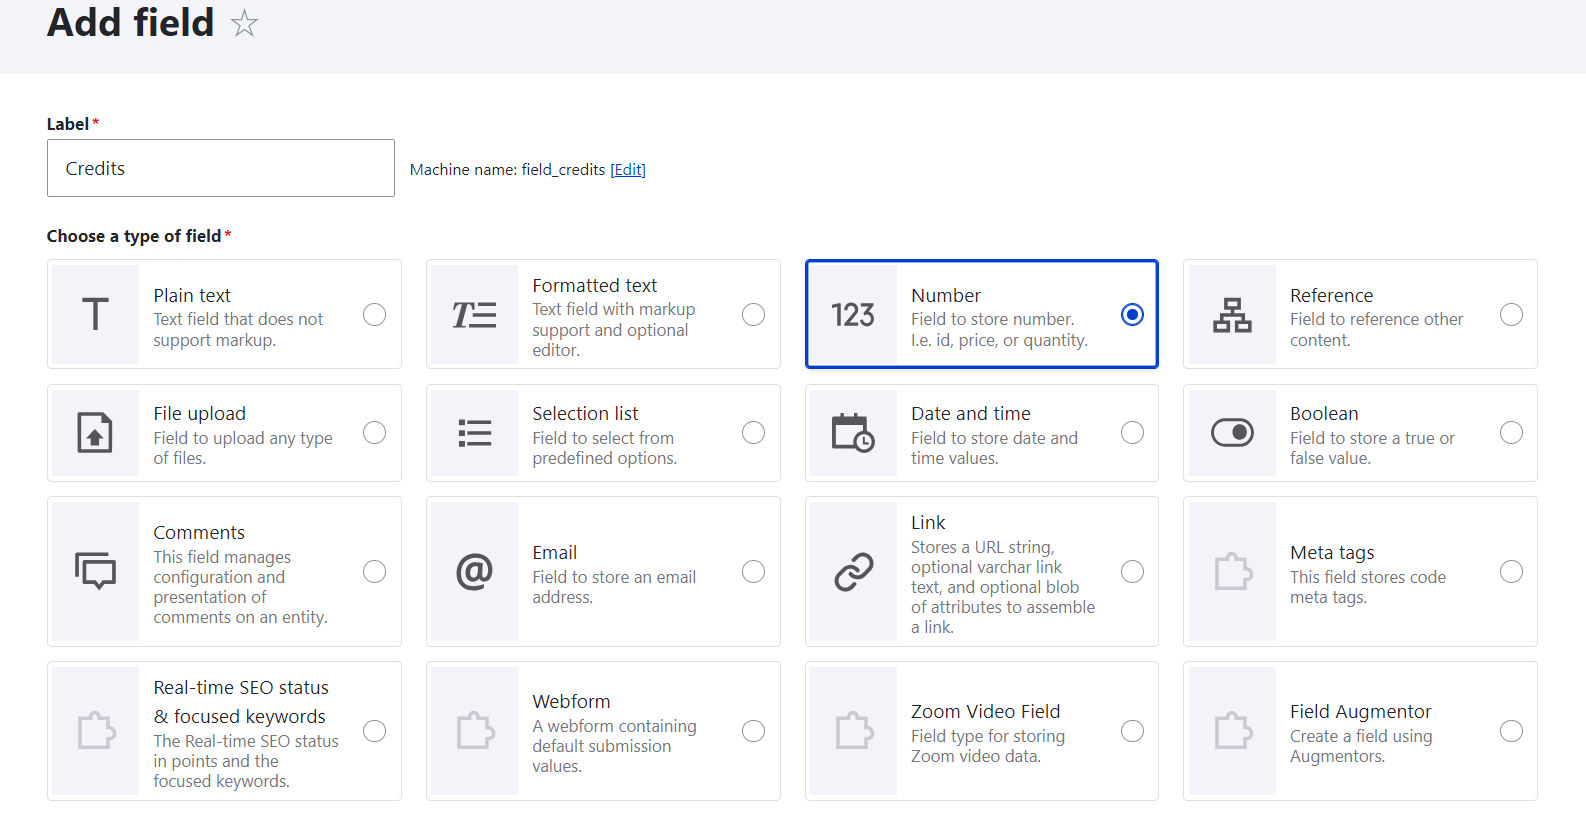
Populate your newly created content type with fields by clicking Manage fields > Create a new field. See more details about creating fields of desired types in the revamped and user-friendly Field UI in Drupal.
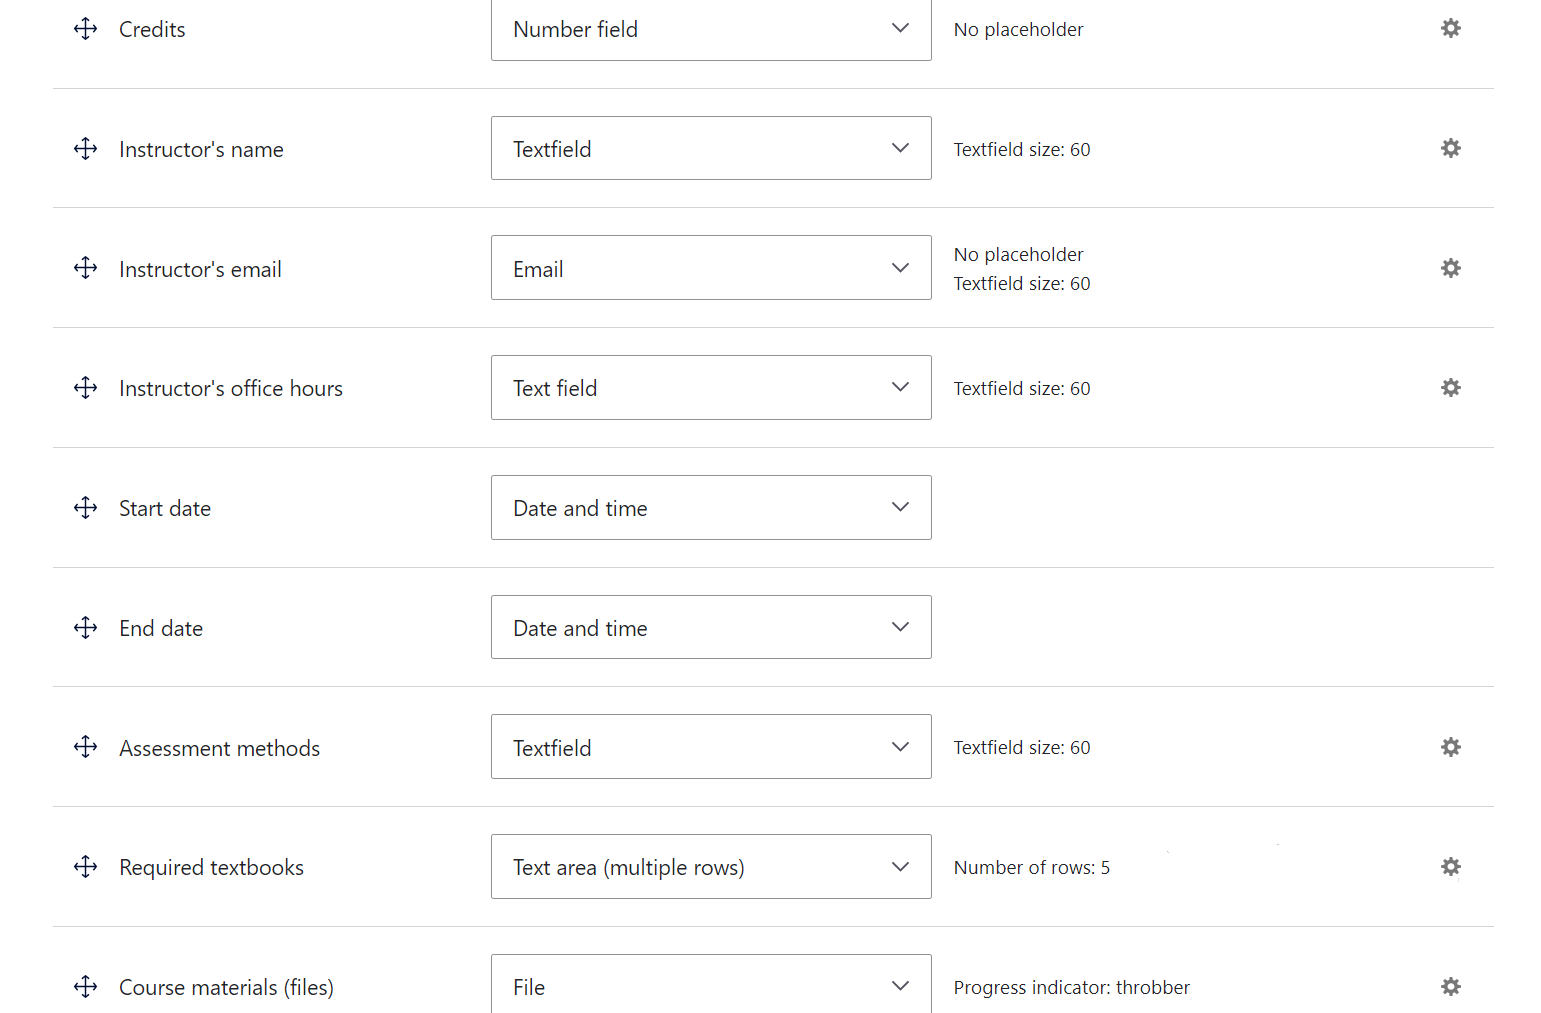
In this example, we’ve created a bunch of fields for a university course — from department and credits to the instructor’s information and assessment methods. On the “Manage form display” tab, you can view and manage the order in which the fields will be presented in the admin dashboard. Currently, it’s chaotic, but let’s proceed to organize them into steps.
Step 3: Creating the steps of a multi-step form
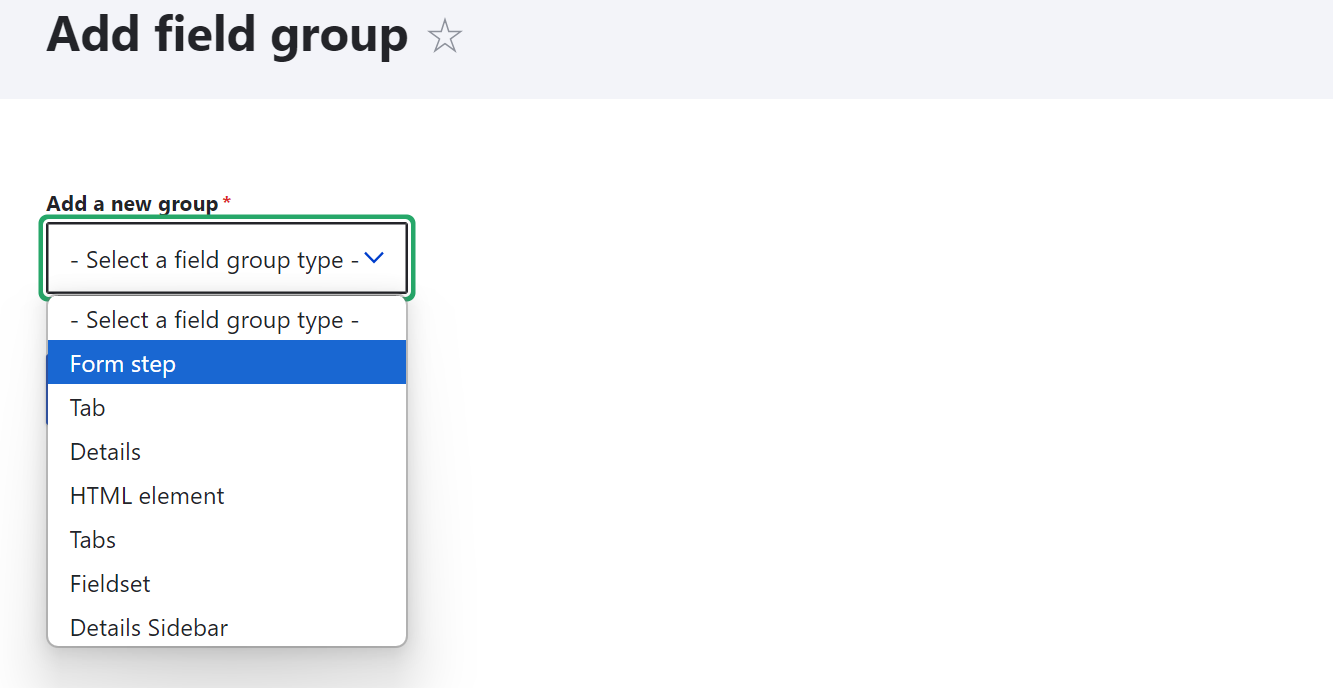
You can add a form step on the “Manage form display” tab of your content type (in this example, “Course”) which is found at Structure > Content types. Click the “Add field group” button.
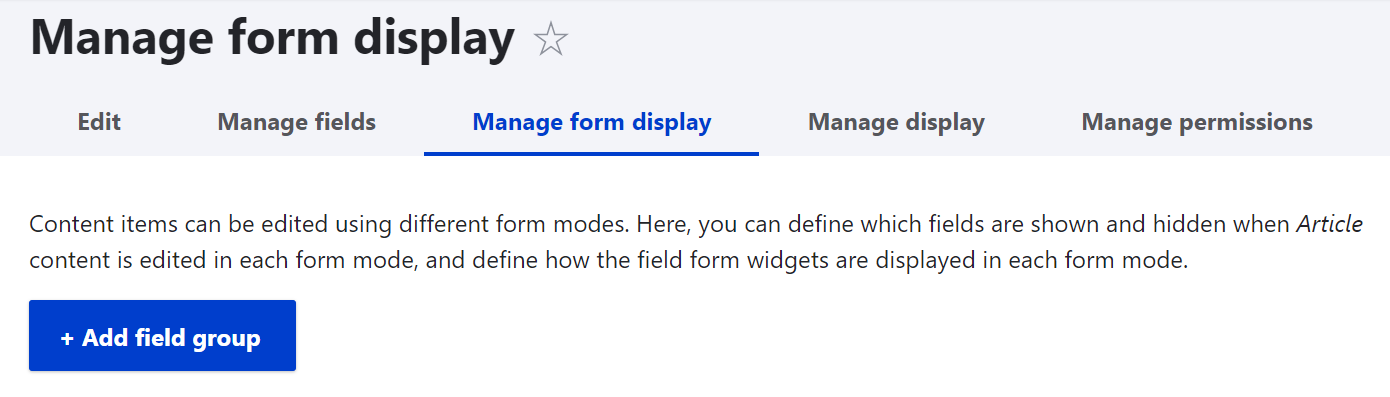
From the dropdown, select “Form step.” This creates a new group that will represent one step in your multi-step form. Give your step a name (like “Step 1: Main information”). This will be a human-readable administrative label.
Step 4: Configuring the steps of a multi-step form
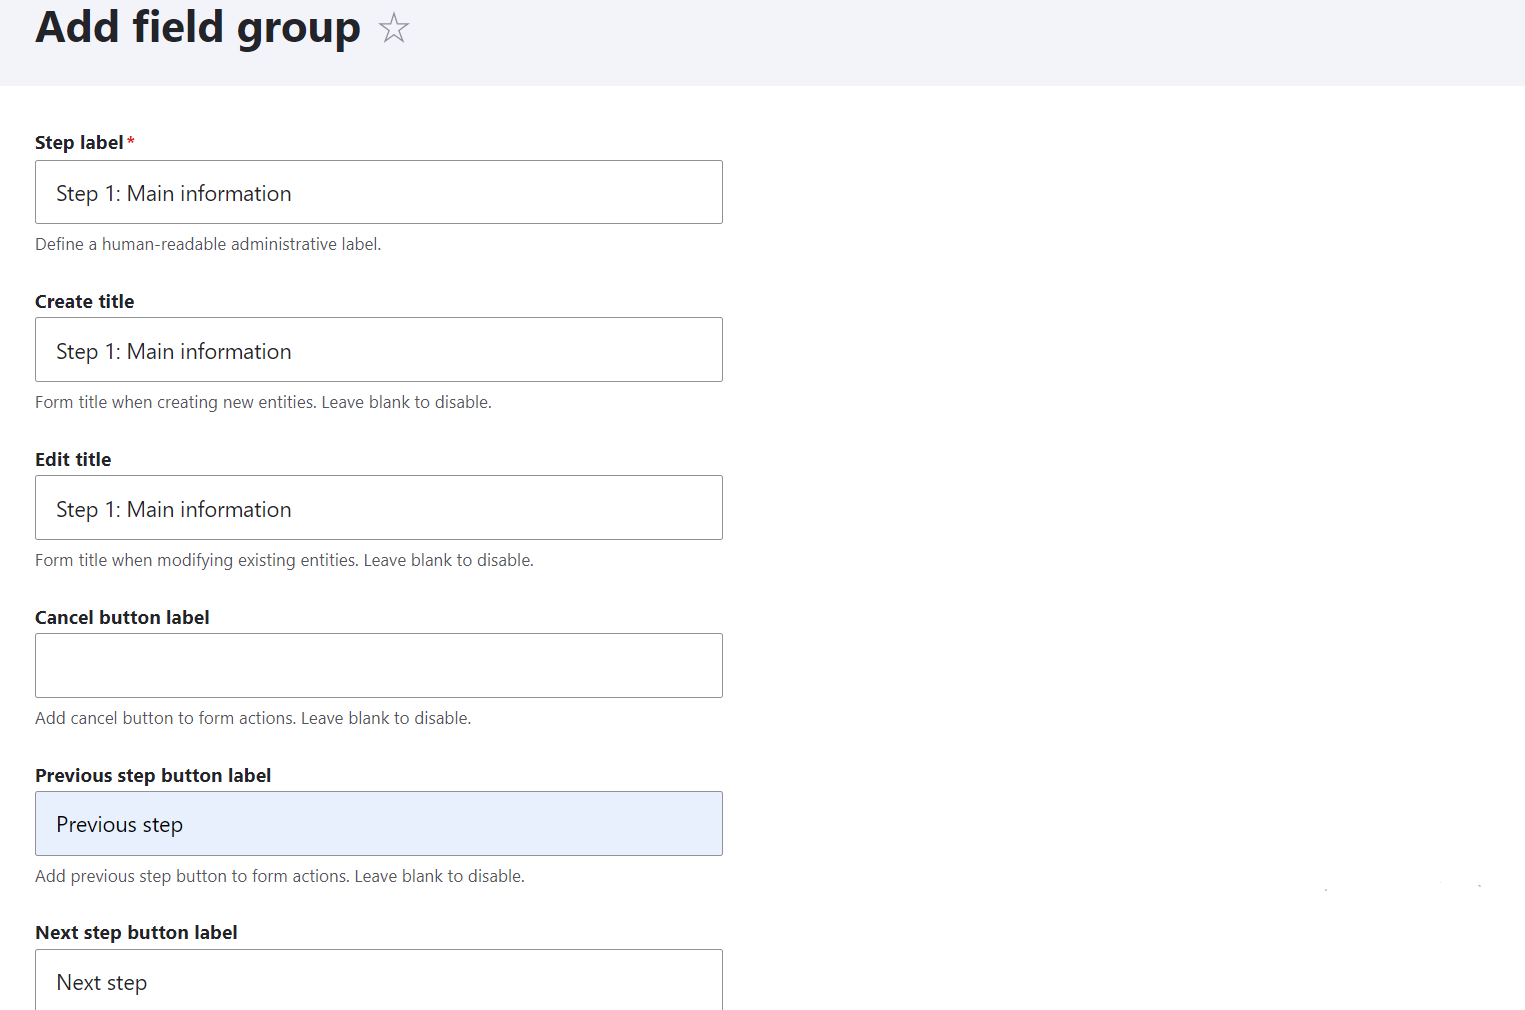
As you proceed with creating a form step, you’ll be prompted with configuration options. Here are the key fields to fill out:
- Under “Create title,” provide the step title that will be displayed when creating new entities.
- Under “Edit title,” provide the step title that will be displayed when modifying existing entities.
- Under “Previous step button label” and “Next step button label,” specify how you want the “Previous” and “Next” buttons to be named.
- Save your configuration by clicking “Create group” at the bottom of the page.
Repeat steps 2 and 3 to create as many steps as you prefer.
Step 5: Organizing fields into steps
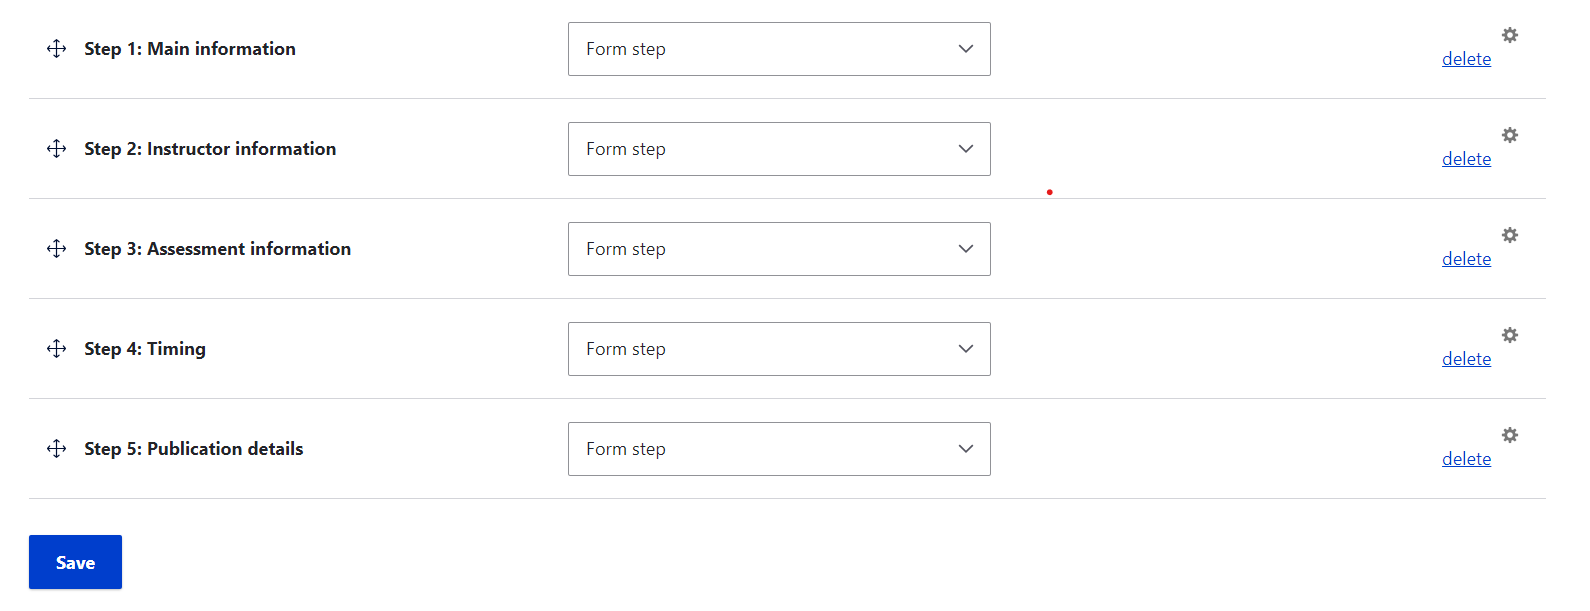
Any form steps you’ve created will be listed in the “Manage form display” tab. They will be in the “Disabled” section so you’ll need to drag them to the “Enabled” section to activate them. You can delete them at any time or edit them using the gear icon to the right.
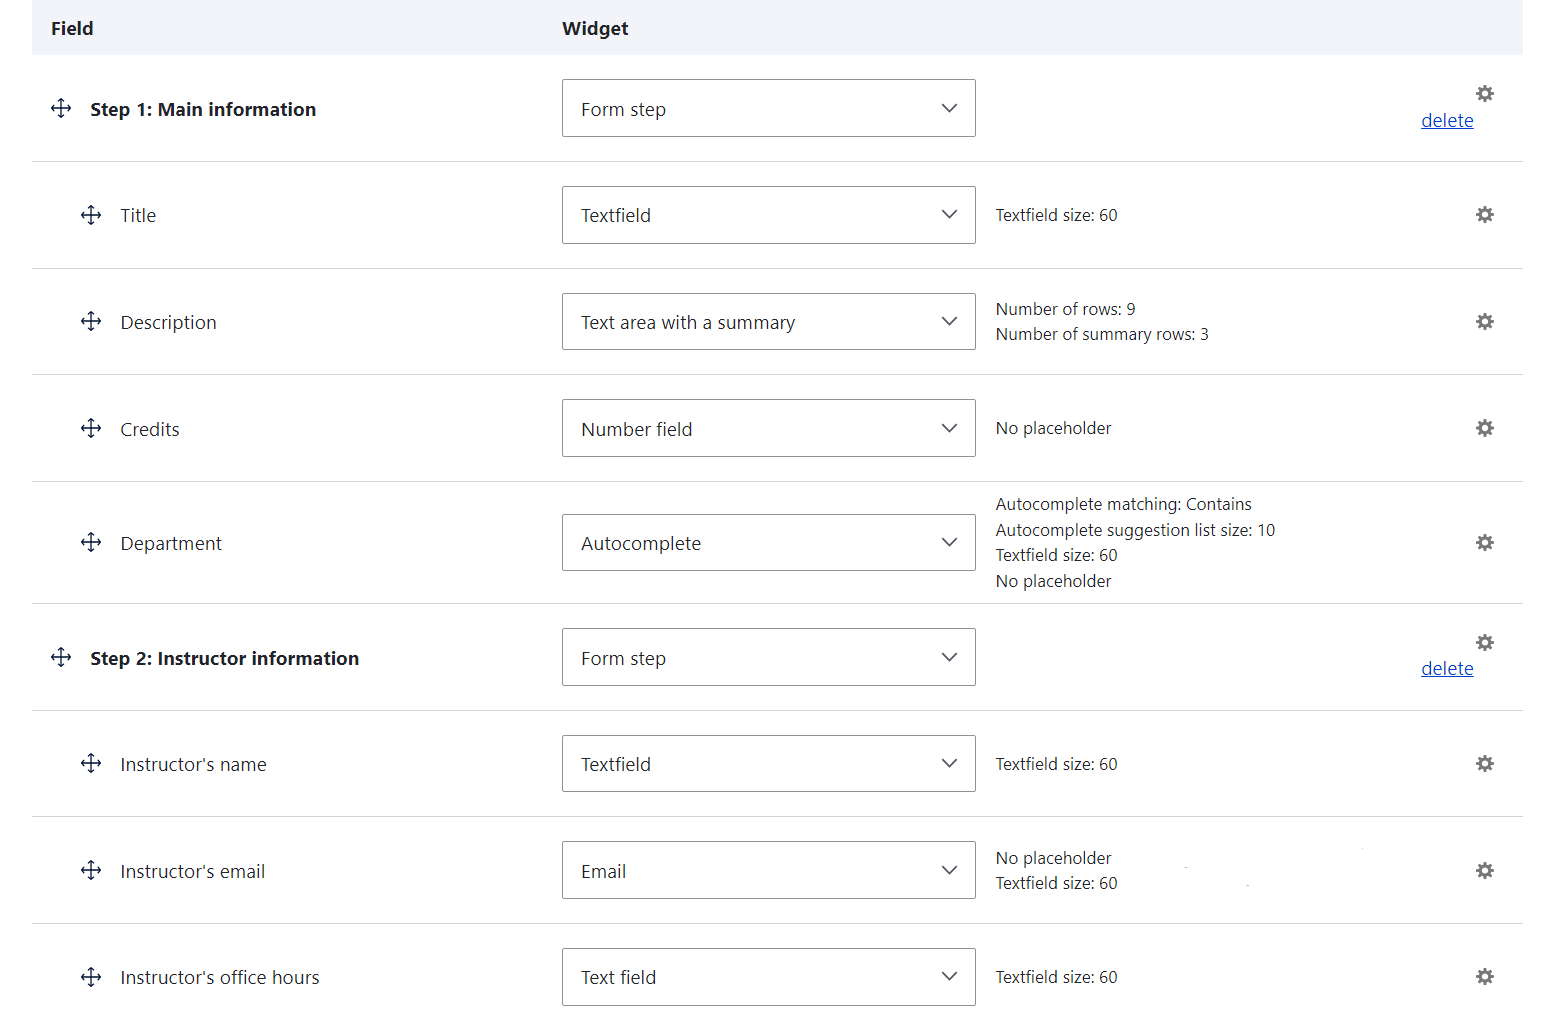
Next, it’s time to organize all existing fields of the “Course” content type under these steps. You can use the drag-and-drop interface to move fields under the corresponding steps. Be sure to verify the fields are displayed with an indent under specific steps which means they belong to them structurally. In this example, we have arranged the fields in the following way:
Step 1: Main information
- Title
- Description
- Credits
- Department
Step 2: Instructor information
- Instructor’s name
- Instructor’s email
- Instructor’s office hours
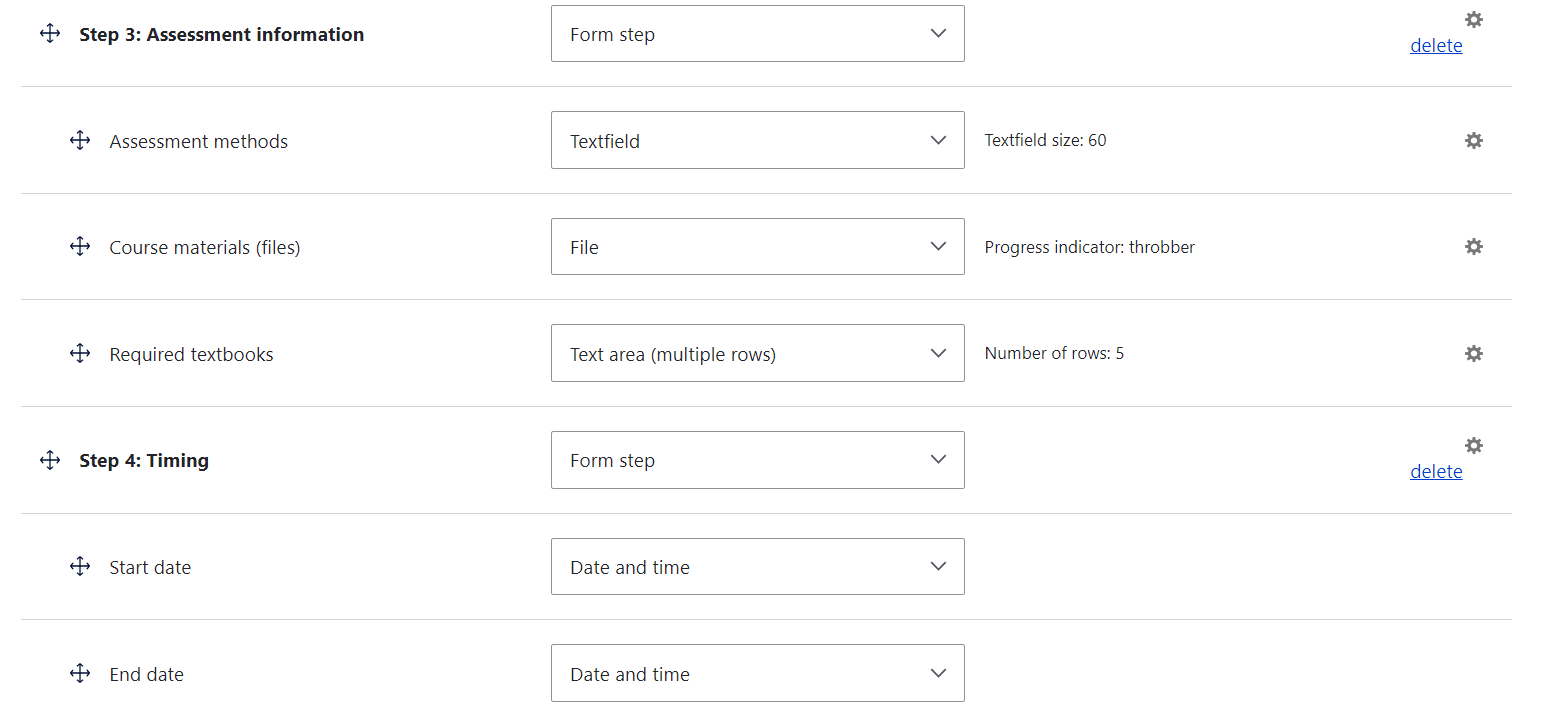
Step 3: Assessment information
- Assessment methods
- Course materials (files)
- Required textbooks
Step 4: Timing
- Start date
- End date
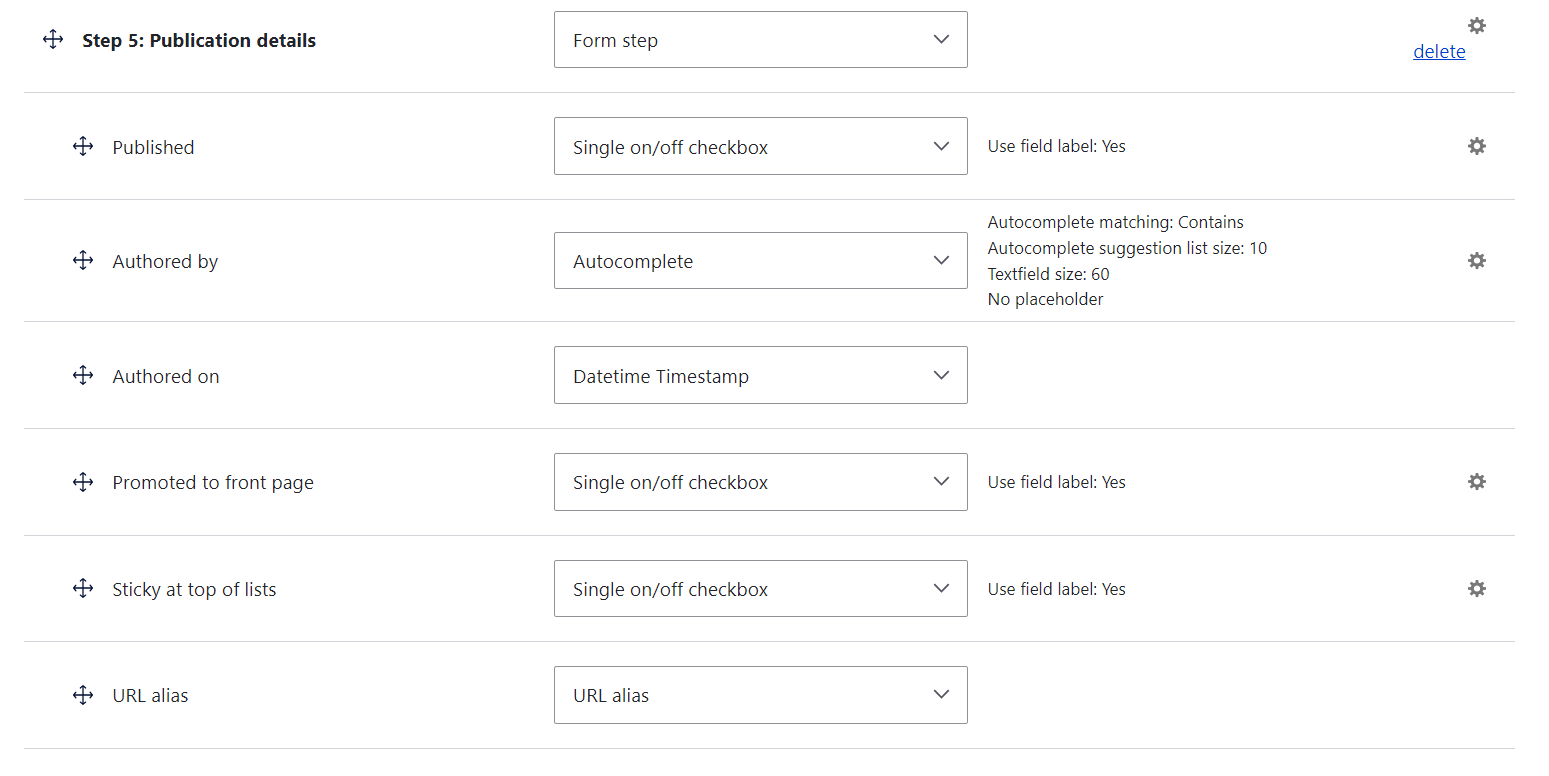
Step 5: Publication details
We’ve moved here all the technical fields related to the publication that a content type comes packed with out of the box:
- Published
- Authored by
- Authored on
- Promoted to front page
- Sticky on top of lists
- URL alias
Step 6: Checking the results
Now you can go to Content > Add Content > Course and see that the content creation form for all items of this content type is now a multi-step form. One step includes the specific fields that have been added to it and handy navigation buttons with customized labels.
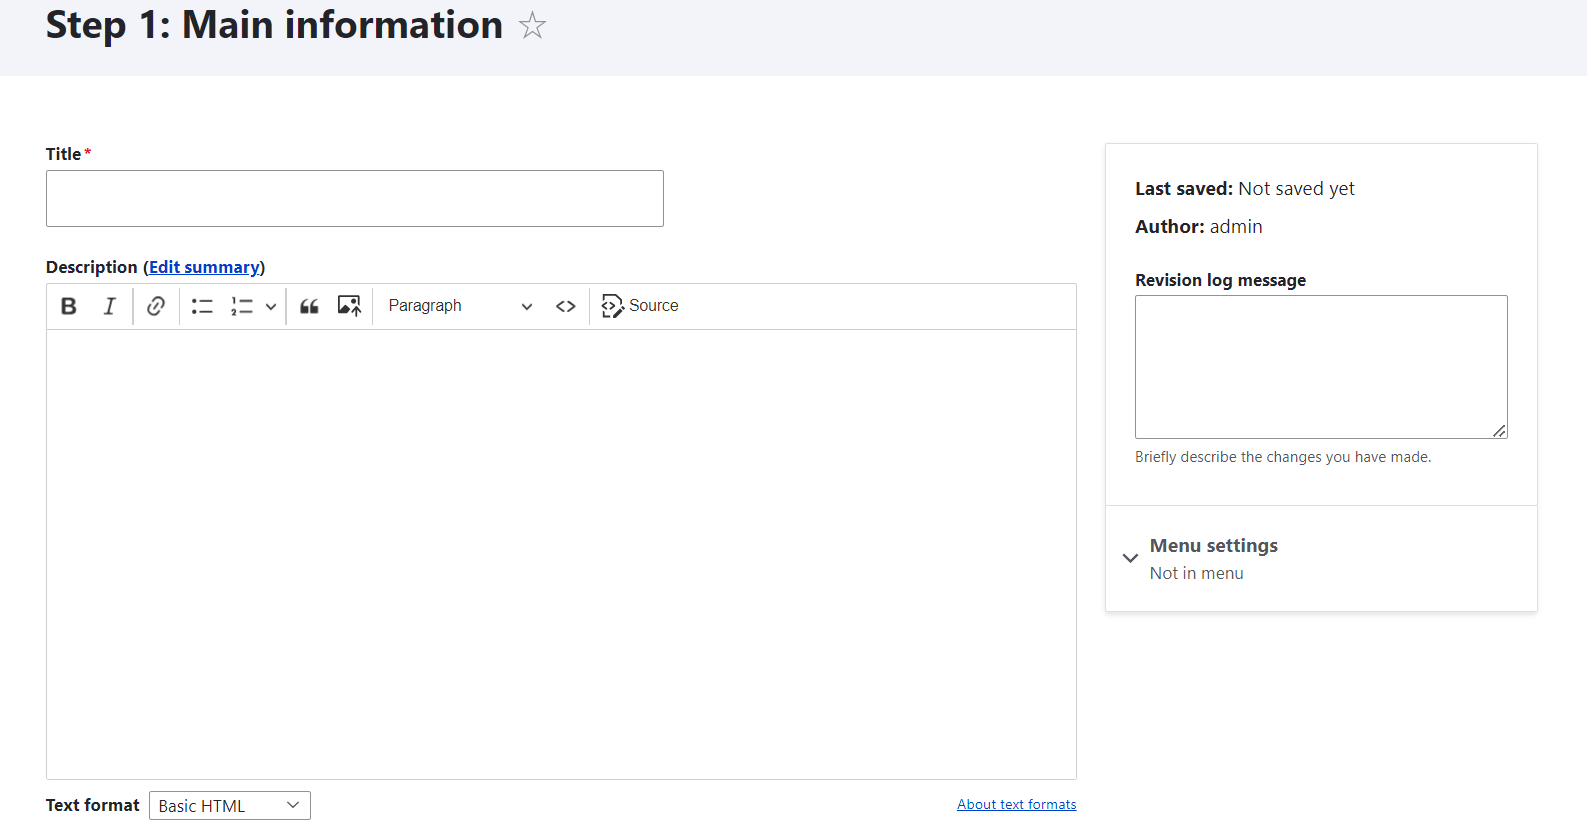
Part 2: how a step of a multi-step form looks in the admin dashboard

Final thoughts
Unlock the power of perfect simplicity and consistency of multi-step Drupal admin forms. Experience how the Entity Form Steps module can add a streamlined, logical structure to your forms that makes your workflows more effective and enjoyable. Reach out to us today, and let’s explore a range of tools and practices to help you maximize the potential of your Drupal website.
Contributors