
How to Manage Your Related Content in Drupal Instantly with Inline Entity Form

On a busy Drupal website, content rarely lives on its own in a silo. Presentations and webinars are linked to speakers, academic programs will reference courses, and events are tied to locations, the list goes on. Update one of these pieces on its own page, and the change shows up everywhere it’s used, reflecting Drupal’s strength as a coherent, interconnected system.
But Drupal doesn’t stop there, it offers special tools for managing related content. This makes an especially big difference for content-rich Drupal websites, where reducing repetitive work really matters. Discover how the Inline Entity Form module helps you manage related content instantly by putting all forms right where you need them. We will also walk you through the process of setting it up.
The Inline Entity Form module in Drupal: a key overview
The Inline Entity Form module enables editors to create, edit, or remove related content inline without leaving the page. It embeds the full edit form of referenced content directly into the parent content’s edit form.
The key benefit of IEF
Without IEF, editors often have to create or edit referenced content separately, save it, come back, and link it afterward, which is slow and error-prone. The module helps avoid context switching and multiple edit screens. This makes managing complex content workflows faster and more intuitive.
Working with content and more
Here, “content” is used as a general term, but technically, the module goes beyond just content. In proper Drupal terminology, Inline Entity Form works with all fieldable entities, entities that are composed with Drupal fields. This includes content, media, users, taxonomy terms, comments, custom blocks, as well as custom entities defined by modules or developers.
Special field widgets
To “attach” one entity’s edit form to another, the Inline Entity Form module provides special field widgets, which we’ll explore in this post and show how they work.
Key use cases for Inline Entity Form
Primary (classic) use case
The primary use case for the module, as described on the module’s page, is for Parent > Child entities. They are managed only within the parent form and not used elsewhere (like product display > products, order > line items, and so on). In this setup, IEF keeps workflows simple while letting editors manage all child entities inline.
Complex (reusable) use case
IEF can also be used with entities that are reusable across the site. Examples include events with sessions or locations, programs with courses, or projects with collaborators. Editors can create or edit a related entity directly while working on the parent entity, and the changes apply everywhere the entity is used on the website.
This advanced setup requires:
- Editor awareness: they must know changes are global
- Proper permissions: only trusted users should be allowed to edit inline
This use case shows IEF’s full strength: editing complex, reusable entities inline while maintaining site-wide consistency. These entities are reusable, fieldable, revisionable, and displayable as listings in Drupal Views — and yet can be edited directly within another entity’s form for a fast, intuitive editing experience.
How to use the Inline Entity Form in Drupal: step-by-step guide
In this example, we’ll be creating a setup where the editing form for an event will include the editing form for sessions. At the same time, sessions will be full-fledged content items, reusable across the site.
Step 1: (Optional) Creating content types
This step is needed if you don’t yet have your content types for this setup (like “Session” or “Event”). With the Inline Entity Form module installed on your Drupal website, go to Structure > Content types on your Drupal admin dashboard.
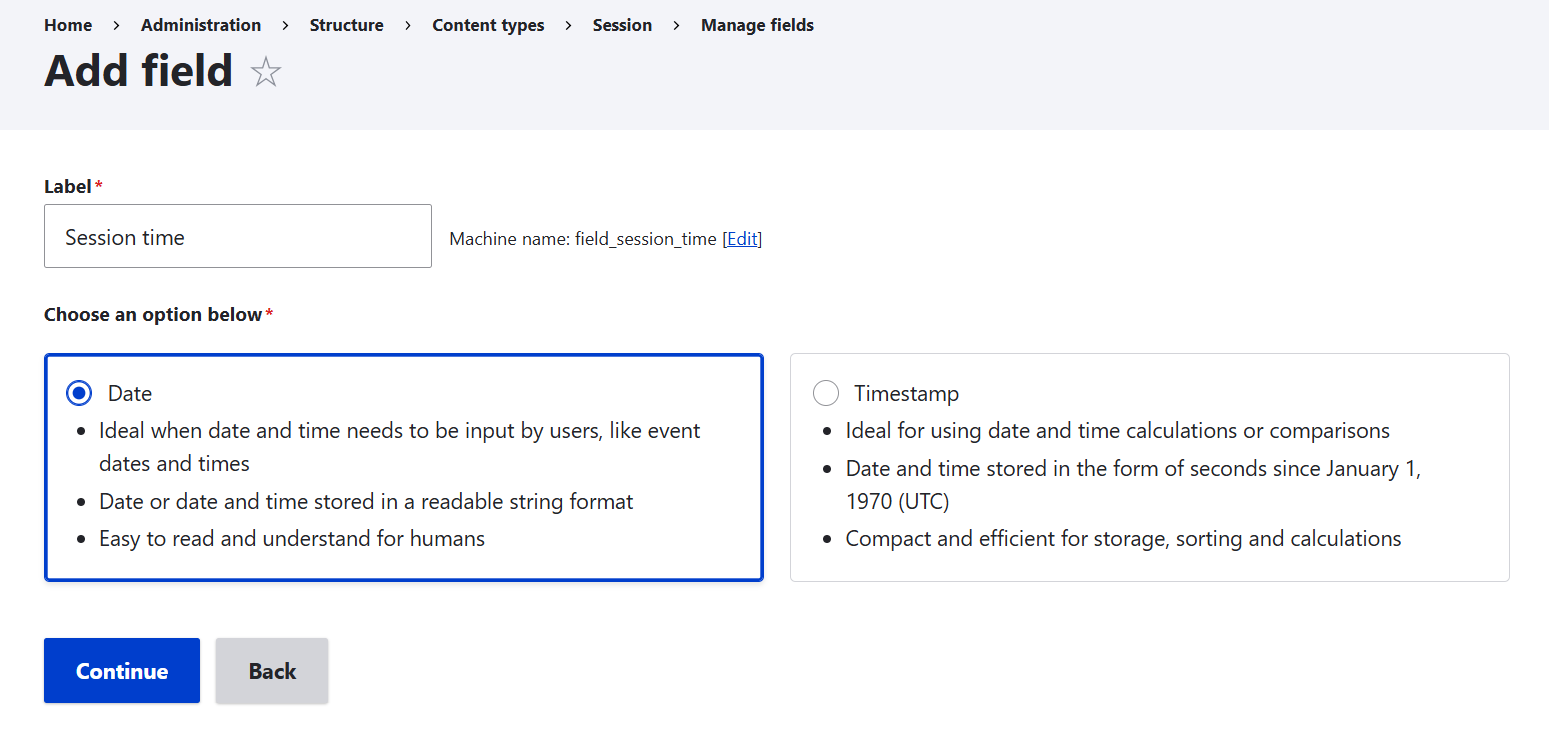
Add a new content type and name it “Session.” Open the “Manage fields” tab and add fields to it, for example:
- Time (a “date and time” field type)
- Room (a “text” field type)
- Speaker (a “reference” field type that will reference users)
Similarly, create a content type named “Event.” Add basic fields, for example:
- Event date (a “date and time” field type)
- Location (a “reference” field that will reference a taxonomy vocabulary with locations)
Fields in your specific setup can be implemented differently from those in this example. If needed, see more details about fields in Drupal: how fields work, what key field types exist, and how to create them via the new interface.
Step 2: Connecting the Event and the Session content types
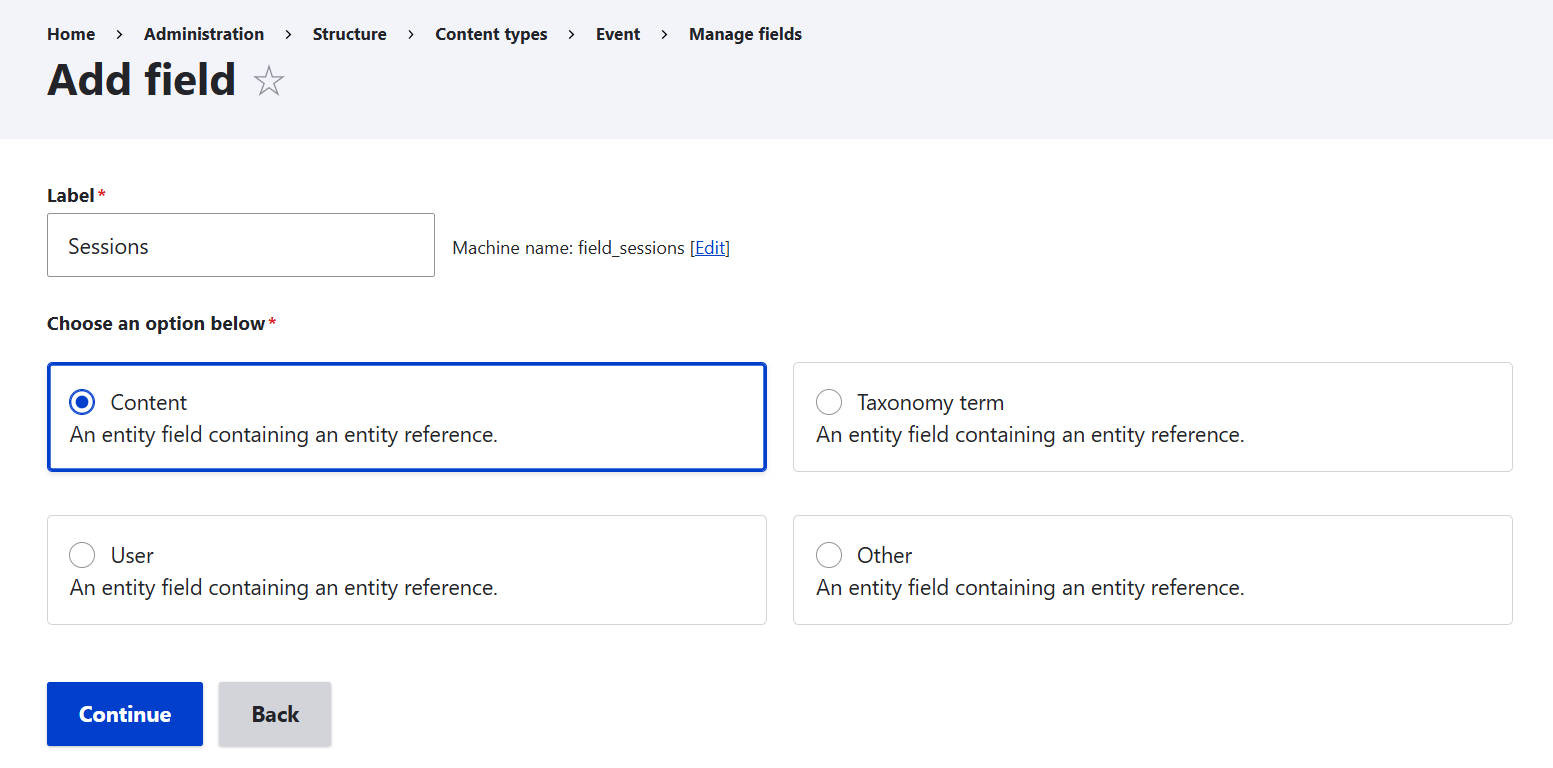
Now it’s time to add the key field to the Event content type that will connect it to the Session content type. Create a field of “reference” type in Events and name it “Sessions.” It’s possible to reference various entity types: content, user, taxonomy, or others. You’ll need to select “Content.”
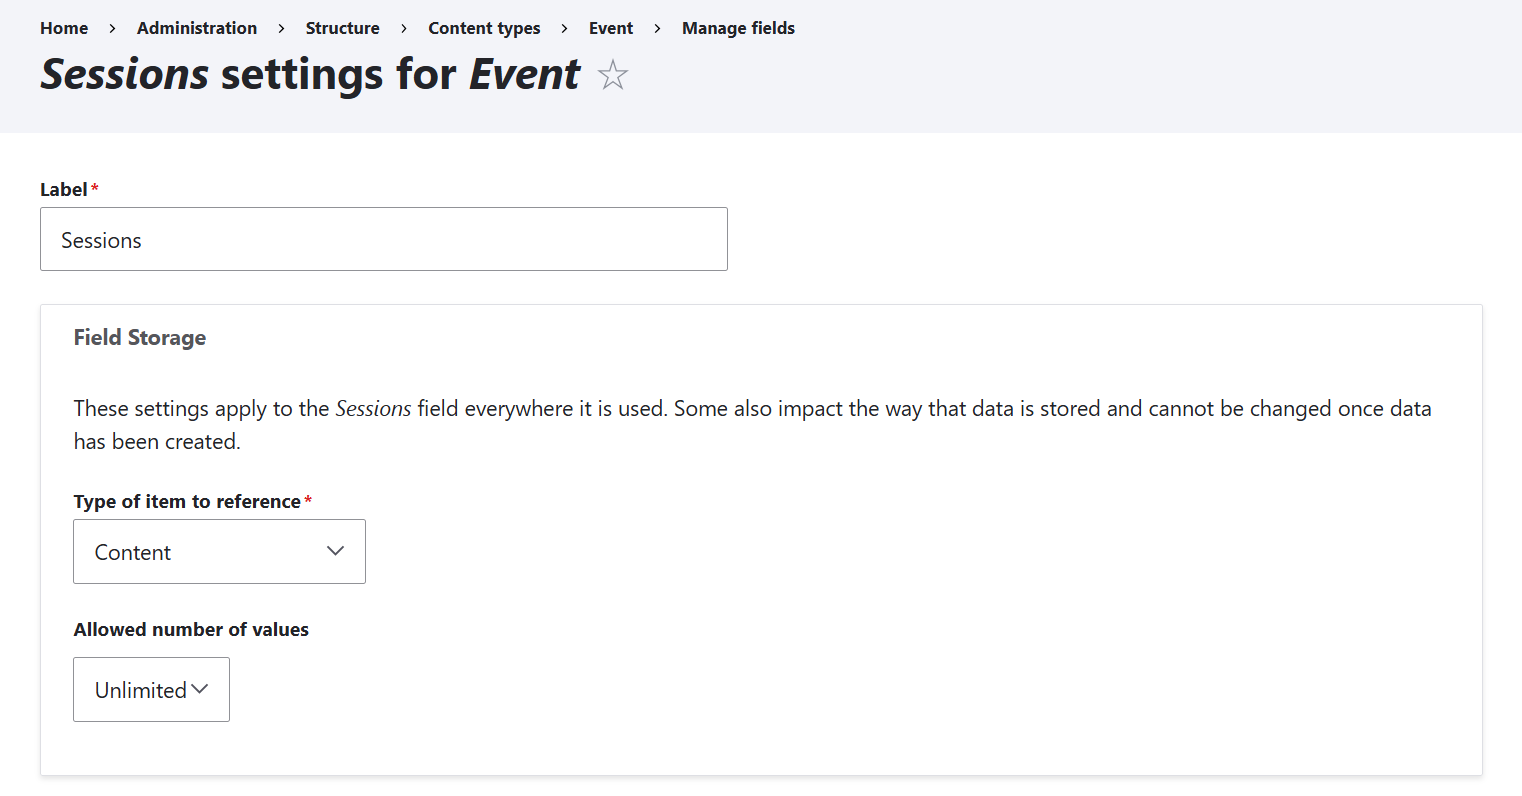
On the next page of the field settings that will open to you, configure the allowed number of values, which means the allowed number of sessions per event. In this example, an unlimited number of values is allowed, but you can set a limited number based on your event specifics.
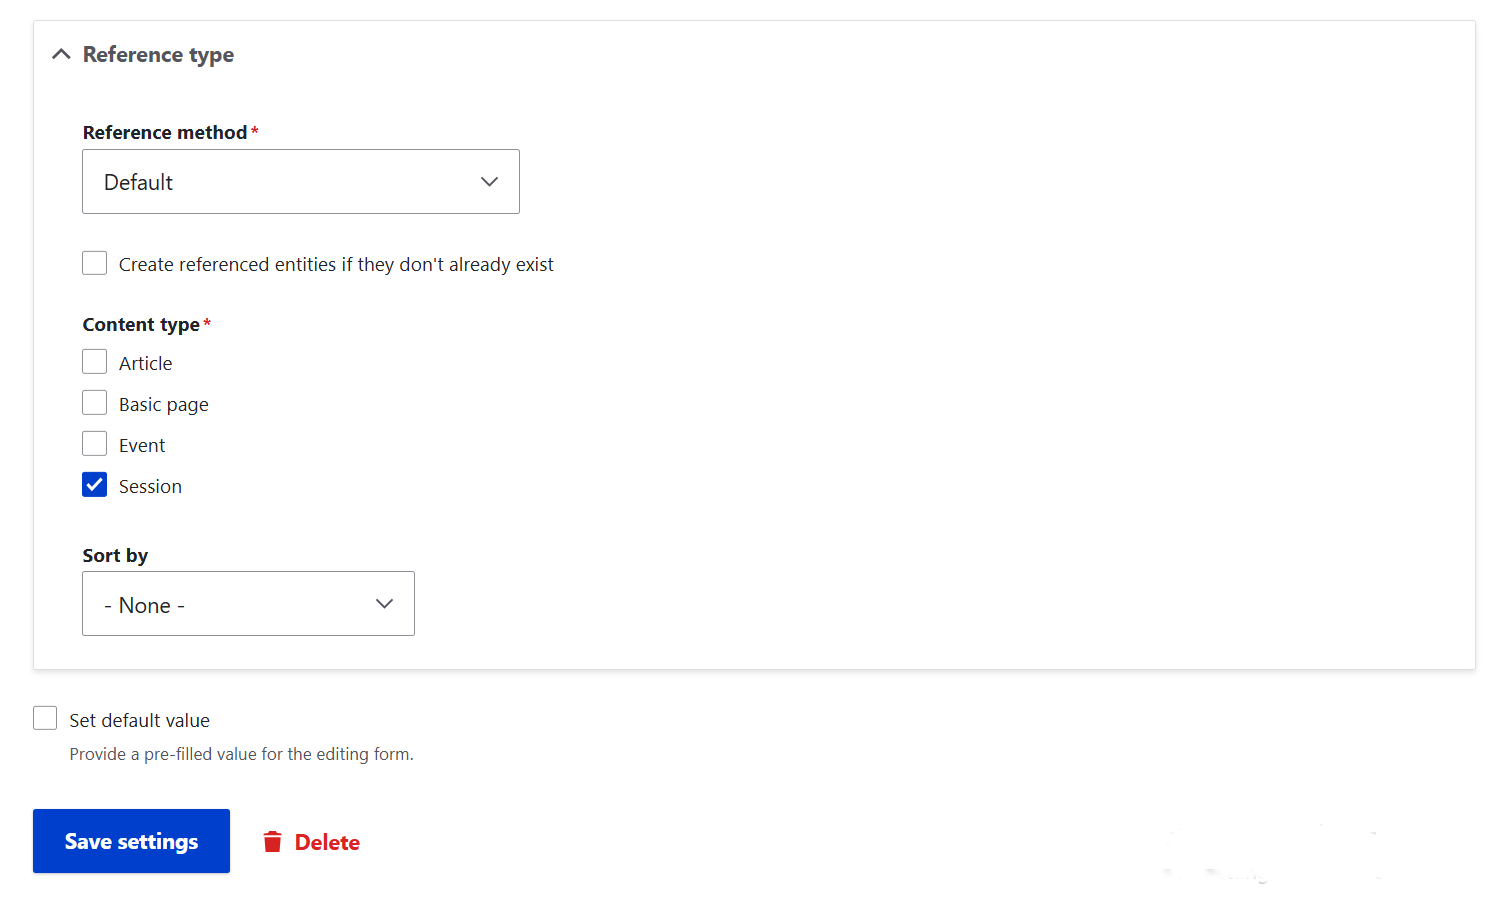
Under “Reference type,” select “Session” as the specific content type to reference. Save the settings.
This is not yet the moment when the IEF module comes to the spotlight — at this point, it’s Drupal’s built-in functionality allowing you to reference other entities so you can add them by selecting them in the content editing form. This enables you to add referenced entities via select list or autocomplete, but without editing them — their own editing forms are only available on their own pages.
Step 3: Configuring the IEF widget
Here goes the key step in this setup that adds the power of IEF to the setup. At Structure > Event > Manage form display, find the Sessions field. Next to it, set the widget as:
Inline entity form – Complex
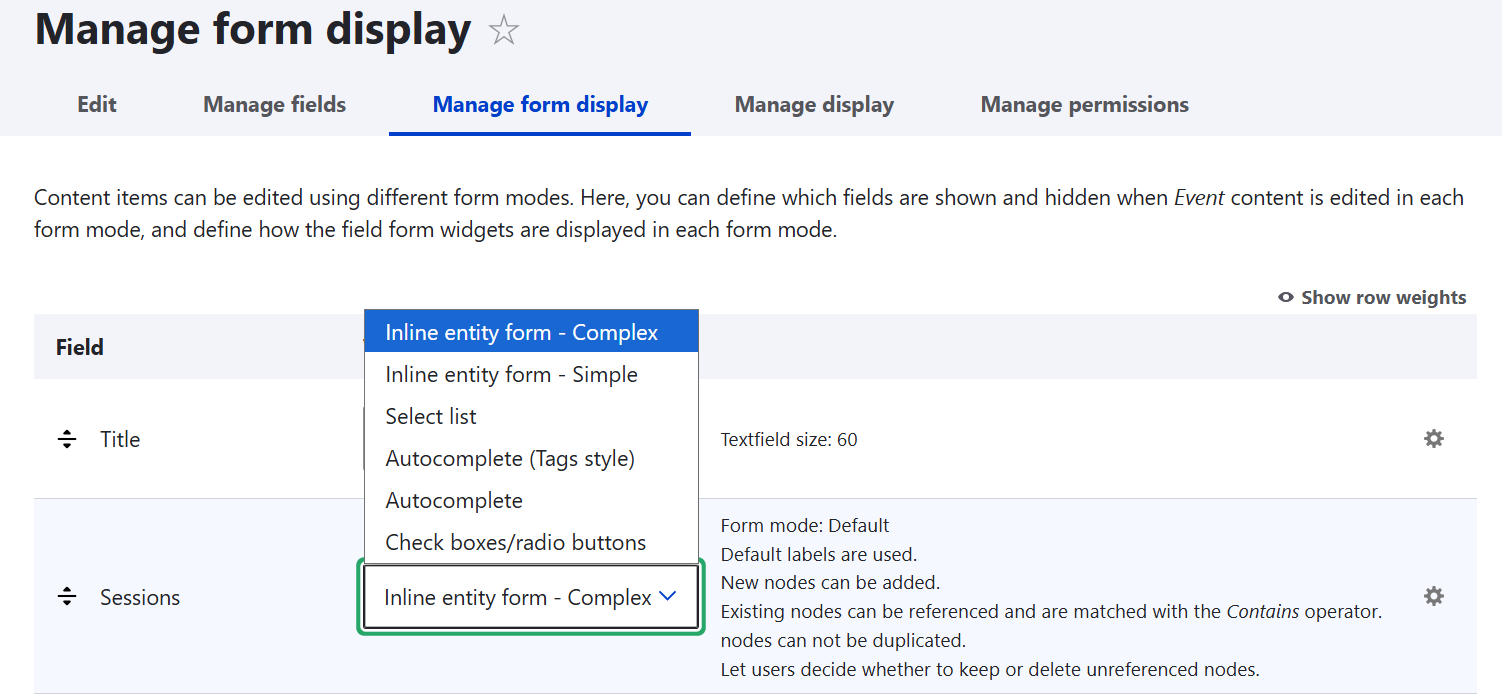
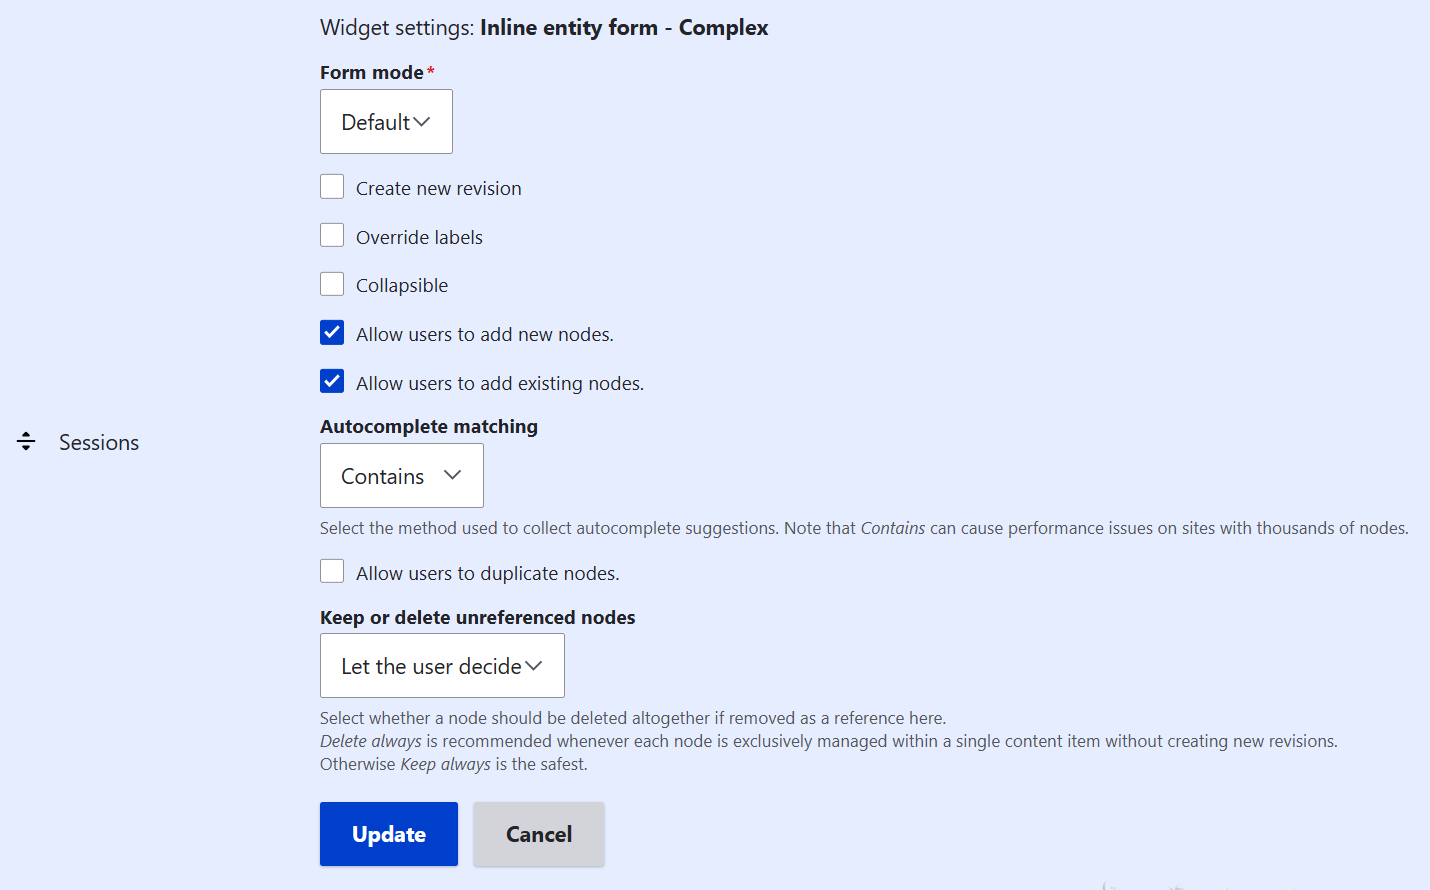
Click on the gear box to the right to configure the widget. Switch the toggle on in “Allow users to add existing nodes.”
Don’t forget to save the result twice here: first by clicking “Update” in the widget and then hitting “Save” for the entire “Manage form display” tab.
You can also define in which order all fields should appear in your event editing form. Do it by drag-and-dropping the fields on the Manage Form Display tabs of both the Event and the Session content types.
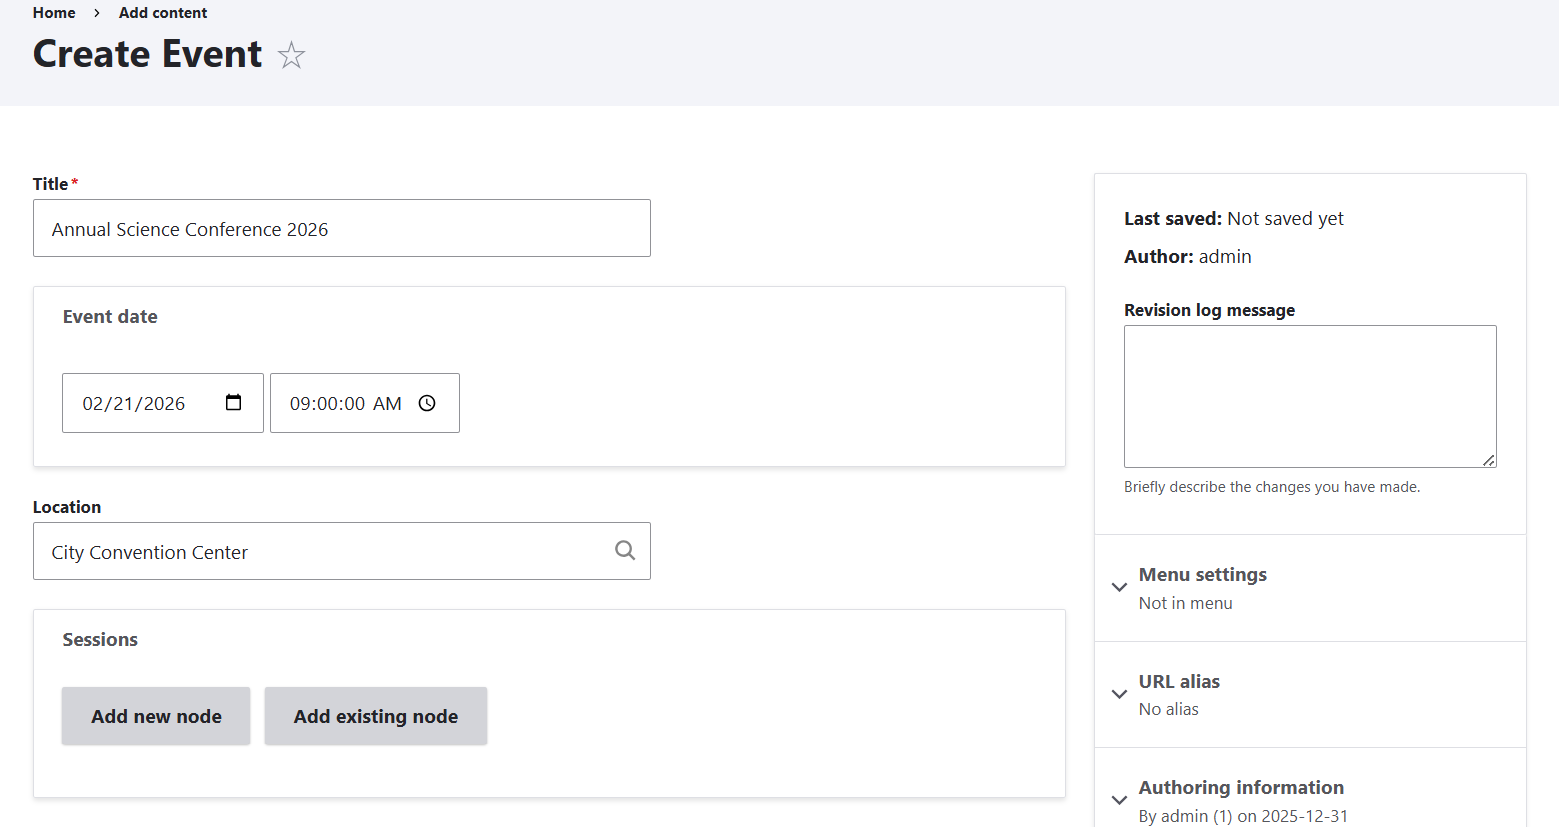
Step 4: Testing the editing experience
Now you can test how it works on a real event. Go to Content > Add content > Event. Alongside the actual fields for the event, you’ll see the “Sessions” section on the editing form with two buttons: “Add new node” and “Add existing node.”
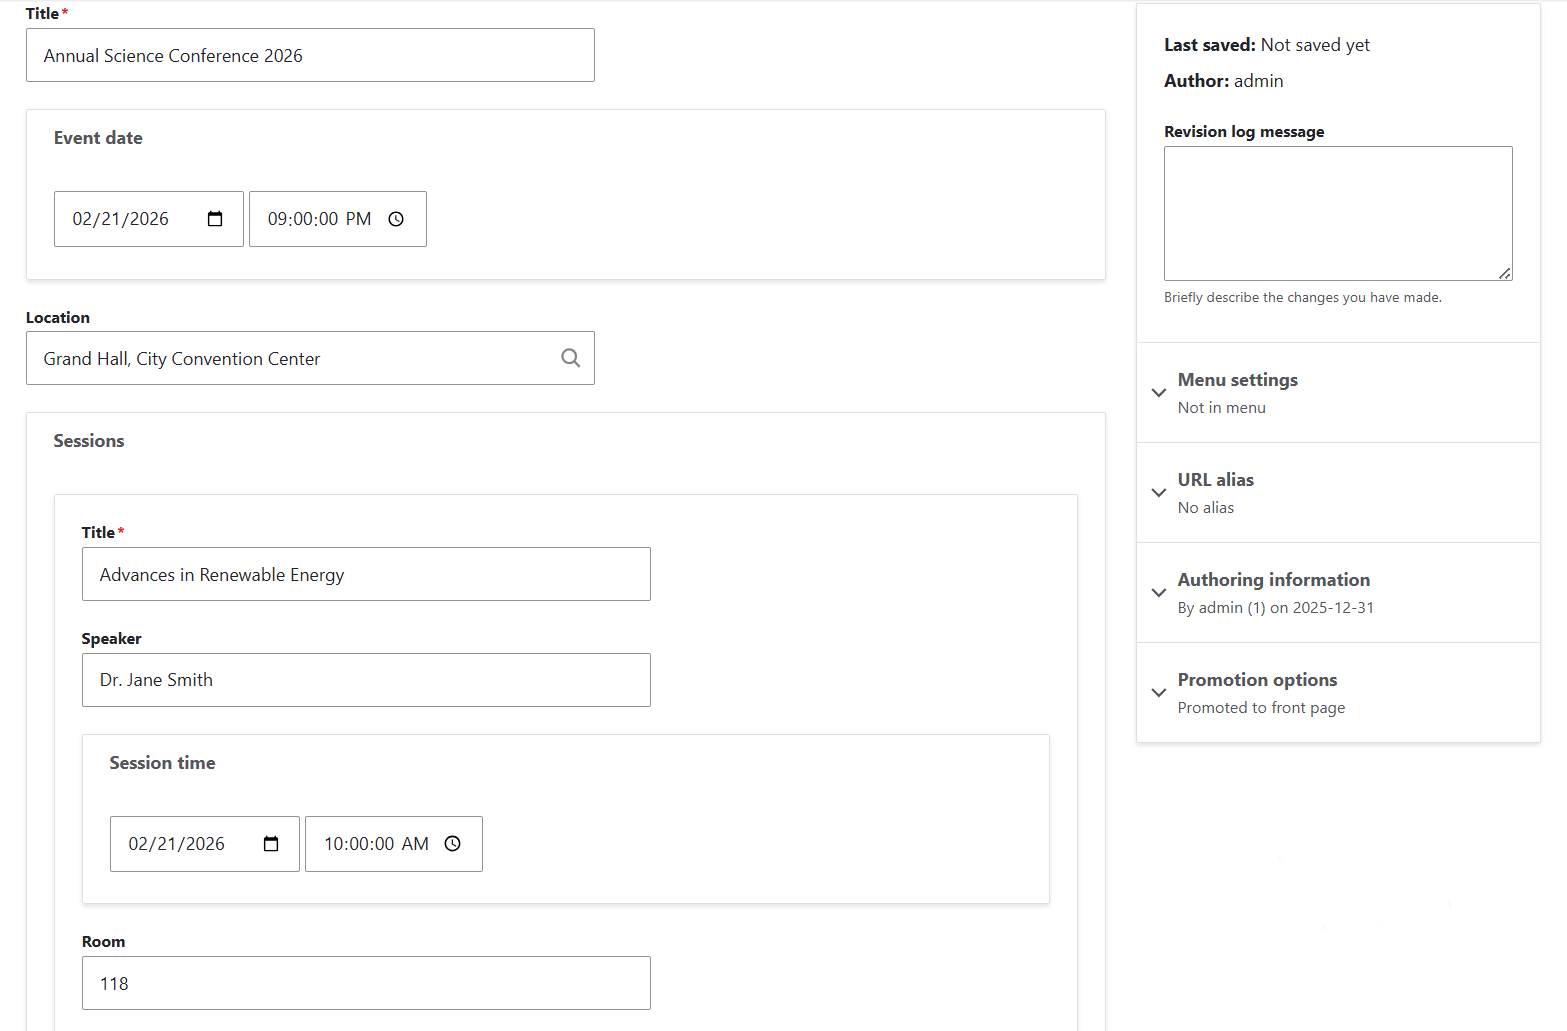
Let’s add a new node. You will see the fields for the session embedded with the event’s content editing form. Fill in all the information about the session, such as title, speaker, time, and room. Click the “Create node” button right below the session section and then save the entire event.
The event has been created. On its page, you can see a link to the session.
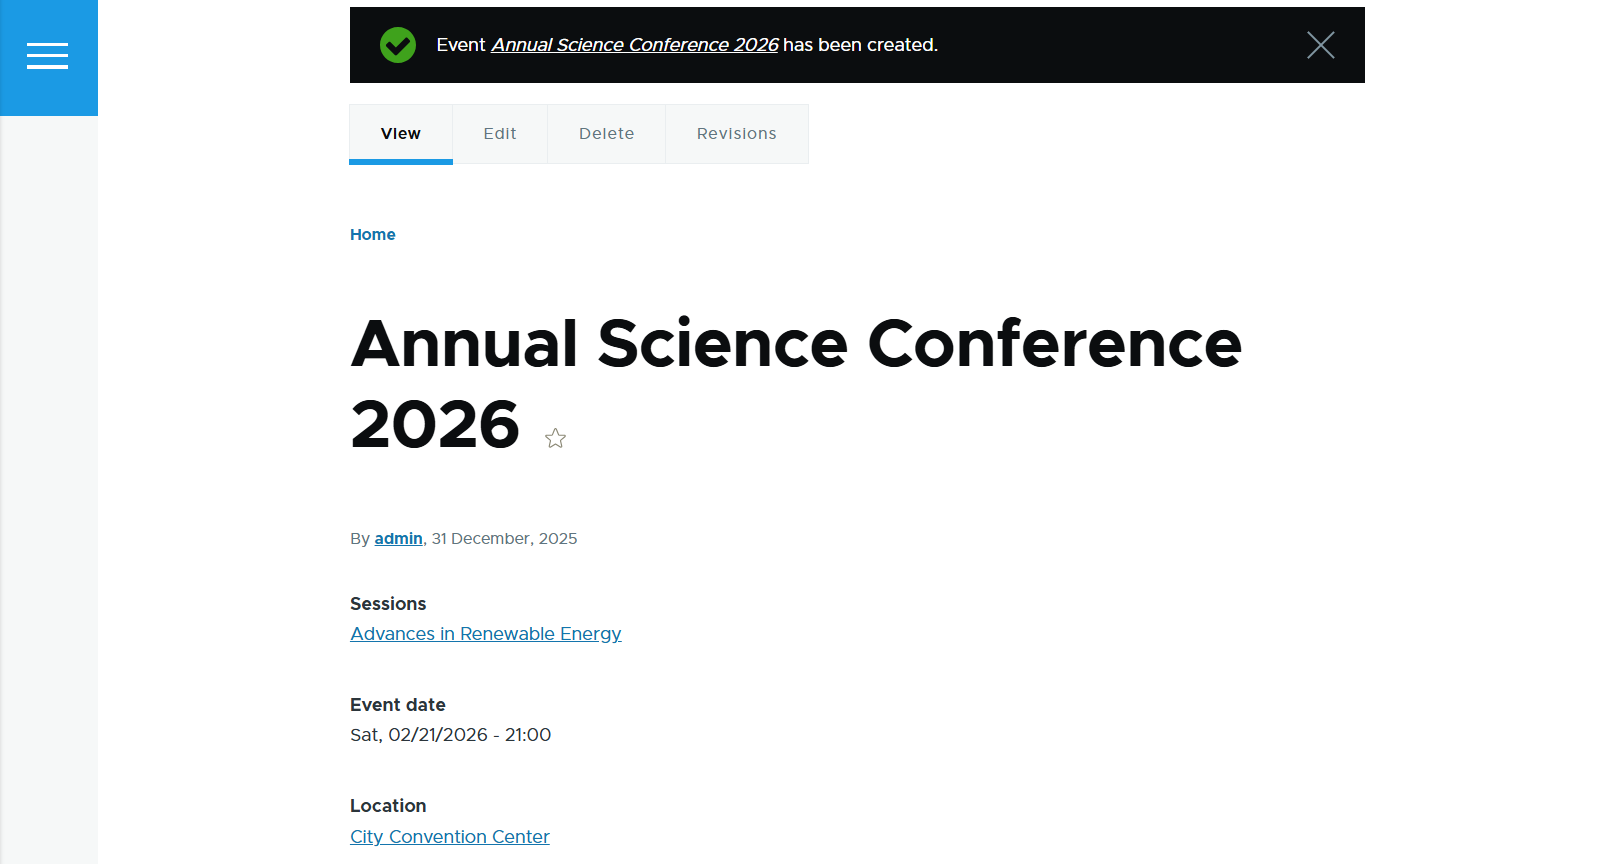
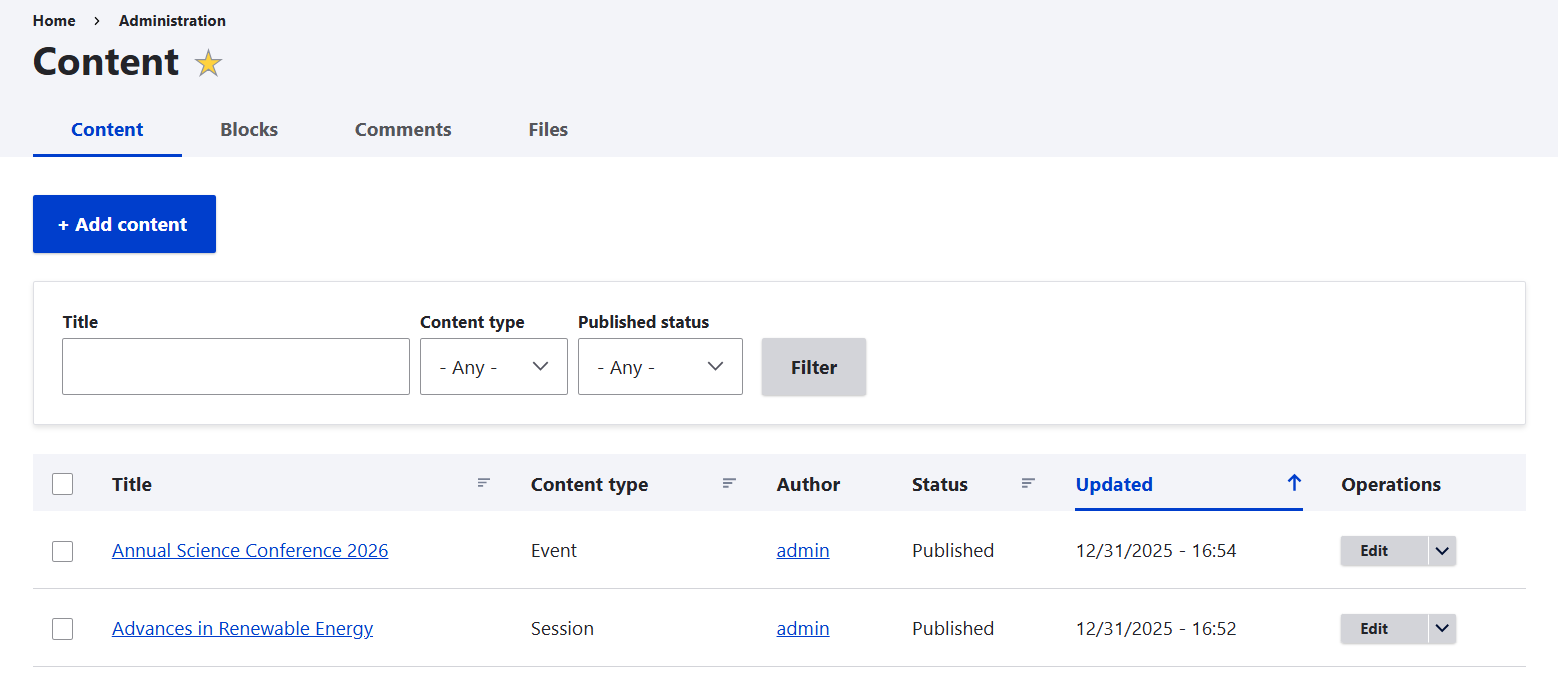
And yes, it’s a real, full-fledged session entity that you can also find on the Content tab.
Step 5: (Optional but recommended) Adding editor safety
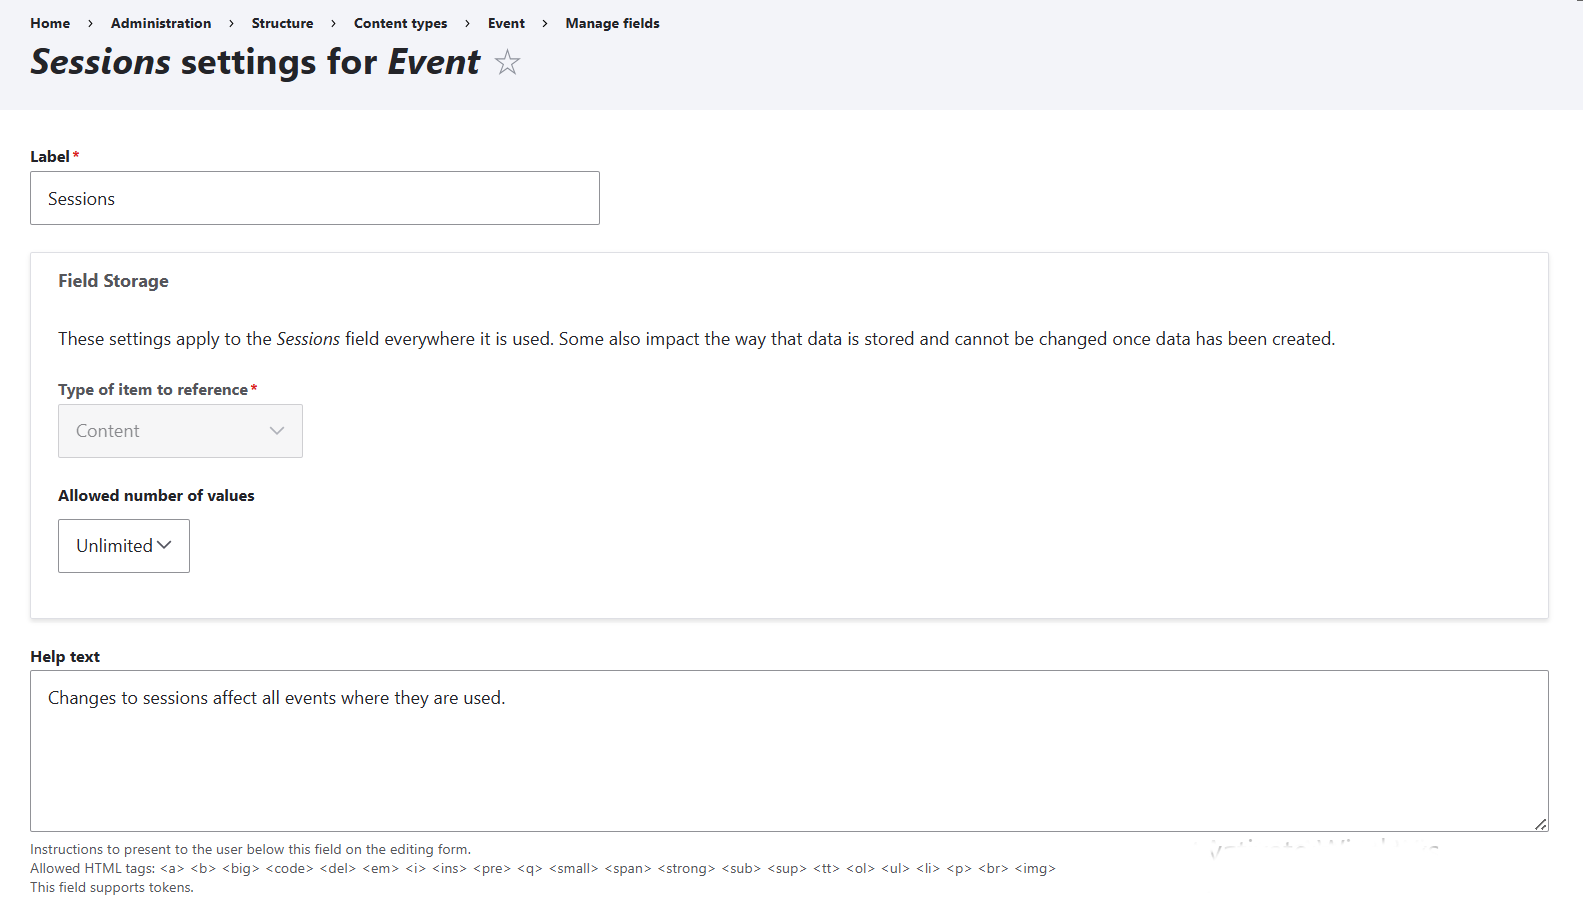
To avoid accidental global edits, consider adding help text to the Sessions field. It could look something like this:
“Changes to sessions affect all events where they are used.”
This could be added in Structure > Content types > Events > Manage fields for the Session field, and it will be displayed below the Sessions section in the Event editing form. Alternatively, you could create these help texts for every single field that a session is composed of.
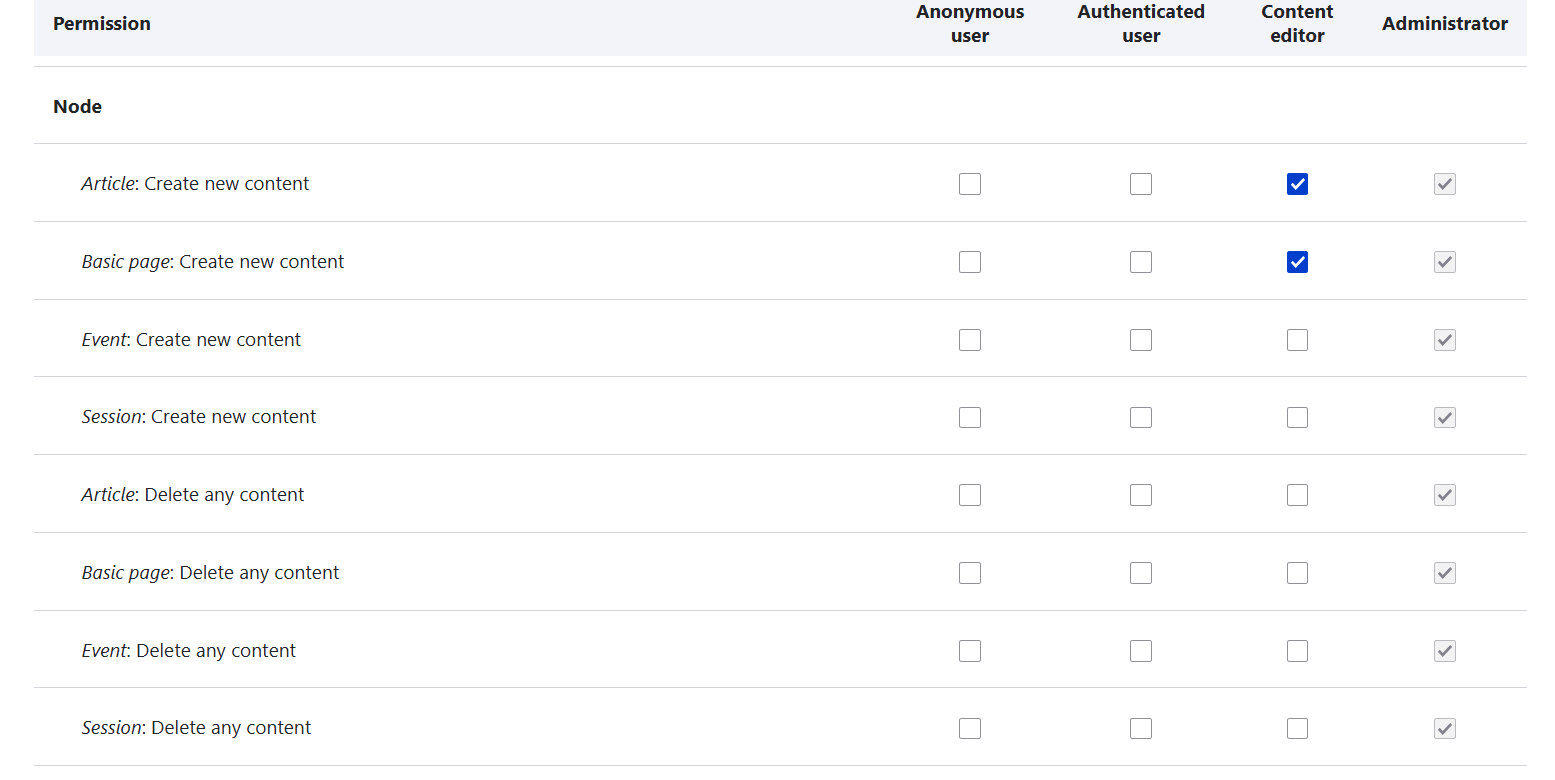
You could also rely on the classic Drupal’s roles and permission system in People > Permissions and restrict who can edit the Session content and the Event content.
Final thoughts
The Inline Entity Form module is ideal for sites with complex, interconnected content, such as higher ed, nonprofits, or any other content-rich Drupal projects. It is one of the great Drupal tools that make an editor’s life much easier. You might also find it useful to check out our earlier posts on bulk-updating content instantly across your entire website, simplifying multistep admin forms, enhancing your event section with great Drupal features, and many other gems within our insights section where you may find inspiration and valuable ideas.
Alternatively, reach out and we’ll be happy to chat about how to make all your workflows as seamless as possible.