Drupal Image Optimization, Part 2: Performance Booster Modules

Our Drupal image optimization mini-series is in full swing — and we’re glad to have you along for the ride! In Part 1, we explored how to improve your Drupal images visually through smart cropping, artistic effects, and subtle enhancements like watermarks.
Now it’s time to shift gears a little and focus on the performance side of the equation. We’re diving into the world of leaner files and shorter load times. It’s all about making your images lighter, faster, and smarter — with the help of powerful Drupal tools for compression, resizing, and lazy-loading.
Thanks to these modules, you can significantly enhance your site’s user experience and see a noticeable boost in your Drupal website’s SEO. Ready to speed things up? Let’s dive into our top Drupal modules for performance-focused image optimization.
Drupal modules for performance-focused image optimization
Compression and format optimization
For better website performance, it’s important to reduce the weight of your images without noticeably affecting their quality. Compressing image sizes and optimizing image formats is one of the most effective ways to achieve this. In Drupal, several powerful modules make this process streamlined and automated.
- Converting images to the WebP format
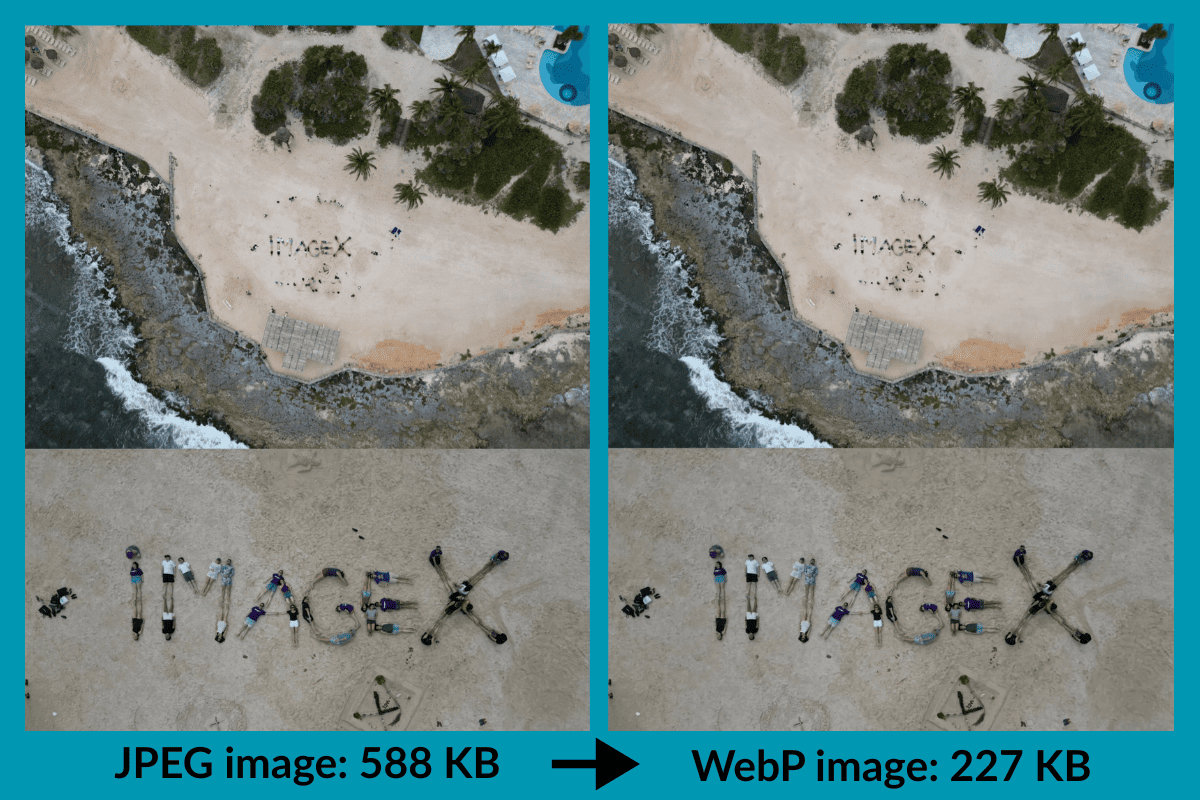
Before we dive into the modules, it’s worth saying a few words about the WebP image format that was developed by Google. It offers excellent image compression — meaning it reduces file size while maintaining good image quality. It supports both:
- lossless compression (full image quality with no data loss)
- lossy compression (file size reduction with some data removed and minimal quality loss)
Google states that WebP lossless images are 26% smaller in size compared to PNGs, and WebP lossy images are 25-34% smaller than comparable JPEG images.
- WebP support in Drupal core’s Image Styles
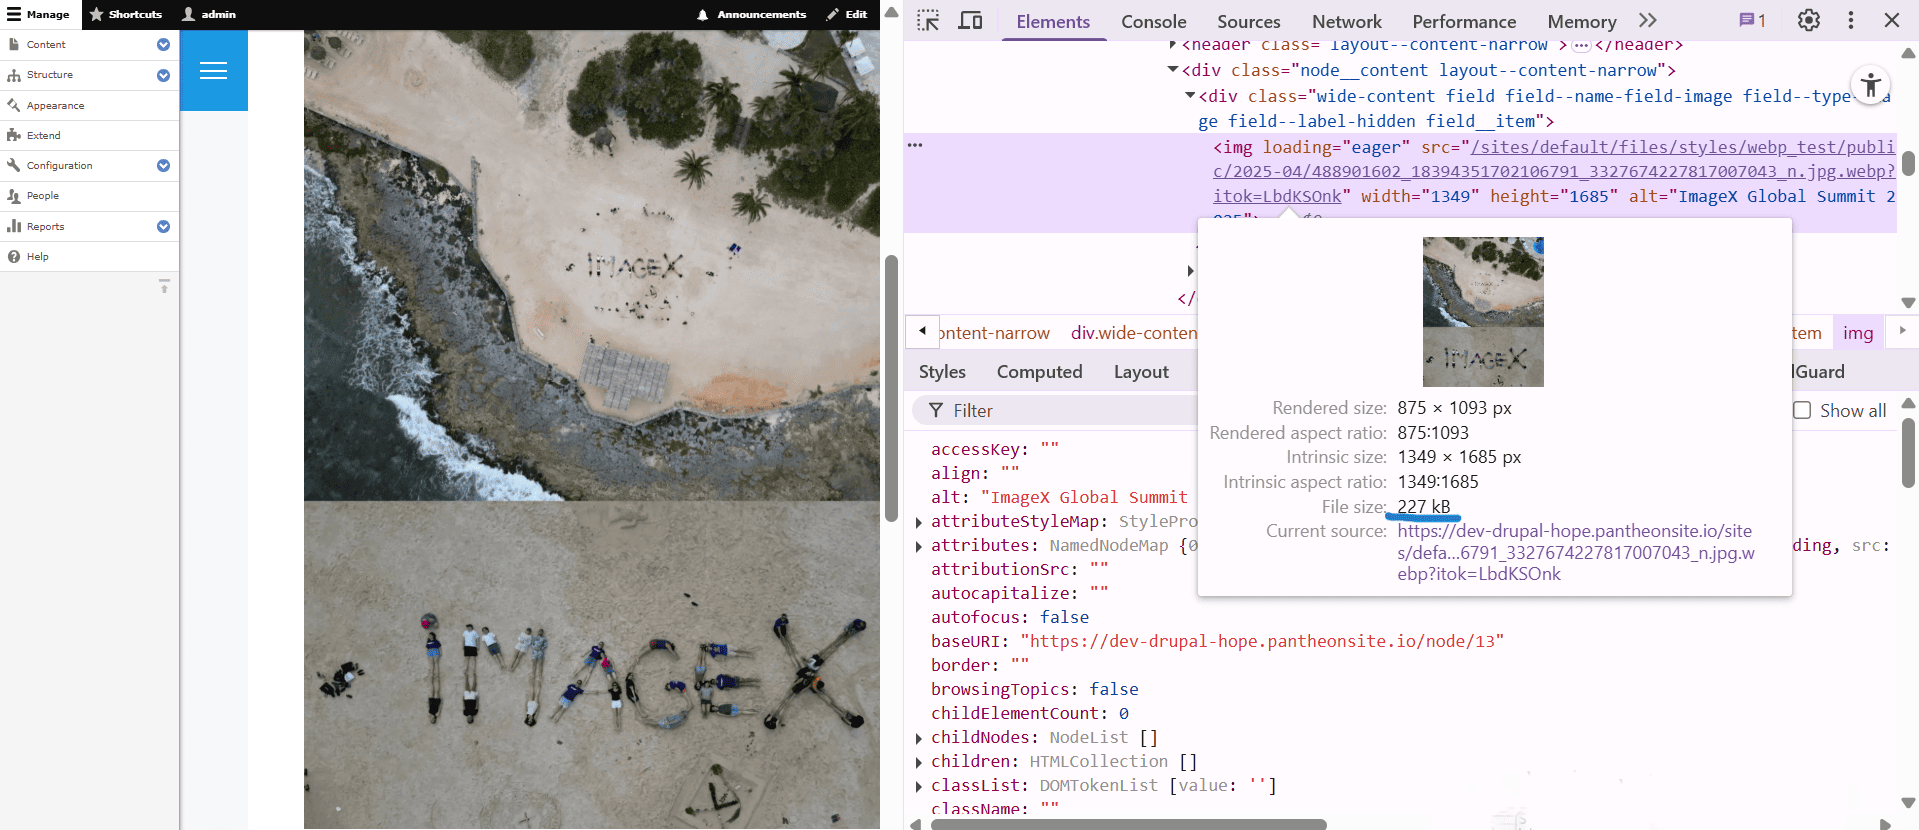
Starting with Drupal 9.2, Drupal core supports outputting WebP versions of images via Image Styles, assuming your website’s server supports WebP. You can select WebP as an output format per image style, choosing the “Convert” effect.
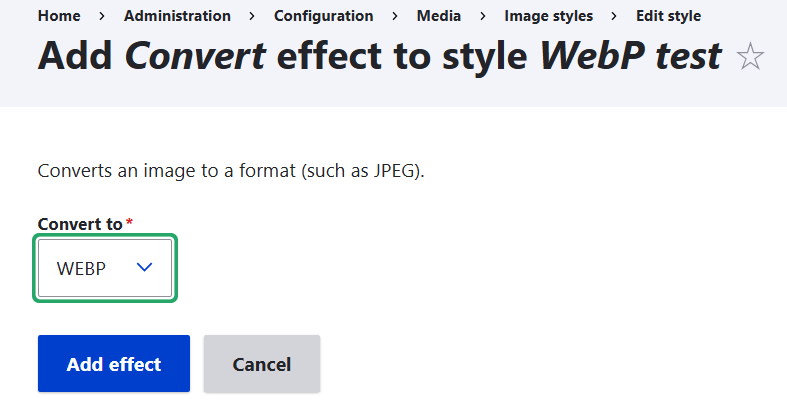
All images using this image style will automatically be converted into WebP in every display where an image style with this effect is used (for example, you can attach it to every article’s cover image). Check out more details about the WebP format and how it is supported in Drupal core.
- The WebP module
When it comes to using the benefits of WebP, there is also the standalone WebP module to consider. It automatically creates a WebP version of every image that’s processed through a Drupal image style. So if you upload an image and Drupal generates a styled version (like a thumbnail or a cropped image), this module creates a WebP copy of that version behind the scenes.
Then, browsers that support WebP (like Chrome or Firefox) will load the smaller, faster WebP version — helping your pages load quicker.
While Drupal core’s support for WebP lets you add a “Convert to WebP” effect in image styles, this module does the WebP conversion out of the box for all image style derivatives — no need to modify each style. It simplifies setup for sites with lots of image styles or developers who want to “set it and forget it.”
- The ImageAPI Optimize WebP module
The ImageAPI Optimize WebP module also helps you generate WebP versions of your images automatically using the ImageAPI Optimize framework. Despite WebP support in Drupal, the ImageAPI Optimize WebP module can still be very useful if:
- you want more control over compression quality
- you’re already using ImageAPI Optimize and want to include WebP as part of a consistent optimization workflow
- you need fallbacks or conditional logic (like skipping conversion for already-optimized images)
- you’re on a setup without WebP support in core libraries
Right next, we’re moving on to the main module which provides the foundation for the ImageAPI Optimize WebP module’s work.
- The ImageAPI Optimize module
The ImageAPI Optimize module serves as a framework for image compression in Drupal. Although it doesn’t perform compression on its own, it enables support for various tools and services through additional Drupal modules created as part of its ecosystem.
You need to install at least one of these modules with ImageAPI Optimize to start compressing your images. This granular approach gives you full control over which tools and services you rely on and improves maintainability. In addition to the above-mentioned ImageAPI Optimize WebP module, the list includes:
- Image Optimize Binaries. It uses command-line tools installed directly on your server — like jpegoptim, optipng, and more — to shrink image file sizes without losing quality. Once set up, everything runs automatically when images are uploaded or processed through Image Styles.
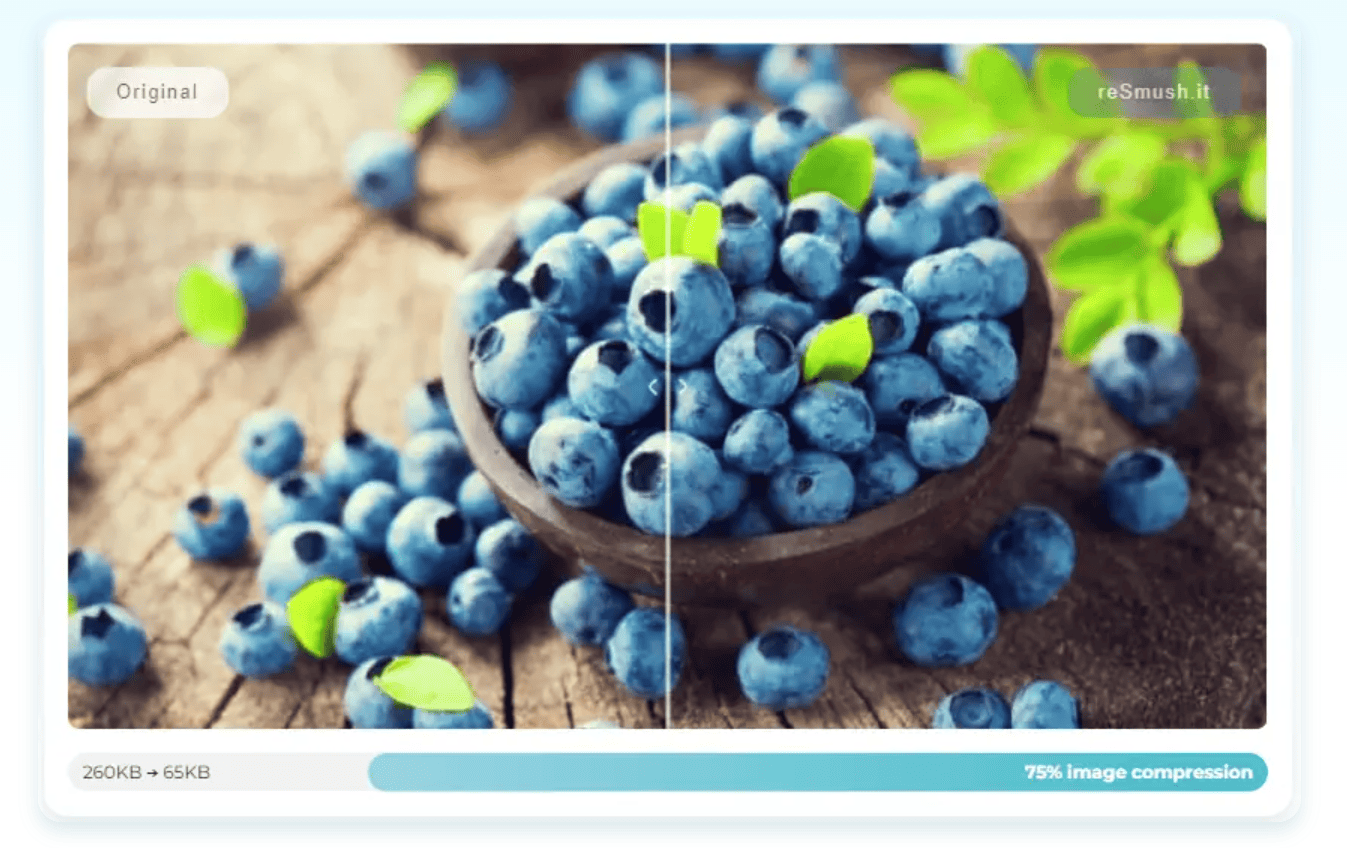
- Image Optimize reSmush.it. It integrates with the free reSmush.it service for easy and efficient online compression.
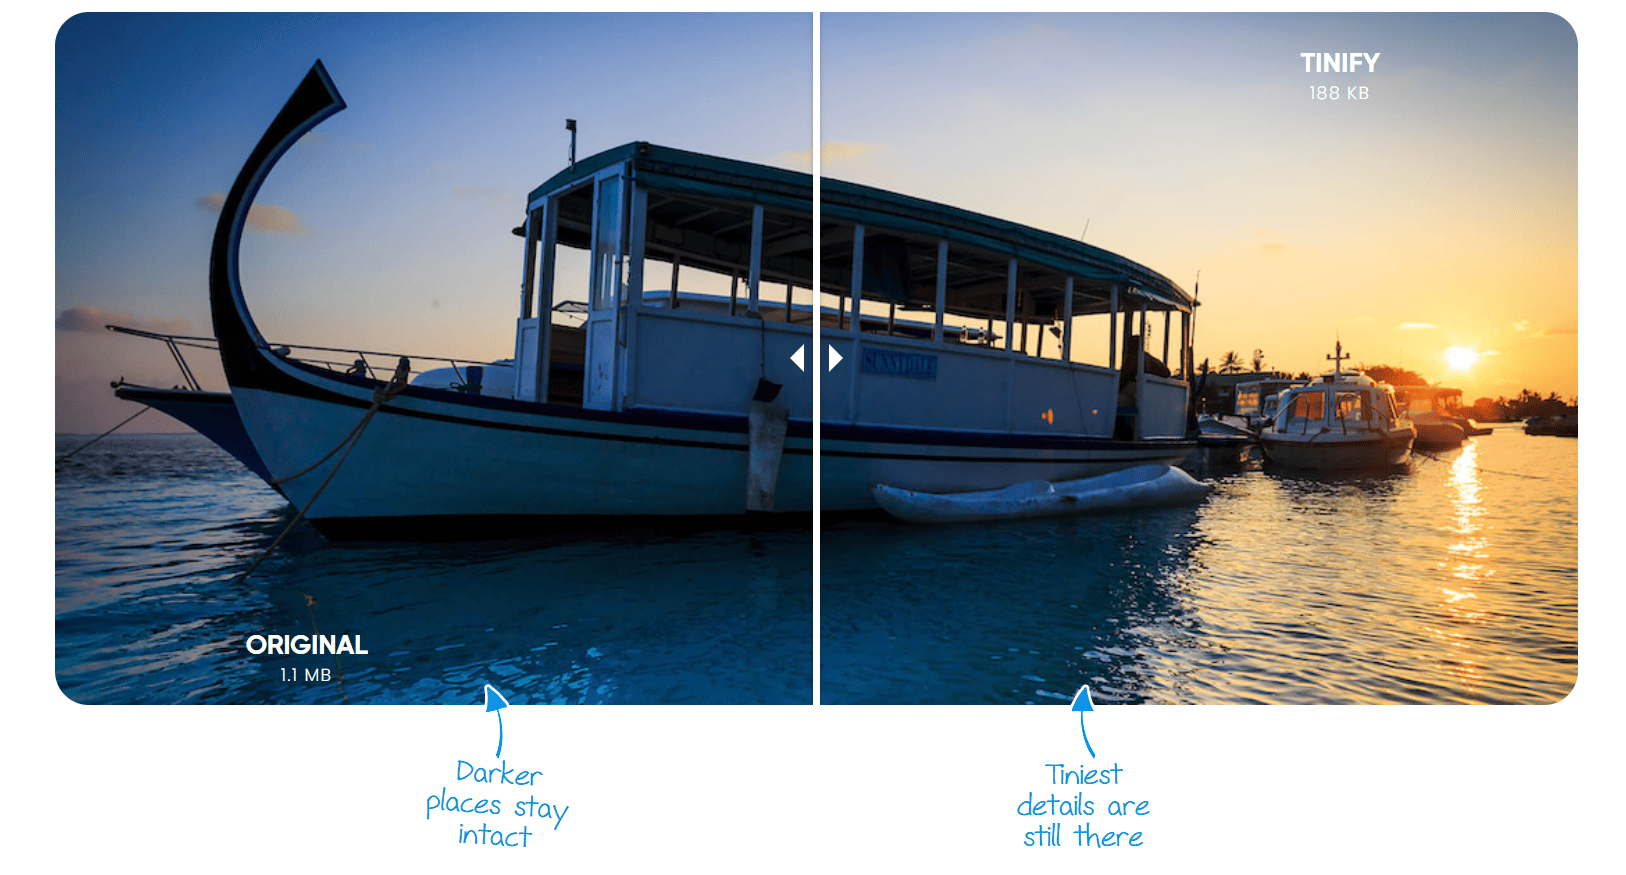
- Image Optimize TinyPNG. It connects with the TinyPNG service for powerful JPEG and PNG optimization.
- ImageAPI Optimize GD. It allows adjustment of compression quality using Drupal’s built-in GD toolkit.
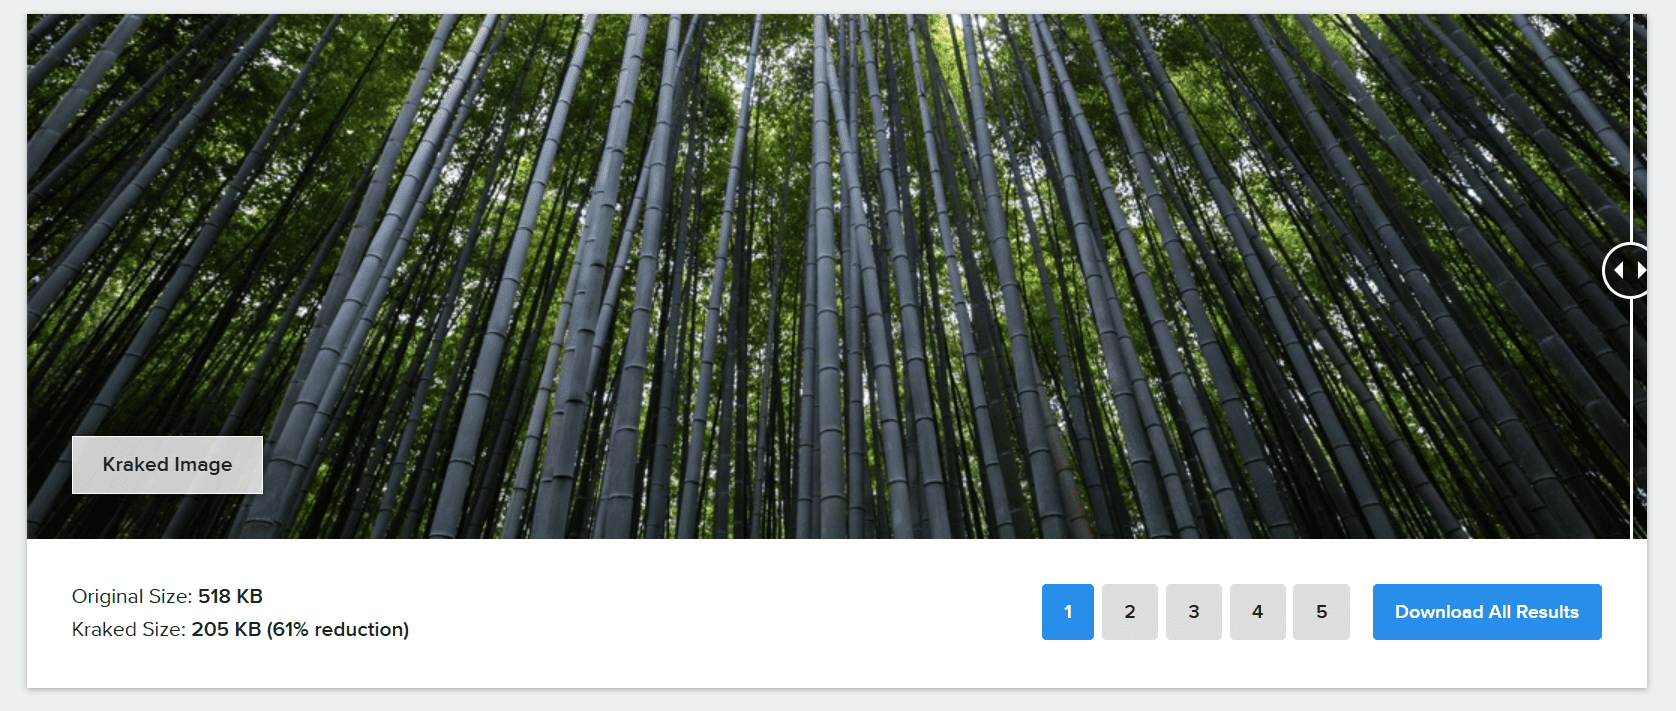
- Kraken. It provides integration with the Kraken.io — a robust image optimizer and compressor tool.
- ImageAPI Optimize AVIF & WebP. It converts images to formats like WebP or AVIF for better performance and smaller sizes.
- ImageAPI Optimize AVIF. It converts images to the AVIF format.
The ImageAPI Optimize module uses a powerful and flexible pipeline-based system for image optimization. “Pipelines” define a sequence of steps for processing and compressing images.
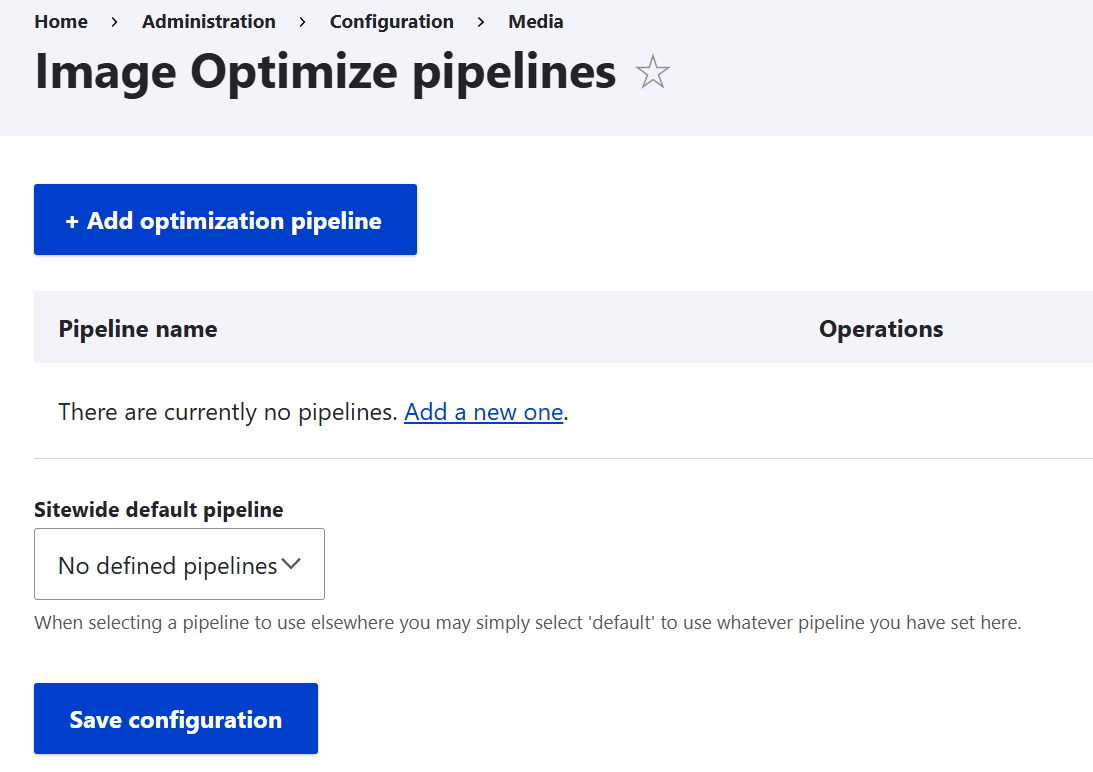
Image resizing
Large images can be detrimental to performance if not sized appropriately. The following Drupal modules help manage image dimensions and serve images more efficiently depending on context.
- Resizing images with Drupal core’s Image Styles
Drupal’s built-in Image Styles system is such a perfect tool that we can’t but mention it in all parts of the series — when discussing the compression when talking about image cropping in Part 1, and now that it’s time to dive into image resizing.
The resize effect is commonly used in Drupal’s core Image Styles. It allows you to modify the dimensions of images based on the width and height you specify, helping ensure that images are displayed at appropriate sizes based on context — such as a thumbnail in a view or a hero image on a landing page.
The “Resize” effect is often paired with other effects like “Scale and crop.” Efficient resizing at the style level is one of the examples of techniques that both improve performance and enhance visual consistency, reminding us again how interrelated they are.
- The Image Resize Filter module
The Image Resize Filter module automatically resizes inline images based on the width and height set in HTML — perfect when using WYSIWYG editors like CKEditor. It works with both local and remote images, and can optionally link resized images to their full-size originals.
Once resizing is enabled in your text format settings, users don’t need to worry about image dimensions — everything is resized on output for a cleaner, faster page.
Image lazy-loading
Lazy-loading is an excellent performance-boosting technique that has images only loaded when they appear in the user’s viewport. There’s no need to load them if the user hasn’t scrolled to reach them.
This dramatically reduces initial page load times and saves bandwidth. We had an entire article dedicated to the ins and outs of the image lazy-loading technique in Drupal that you might be interested in checking out.
- Lazy-loading in Drupal core
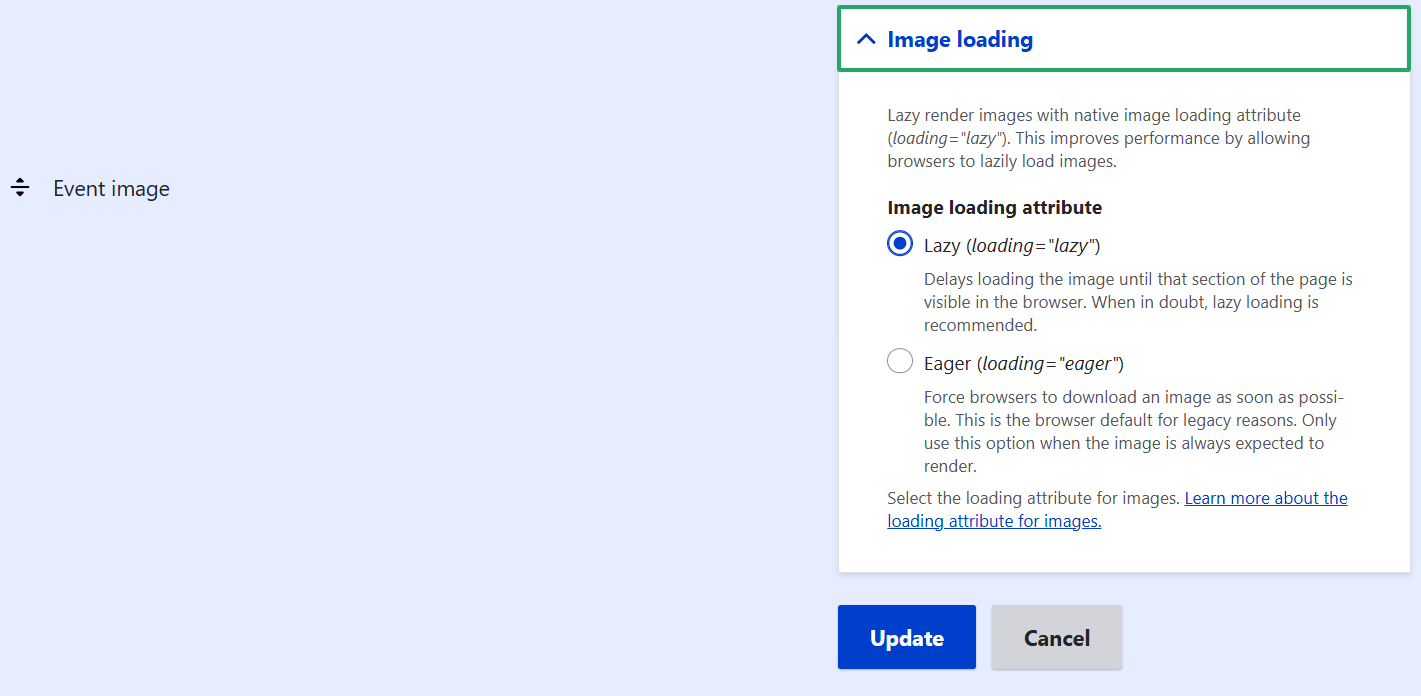
Lazy-loading is enabled by default for most images in Drupal starting with version 9.2. However, having more granular control over these settings is always a plus, right? Beginning with Drupal 9.4, a new user interface makes it easy to switch between “lazy loading” and its opposite — “eager loading” — for specific image fields.
Drupal 10.1 took this even further by improving lazy-loading support for Drupal’s responsive image fields. These fields help adjust the size and resolution of images based on the device’s screen size (a mobile, a tablet, or a desktop). The improvement comes from adding the width and height attributes to the responsive image tag and offering an option to toggle between the loading=”lazy” and the loading=”eager” options. Don’t miss this in-depth look at the standout front-end advancements introduced in Drupal 10.1.
- The Lazy-load module
The Lazy-load module is a popular contributed tool for lazy-loading which gives you fine-grained control over the process. The module uses libraries like lazysizes for more advanced techniques (like loading images only when they are about to enter the viewport). It is great at detecting any visibility changes triggered through user interactions with the website.
The module supports inline images and iFrames. It works with a variety of image fields such as:
- Colorbox
- Image
- Responsive image
- Media Thumbnail
The module also enables you to configure your website’s theme images to use lazy-loading by just doing some easy markup changes.
- The Lazy Views module
A similar idea to the lazy-loading technique is used in the Lazy Views module contributed by our team’s Software Architecture Director, Bryan Sharpe (b_sharpe). It is meant to improve your website’s performance by only loading the content when it’s needed. The module works with content listings created by Drupal Views — an essential Drupal core tool widely used across Drupal websites. One of the most popular formats in Views is a grid with beautiful images, just like in our example below.
You can configure your “lazy” view to load:
- when a user clicks a button or a link
- upon page load
The module supports the filtering and sorting functionality of Views. Read more about it and check out a step-by-step guide in our article on modules to extend Drupal Views.

Final thoughts
While we couldn’t cover every useful image optimization module, it’s important to remember that the best approach depends on your website’s unique needs. The ideal solution may involve a mix of Drupal core features, contributed modules, or even custom development. Need help finding the right fit? Our professional Drupal team is here to help you build the perfect image optimization setup for your site.